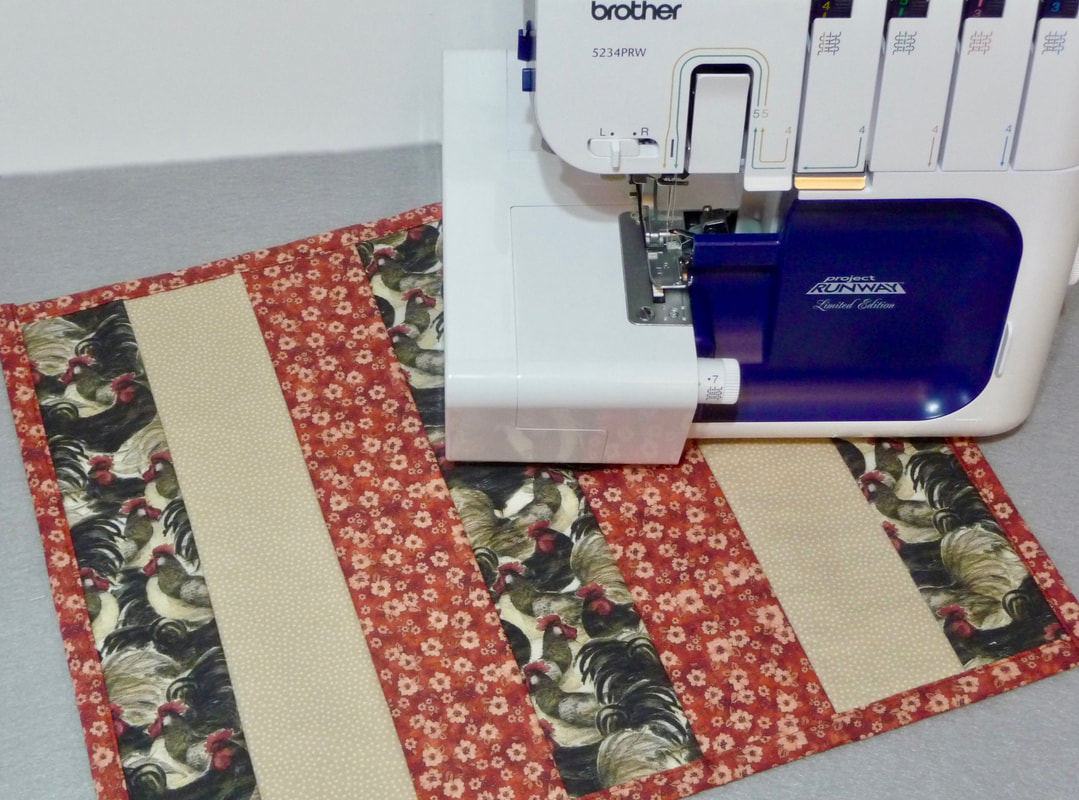
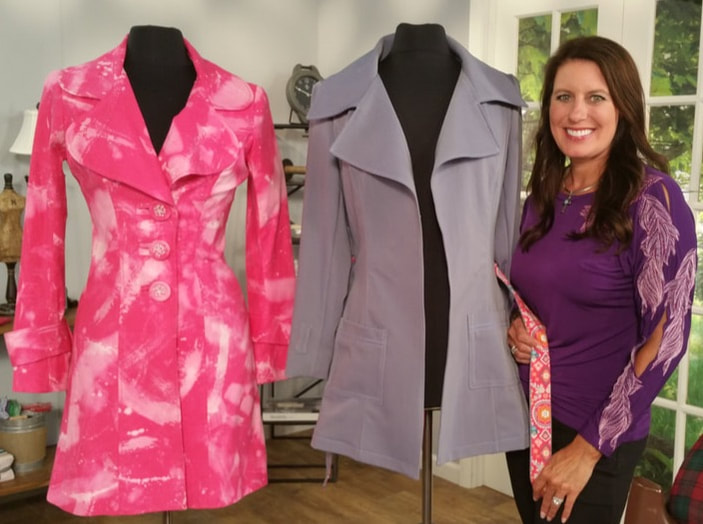
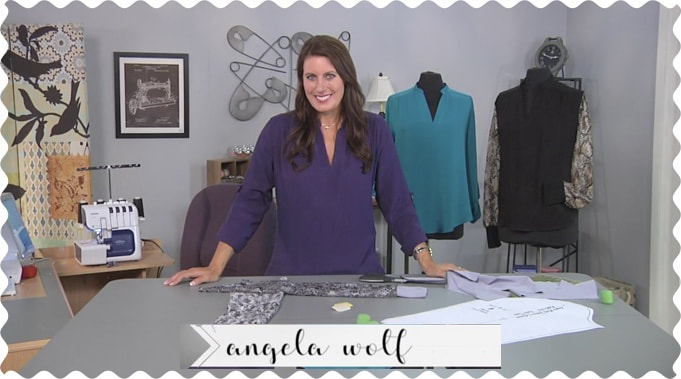
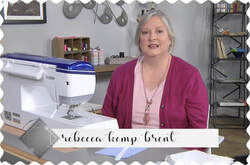
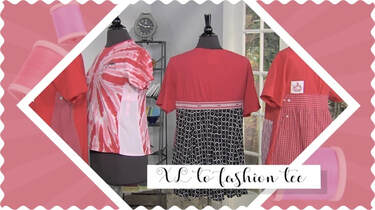
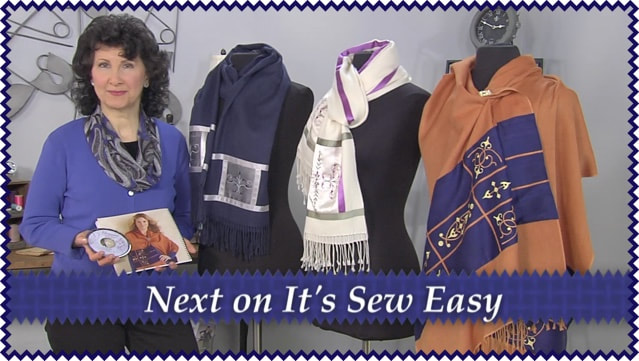
Every wardrobe needs that versatile garment that can take you through the seasons with slight changes or additions. Lindsey Marsh starts with making a wardrobe to flatter and fit your unique shape by creating a muslin and how to choose the pattern and grade between sizes. Then Rebecca Kemp Brent shows how to transform your wardrobe with embroidered pendants and fabric beads. 
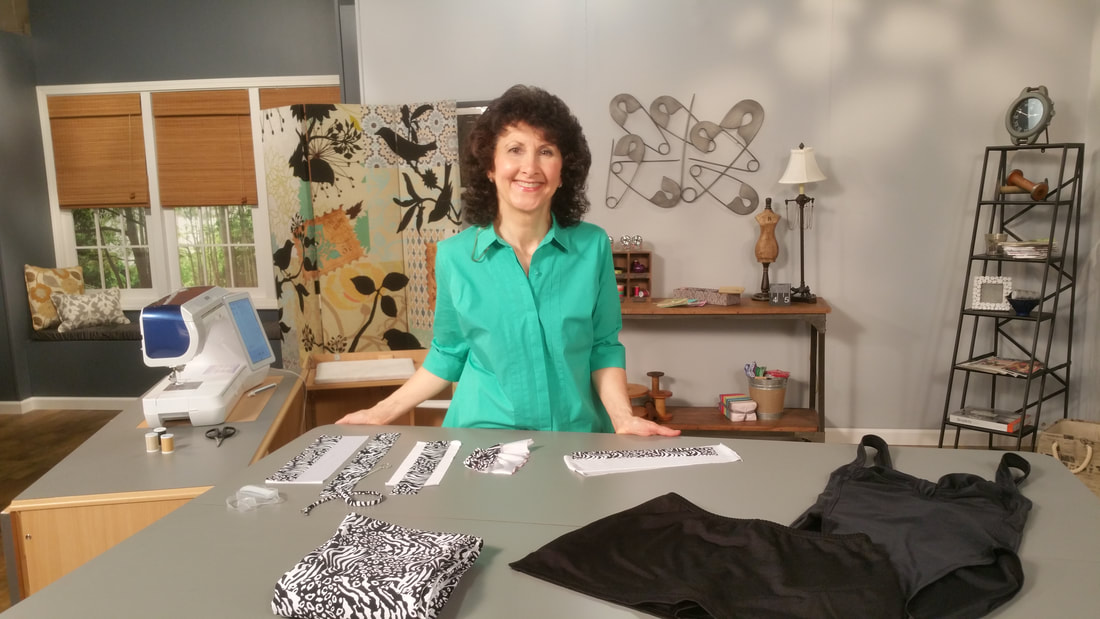
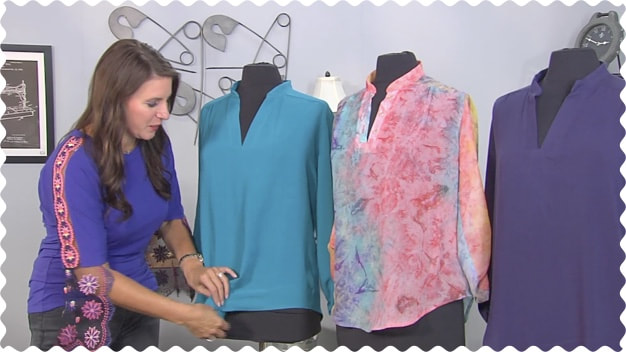
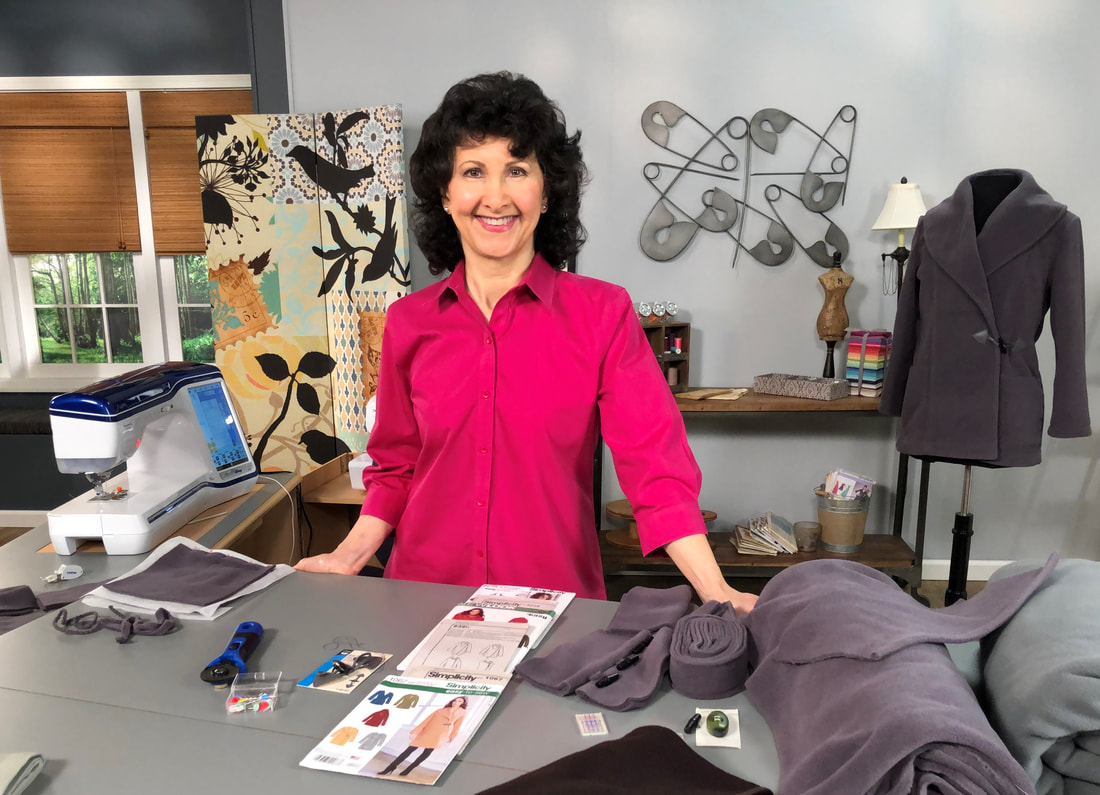
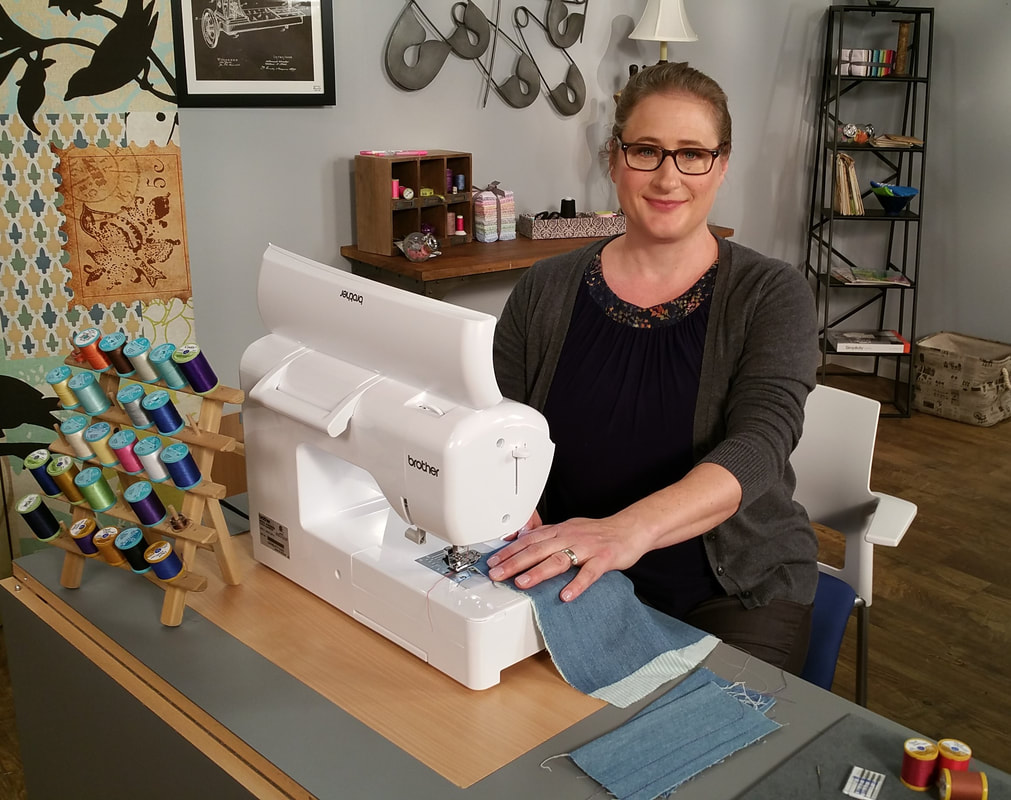
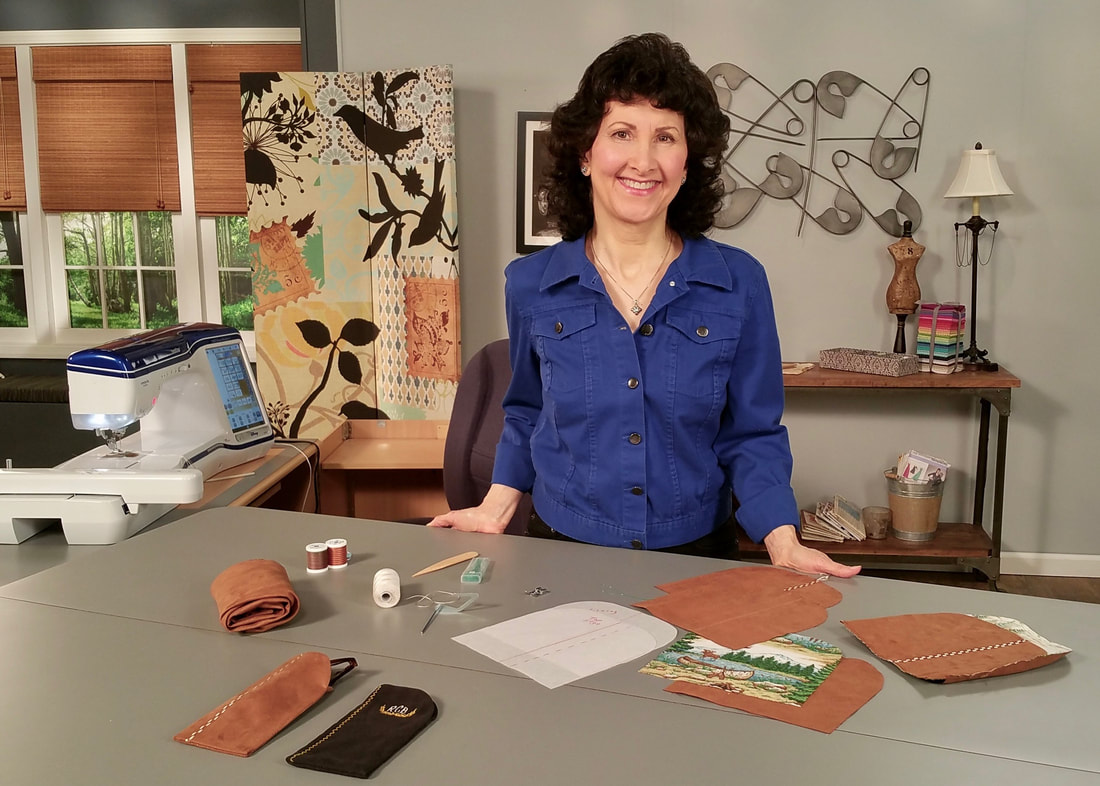
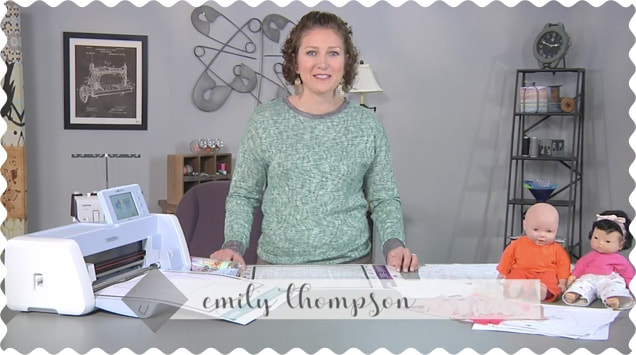
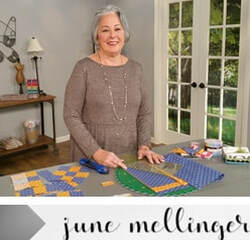
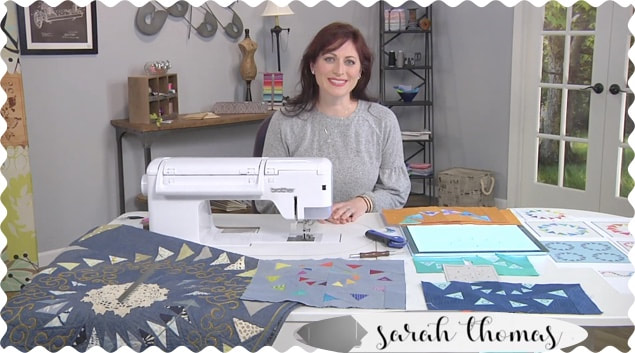
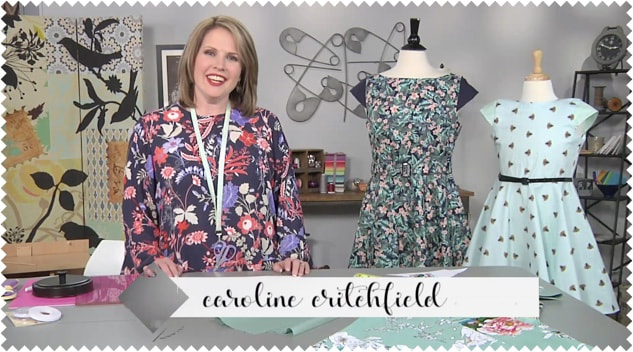
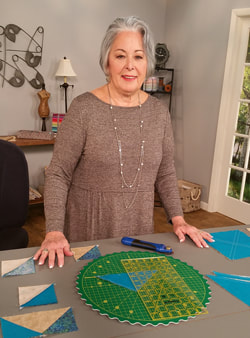
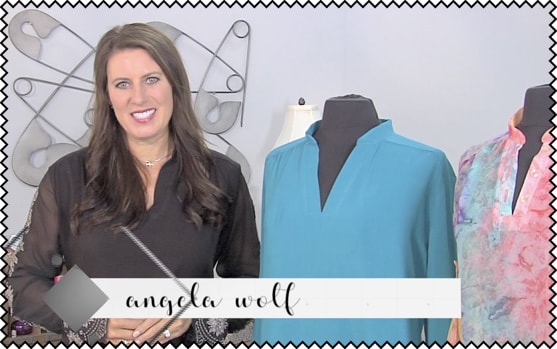
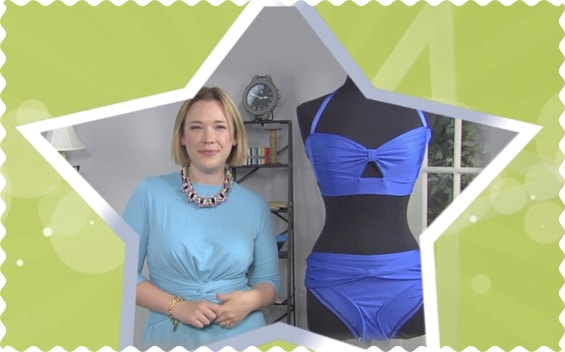
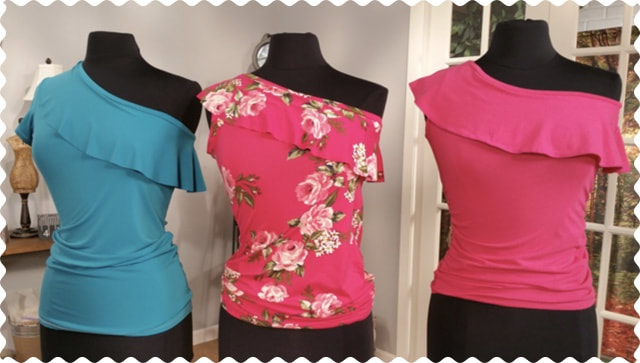
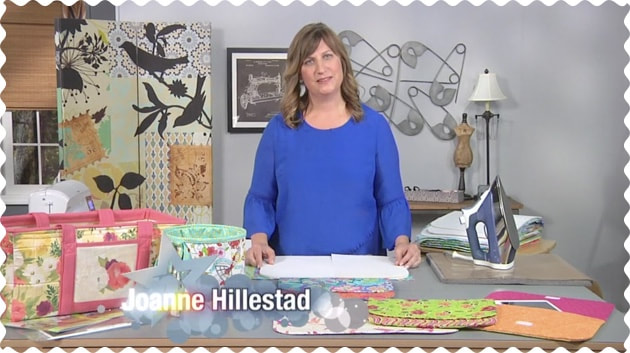
Lindsey Marsh from Sew To Grow is a Texan turned Aussie by way of marriage. Her delightful pattern line includes some great looking classics that would be suitable for a wide range of figure type and lifestyles. 
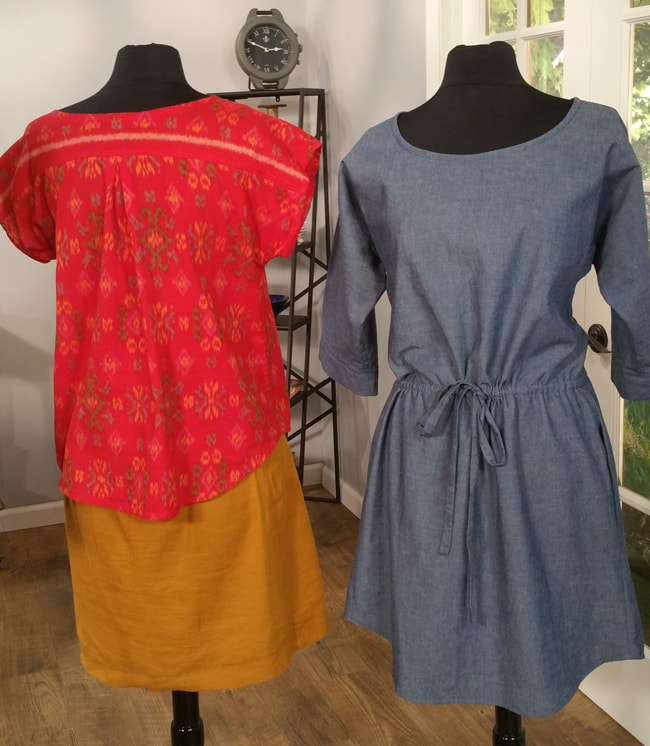
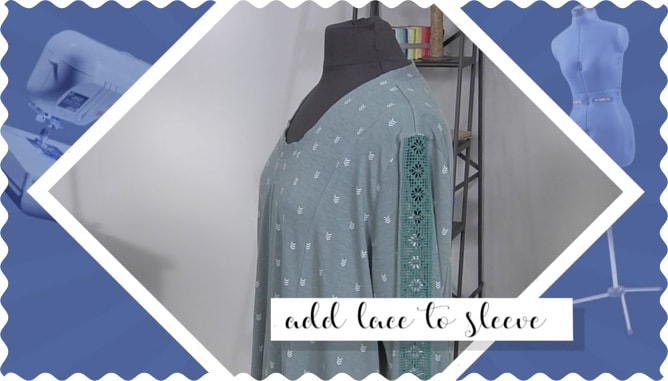
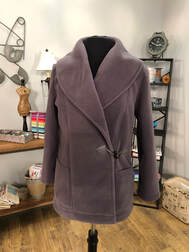
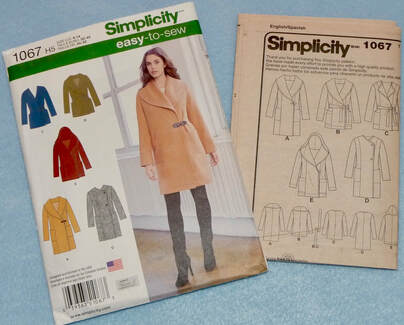
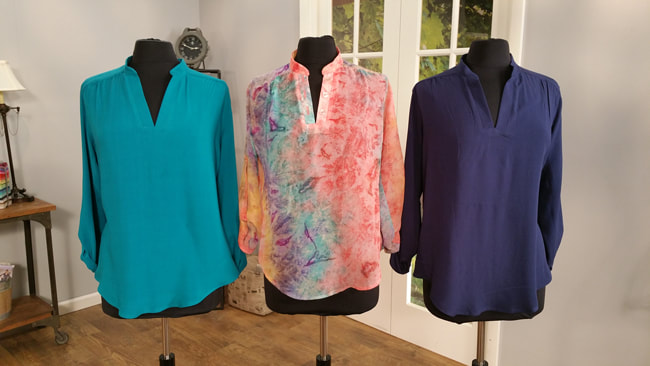
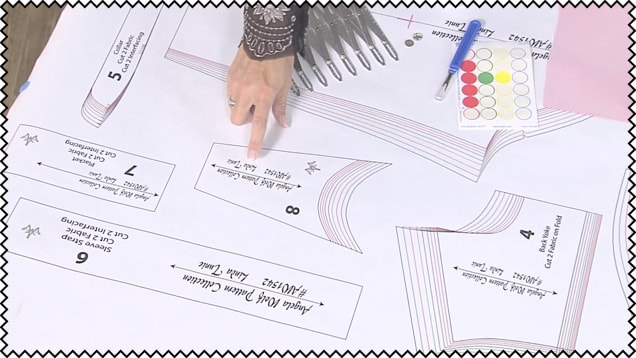
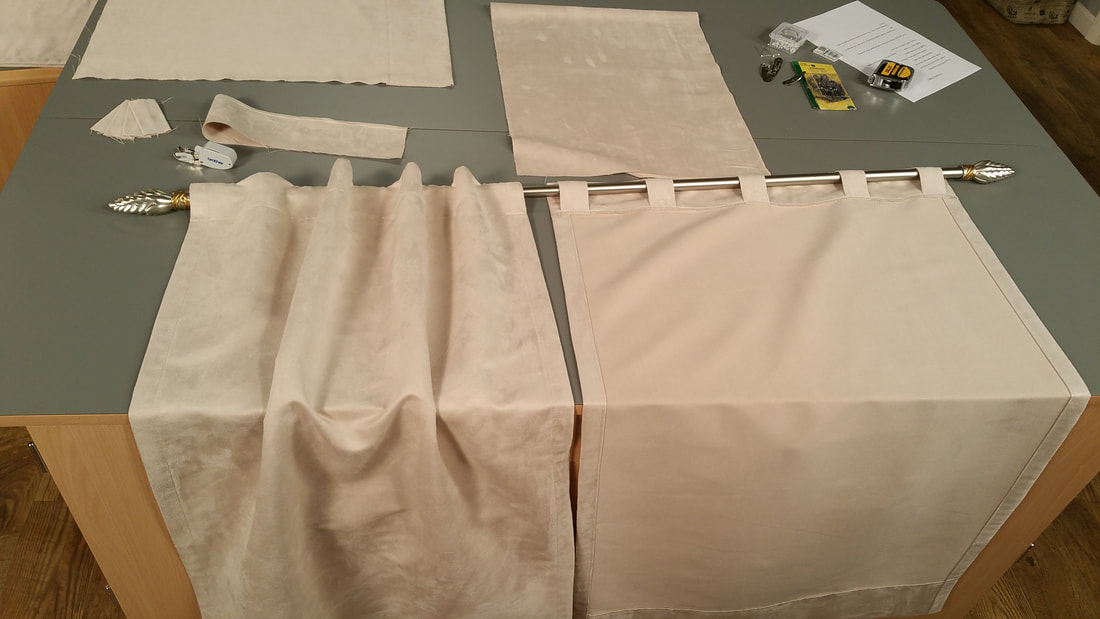
In this segment she uses her Bondi Top Pattern as an example for pattern fitting variable sizes. She calls it a tic tac toe of sizes, meaning the bust, waist, and hip measurements do not fall on the same cutting line throughout the pattern. 
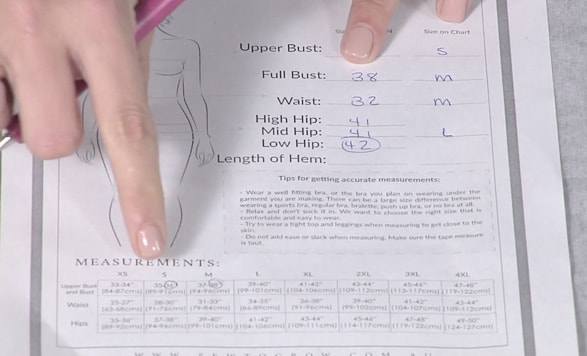
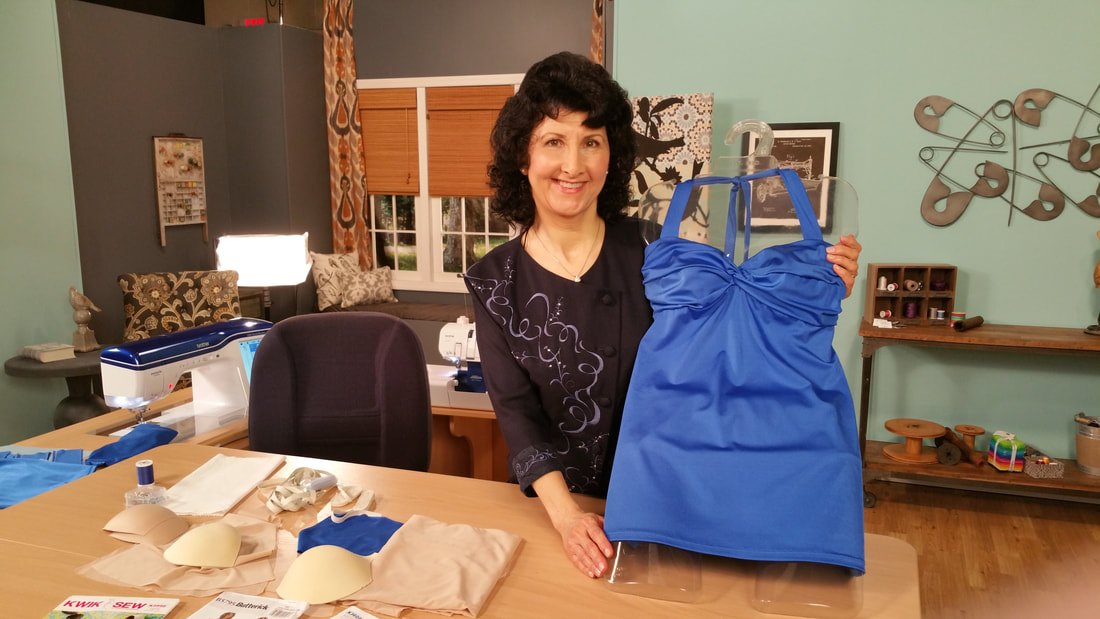
In this show she walks you through the process of measuring your body, then connecting sizes on the pattern, and finally shows how to make a muslin for a trial fit. You'll find details in her instructions, along with a free download for her personal measurement fitting chart HERE. 
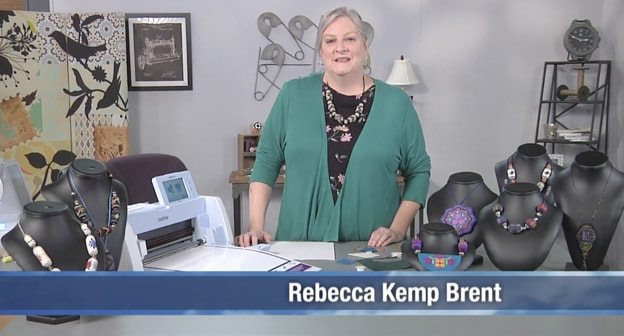
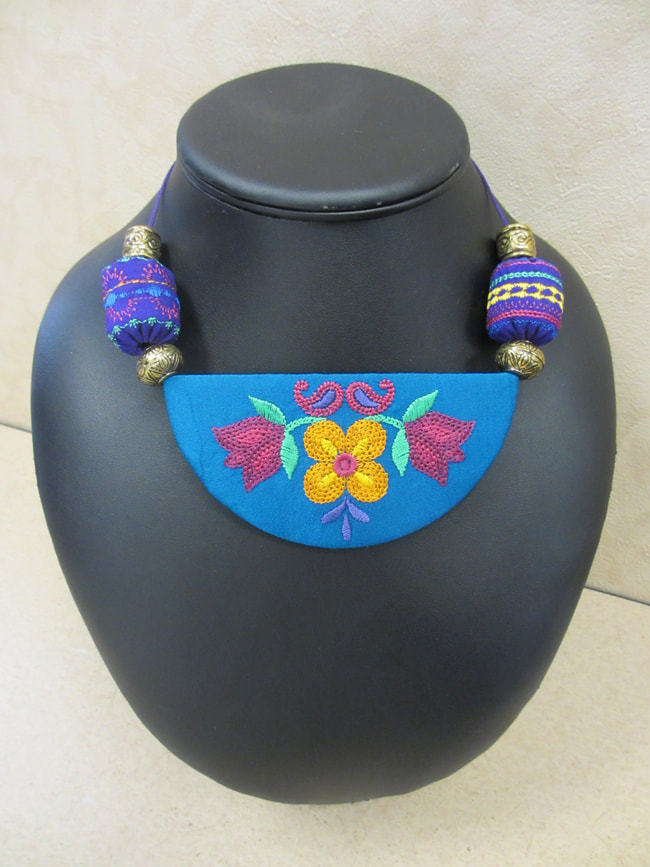
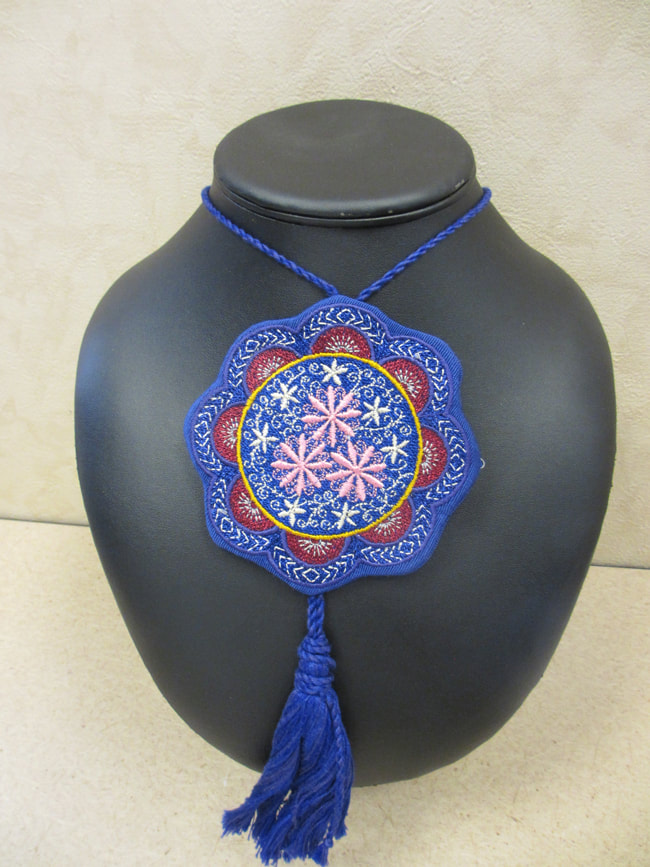
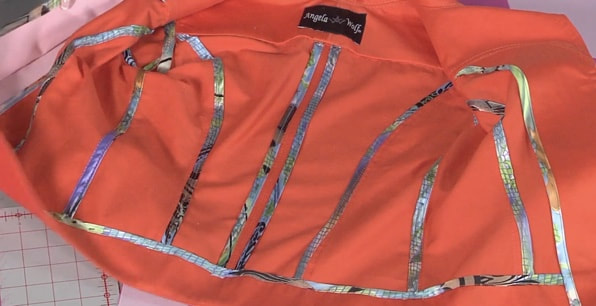
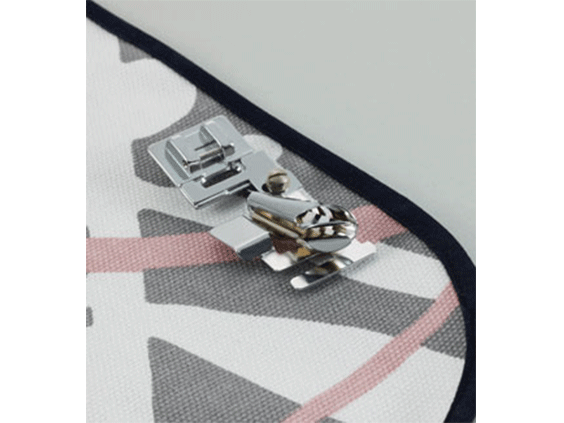
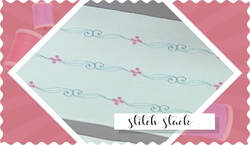
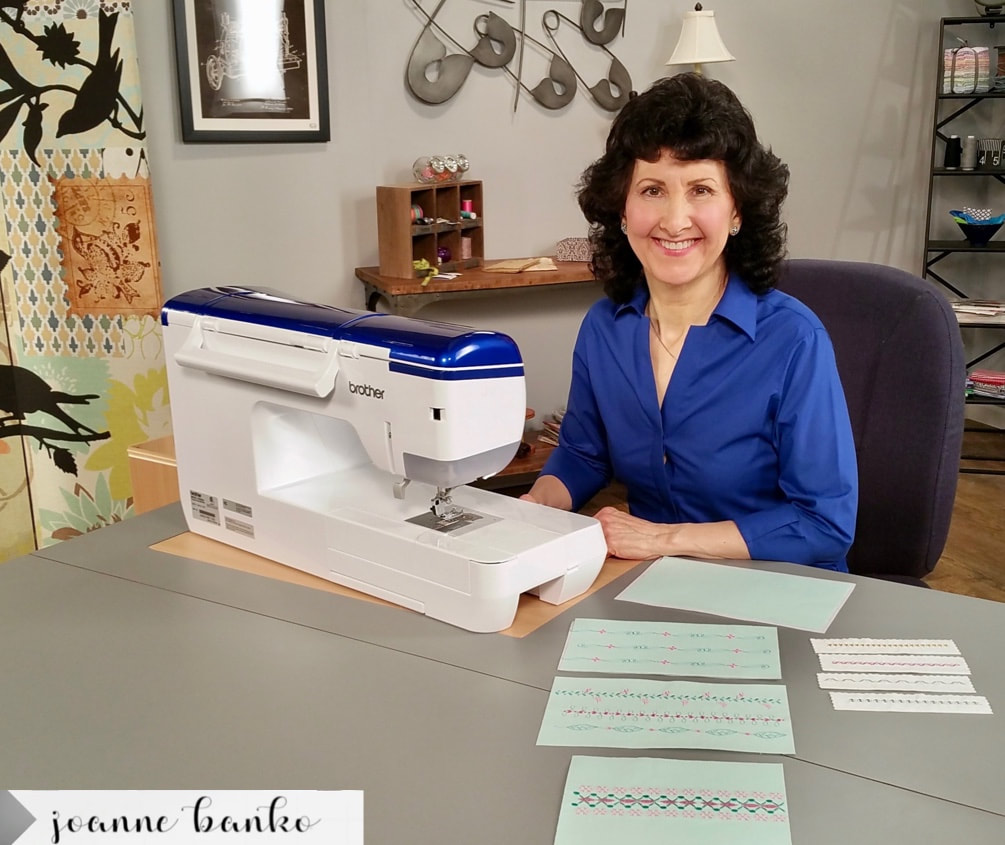
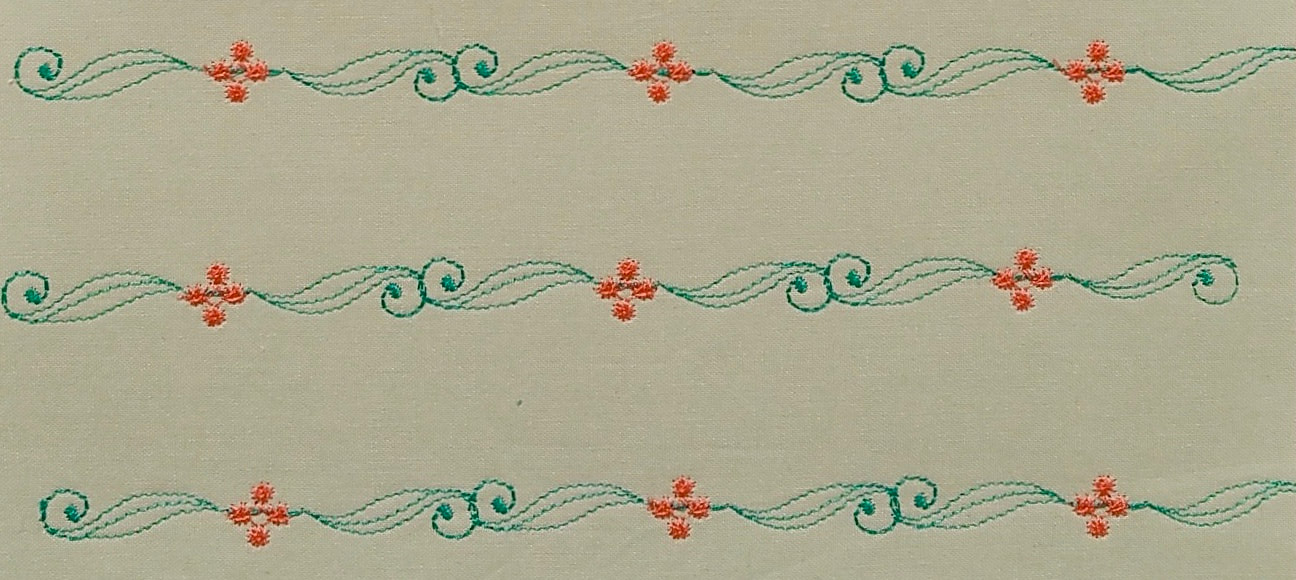
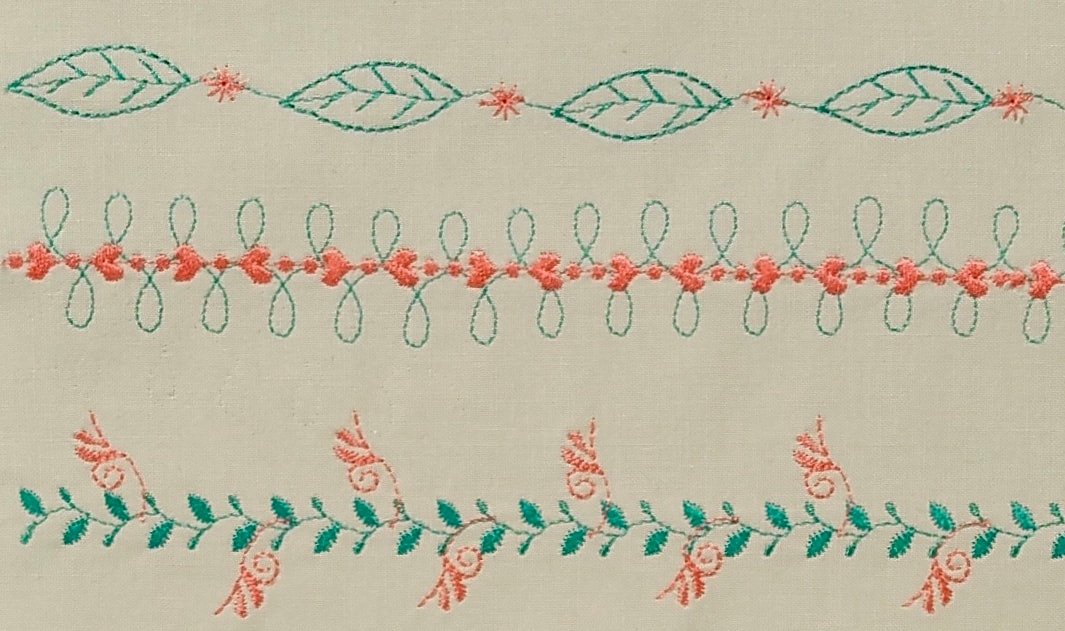
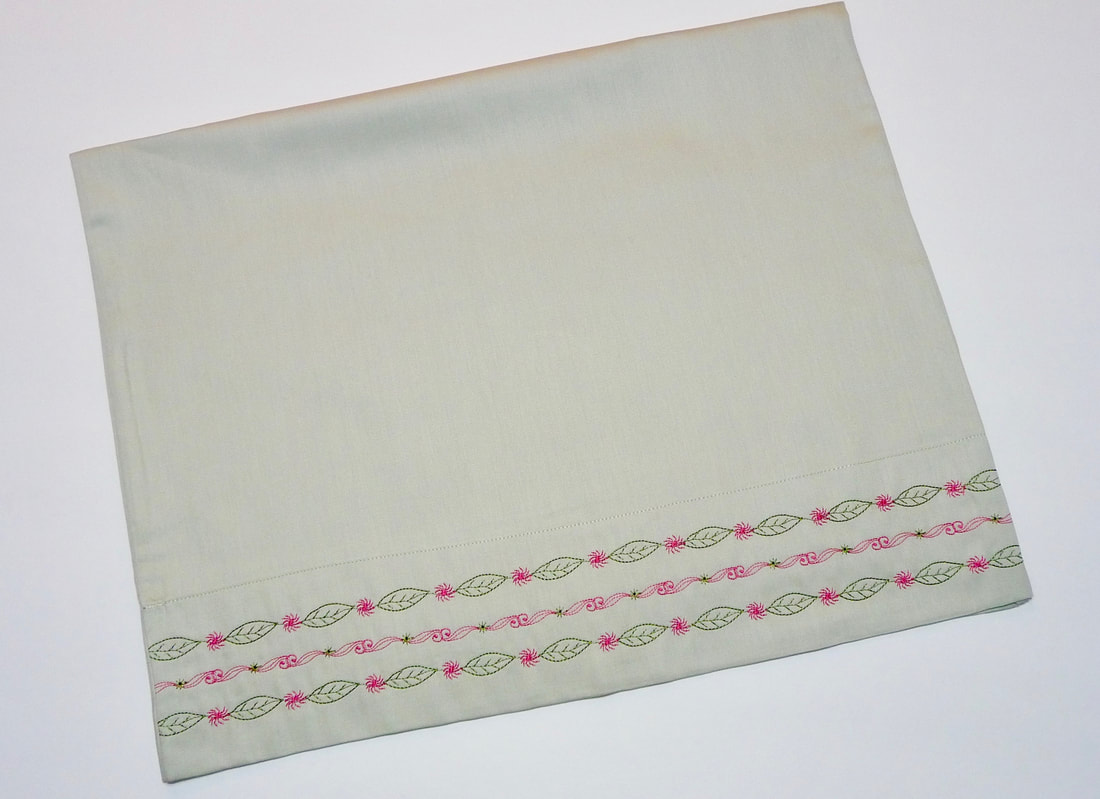
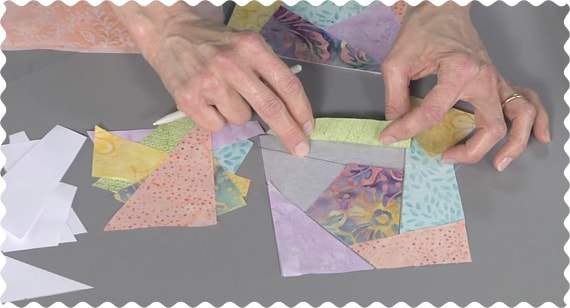
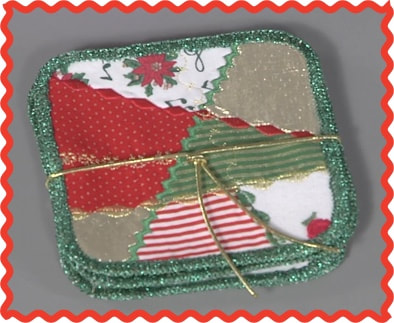
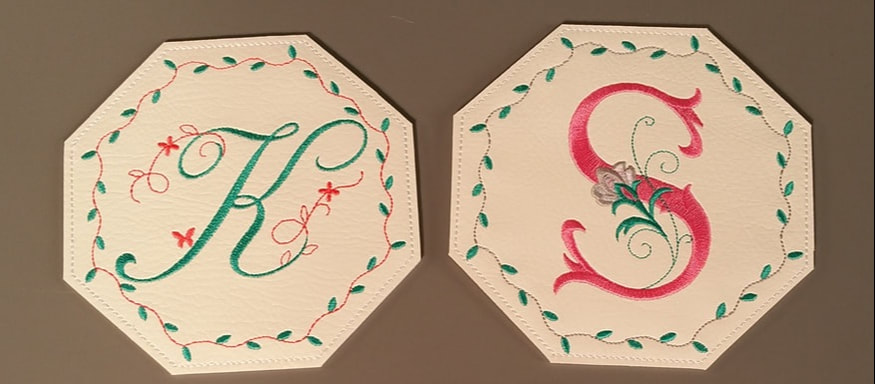
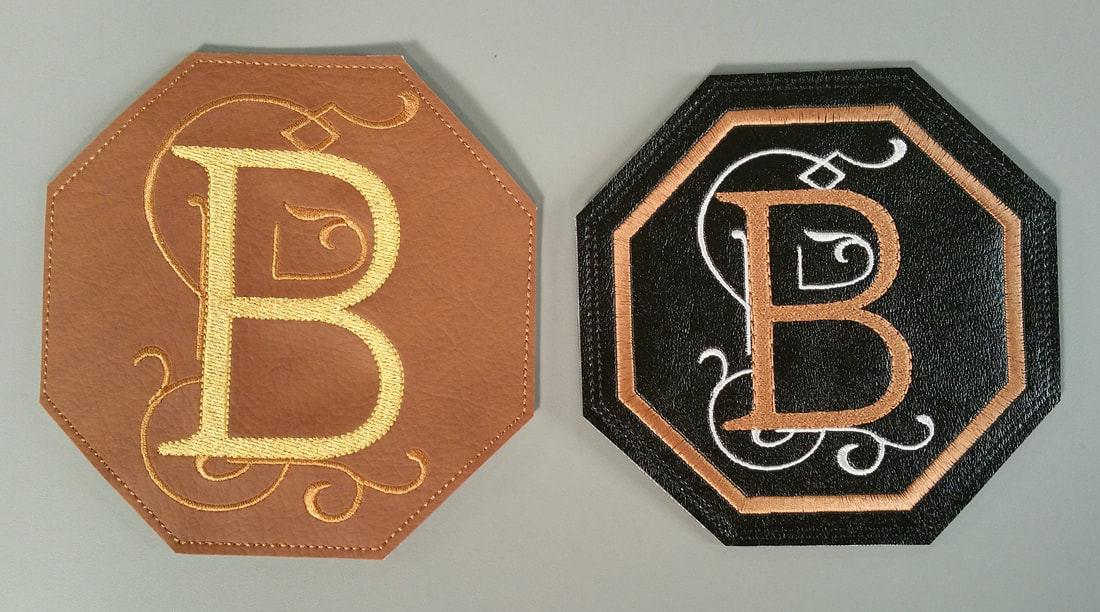
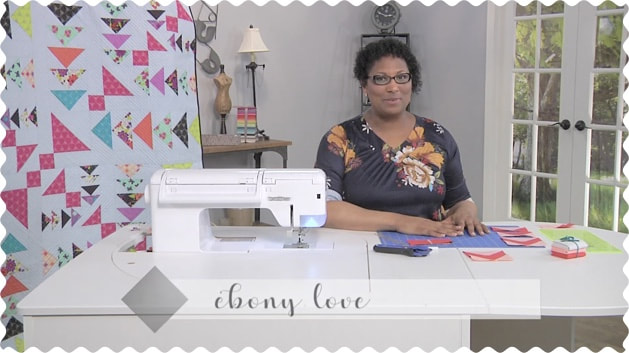
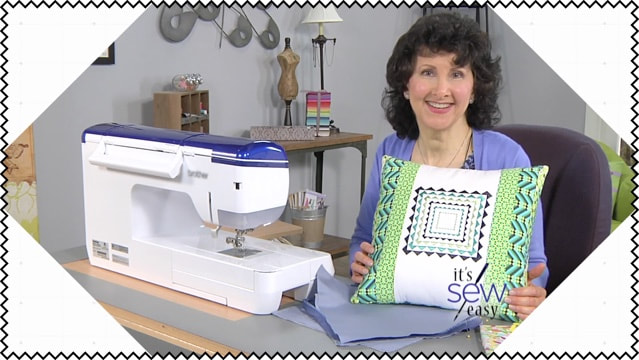
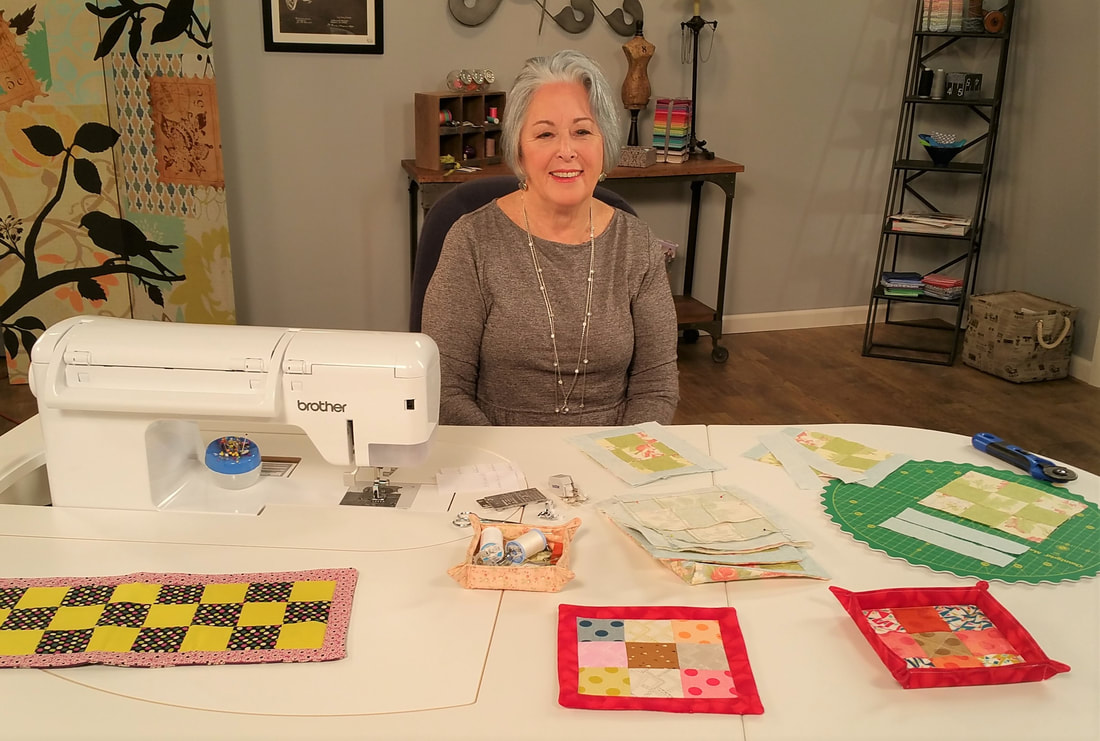
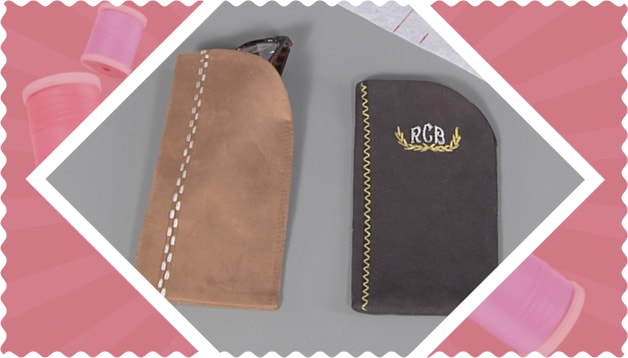
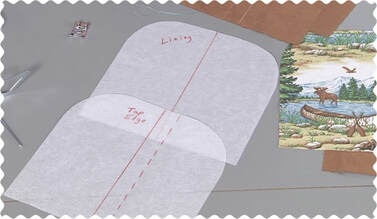
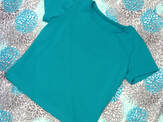
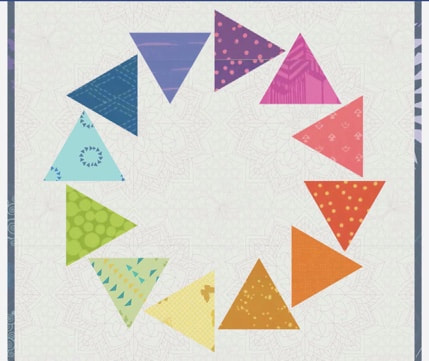
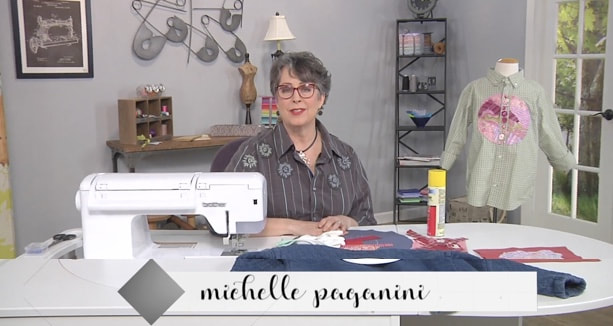
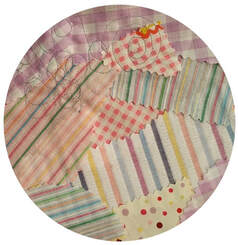
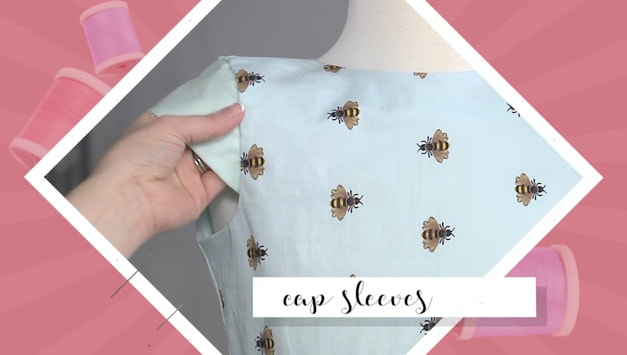
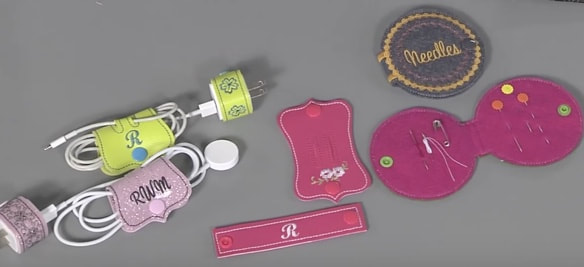
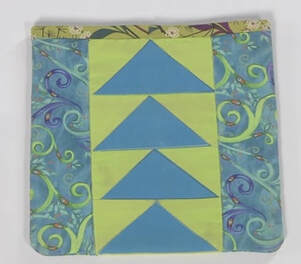
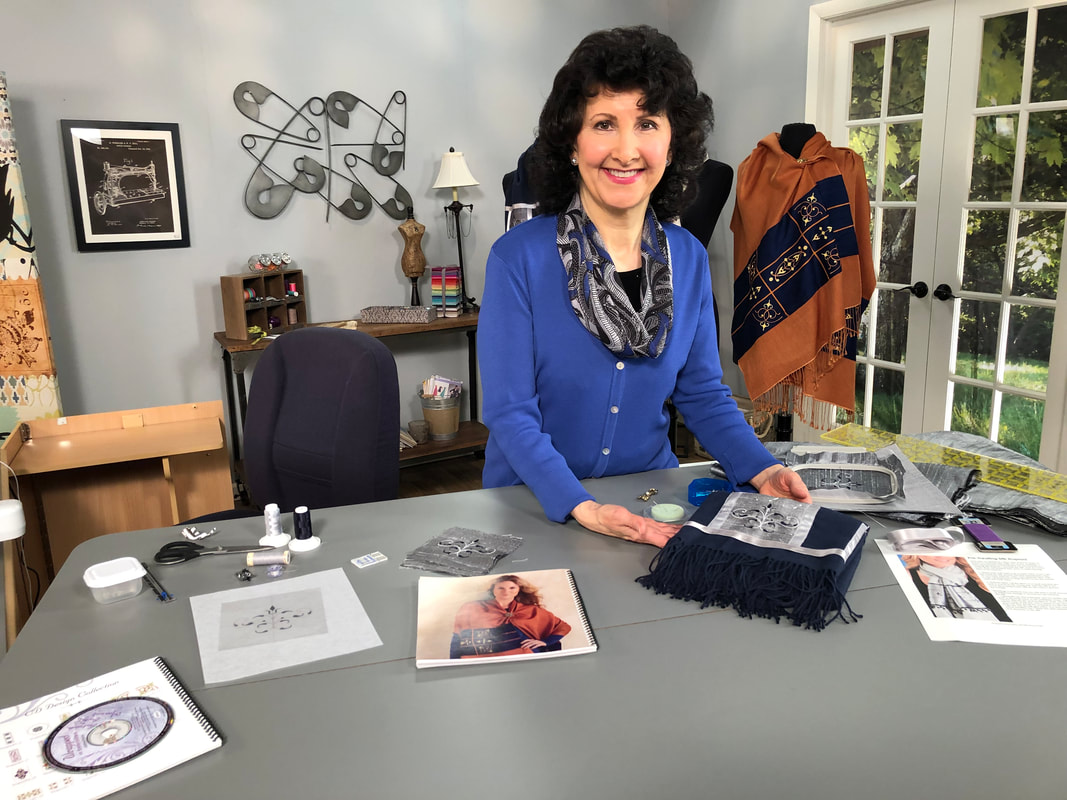
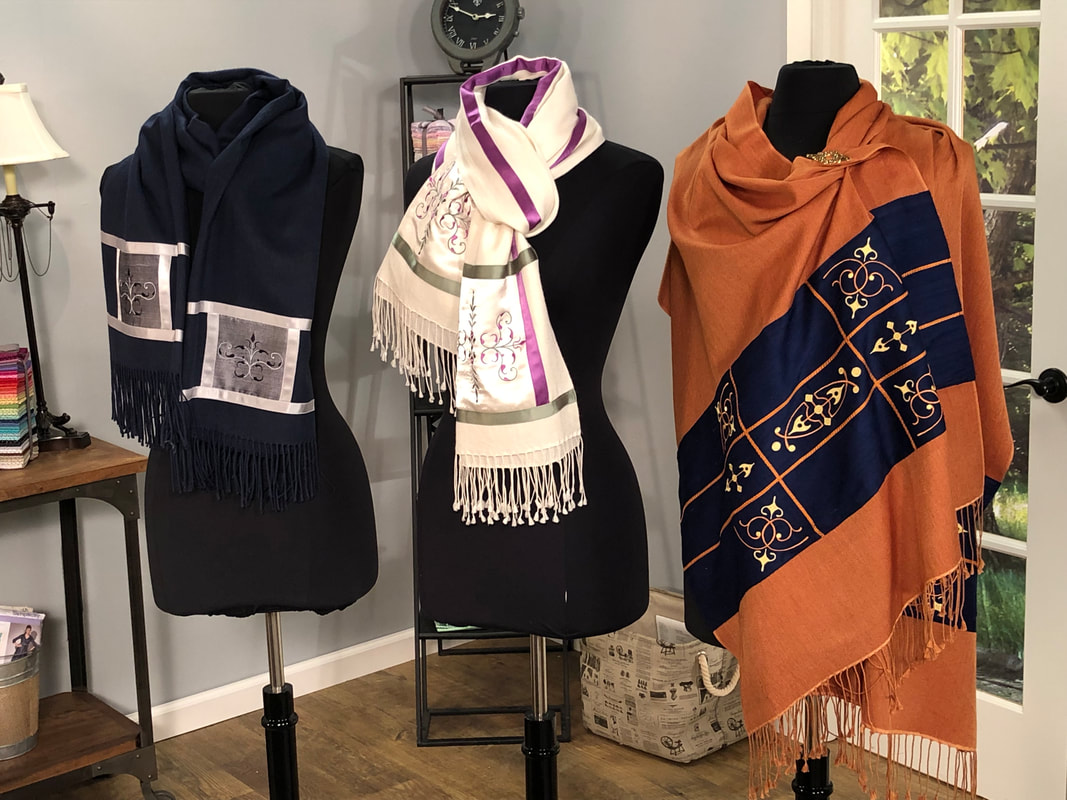
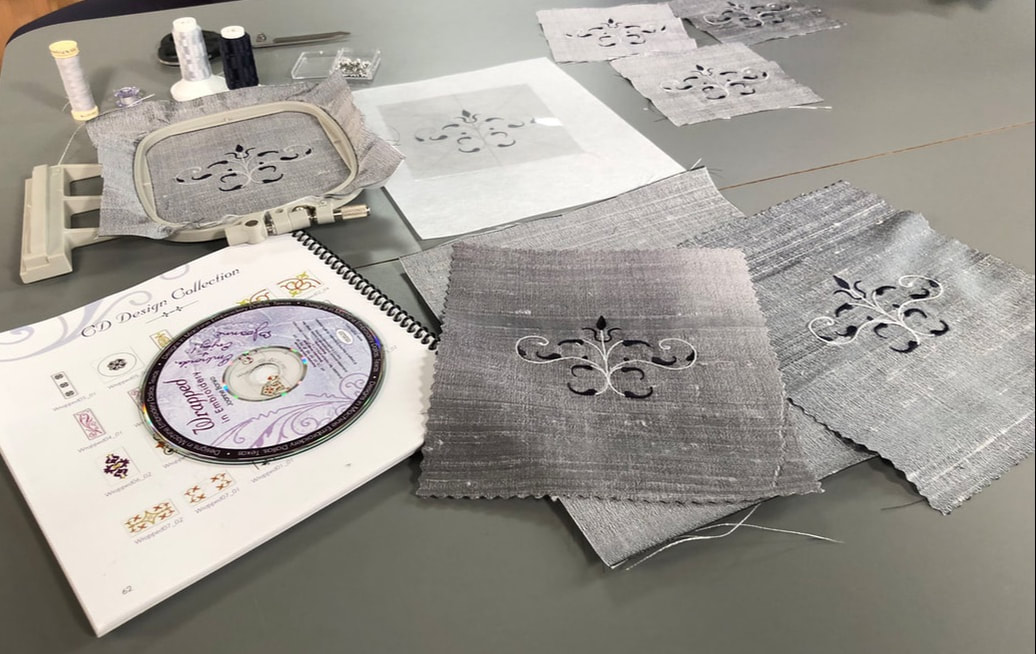
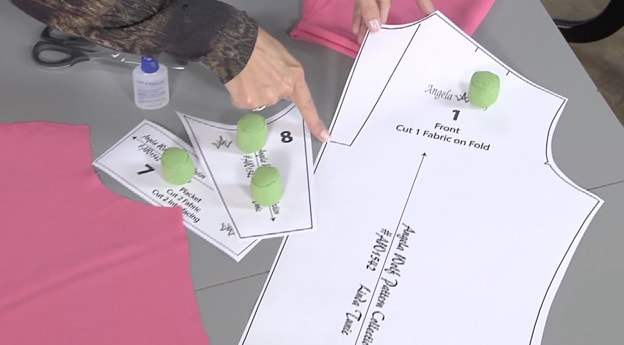
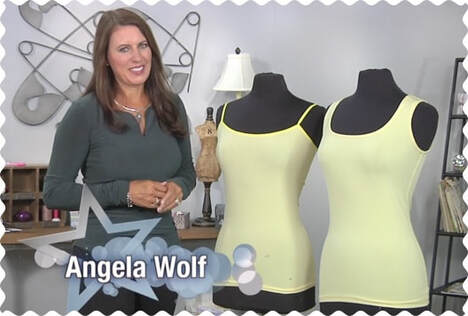
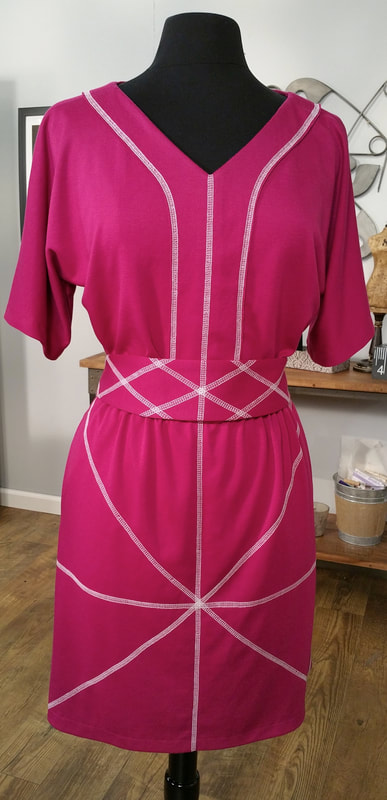
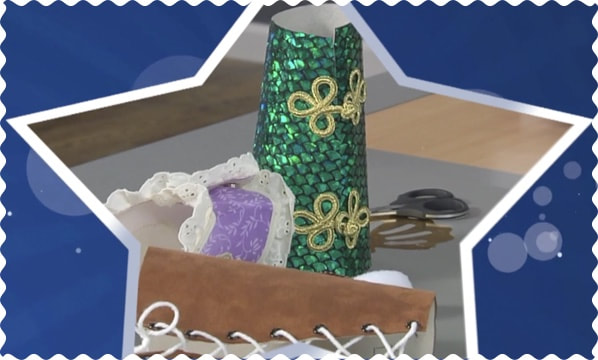
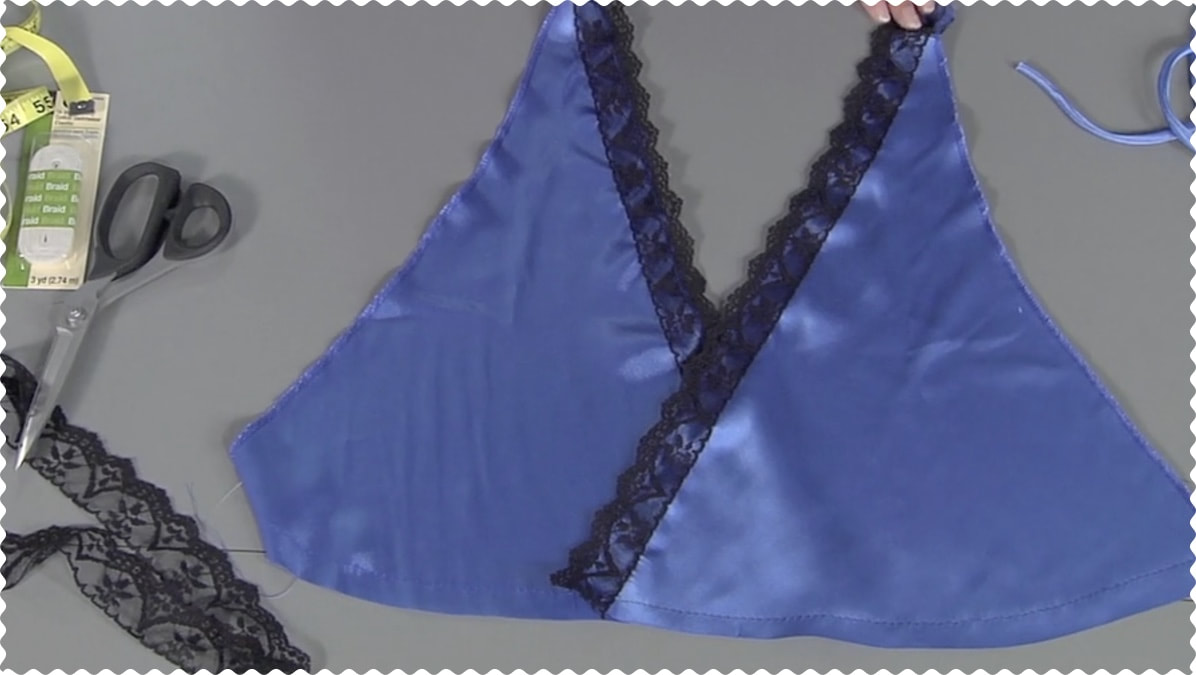
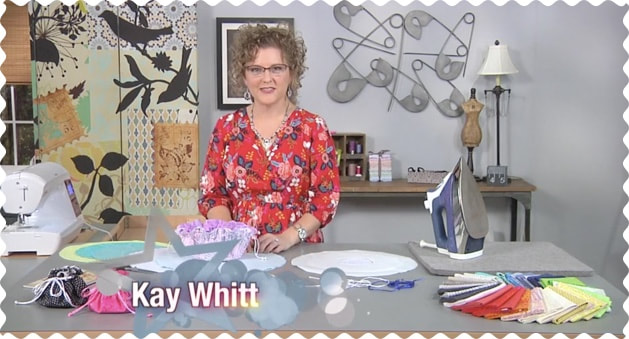
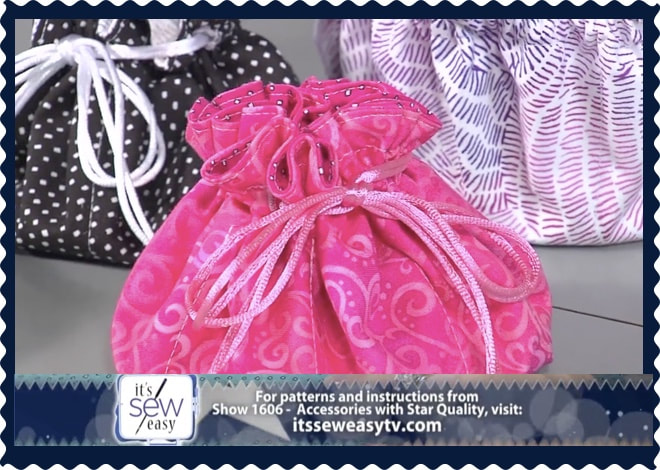
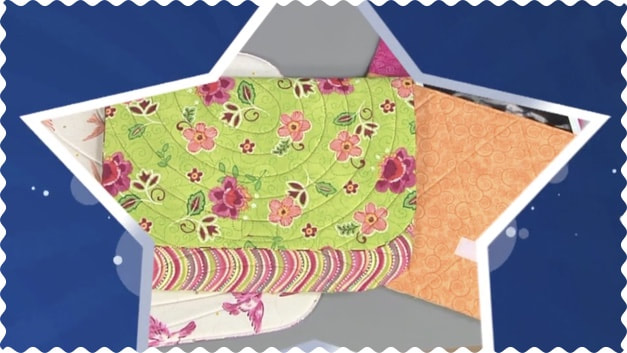
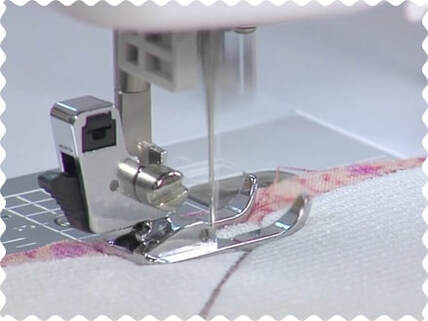
You're in for a real treat when you watch Rebecca Kemp Brent's segment on machine embellished jewelry! If I start bragging about my friend Rebecca's many tablets I may never stop. Suffice to say she never ceases to amaze me with her inventive and artistic creations! Take a look at some of the samples from this show below: 
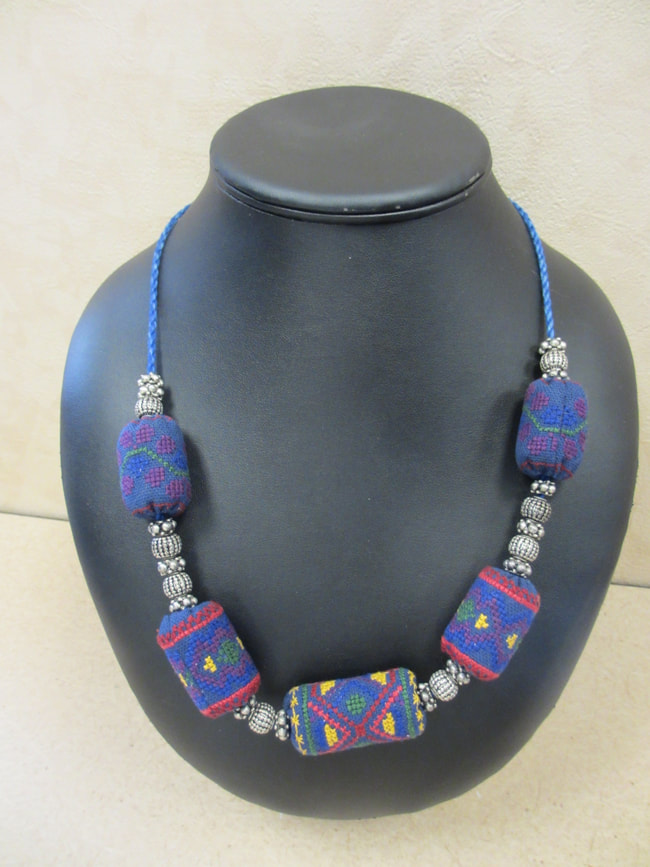
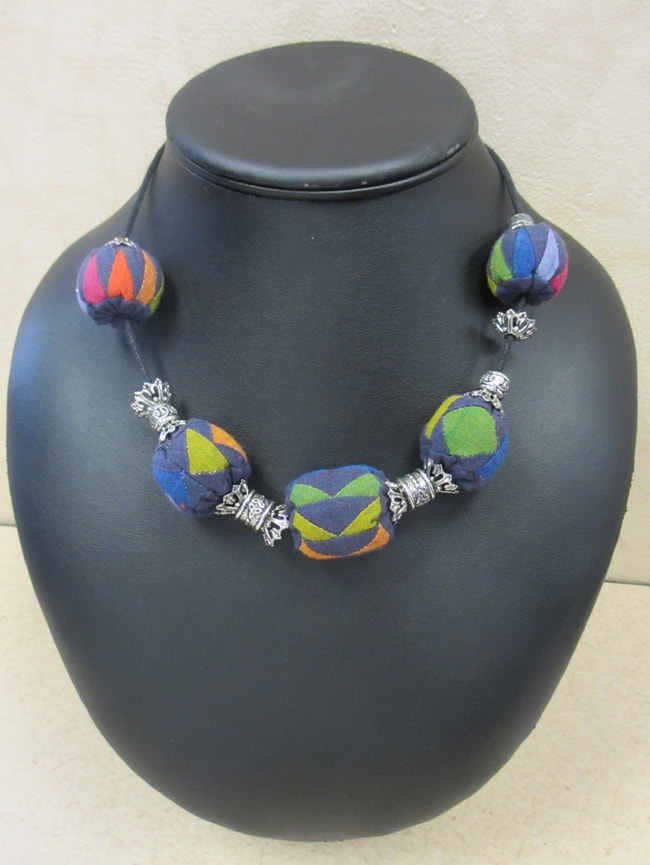
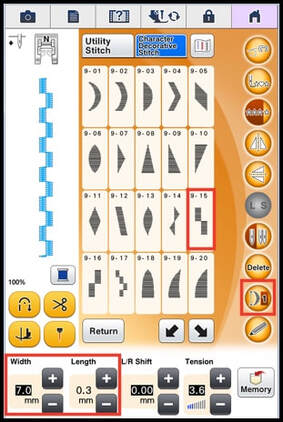
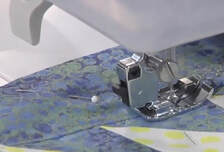
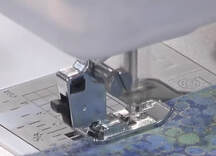
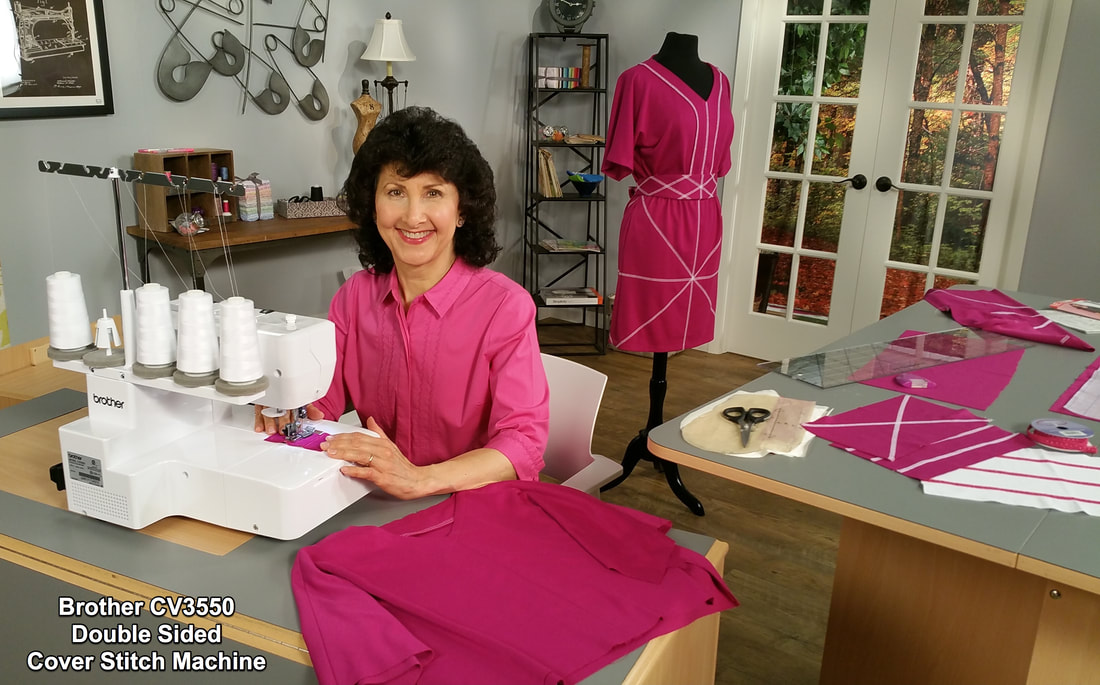
You'll see how she cuts accurate shapes using the Brother ScanNCut electronic cutting machine. As always, Rebecca provided instructions to help you design your own similar masterpieces. CLICK HERE to view and download. 
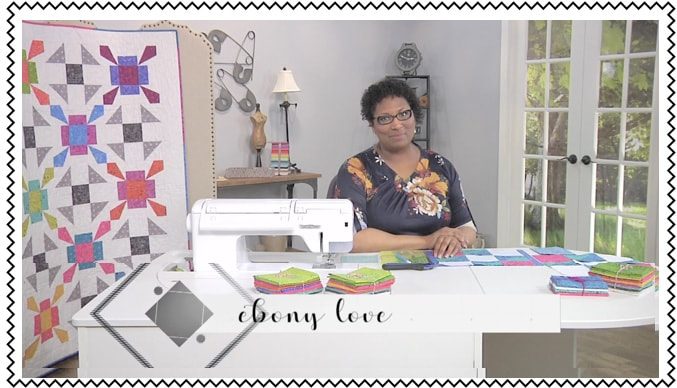
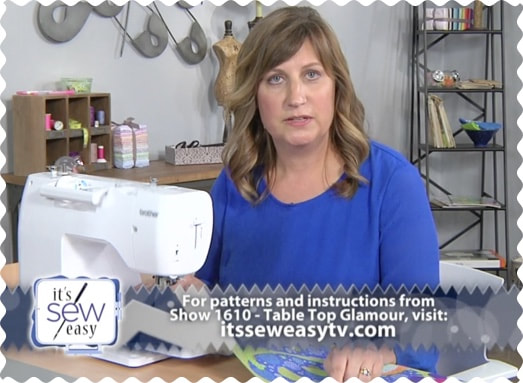
You'll find this show airing for free online at www.itsseweasytv.com until noon EST July 17th. Enjoy!
9 Comments
Show 1803 brings you four different segments with everything from swimsuit ideas to mermaid costumes. You'll also get some technical advice for sewing princess seams. Emily starts the show with a super easy way to finish a little girl's tank style swimsuit. With a darling little girl of her own, I know Emily gets lots of practice when it comes to perfecting clothes for kids. CLICK HERE and you'll find a link to her written tutorial on the topic of fold-over elastic trim. Next up, you'll see more swim trim ideas with my demo of three different ways to add accents to ready-made or custom made swimsuits. Would you believe I've made most of my own swimsuits since I first learned to sew? Through the years I've tried out many different patterns and enjoyed getting exactly what I want in swimwear by making it myself. However, I have also purchased suits and find that it's fun to customize them with trims like the ones you see in this segment. CLICK HERE to download instructions for the trim ideas. If you'd like even more swimsuit tips, I invite you to check out It's Sew Easy TV show 1109-1, where I give more in-depth information for making your own swimsuits from scratch. Click on the above image to watch this show on my YouTube channel. If a by the sea costume is something you're dreaming of, you'll see Cheryl Sleboda craft a mermaid costume in the third segment of the show. Last but not least, Angela Wolf shows you how to sew and press the princess seams in her ongoing trench coat series. Princess seams are always a bonus in my book since they afford so many options for customizing and fine-tuning fit. Sewn properly, they give a garment nice lines and a polished look. That wraps up show 1803. visit www.itsseweasytv.com to watch this show online for free until noon EST July10th. Three instructors will entertain you on this episode of It's Sew Easy TV! Whether you love making garments or crafts, this show will give you something new to try and help you sharpen up your existing sewing skills! The show begins with Sarah Gunn. Sarah boldly states that pricey designer clothes can be replace with home sewn, hand crafted garments, imitating the best of ready to wear. In show 1802 she sews a scalloped skirt with a feminine flair. I love her low math method and no special tool approach to making a unique and stylish skirt. Click on the above image to download show notes and instructions from Sarah. If you're looking for another scallop show I suggest you take a look at this previous It's Sew Easy video with Rebecca Kemp Brenda as the instructor. Here is a short link to the video on the KS Productions YouTube channel: youtu.be/PQCb0T0DJd8 Angela is next up, with a tutorial for creating a vent at the back of her pretty pink Chloe jacket. Follow along as she demonstrates each step with great detail. You may want to make step by step sample to refer to at a later date. Knowing how to sew a professional vent will serve you well when making jackets or skirts in the future. The show wraps up with Emily Thompson sewing a craftly little bunny bag. I think you could easily change the ears to make this look like a cat, dog, or bear just for fun. CLICK HERE and you'll find a link to download Emily's free pattern. That wraps up the preview of the online showing of 1802. Visit www.itsseweasytv.com for more information on this show. You can watch this episode for free until noon EST July 5th, 2020.
Series 1800 has started to air for free online each week on the official It's Sew Easy TV website, www.itseweasytv.com. Each week I'll preview the newest show and include extra material and information for your sewing pleasure. The theme for series 1800 is Whatever the Weather. This season is full of projects to take you through every season in style! Season 1800 kicks off with Angela Wolf's new sew-along, her new Chloe trench pattern. Angela starts by recommending the making of a "muslin" otherwise known as a trial garment. I'm a big fan of this idea although I admit I don't always practice what I preach. Generally, when my fabric is pricey or the garment/pattern is really unlike anything I've previously made, I do take the time to sew a trial garment. The key when doing this is to pick fabric that is pretty similar in weight, drape, stretch, etc., otherwise you're not performing a "real" test. Therefore, the term muslin really applies more to Check out this article HERE for more thoughts about making a muslin or toile as it is sometimes called. You'll also see her technique for binding seams on the unlined version of the jacket. This bias binding trim is easy to do if you have the right foot for the job. In the photo above you see the Brother binder foot, part No. SA109. You can use 1/4" double fold or 1/2" wide single fold pre-purchased bias for this technique. Keep in mind, this isn't as thin or as pretty as bias from a snazzy contrast fabric like you see in Angela's jackets. CLICK HERE and you'll find written instructions directly from Brother for using this foot. HERE is a short video demonstrating the entire process on a Brother machine. Next up, is the couched and quilted vest from show 1801. To say I had fun making this is an understatement. I had a blast! The hardest part was hunting for a pattern. I bought hree different ones but settled on Simplicity 1499. If you're interested in the pattern I would suggest you snatch it while you can. As of right now it is still available but seasonal patterns like this aren't always around for long. In this segment you'll get some tips for doing a trial fitting, see options for binding the front edge, learn how to shorten a separating zipper from the top edge, and embellish the back of the vest with embroidered yarn couching. It is possible to trace a simple motif on your fabric and create a couched design using yarn on the sewing side of the machine. You'll find a video with some ideas for couching on the sewing side of your machine HERE. If you decide to use this method consider using a contiuous line quilting design as your pattern. Quilt style line art would be ideal for the contiuous flow of yarn. Basically, you want a design without a complicated pattern to follow. The embroidered motif I stitched on the back of the vest was accomplished with a special upgrade kit that included a couching attachment and unique designs such as the two butterfly motifs featured on the show. These butterflies are part of a unique collection of 40 yarn couched patterns for the Brother XP1 Luminaire machine. Once the machine is set up with the couching attachment in embroidery mode a diamond-like stitch anchors worsted weight yarn in place to form the pattern. It's quite amazing to see it take shape! Visit your local Brother dealer for more information on this item. You'll find a feature sheet HERE with more details about the kit. Visit www.itsseweasytv.com to watch this show. Enjoy!
One of the prettiest details you can add to a project is lace or lacy looks. Angela Wolf starts the show with the final lesson of the Linda tunic Sew Along and changes the sleeve to lace. Her idea for adding sleeves made from lace yardage is ideal for adding a whole new look to this top. I'm thinking this would be a nice addition to a summer jacket as well. In this particular case Angela mixes a casual knit cuff with the lace sleeve on the blouse. Not necessarily what you might think of for standard styling but when you see the result, I'll think you'll agree that it works! Next up you'll see my Stitch Stacking tips. Blending, combining, and stacking decorative stitches adds interest to any project. In this segment you'll see how easy it is to make use of the beautiful decorative stiches built in to your machine. I had a lot of fun creating this combination of stitches on the Brother Dream machine. Many machines will have similar capabilities for building a line of decorative stiches with space in between. Check your machine menu for available options. The idea is pretty simple. I started by creating a combination of stitches, adding straight stitches to create a space between the motifs. Then I went back and added a single motif on top of each of the areas with open space. Using a different thread color really makes the design combination pop! Here are a few more combinations. For the final project I meant to show a pillowcase finished with rows of stacked stitches. Somehow that got left off the video. Here it is for you to see. Click on the pillow case picture to view and donwload all the instructions for this segemnt on Stitch Stacking. Rebecca Kemp Brent wraps up the show and with a different way to add lace to a sleeve. Towards the end she shares some beautiful samples of lace made with an embroidery machine. CLICK HERE for Rebecca's detailed instructions for this segment. It's Sew Easy TV show 1713 is currently showing at www.itsseweasytv.com until noon EST December 20th, 2019. More about lace . . . Making freestanding lace and lace appliqués with an embroidery machine has been one of my favorite techniques for more than two decades. Over the years I've created quite a few garments with this added accent, including the forties style slip dress/nightie shown during It's Sew Easy TV show #906. You can watch this show HERE.
I have multitudes of pieces in my lace stash just waiting to be sewn on to something special. Making machine embroidered lace is a popular topic. There are a lot of both old and new designs that can be considered classics. Watch for a future blog post on this subject. I'd love to hear your comments, thought, and stories about lace that may be in your stash. Is machine embroidered lace a favorite technique for you too? Or, is this something you have not yet tried? Do you have lace in your stash? Feel free to leave your comments below! Series 1700 is winding down with just two more shows to go. You've seen a lot of pieced patchwork sprinkled throughout this series. Show 1712 has two more for you to try and then a quick and easy quilt binding technique you can use to finish off your pretty patchwork. I had the opportunity to kick off the start of the show with a favorite strip piecing technique sewn on the serger. Sergers are known for speed and efficiency, not necessarily for precision. Strip piecing on a sewing machine is a well-loved technique. Indeed, sewing strips is a very forgiving way to build a pieced project quickly. However, if you were finishing your piece with traditional methods, you will still need to layer and then quilt the item. Enter the easiest way ever to piece and quilt at the same time, all while taking advantage of the speed and efficiency of the serger! In this short tip segment I show the basics on a sample piece. You can download an instruction sheet outlining the basics HERE. To download step-by-step instructions for an actual completed project, click on the image above and you'll find a Serger Style Quilt-As-You-Go placemat project I contributed to Stitching Sewcial, the official Brother blog. Once you master this technique you'll find yourself using it to make more placemats, plus baby blankets, potholders, & more! Paper piecing is the next technique you'll learn in this week's show. My friend Emily Thompson is known for clear instructions that help you sail through the steps to creating something beautiful. Her paper piecing for beginners will give you confidence to try this method even if you have trouble thinking inside out and upside down. I say that because paper piecing is a little like that. You are working from the opposite side of the right side, which feels just plain wrong when you first get started! I encourage you to let Emily be your guide. She'll take you through stitching, pressing, flipping, and trimming until you have a perfect piece, points and all! Click on the image above for Emily's instructions and free pattern. Caroline's binding tutorial is a fitting end to the show, with her Quick and Easy Quilt Binding instructions. If you struggle with sewing strips long enough to bind a quilt, or you can never remember how to miter the corners, this will be a great refresher for you. After watching the show you'll want to CLICK HERE to download her instructions, which include lots of photos to guide you step-by-step. It's Sew Easy TV show 1712 is currently showing at www.itsseweasytv.com until noon EST December 13th, 2019. As a side note, I once took a paper piecing class and the end result wasn't a pretty sight. In fact, after an entire day of stitching I tossed the pieced piece knowing I would never finish it. I think it was a case of not loving the fabric or being enthused about the sample photo on the cover of the pattern. You see, it was part of a kit and fabric selection was not an option. It was also my first experience with paper piecing, and I felt like I could have had an entire garment put together in the time it took me to piece a block less than 18-inches square. However, my points were all perfect, I'll have to say that!
After watching Emily, I'm willing to give it a go again. This time I'll choose fabrics that speak to me and follow her easy methods for paper piecing from start to finish! How about you? Do you have a paper piecing story to share? I'd love to hear all about it :-) It's Sew Easy TV Show 1711: Quick Gifts, Chevron blocks, and Curved hems made Easy on Show 1711!11/30/2019 This show includes something for everyone. There are four segments with a garment project, a craft item, a short quilt block tutorial, and then a tiny quilted project. You'll be treated to helpful tips so you can quilt and sew along! First off, Angela hems her Linda tunic and shares tips for sewing shirttail hems. These can be a little tricky, especially on light weight fabrics. Be sure to watch her fingertips as she eases in the curved edge. You’ll see that the recipe for success in this area includes the following:
I believe a quality iron is key in this process. I'm sure Angela would agree! I actually have the same Reliable iron you see used in the TV studio. In fact, it was brought in by my recommendation. I have no affiliation with the company, but you can CLICK HERE to read a post I wrote about pressing and pressing tools which includes this iron. Reliable Corp. has since updated their line of irons with new models but the principle design difference they offer is described by the company in the statement below: "Velocity irons use a patented 2-heating element and micro-pump technology that pre-heats the water and turns it into steam before it reaches the soleplate." This design difference means you can steam at lower than average temperatures. a real bonus when working with a wide variety of fabrics and fibers. Indeed! Proper pressing is an important part of the whole sewing process. Perfecting your pressing techniques will result in a professional finish for all your projects. In the second segment you'll see my coaster creations. If you are always on the hunt for great gift ideas, I think you will enjoy these two distinctly different styles. Watch the 14 second video you see here, and you'll get a quick look at the variety of coasters I made to demonstrate on show 1711. Coasters make great impromptu gifts, are easily mailed in an envelope, and are surely a one size fits all answer to gift giving. Coaster creation #1 is stitched on the sewing side of the machine. From pastel batik prints to a mix of holiday colors, these crazy quilt style coasters make use of small scraps, and they're quick and easy to complete. Switching to the embroidery side of the machine you’ll see how I made monogrammed coasters using fonts built into several Brother model machines. I combined the fonts with my favorite octagon frame shape that's built into all Brother embroidery models. Check your personal design collection or favorite software program to search for large letters that are similar to these. You'll find instructions and a Free crazy quilt pattern to download when you CLICK HERE and scroll down to show 1711-2. As I write this today, my mug rests on my own vinyl monogrammed coaster. So yes, I have gifted myself with one of these too! Ebony Love closes out the show with the last two segments. You'll see Ebony whip up some flying geese blocks. Her technique makes this pieced patchwork style easy and foolproof. If you are a wanna be quilter I think this is one of the best blocks you can learn to make. Flying Geese add a really nice touch as a narrow border or edging on a quilt and look fabulous made into full size block too! Watch as she shows how the Edge Joining Foot makes stitching perfect lines a piece of cake. Last but not least you'll learn how to make two tiny, and practical sewing projects using Ebony's tutorial as a guide. Instructions for making the chevron are HERE. addtional project instructions are HERE. I hope you enjoyed this week's preview. of Visit www.itsseweasytv.com to watch show 1711. It currently airs until noon EST December 6th, 2019.
Tips for adding great details to your custom made clothing coming your way in show 1710! Pay attention to details, they make all the difference in a quality, hand crafted garment. Hand crafted seems like an odd set of words to describe something sewn entirely or almost entirely on a sewing machine. Yet indeed, each and every thing we make can be called hand crafted as it is our own hands that put the pieces together. And, as “smart” as our machines may be, they are nothing without us to tell them what to do! Show 1710 starts with another detail added to Angela's Linda tunic. In this segment you’ll see how to change up the neckline to make a traditional closed placket. Her placket technique will make placket sewing easier anytime you need to add buttons and buttonholes. I wonder if anyone recognizes the SimFlex Sewing Gauge used as a spacing tool. I misplaced mine and just found it the other day in a forgotten drawer. It's such a handy tool anytime you need to mark off areas for precise and even spacing. Speaking of buttonholes, Angela is using the Brother Luminaire XP1 in this show. It features a whole new design for the buttonhole mechanism with a stabilizing plate that prevents slippage of stretchy or thin fabrics and it includes the ability to sew larger buttonholes. See Angela's official tutorial for this foot HERE. By the way, Brother created a new foot with the stabilizing plate for many other models as well. Take a look at teh options with SA105 and SA111 and visit your Brother dealer for more details. For more of my own personal buttonhole tips and tricks CLICK HERE for my Building Better Buttonholes tutorial. In the second half of the show you'll see me presenting one of my all-time favorite projects for It's Sew Easy TV. Being a fan of Mill Yardage "genuine" Polar fleece, I was thrilled to be able to give some in-depth tips for sewing a semi-tailored jacket with this wonderful Polartec Classic 200 fabric. This show includes the following tips and more:
I encourage you to watch the video and learn many of my favorite tips and tricks for sewing Polar type fleece. Be sure to CLICK HERE to see coordinating instructions for this segment. I included more about the pattern I used and slight adjustments I made for my version of this jacket.
I hope you enjoyed this week's preview of the show. Visit www.itsseweasytv.com to watch show 1710. It currently airs until noon EST November 29th, 2019. P.S. If you have sewn with polar fleece yourself I'd love to hear more about your personal polar fleece projects. Be sure to share in the comments below! As avid sewing enthusiasts know, details can make the difference between "So So" and SEW Fabulous! This show is loaded with ideas for details you can incorporate into garments, quilts, and home decor. You'll gather some great ideas for details in show 1709! The show starts with my Pillow Parade! Over the years I have made many pillows in all sizes, shapes and colors. Appliqué, machine embroidery, and trims have adorned these pillows and made each one unique. I've been known to say that pillows are the quickest way to update a room. They're also a great decorator starter item. Just what do I mean by that? Well, if you're moving to a new space or starting off with new furnishings you may want to consider making, or planning accent pillows first, and then build the rest of the room around the colors or shapes found in your pillows. Of course, you can decorate in the opposite fashion, filling the room and then adding decorative pillows to tie the scheme together. Whether you're decorating from scratch or simply looking to freshen up a room I suggest you start with some pillows. I'm convinced you'll be pleasantly surprised how much they can make any room look new and fresh. You'll find a link to show notes for this segment plus a free Pillow Pointers tip sheet when you CLICK HERE. Have any pillow stories of your own to share? I'd love to hear about them in the comments section. Jennifer Stern of Stern Designs is well known for her jeans pattern, classes, and videos. In part two of this show Jennifer shares her techniques for topstitching. Demonstrating on denim, you'll see her share some interesting ways to sew outside the box and stitch accents that lend an eclectic look to ordinary garments. She recommends a few specific items to fine tune the final outcome and achieve professional results with thicker threads and fabrics famous for topstitch details. CLICK HERE to download Jennifer’s instructions for this segment of the show. June Mellinger is the next guest on the show. She's someone I admire greatly and consider a mentor in the field of sewing education. At the start of the segment you'll hear her say that's she's been a sewing educator for a long time. Retired from her role as Director of Education at Brother International, it's great to see her continuing to share her knowledge and expertise. In this segment June shares valuable tips for stitching accurate seams on quilt blocks and turns her 9-patch block into a colorful fabric tray. You'll find June's instructions for this project when you CLICK HERE. That wraps up this week's preview of the show. Visit www.itsseweasytv.com to watch show 1709. It currently airs until noon EST November 23rd, 2019. Here's a peek at what's coming up on next week's free online show:
This show continues with both subtle and show stopping details you can add to your sewing projects. step by step instructions in detail. Then the eyes have it as first, Joanne Banko makes a glasses case with a design aesthetic perfect for a gift for your favorite guy! We finish with Kay Whitt adding a sunglass pocket to a tote.
Angela begins with by adding a flirty flounce to the sleeve of her Linda tunic. Machine embroidery on the sleeve is a standout detail that elevates this top into a style worthy of the runway. If you prefer a look that's more understated, you can simply add the flounce without the machine embroidered flourish.
I really like the inconspicuous casing she adds for gathering a sleeve cuff with elastic. On the show you'll see her use purchased binding. For a super neat finish you could consider cutting you own bias strips of fabric, using Dritz bias tape makers to form the bias strip. this would be especially nice if you want to maintain a soft feel and a clean look inside your top.
Next up, you'll see me sewing something suitable for the men in your life. This easy to make eyeglass case would be just fine kept plain but I think you'll enjoy the unique cording technique.
I used Razzle™ 6 ply rayon thread, generously provided by Wonderfil® Specialty Threads for my cording, feeding it through a five-hole cording foot. Then I selected a checkerboard stitch to anchor it in place.
You can achieve a rich look with faux suede on the outside, then have some fun by using novelty fabric for the lining.
Fabric.com has a great selction of faux suede. You could also substitute firm fabric such asmedium weight home decor fabric. Check out current sale prices with the *link below.
Add a monogram before construction if you wish and you'll be proud to present a gift any guy would love to receive.
True confession, I forgot to slip a piece of tear away underneath the piece while I did my decorative stitching, but I want to make sure you get every step just right so make sure you CLICK HERE to download the show notes. In addition to complete instructions, you'll find a full-size pattern so you can quickly get started making your own custom cases.
Kay Whitt is last but not least with her purse pocket for glasses. Kay's pocket for glasses is something you may find yourself making over and over again. I suggest making a sample on scrap fabric just to get the hang of it before cutting into designer fabric. While this pocket is not hard to do it’s always good to warm up with a practice sample when possible. Known for her thorough instructions, you'll find a step-by-step pdf file you can print when you CLICK HERE.
Visit www.itsseweasytv.com to watch this show. It currently airs until noon EST November 15th, 2019. This episode is all about size – not what size you wear but sewing projects both small and large. On the tiny side, Emily Thompson eaches tricks to creating doll clothes. Then Michelle Paganini turns a men's t-shirt into a fashion shirt that has a feminine flair! In the last short segment June Mellinger cuts and sews a 9 patch block, one of the most versatile and easy quilt blocks you'll find! Emily Thompson of Life Sew Savory is an expert at showing you who to create simple garments for kids and adults. In this show she goes down a few sizes with tiny clothes for dolls. Click on the above image for directions and a free pattern download for this show. She is known for having lots of downladable patterns on her website. If you have ever sewn doll clothing you know it can be challenging to manuever those small pieces. Any former Barbie doll fashionista out there? When I was young I had a collection of Barbie clothes made by an extended family member. I was appreciative of the great gifts to dress up my doll but at the time I surely didn't appreciate the effort it took to make them. Wish I had them now but alas, when I entered my teens I thought I was too old to hang on to "kid stuff." Pardon me while I took a brief trip down memory lane. Back to the show, in this segment Emily will teach you some fast flat construction. Sewing flat as opposed to "in the round," is common technique with ready to wear and it really does speed up the sewing process for basic items like T-shirts. When done properly it can be neat looking from both the inside and the outside of the garment. Check out this T-shirt post I wrote a while back for the Brother blog and you’ll see and adult sized version of this on a simple summer T. For easy and fast construction on clothing that isn't too tiny, I like to follow the flat construction method all the way up to the neckline. There, I switch to sewing in the round, which means the shoulder seams are sewn, the neckband is a complete circle, and then they are put together matching circle to circle. I know you'll enjoy this lesson from wife, Mom, and blogger Emily. To get a beteer picuture of her experience with sewing clothes for her family I suggest you CLICK HERE and read her bio. Michelle Paganini of Paganonoo fame is up next talking, talking T-shirts with a twist. Watch as she adds side gussets to a unisex T-shirt using sleeves from a men’s shirt, yes, really, sleeves from a mens shirt. Known for her eclectic styles, the artist result is a very wearable "blouse." June Mellinger rounds out the show with a nine patch quilt block. You'll see her sew the patchwork with the 1/4-inch foot included with the Brother PQ1500SL. This is Brother's high-speed straight stich sewing machine loved by many for its ability to tackle everything from sheers to upholstery weight fabrics. June closes by promising to share a project idea for the block in a future episode. Show 1707 is currently airing online at itseweasytv.com until noon EST on November 8th. Watch the show and feel free to share your thoughts and comments here.
Shape up your sewing with designs built around geometry! Angela Wolf has rectangles that become tabs on sleeves, Emily Thompson turns a circle into a skirt, Sarah Thomas creates projects from triangular flying geese blocks. Get ready for a show that centers around sewing shapes! Angela Wolf starts off the show with a buttonhole and button sewing lesson as she adds roll up sleeve tabs to the Linda tunic. I have a few ready-made tops/shirts that have this tab attached to the sleeve. It comes in handy when moving from warmer places to cooler spaces all in a short period of time. In this segment you'll see the latest and greatest buttonhole attachment designed and built by Brother for their top-of-the-line Luminaire machine. Lest you think this is just for the TOL machine, you should know that they've also designed one to fit many other Brother models. Click on the above image to see a complete list of compatible models. This new gizmo has the button in the front of the foot instead of the back end where it is on most one-step buttonhole accessories. It also includes a leveling plate which helps make buttonholes sew smoothly on uneven surfaces. If you'd like to more tips for stitching buttonholes you can CLICK HERE to read my previous post titled building Better Buttonholes. Sewing on buttons by machine is the next thing you'll see Angela demonstrate. This little foot comes in two different forms. One has the slot to hold the button in place and the other one has a gripping foot to keep the button steady. CLICK HERE to watch a video that shows the second version of this foot in action. A classic circle skirt is next on the agenda. Grown up girls and little girls alike love this swishy skirt style! Emily Thompson of Life Sew Savory guides you through a few easy steps for making your own circle skirt in any size. You can view all of her instructions HERE, and see a second version in a little girl's size when you CLICK HERE and visit Emily's website. If you'd like to sew your shapes into a colorful quilt block, then the last segment of this show is right up your alley! Sarah Thomas of saridity.com gives you a lesson on completing her paper pieced flying geese block. Watch as she shares some great ideas for designing creative quilts in assorted sizes with this innovative variation of flying geese. There are so many ways to turn and flip these flying geese blocks! For some of us geometry sounds too much like math, but I think this show proves that precise shapes turn into beautiful projects when guided by inspiring instructors. I hope you enjoy It's Sew Easy TV show 1706 as much as I did!
This episode concentrates on tops with a splash of quilting. Michelle Paganini has a way to use up your fabric stash to create unique patches on tops featuring free motion quilting. Then Caroline Critchfield has a technique for adding cap sleeves to any top or dress, perfect for when you need a little extra cover. Sarah Thomas closes the show, demonstrating a totally different version of the geese pattern using foundation piecing. Since this week is highlighting ideas for tops, let me ask you . . . how many are in your closets and drawers? I know I have lots and lots. In fact, I have an under the bed container full of shirts that are rolled up to save space. Short sleeves get stored there in winter and long sleeves take their place in summer. My variety of tops get paired mostly with jeans, dress pants, and an occasional skirt. They make getting dressed easy and quick. In this show you’ll gain some tips for making tops, plus there’s a quilting tip for those who prefer quilting to clothing. Let’s explore this week’s show, shall we? Michelle Pagnini’s tops are all a work of art. She is the queen of mix and matching, and her specialty is creating things of beauty without wasting a tidbit of fabric. If you are used to precise sewing and matching to the point of perfection you may enjoy following her free motion excercise just to lighten up your sewing repertoire a bit. I could see her free-wheeling patchwork idea translated into a pillow or even a fun stuffed animal for a child. I see that Michelle is using a pair of Kai Pinking Shears to add a ravel resistant edge to her fabrics. I own this same pair and I can tell you, they are the finest I have ever used. Kai is a current sponsor of It's Sew Easy TV so we all get to try them out on set. As a side note, my second favorite pair is the 5 1/2-inch curved tip style. This segment of the show is full of scrap happy fun. Don't forget to check out Michelle's instructions HERE. And yes, the video for this show is available on YouTube HERE. Caroline is the next featured instructor. If you have ever felt self-conscious wearing sleeveless tops or if you would just like a nifty way to accent a sleeveless style, I think you'll really enjoy this segment. Caroline's method for drafting and sewing simple cap sleeves will help diminish the bare feeling of having nothing covering the upper arm. This certainly adds a dressy look to a garment with the option for sleeves that color coordinate with your fabric. CLICK HERE for complete instructions and HERE for the YouTube video. Sarah Thomas from saridity.com is an artistic custom quilter with a variety innovative and interesting quilting methods. In this segment you'll see Sarah layout the plan for flying geese that are fussy cut and paper pieced in an innovative quilt block. You can watch the full video HERE.
I'm wondering how many of you have tried paper piecing. With paper piecing what you see on the paper is the reverse of what you will sew. I've worked on a couple paper pieced projects and I know it is a fantastic way to get intricate patchwork that would be difficult if not impossible using other more standard methods. Some of my fellow stitchers really love the technique. As for me, I'm still on the fence as to whether or not it floats my boat. How about you? If you have paper pieced in the past I'd love to hear about your experience. Please share in the comments below! Step up to your machine and get ready to perfect some basic skills on It’s Sew Easy. Angela Wolf continues her tunic lessons gathering front and back for the yokes and adding the collar. In part two Reen Wilcoxson makes an entire passport cover In-The-Hoop! Finally, June Mellinger makes a tablet cover with her flying geese block from show 1703. Once again, Angela's classy Linda tunic pattern is the star of the show. First she shows gathering for the yokes and then she sews a neatly finished collar. I enjoyed watching her sew the collar as it's the very same method I learned way back when in fashion school. Sometimes called the burrito method, this technique is a way to avoid hand stitches where the collar meets the front edges. In fact, Angela presses under the reamining seam allowance and stitches the entire collar by machine. However, after you get the front edges done you could choose to hand sew the inside of the collar and follow up with a final topstitch all around the collar. I'm a little on the fussy side so I prefer to hand sew before topstitching, but it's really just a matter of personal preference. Don't forget, you can purchase the Linda Tunic pattern and any other pattern with a 15% discount* if you visit Angela's site and use JOANNE as your code. CLICK HERE to watch this show on YouTube. Up next, Reen will entertain you with a practical passport cover, yet another one of her amazing In-The-Hoop designs. I'm happy to call Reen a friend and we got to be in the studio together when she came to tape this show. Here we are after having our faces "enhanced" in the maekup room. Ready for lights, camera, action!!! Reen's Embroidery Garden site is a virtual candy land for machine embroidery enthusiasts. Her specialty is In-The-Hoop projects design with attention to detail for foolproof results. Flawless finsihing is a hallmark of Reen's designs with lined purses, pouches, and a plethora of projects that are perfect for gifts you want to keep or give away to cherished friends and family. Reen has several travel worthy pieces you can make. CLICK HERE to view Reen's instructions and you'll find a download for a free needle keeper travel case. Watch this video on YouTube HERE. June Mellinger finishes the show with a project made from her block in show 1703. My friend June is a true machine maven. I doubt that there is anything she cannot sew. Remember her flying geese block from the previous show? Wait till you see how she finishes it! You'll see her do some fancy footwork in this show, using the Stitch in the Ditch foot for accurate quilting. She uses another one of my favorite feet, the Overcasting Foot to overcast the raw edges as a substitute for using a serger. This foot actually has a pin which acts as a stitch finger to perfectly form the overcasting stitch without puckering up the fabric, much like a serger does. Take a look at her beautiful finished e-reader sleeve! Click on the image for June's downloadable instructions and CLICK HERE if you'd like to watch this show on the shows YouTube channel.
Learn how to dress up your wardrobe when you watch show 1703. First you'll see how to embellish an original pashmina wrap using trim and embroidery. Next, watch as Meg Healey takes a dress and turns it into a two-piece outfit. In the final segment June Mellinger sews a flying geese patchwork block. During this segment I had the opportunity to feature another pretty pashmina based on my book titled Wrapped in Embroidery. The dress forms are draped with two pashminas from the book, the Florals and Ribbon Pashmina is in the center and the Classic Banded and Beribboned Pashmina is on the right. The third pashmina on the far left is the one I created especially for the show. Each of these has three things in common: 1. A fabric band added to a ready-made pashmina. 2. Machine embroidery added to the band of fabric before it is attached. 3. Silk ribbons trimming the fabric for a neat finish and a color coordinated accent. Each one of the embroidery designs you see are part of the collection included in Wrapped in Embroidery. I chose to stitch on pre-washed silk dupioni for the navy/silver pashmina. I love the way the silk softens up after washing. You may be curious about the actual pashminas. I hunted for the best quality I could find for the book projects and came across a website called The Pashmina Store where I found exquisite silk blend pashminas. They are pricey but beautiful. In search of a more economical option I found the navy one online. Though it's a bit heavier it is none-the-less soft and drapey. CLICK HERE for step by step instructions for this elegant wrap and you'll find out where I purchased the navy wrap. You can re-watch this show HERE on my YouTube channel. Meg Healy is well known for her garment sewing and her association with Burda patterns online. In this show she takes a simple dress and turns it into a trendy two piece outfit. In the beginning she shows the dress printed directly onto the dress fabric - no paper and no pattern! You may wonder how this came to be. Apparently, Spoonflower fabric printing company once offered this option in partnership with Sprout Patterns. As of this posting, this service has been discontinued. You can read more HERE. If you would like to watch this segment you'll find it HERE, on the KS Productions YouTube channel. Click on the image with Meg's photo for her detailed instructions for the two piece outfit. In the last short segment, June Mellinger shows simple steps for sewing a flying geese block using the Brother PQ1500SL high speed straight stitch machine. Watch as she zips through the construction of this classic quilt block pattern. Click on the image above for June's downloadable instructions. In the next show you'll see what she makes with her finished block. CLICK HERE if you'd like to watch this show on KS Production's YouTube channel.
In show 1702 you'll see Angela Wolf, Ellen March, and Ebony Love show off some great fabrics in their trendy and timely projects. This show covers all the bases with garment making, a great accessory item, and a useful quilting item to take to class. Are you ready to explore the topics in this week's show? Let's start the preview! This is the beginning of the tunic tutorial as Angela Wolf takes you step by step with her Linda tunic pattern as her featured tunic top. Let me remind you right off the bat that you can purchase this pattern with a 15% discount* if you visit Angela's site and use JOANNE as your code. Click on the image below and it will take you directly to the pattern page. This top has a neat neckline and you'll find it surprisingly easy to sew, especially when you watch the video demo. This pattern has all the pieces and markings you need to sucessfully sew this modest, yet attractive neckline slit. Be sure to pre-test your interfacing as some fabrics "fuse funny." One of my personal favorite soft interfacings is Pellon 460 Stretch Fuse. I suggest you check it out and give it a try next time you need interfacing that stays soft and pliable but adds the stabilization you need on soft flowing fabrics. Ellen March is next with a super stylish tote made from shimmery fabric combined with cork. Watch as she shows you how to stitch a boxed corner without wasting fabric by folding and cutting off the points. This is especially useful knowledge when working with cork as you’re saving on the cork cost. In her instructions she lists all the supplies you need and guides you through the steps to make a look alike tote. CLICK HERE to download a copy. It was particularly interesting to see all the notions and fabrics she combined for this tote. Cork is featured prominently along with notions that give this bag a quality look. I've included links to these items so you can find them quickly. Check out the list below: The cork fabric and straps are from Fabric Funhouse. I met the owner at the studio, and she had lots of pretty samples for us to see & touch. As you'll see in this show, sewing with cork is quite easy. Click on the above image to visit the site. You'll find a terrific selection along with reasonable shipping prices. In the last part of the show Ebony Love returns with the project she promised last week while making the Contrary Wife quilt block. I think you'll love (pun intended) her project - it's a portable mini design wall. You'll find instructions HERE. That wraps up the show for this week. This show currently airs until noon EST on Friday October 4th at www.itsseweasytv.com. Below you see a sneek peek at what's in store for next week. I can't wait to share more tips with you then :-)
Here's a preview of show 1701! The theme for this series is sure to boost your sewing mojo and take you to new levels with skill building projects and a focus on details. Beginning this week and continuing for 13 weeks total, I'll post a new blog with a preview of series 1700 as it's released online via www.itsseweasytv.com. Read each blog post before watching and you'll have a good idea of what's in store for you when you take the time to actually watch the show. Highlights for this season include a trendy, (and might I say beautiful) tunic with Angela Wolf. A multitude of great gift items (with perfect timing for the holidays ahead). Plus, plenty of projects with delightful, stand out details. But wait! There's more! Follow along this season and learn how to make some simple quilt blocks you can turn into finished non-quilt pieces. Presented by truly talented quilt experts like June Mellinger, Ebony Love, and Sarah Thomas, I guarantee you'll fall in love with these ideas, and be inspired to play with patchwork pieces. Let's get started with a preview of show 1701! The show begins as Angela Wolf introduces her newest sew along, the lovely Linda Tunic. In this short segment you'll get a glimpse at the top and learn some tips for interfacing the soft, flowing fabric necessary for this style. Named after her supportive Mom, the Linda tunic is a classy and classic blouse that flatters every woman of every size and every shape. Get more details on the pattern HERE. If you decide to order* be sure to use coupon code JOANNE for a 15% discount. The Linda Tunic pattern is available in sizes ranging from 0-18 and 16W-36W. You'll find both paper and digital options on Angela's site. Next up is Kay Whitt. The first thing that grabs you while watching Kay is her endearing enthusiasm for sewing, and for working with beautiful fabrics. Kay has recently branched out into designing and selling unique jewelry, but you'll find plenty of beautiful garment and bag patterns on her sewserendipity website. During this show Kay walks you through the complete process for making a practical yet very pretty cross body bag. Imagine all the fun fabric combinations you can come up with to make this carry your essentials, stylish bag. You're sure to get stopped on the street while wearing this work of art slung over your shoulder. CLICK HERE to download free instructions for making Kay's crossbody bag. Note that you'll need a few of the fine Dritz notions to re-create the look. Here are direct links for the hardware and strapping shown on the show. Ebony Love from lovebugstudios.com rounds out the show with a step by step tutorial for her Contrary Wife Quilt block. The steps are easy to follow with Ebony's clear and consise teaching style. Free instructions for Ebony's block are found HERE. I had the chance to meet Ebony while we were at the studio and we spent a delightful time together :-) In a future episode you'll see Ebony create something clever with her Contrary Wife block. Ready to watch the show? Show 1701 is currently airing at www.itsseweasytv.com until September 27th at Noon EST.
I'd love to hear your comments after you've had the chance to watch the show! Enjoy! Be a sports star or just look like one with apparel you create yourself. Sewing your own sporty garments is easy and fast when you work with simple patterns and knit fabrics. Show 1613 will inspire you to mix and match fabrics and make your own standout sportswear! Jennifer starts the show with her own yoga pant pattern. This one-piece pattern is sized from XXS to 3XL, designed for 4-way stretch knits, can be customized for any length from shorts to full length, and is SUPER easy to sew! Watch as Jennifer makes her pants entirely on the sewing machine and explains how to make a custom waistband perfectly suited to fit your personal size. If you've always wanted to make your own "legging style" pant I think this pattern would be a good place to start. CLICK HERE to download the sewing instructions Jennifer provided for this show. Emily Thompson is up next. This past week I had the happy occasion to meet Emily in person at the Brother Ambassador conference held at Angela Wolf's studio in Michigan. Emily is a fellow blogger at blog.brothersews.com. We had fun talking sewing and sharing tips. In fact, quick tips and simple "free" sewing patterns are one of Emily's specialties. Her racer back knit tank top takes up the entire second half of show 1613. CLICK HERE for complete instructions and a printable PDF pattern in size XS to XXL. You'll see Emily use the Brother 5243PRW serger to zip through construction on this trendy top. I've zipped through quite a few seams on this serger myself. I love the smooth seams and the supportive extension table on this 5,4,3,2 thread serger. It's easy to thread and a real workhorse when it comes to handling various weights of fabric. My experience with sergers goes back decades as I had the opportunity to purchase one of the first "home" models available in the market. At that time they were distributed by industrial supply places and we used them in my fashion school classroom. I'm beginning a series of Serger Tip sheets. CLICK HERE to read the first one, titled Serging Versus Sewing. Emily also uses the Brother CV3550 Cover Stitch machine for top-stitching her seams with a cover stitch that has loops on both the top and bottom. This is the same machine I used for my swimsuit coverup in show 1611, except that I choose to have loops only on one side.
You're sure to learn a lot of valuable sewing and serging tips this week! Visit www.itsseweasytv.com to watch show 1613. It currently airs until June 21st at noon EST. Enjoy! Are you ready for some easy and elegant Home Dec ideas? If the answer is yes, then you're ready for show 1612! In this next to the last show in the series, Louis Carney has some interesting ideas for bedroom decor and then you'll see Yours Truly create faux suede, back tab draperies. At the end of the show you'll see how to sew a form fitting camisole as Angela Wolf finishes out her tank top series. Louis Carney starts the show with a glitzy but simple idea for decorating a bedroom with a headboard that's easily updated or changed any time. The photo below shows the finished result, along with a few accent pillows he made to coordinate with the headboard. Click on the image below to view the instructions Louis provided for the headboard idea. Louis always finds a way to sprinkle some sparkle in most all of his projects. As you can see by the jacket he's wearing on the set, making something with metallic thread is his specialty! At times metallic thread can be a challenge. There's a tip sheet for sewing and embroidering with metallic thread in the Let's Go Sew archives, you'll find it when you CLICK HERE. Next up, you'll see me walk through the steps for making back tab drapes. I really love this casual, easy to sew style for window treatments. This type of drape isn't fussy but it can look oh so elegant when you use a luxurious faux suede fabric. Naturally, you can opt for a casual look if you wish. I've made these exact same drapes from medium weight Home Dec fabric. Look at the photo above and you'll see that the rod slips easily through the tabs and then the fabric forms soft pleats when it hangs. This specialty foot is available for select Brother models and included with some. CLICK HERE for all the instructions and you'll find an alternative idea for the foot, along with a detailed formula for making your own custom drapes. Oh, I almost forgot, there's a Let's Go Sew tip sheet for sewing faux suede too! You can CLICK HERE to download this free resource. If you've been following along since series 1600 started you've seen Angela make tank tops in a wide variety of styles. This final top in the series is designed to work as a foundation piece or be worn layered with other garments. You'll see how to add adjustable straps like the ones found on ready to wear lingerie and sew satiny stretch elastic. Dritz makes this fold-over elastic in many different colors. Learn more about this product HERE. I hope you got some new ideas from this show. Personally, I think sewing your own Home Dec can be one of the best ways to sew and save! I'd love to hear your home dec stitching stories! Feel free to leave your comments and share your thoughts and ideas.
Visit www.itsseweasytv.com to watch show 1612. Its currently airing until June 14, at noon EST. Enjoy!
One topic, poolside glamour, and two segments make up this week's show. Yours Truly presents a knit cover-up that doubles as a dress and is enhanced with specialty stitching. Then, Meg Healy helps you look and feel your best in a flattering two-piece swimsuit. Note: If you're a one piece kind of person you'll still learn from the tips she presents with her two piece rendition.
Meg is a talented educator and the online Editor at BurdaStyle.com. Her two-piece suit is available as a digital download pattern Here.
In this segment Meg focuses on showing you how to make the bottom half of the suit, with tips for sewing on a regular machine as well as the serger. Click on the above image for Meg's instructions with step by step photos for her project.
Have you ever made a bathing suit yourself or even thought about it? Once you find a pattern that suits you (no pun intended) you'll be amazed at how easy it is to construct your own suit. If you're at all timid about the process I suggest starting with a swimsuit for a little girl. The fabric requirements will be minimal and the child you make it for isn't likely to complain much if it isn't quite perfect. Check out sewsassy.com for a great selection of swimwear notions and even a few patterns. Awhile back I featured swimsuit sewing tips in a previous It's Sew Easy TV show. If you haven't seen it, you can watch the video for show 1109-1 HERE.
Next up is a swimsuit cover-up created with cover stitch decorative stitching.
This garment doubles as a dress as it's made from a simple and easy to sew New Look dress pattern. The obi sash elevates it to dress status and the comfort of the knit fabric makes this dress easy to pop on or off.
In this segment you'll learn to manage starting and stopping on a Cover Stitch machine, see how to flip facings for a decorative effect, and modify side seam pockets for a smooth, bulk free look on knit garments. And yes, of course you'll find instructions to help you make your own. CLICK HERE and you'll find what you need instruction wise.
Are you ready to go and watch the show? Visit www.itsseweasytv.com. This show airs until June 7th at noon EST. Enjoy!
Sewing lets you strut your style with wearables, and with items to your personal style at home. In this show the table is the star. The show starts with a quilted coaster and placemat set from Rebecca Kemp Brent. Custom crafted placemats always grab my attention. Truth be told, machine embroidered garments sewn from scratch are my top pick for something to sew, but would you believe that after that I might just pick making placemats?!? In this segment Rebecca makes hers entirely with the Brother Dream Fabric Quilting Frame, along with the optional Automation Software. Her design may remind you of a Spirograph toy or art kit. In the software this style is call bow ditches. Go figure . . . they are quite nice looking despite the strange name :-) Rebecca has instructions for the complete project. Click on the above image to view the info. Next up is a colorful table runner by Joanne Hillestad, from the fatquartergypsy.com. Joanne designed a colorful and incredibly unique table decoration that mixes prints with basic felt for the background. This project is oh so clever and easy to execute. Click on the above image and you can access her fabulous instructions with all the patterns included for this WELCOME table runner. I loved Angela's lacy tank tops in the last segment. In just a few short minutes she shows you how to do a pattern hack for the tops and serge the yoke seam with the addition of clear elastic.
Three instructors and three great projects all in one super It's Sew Easy TV show! CLICK HERE to watch the show. It's currently airing until noon EST May 31st, 2019. 1609 has two full segments so you're going to see a lot of the step-by-step details for each project. The show starts with Angela showing you how to design a summery top with a few measurements and easy cutting techniques. This is a great looking top for wearing under or even over something else. Lengthen the top and add additional fullness for a great swimsuit cover up. Watch this segment and you'll get ideas for adding embroidery and decorative stitches to embellish the front. Cheryl Sleboda takes over the second half of the show with her signature style of accessories for Cosplay creations. Her variety of gauntlets are easy to make from a custom pattern.
Visit www.itsseweasytv.com to watch the show. It currently airs until noon EST on May 24th. Enjoy! Three instructors will inspire, educate, and enlighten you this week on It's Sew Easy TV! The first two segments are full of practical information and tips every sewing enthusiast will appreciate. Ah ha moments are sure to arise while you watch and learn these superstar sewing tips and tricks. Ellen March, Community Content Director for Sew News magazine starts out the show. Over the years she has collected many tips from readers of the magazine and today is the day she shares her favorites. I would normally tell you to grab a pen and paper but you don't need to, you'll find all the tips listed in one compact PDF file on the TV website. CLICK HERE to download and save these valuable tips. Mary Roediger, Ohio State Director of the Make it With Wool Contest is up next. You won't need a notepad for this segment either, but you will need to imagine the feel of each of the fabrics that Mary shows and describes with detail. You'll find her detailed descriptions and printable tip sheet HERE. Wool truly is such a special fiber. It's likely many of us have some sort of garment memory that makes us think of wool. My most vivid one is that of my final coat project while attending Progressive Fashion School in Cleveland Ohio. During those days I traveled downtown from my family home in the suburbs, driving to a bus stop, taking a bus downtown, and then walking a bit before I finally made it to 4th Street and Euclid avenue where the school was located. As you can imagine, winters along the Lake Erie shore could be brutal. To fight of the freezing temps I made an ankle length coat from a cinnamon colored medium weight wool, interlined with muslin, underlined with a loose woven wool and lined with flannel backed satin. It had about ten bound buttonholes with covered buttons, lots of topstitching, and a detachable wool hood. Wish I had a photo for you but again you'll have to use your imagination. It was a bit heavy but ohhhh so warm, and quite stylish I might add! I'd love to hear your wool stores if you have one or more to share. Angela Wolf is last but not least as she takes you through the steps to transform an ordinary tank top into a sleek one shoulder style with an added ruffle. I love the way she chops up a standard pattern shape to make it new and different!
Visit www.itsseweasytv.com to watch the show. It currently airs until noon EST on May 17th. Enjoy! This show features two instructors with items that are unrelated but still fit the "Movie Star" theme. Angela Wolf starts out with a chemise. This French word simply means shirt, referring to an under garment worn during the middle ages. Today we think of a chemise as a slinky slip like garment in a dress length or cropped to wear as a camisole top. It's a classic nightie with a big dose of feminine flair. In this segment Angela focuses on the steps for lace application and gathers on the bodice. She's hacked one of her own patterns to create the look, but of course you can apply many of the techniques to ready made patterns. Since this is such a timeless style it's likely that you'll find many commercial patterns with a very similar style. In a super quick search I found the following in current pattern catalogs: Keep in mind that commercial patterns may be discontinued at a moment's notice so snatch one up now if you really like it. Another alternative, and MY absolute favorite chemise pattern is Folkwear Intimacies 219. In one of my earlier It's Sew Easy TV shows, Show 906-1, I used this pattern for a nightie trimmed with machine embroidered lace. I modified the pattern slightly, adding gathers to the front bust. Folkwear patterns are generally geared for intermediate to advanced stitchers but this sweet and feminine nightie is surprisingly easy to make. CLICK HERE to watch show 906 and you' see a link to a tip sheet for the crepe back satin fabric I choose for this garment. This tip sheet includes a great method for hemming slinky and slippery fabrics with a shell tuck hem. Last but not least, CLICK HERE for the lace making instructions that accompanied this show. In part two of the show Cheryl Sleboda makes a simple crown shape with shiny fabric and a foam insert. Her samples show crowns suited for a variety of occasions, including a cute idea for a birthday party. I couldn't locate any patterns for this specific project, but it seems like it would be easy to draw one to your own liking. If you're looking for more princess style party favor printables, check out this collection from my friends at Scrap Smart.
To watch this show visit www.itsseweasytv.com. This show airs until May 10 at noon EST. Fabulous fabrics and amazing accessories shine in the limelight of this It’s Sew Easy TV show! Kay Whitt from Serendipity Studio is up first with a wonderful jewelry pouch. With Mother’s Day coming up this circular pouch could be the answer to the “what can I make that’s special enough for Mom” question. In fact, this item would fill the need for many gift giving occasions. I've made a couple of these myself, using a similar method but taking the extra step of adding a monogram to the center circle outside the pouch. This shows only on the bottom side but it sure makes the owner feel special. Wait till you see how quickly Kay puts hers together with her rainbow of fabric choices. Throughout the show he dishes out tips left and right! I suggest you listen close and keep paper and a pencil handy. One of her tips includes the use of a guide for stitching around the circle. Below you'll see one of my favorite guides. Although it's designed for use with the walking foot, it slips nicely into the slot at the back of the standard presser foot holder. This featured accessory is for Brother machines and you'll find more info when you click on the image. Kay has complete directions for you along with a printable pattern for this project. Click on the image below and it will take you right where you need to go. In part two, Joanne Hillestad (AKA The Fat Quarter Gypsy) makes her first appearance on It's Sew Easy with a pretty quilted tablet cover. She'll teach you how to mix, match, and make your case with eye-catching fabric selections. Joanne provides instructions for her project as well. Click on the star image below to view and download these. You’ll see that foam is the filler for this project. It’s interesting to note that the popularity of this foam, be it fusible on one side, fusible on both sides, or standard. It's often seen as a replacement for batting. Joanne is quick to point out that it’s important to keep this foam out of the seam allowance. While I think batting is still a good option in some cases, this product works well when you want that extra puff that the foam gives. If you're ready to go and watch the show simply head over to www.itsseweasytv.com. this show airs until noon EST on May 3rd.
|
Welcome!
Each week at noon a new show airs online at itsseweasytv.com. This blog features a preview of each weekly show. Author:Joanne Banko Archives
March 2021
As a believer in full disclosure, I'd like you to know that Blog posts may contain affiliate links for products and services I know and trust. Purchasing items through a link marked * results in a small commission for me, with no extra charges for you.
Shop popular online retailers via EBATES and you will receive cash back rebates on all your purchases. I have personally used Ebates for for several years and receive a small referral fee if you click the button below.
|
|