Bag it! CLICK HERE for a great bag project.
|
|
|
Have you ever wanted to change button sizes on a pattern but you were unsure about repositioning your coordinating button holes? Changing a button size means changing spacing. Spacing from the edge is called the "stay." Take a look at the guide below and you"ll get details for how to measure and mark according to button size. 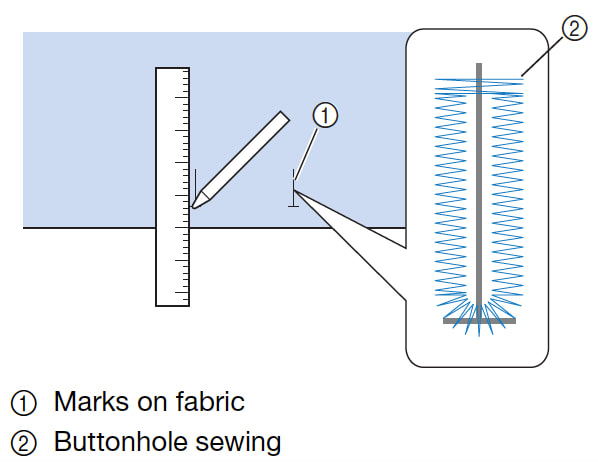 Stay is the amount of space between the edge of the garment and where the buttonhole is placed. The stay usually equals the size of the button. However, you never go under ½- inch or over 1-inch. Example: ½-inch button equals ½-inch stay ¾-inch button equals ¾-inch stay 1 ¼-inch button equals a ONE inch stay ¼-inch button equals a ONE HALF inch stay Feel free to change button sizes and alter your button hole spacing to make both buttons and buttonholes coordinate beautifully.
One hundred sewing and embroidery tips and tricks - #10 Whether you're cutting patchwork pieces for quilts, constructing garments, turning out designer home decor, or crafting some other sort of masterpiece, it's likely you are measuring many times throughout the process. 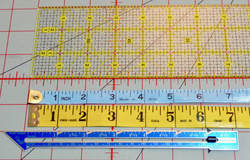 Today's tip is to always use the same measuring device throughout your project when ever the ultimate in accuracy is important. If you look closely at the cutting mat, quilting ruler, tape measures, and seam gauge you'll notice slight differences between each of them.
When compared side by side the quilt ruler and the seam gauge would be virtually identical and a pretty close match to the cutting mat. However, if you were to switch between all four of these while trying to cut same size pieces you would get some minor discrepancies. While it may not show up with short measurements the compound effect would surely be noticeable on larger pieces. Tuck this tip in your back pocket and remember it next time you reach for multiple measuring devices. Measure twice cut once, but do it all with consistent measuring tools for happier sewing and more polished projects! One hundred sewing and embroidery tips and tricks - #9 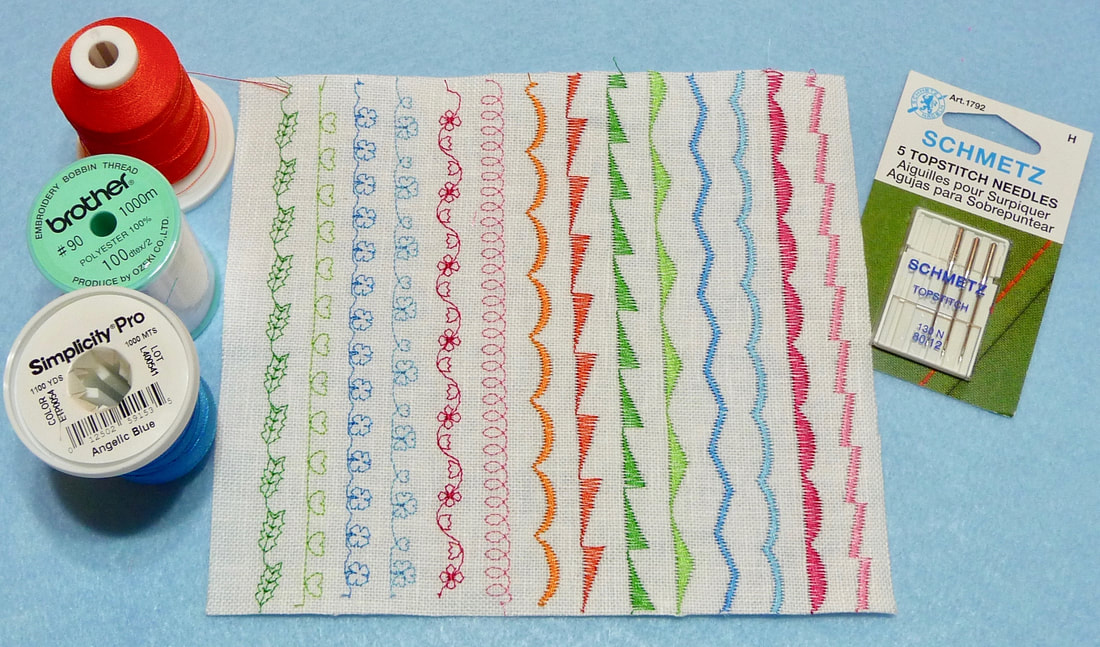 When is the last time you sat down to play with decorative stitches on your machine? Many decorative stitches are far prettier stitched in thread as opposed to an image in your machine machine manual or on the screen of your machine. Thread your machine and see watch as little flowers bloom and a myriad of decorative stitches come to life! I hope this little sampler will encourage you. Here are some tips:
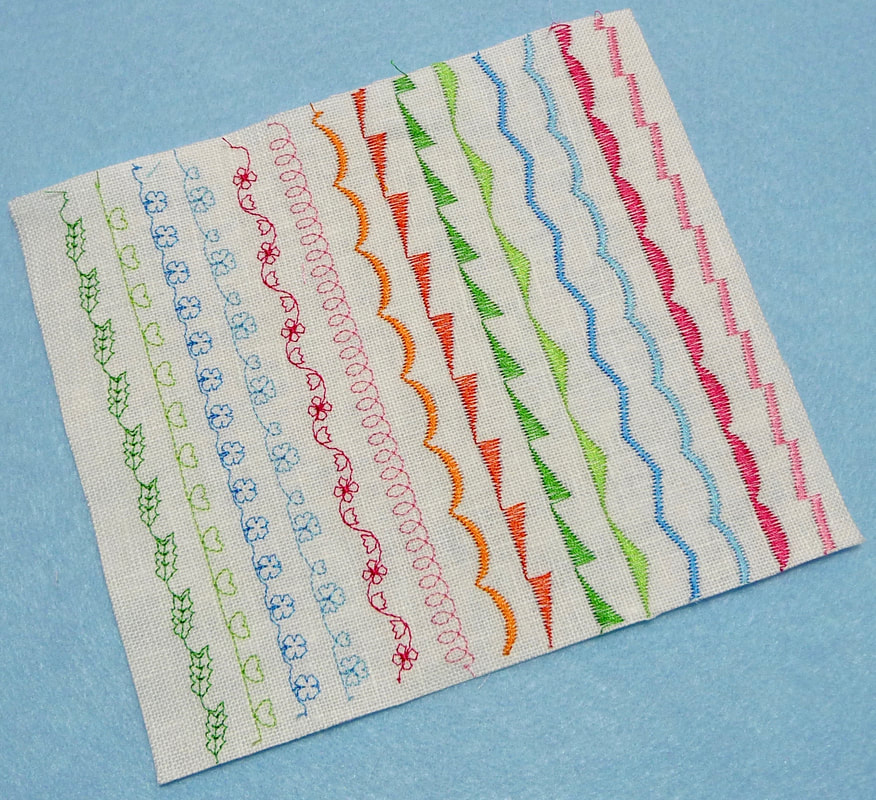 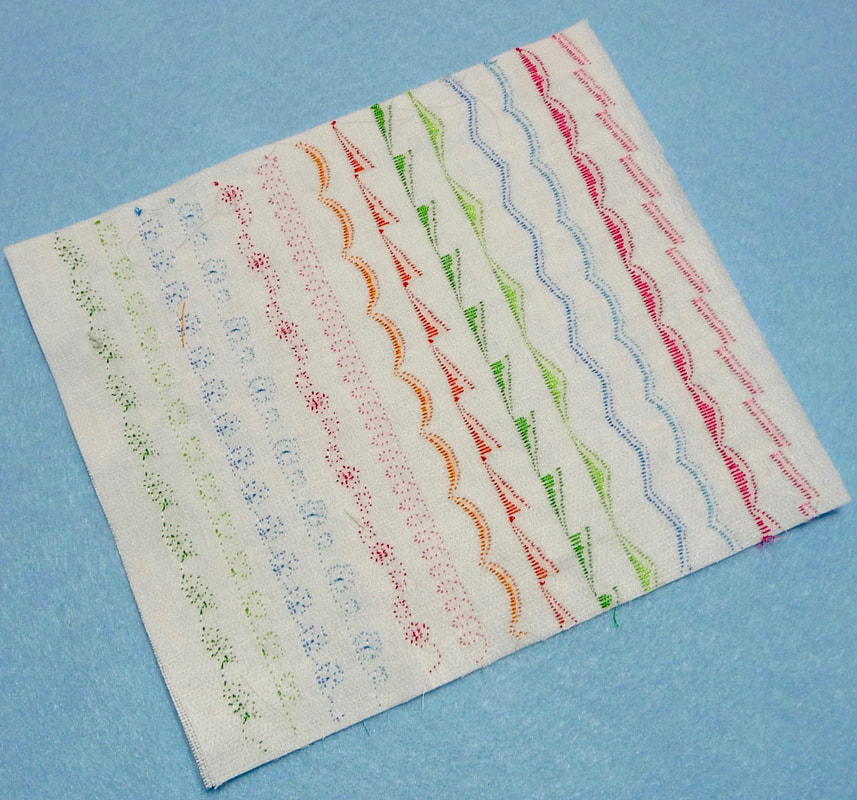 Have fun!
One hundred sewing and embroidery tips and tricks - #8 You may choose a pattern for many different reasons. Perhaps you like the style, fit, or packaging of a particular brand. Commercial pattern companies differ in more ways than one. Understanding major differences will help you make intelligent decisions about which ones to purchase. Consider the following when choosing from the major pattern companies:
In summary, it's wise to study patterns carefully. Experiment with different brands by making test garments from bargain fabrics. If you find a brand that seems to suit you it's wise to stick with that brand.
For many years I've been a fan of New Look patterns and I've found them to run very true to size. This means I need to be very honest with my measurements when compared to the pattern envelope. However, it also means I can be pretty sure of a good fit when I pick a size that's closest to my personal measurements. How about you? Do you have a favorite among the major pattern companies? Please share your own experiences in the comments below. One hundred sewing and embroidery tips and tricks - #7 Ever get confused while cutting numerous strips of different widths? I seem to lose the line on my ruler and end up with a mixed bag of skewed sizes and strips that slipped. Now I make a point to place sticky notes along the line I'm using for my specific measurement. It's easy to move the paper and stick it along different lines on the ruler for goof proof strip cutting.  I have a couple favorite rullers that have all black lines that are hard to see, especially on darker fabrics. Here is a close up view of sticky notes coming to my rescue! 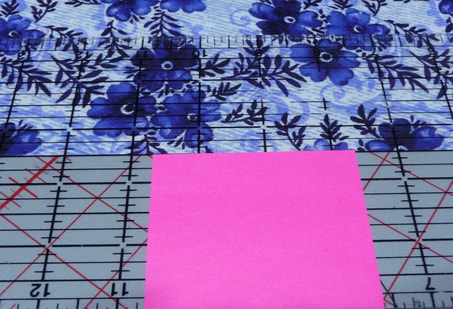 By the way, it helps to have no slip grips on the bottom side of rotary cutting rulers. These TrueGrips from the Grace Company fit their own specialty rulers and all others too. These little circles are clear and very flat. They increase safety and make all your cutting more accurate. 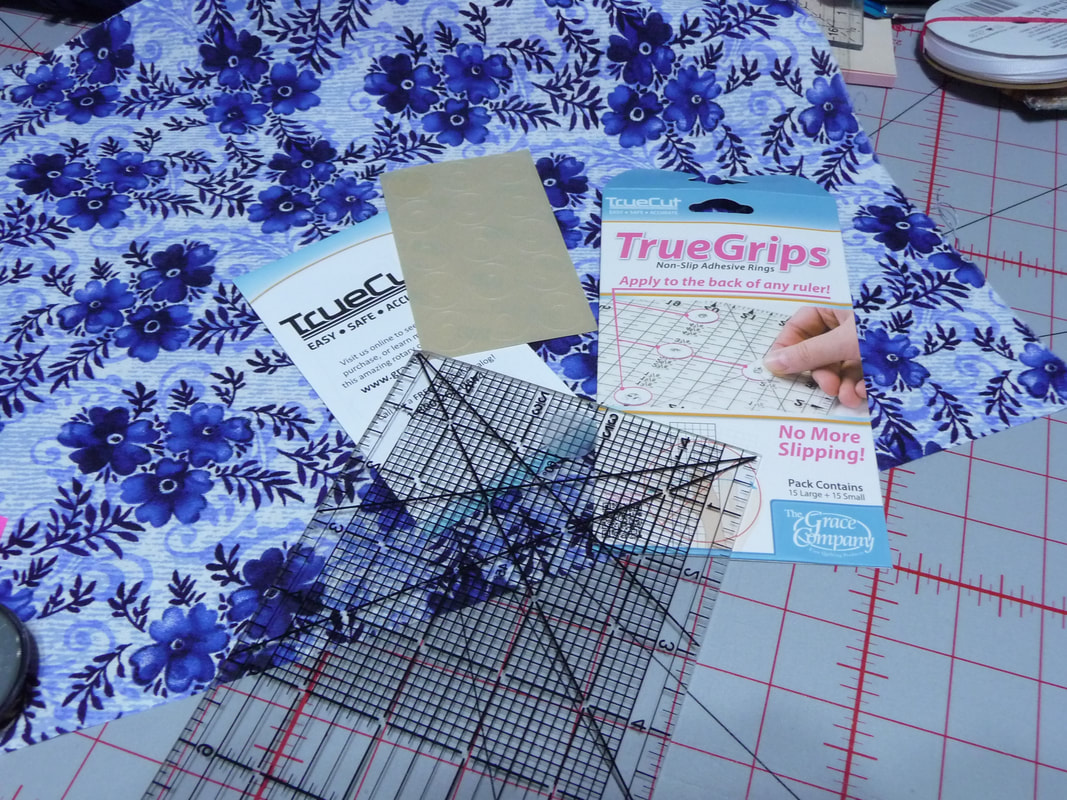 I hope these little tips have been helpful. Soon I'll have all my strips cut and ready to sew so I can share them with you in a future post!
One hundred sewing and embroidery tips and tricks - #6 This short video shows how easy it is to stitch a blind hem on knit fabrics. Watch as the stitch forms with zigzag traveling stitches and one big zigzag stitch that bites into the hem. 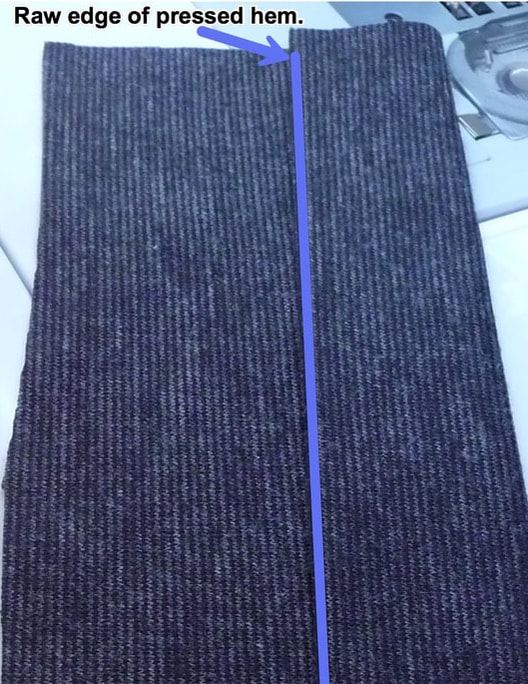 The first step for a blind hem is to fold up the hem and press. 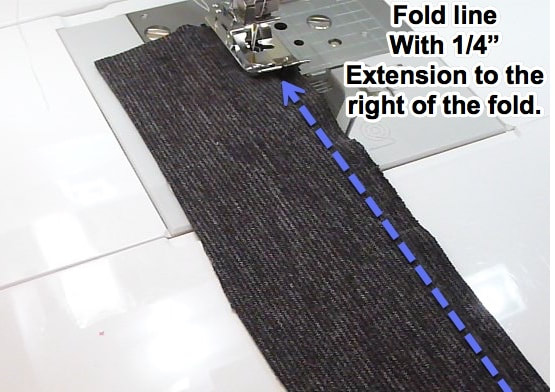 Next, fold the hem again so the outside of the hem allowance touches the outside of the garment. You need an extension on the right hand side that is about 1/4-inch in width. 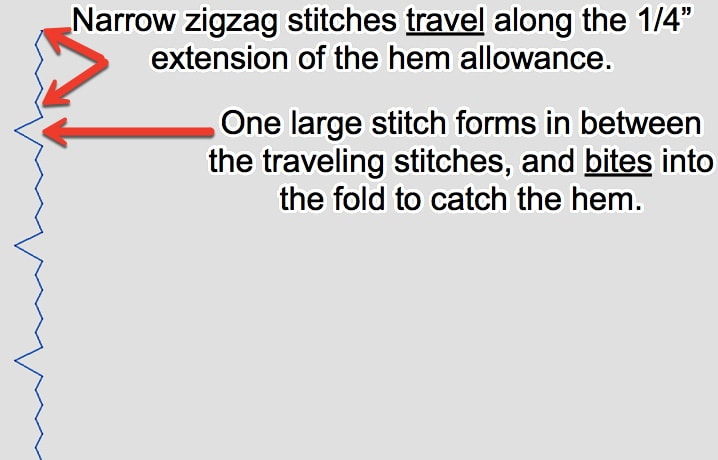 When the number for width is increased for a higher number to the left, (<---) more of the garment fabric gets grabbed. When the setting is set for a higher number to the right, (--->) less fabric is grabbed for the hem. Changing the length simply means there are more traveling stitches between "bites." If you look at the selected stitch below you'll see the exact setting I used for the grey knit sample.  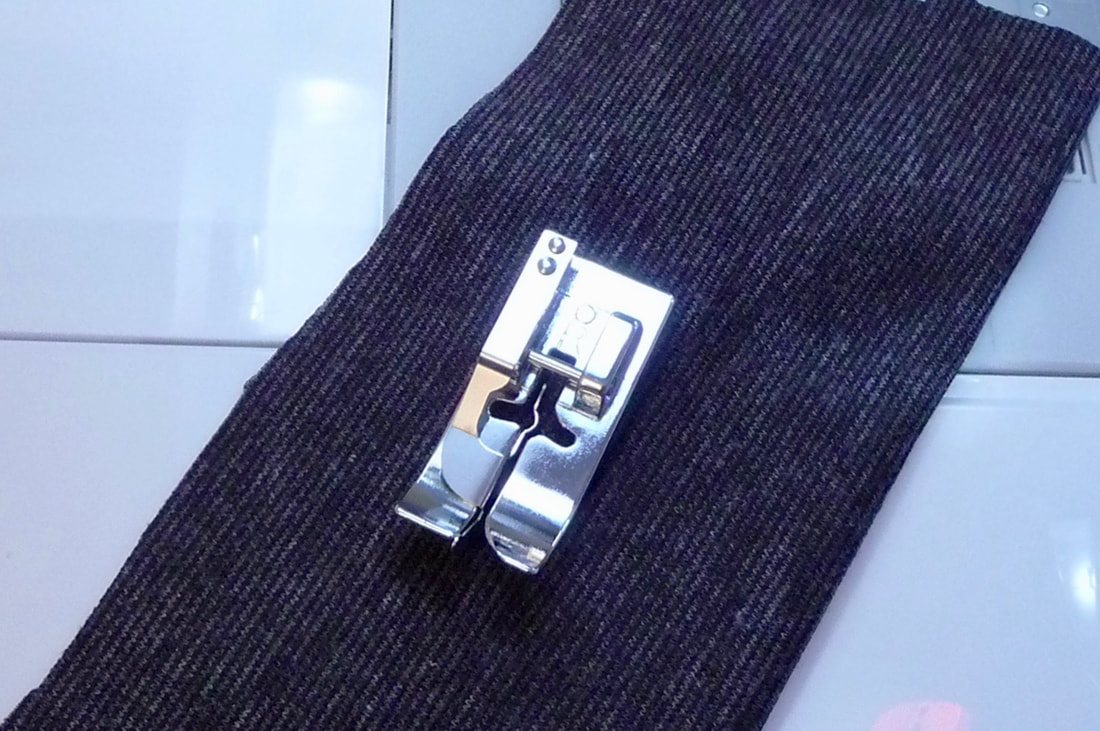 The blind hem foot, foot "R" is made to perfectly coordinate with the standard blind hem stitch or the stretch version. This foot has a blade down the center that is meant to rid along the fold of the hem so you stitches stay consistent. This foot is not adjustable. In this case the stitch is adjusted to "bite" more or less of the hem. Some machines have an adjustable blind hem foot and the foot is adjusted so the stitch bites more or less of the hem. Watch the video again and you'll see how the finished blind hem stretches along with the fabric. 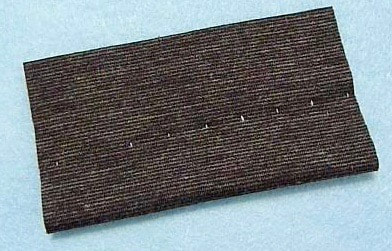 Ideally you want the stitches to barely show or not show at all on the outside of the finished garment. Thicker or more spongy fabric hides stitches better than thinner, flat fabric. This example shows the blind hem stitched with contrast thread for better visibility. Choose a thread color that matches as close as possible so the stitches hide in the fabric and are barely noticeable.
Have you ever used the blind hem stitch for stretch fabrics? Do you have any questions about sewing blind hems? If so I would love to know . . . please leave your comments and questions so I can help. One hundred sewing and embroidery tips and tricks - #5 Do you struggle with standard, ready to wear T-shirts that are too long? Or, do you like to make your own knit tops from soft jersey or interlock knits? In either case you may have found that thinner knits in particular are tough to tame when it comes to top stitching hems. Here is a tip for stitching a nice, neat, twin needle hem. Begin by gathering your supplies:
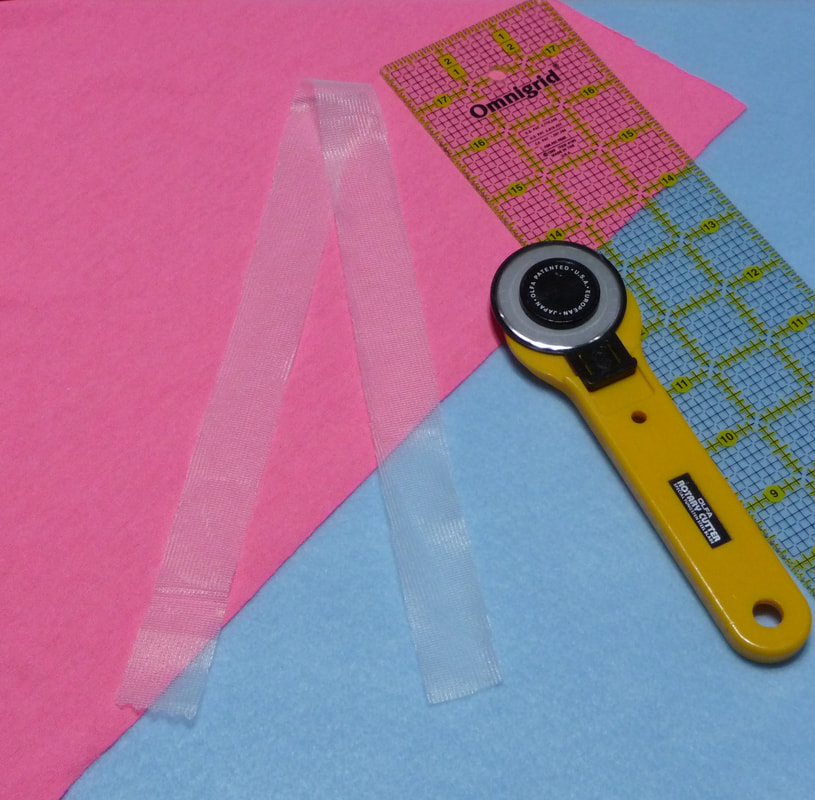 Plan for a 1-inch hem on the garment and cut a 1-inch wide strip of tricot to fit hem circumference, making sure to cut length of tricot on the crosswise grain to maintain a bit of stretch.  Fuse tricot to wrong side of hem, having tricot even with cut edge. Tip:The rough side is the fusible, "glue side" of the tricot. Important! Before inserting the twin needle turn on machine and make sure you have selected a center needle straight stitch. Increase length and decrease upper tension slightly. 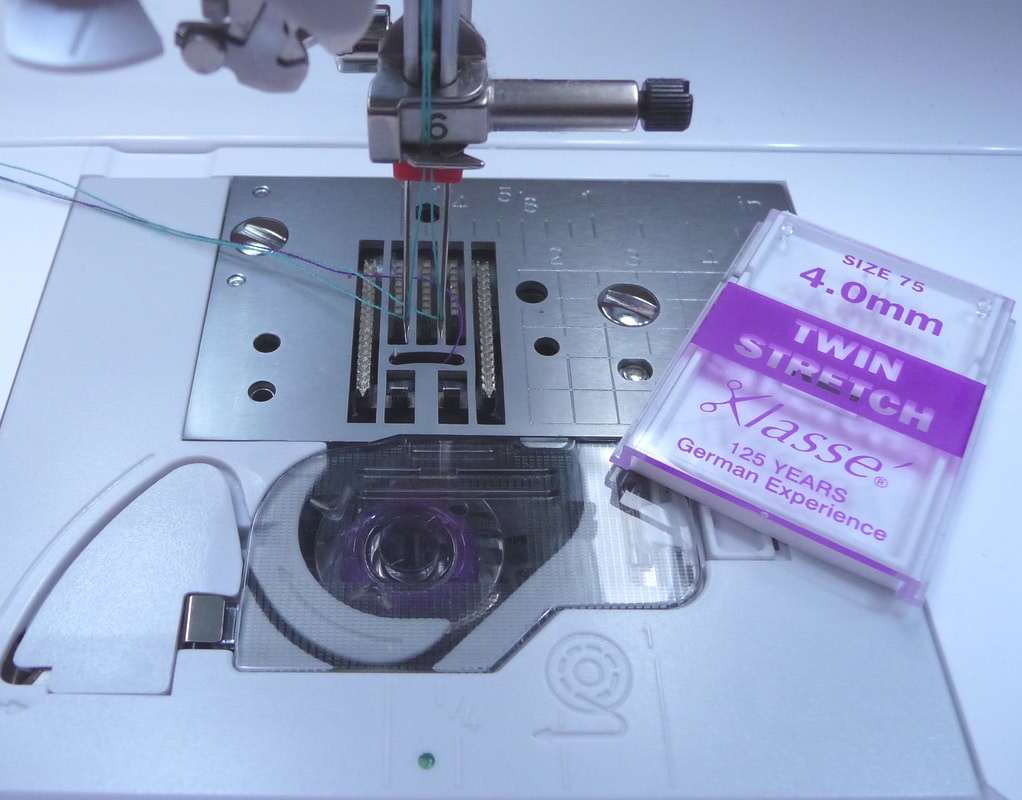 Thread machine for twin needle sewing. CLICK HERE to read my previous post with tips for threading. 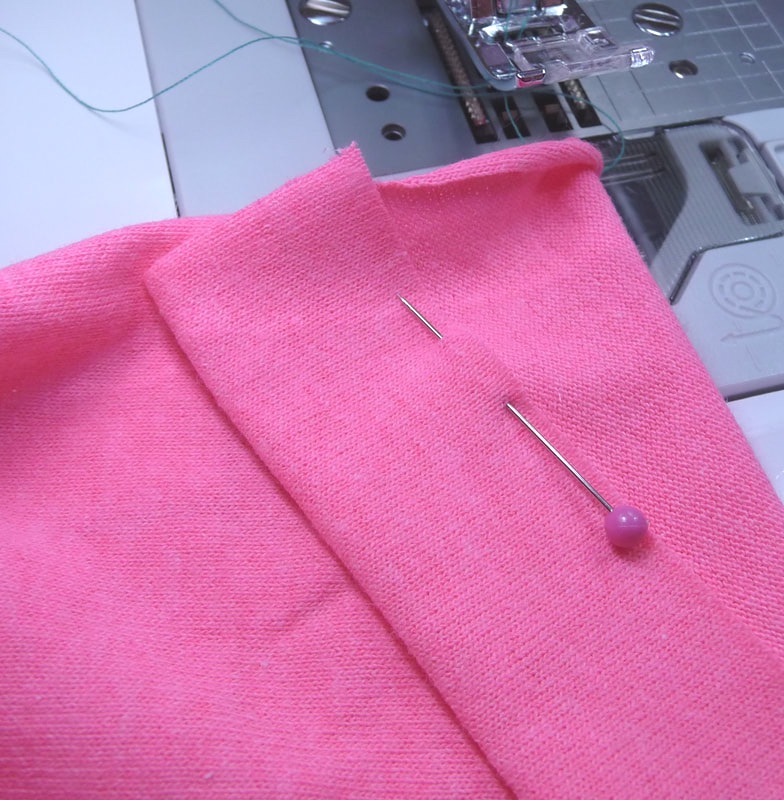 Press up hem and mark raw edge with a pin. 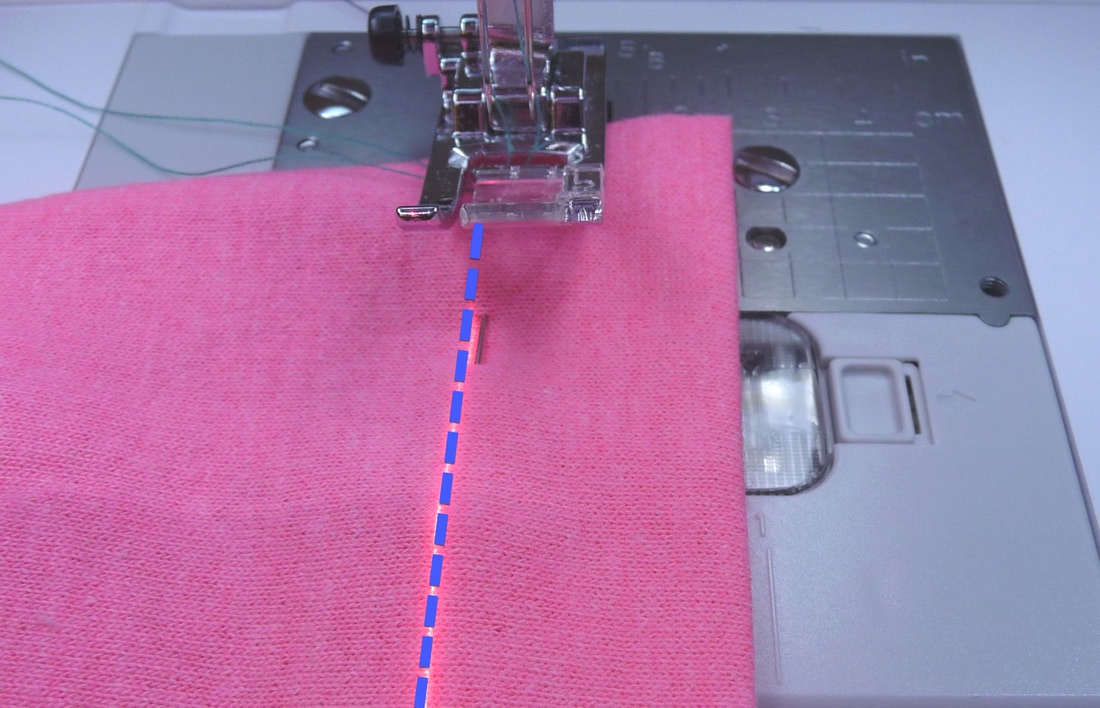 Flip to right side and see where you need to position folded edge so both needles catch raw edge on the wrong side. Remove pin. See red arrows below. 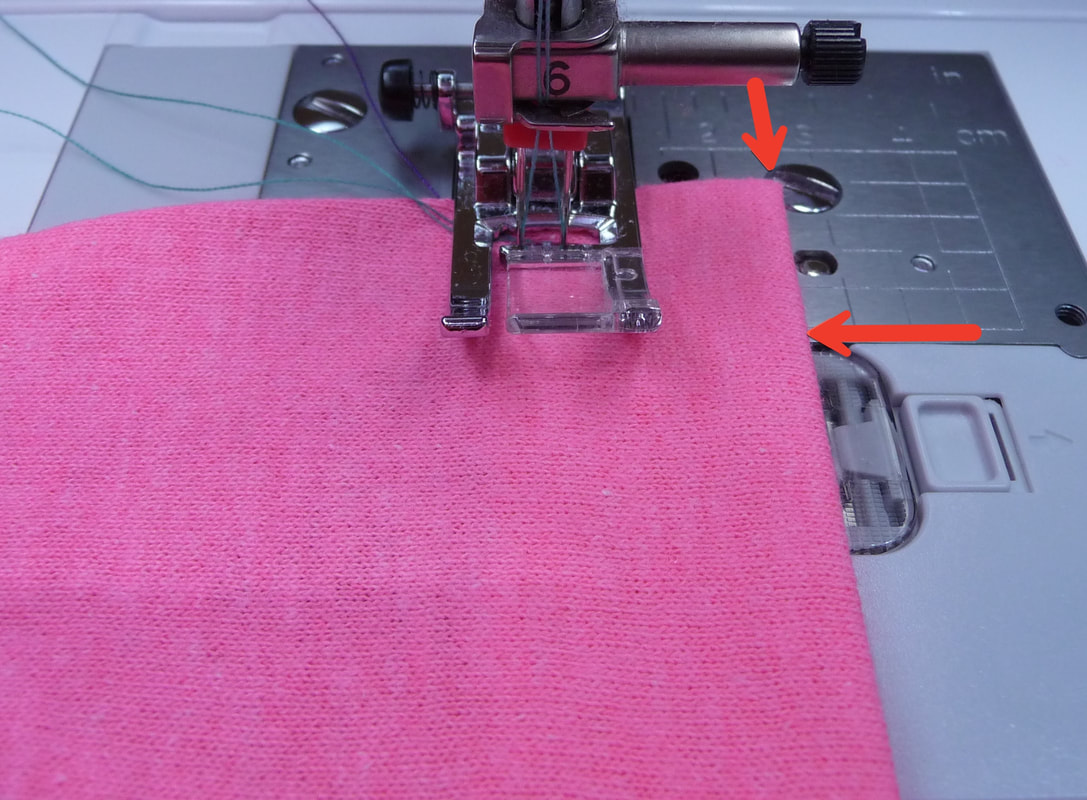 Stitch slowly, keeping folded edge even with your guideline. See below for finished hem on right side. Note that sample is stitched with contrast thread for better visibility. 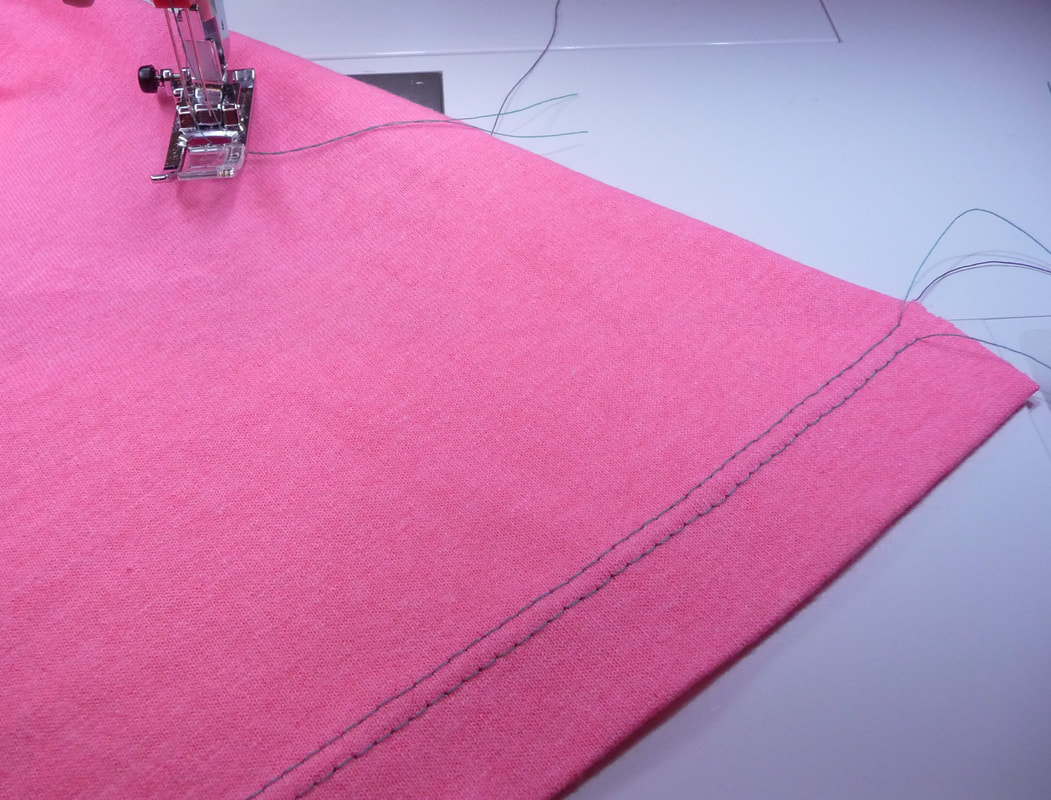 See below for finished hem on wrong side. Note that the bobbin thread zig zags between the two stitches formed by the needle. This provides the stretch factor. You'll find that the tricot beefs up the hem so the stitch forms more smoothly, the hem lays flat, and the stitches don't "pop" when stretched. This method does inhibit the stretch factor slightly so it's best used when you don't need a hem with an intensive stretch factor. 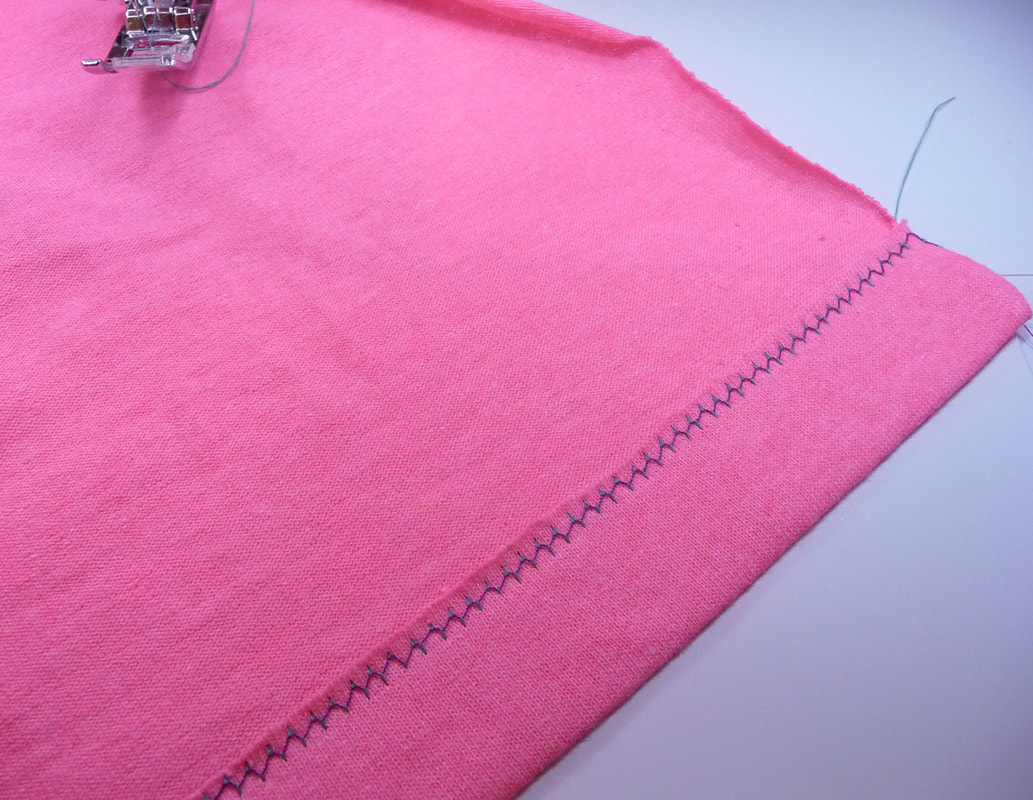 Have you ever tried this method? If not, do you think you will try it now that you have a little tutorial? Let me know in the comments below.
|

Author:Joanne Banko Archives
March 2024
*As a believer in full disclosure, I'd like you to know that Blog posts may contain affiliate links for products and services I know and trust. Purchasing items through a link marked * results in a small commission for me, with no extra charges for you.
Categories |

 RSS Feed