letsgosew.com
  • Home
  • Contact
  • Privacy Policy
  • Sign Up for Sewing News, Freebies, & Updates
  • Order Just Jackets Embroidery Collection
  • Just Jackets FAQ
  • Order Wrapped in Embroidery Book by Joanne Banko
  • Joanne Banko's Blog
  • Machine Embroidery Survey
  • FREE Tutorials and Tip Sheets
    • NEW! Serger Sample Sheet
    • NEW! 2-Thread Serger Techniques-Pt.1
    • NEW! Basic Serger Stitches
    • New! Sew with Your Feet_Resources
    • New Project! Chic Triangle Scarf
    • New! Embroidered Sachet Envelope Project
    • Denim Re-design Hanging Organizer
    • Sewing a Cargo Pocket
    • NEW! Interfacings for Embroidery Tip Sheet
    • Making Kitchen Towels & FREE Cornucopia Applique Design
    • NEW! Embroidery Placement Positioning Tips
    • Tip sheet - 5 Reasons Quilters Need A Serger
    • Free In-the-Hoop Patch Pocket Design
    • Serging versus Sewing
    • FREE Project-Embroidered Gift Tag with Gift Bag
    • Tip Sheet - Pillow Pointers
    • Tip sheet_Sew Straight Laser for Seams
    • Embelishment Tips from dime V.111
    • Tip sheet - Shannon Embrace Double Gauze
    • Tip sheet - Fun with Fonts
    • Fabric Tip Sheet- Sewing Faux Suede
    • Tip sheet for Sewing & Embroidering with Metallic Thread
    • Fleece Ruana Pattern: As seen on PBS It's Sew Easy TV
    • Fabric Tip Sheet - Crepe Back Satin
    • Fabric Tip Sheet-Sewing Slinky Type Knit
    • Fabric Tip Sheet - Fleece
    • Fancy Footwork Tipsheet - About the Walking Foot
    • Fancy Footwork Tip Sheet_Basic Appliqué
    • Fancy Footwork Tip sheet - Ruffler Attachment
    • Fancy Footwork Tip Sheet - Narrow Hems with a Standard Foot
    • Fancy Footwork Tip Sheet - Non Stick Foot
    • Tip sheet - Machine Embroidery Pattern Connection Resources
    • Tutorial_Embroidered Greeting Card Project
    • Tip Sheet - Machine Set up for Shirring
    • Tip sheet - Snowman and Target Markers
    • Tip Sheet for Printing on Fabric
    • Tip sheet-Five Ways to Finish Fleece Blankets
    • T-Shirt Transformation Tutorial
    • Project- Serge a Little Girl's Sweet Summer Dress
    • Tip Sheet for Fleece Frame Shape Appliqué
    • Tip Sheet - Bobbin Work Sewing & Embroidery
    • Tip Sheet - Custom Covered Buttons
    • Tip Sheet - Liquid Stabilizers
    • Tip sheet - Appliqué with Brother XV8500D & ScanNCut
    • Project - Sheer Chiffon Wrap
    • Project - Pearl Trimmed Candle Ring
    • Tip Sheet -Mitered Satin Blanket Binding
    • Fabric Tip Sheet_Knit Know How
    • Tool School Tip Sheets
    • ITH Project Planner
  • As seen in DiME Magazine - Photo Gallery
  • Sewing and Embroidery Events
  • My Sewing Story
  • It's Sew Easy TV Online Blog
  • IT'S SEW EASY TV Videos & Bonus Files
    • NEW! It's Sew Easy TV Series 2100
    • It's Sew Easy TV_Series 2000
    • It's Sew Easy TV_Series 1500
    • It's Sew Easy TV - Series 1600
    • It's Sew Easy TV_Series 1700
    • It's Sew Easy TV Series 1800
    • It's Sew Easy TV Series 1900
    • NEW! Superstar Sewing Stitches
    • NEW! Classy Textured Cape
    • NEW! Baby Bath Wrap
    • NEW! Detachable Collar
    • Sew a Swimsuit
    • Machine Embroidered Garments
    • Kimono Blouses
    • Custom Covered Hangers
    • Sewing Beautiful Belts
    • Felted Flower Hat Trim
    • Sew a Waffle Weave Robe
    • Learn about Couching accessories!
    • Turn a Pashmina into a Trendy Topper
    • Machine Embroidered Reverse Applique
    • Machine Embroidered Knit Dress
    • Use Non-Stick Foot to sew a Custom Luggage Tag
    • Serge & Sew Broomstick Skirt
    • Machine Embroidered Western Jacket
    • Machine Embroidered Bobbin Work Pashmina
    • Embroidered Pajamas
    • Sewing Pearls and Sequins
    • Learn how to use the Fringe Foot
    • Quilted Pinwheel Patchwork Tote
    • Machine Embroidered Lace for Lingerie
    • Sewing Circles with a Circular Attachment
    • Sew with the Edge Joining Foot
    • Re-style Tops for Little Girls
    • Short Style Tip- Blouse Embellishment
    • Learn how to make pretty piping using the Piping Foot
    • Embellish with the Three Slot Cording Foot
    • Facebook Live Interview 12-4-2018
    • Machine Embroidery - Starter Tips

Machine Embroidery Mixed With Decorative Stitches

9/15/2018

10 Comments

 
Picture
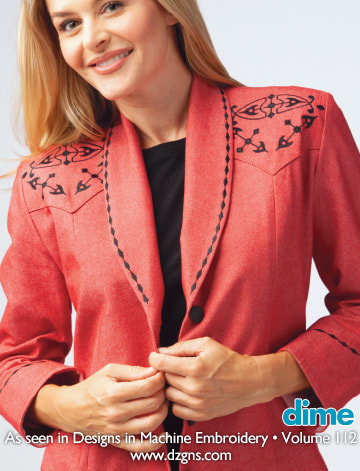
Have you seen the red denim jacket titled Western Flair in Volume 112 of Designs in Machine Embroidery magazine? If you have, then you know that machine embroidery is the focal point of the pretty pointed yokes. 
Picture
Picture
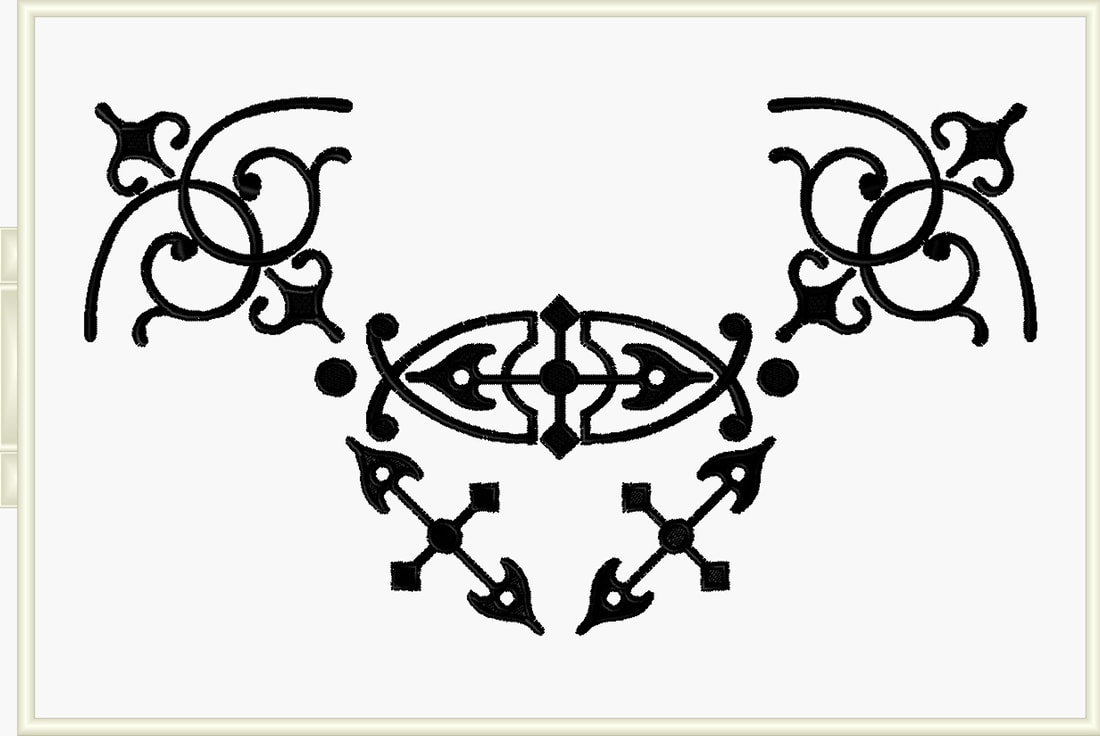
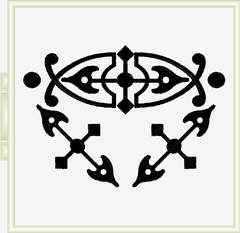
The jacket pattern I selected, Folkwear Pattern #242, inspired me to create a design combination to compliment the shape of the yokes on the front and back. I had fun decorating these yokes by mixing motifs from the design collection included in Wrapped in Embroidery. This group of classic designs has proved to be quite versatile as they've found their way onto many garments hanging in my closet! 
This article includes ideas and tips I think you'll find useful for designing your own machine embroidered masterpieces. You'll see exactly how the yokes were made and get a glimpse of the decorative stitching added to compliment the embroidery motifs. I like to think of decorative stitches as itty-bitty embroidery patterns. They are plentiful on the sewing side of the machine and compliment embroidery motifs quite nicely. Keep reading and I'll tell you more about these decorative stitches and how you can successfully stitch similar designs.
Picture
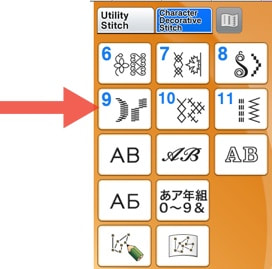
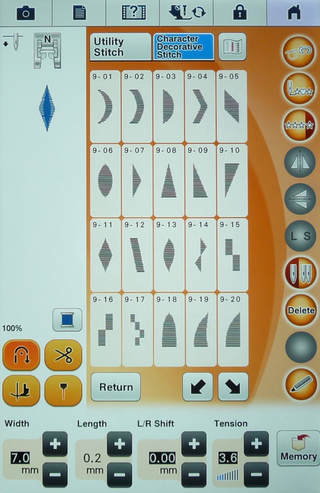
The diamond shaped stitch you see on the shawl collar and cuffs is from the Satin Element stitch menu on the Brother Dream Machine. These stitches are known as elongation patterns because the shapes can be stitched in five elongated sizes. The shape itself remains the same, whether it is a diamond, scallop, or geometric shape. However, the pattern is stretched out or "elongated" while maintaining the same density of the original pattern. You'll find these stitches in the decorative menu of many different machine models. They're actually quite common and have been around for a long time. I encourage you not to overlook them just because they're common. They can make an extraordinary accent on many different projects!
Picture
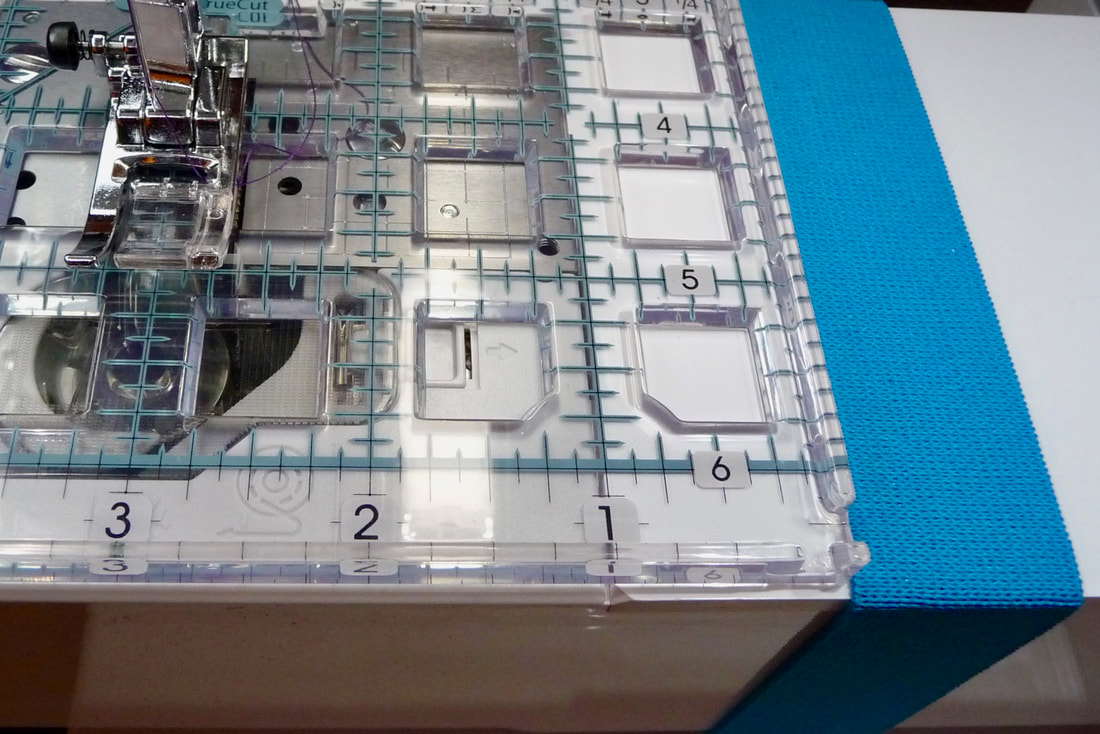
In the photo above you see an example of all five different sizes. 

Since these are made up of satin stitches the needle moves from right to left to form the pattern. If there is a high contrast between the thread color and the fabric itself you may notice a bit of fabric showing through the space between the stitches. While it's possible to shorten the stitch length you'll find that this also alters the size of the elongated shape. Today you'll learn mare about these stitches and learn a few tricks to get the look you want, maintain the size, and get a nice dense look on contrasting fabric.
Picture
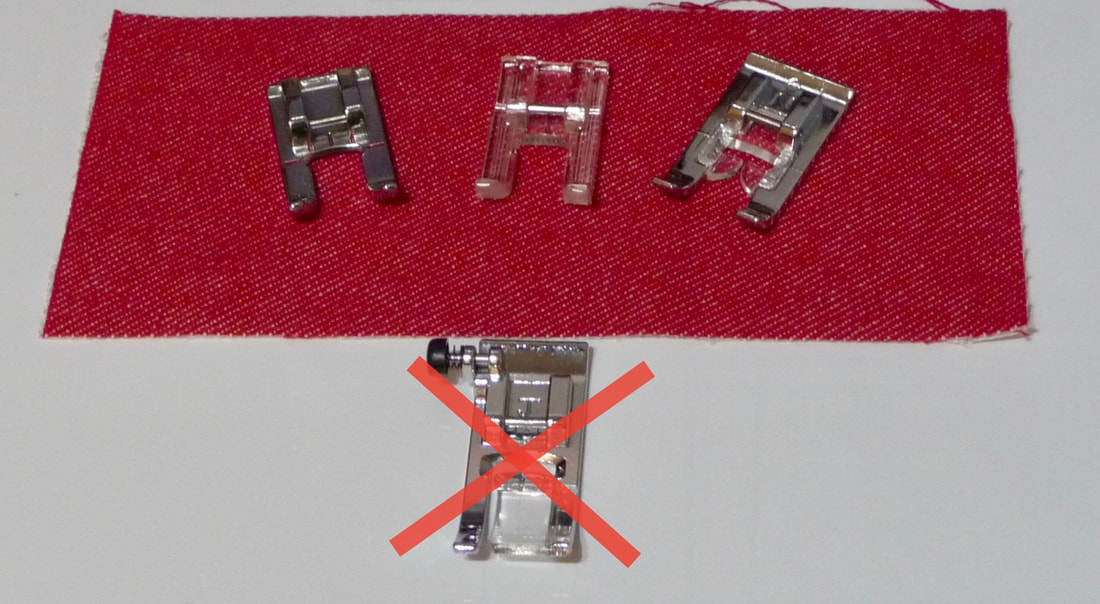
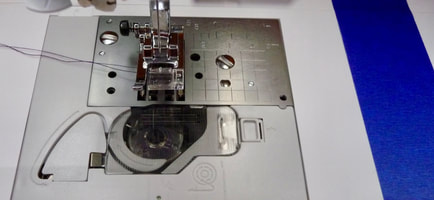
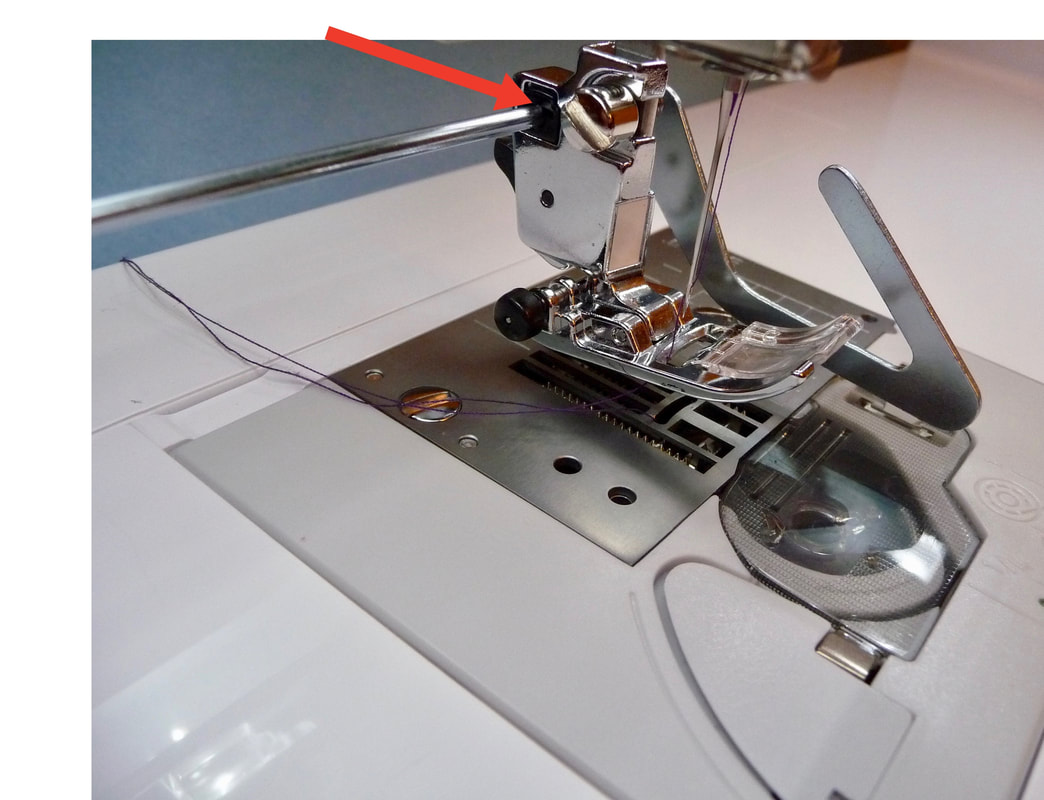
First let's talk about some presser foot possibilities for successful stitching. The foot on the right is the "N" foot and this is the one the machine will tell you to use. It works fine but I prefer an open toe foot for these. Here you see a clear foot in the center and a metal version on the left. It's important to know that all three of these feet have one thing in common, they have a groove or a channel on ​the underside which helps the thickness of the stitch easily flow under the foot. It's also important to know that you never want to use the standard "J" foot for satin stitching. This foot is too flat and will surely get stuck on the stitches. The big red X is here to remind you to put this foot away while satin stitching.
Picture
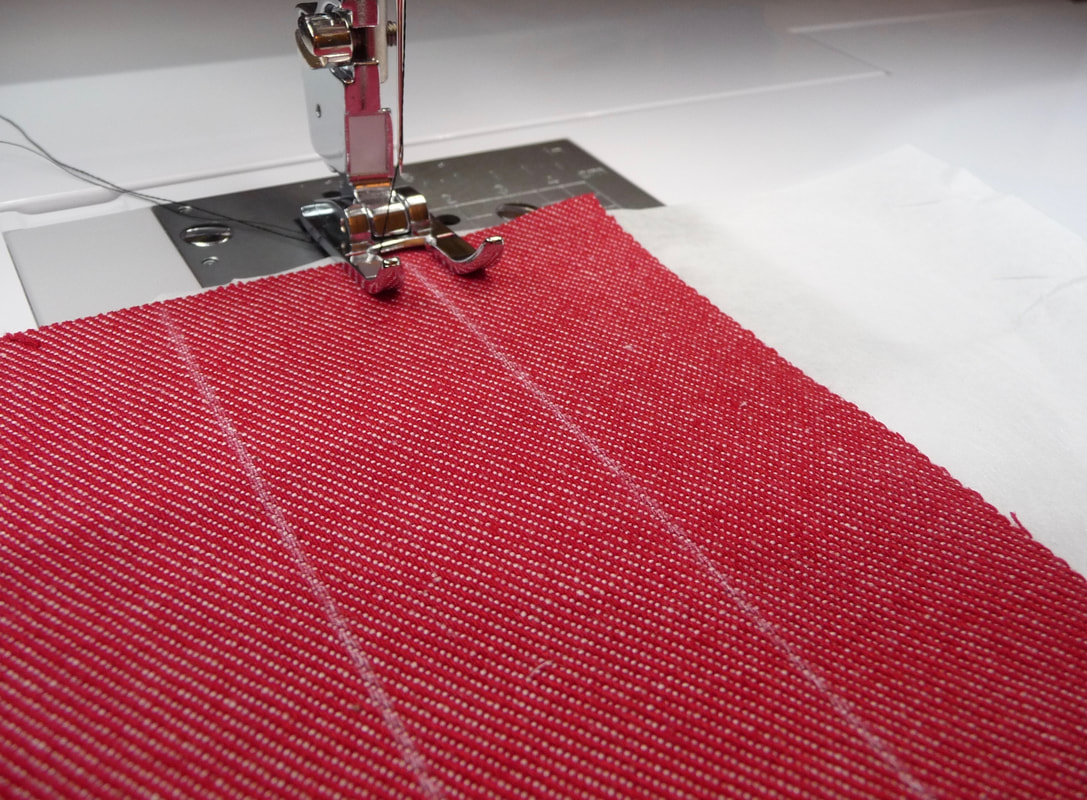
You'll also want to add stabilizer for successful stitching. Here I added a layer of tear-way underneath before stitching the samples. It's important to know that this type of stitching should be done on a single layer of fabric. The collar and cuffs for the jacket were decorated before construction.
Picture
Picture
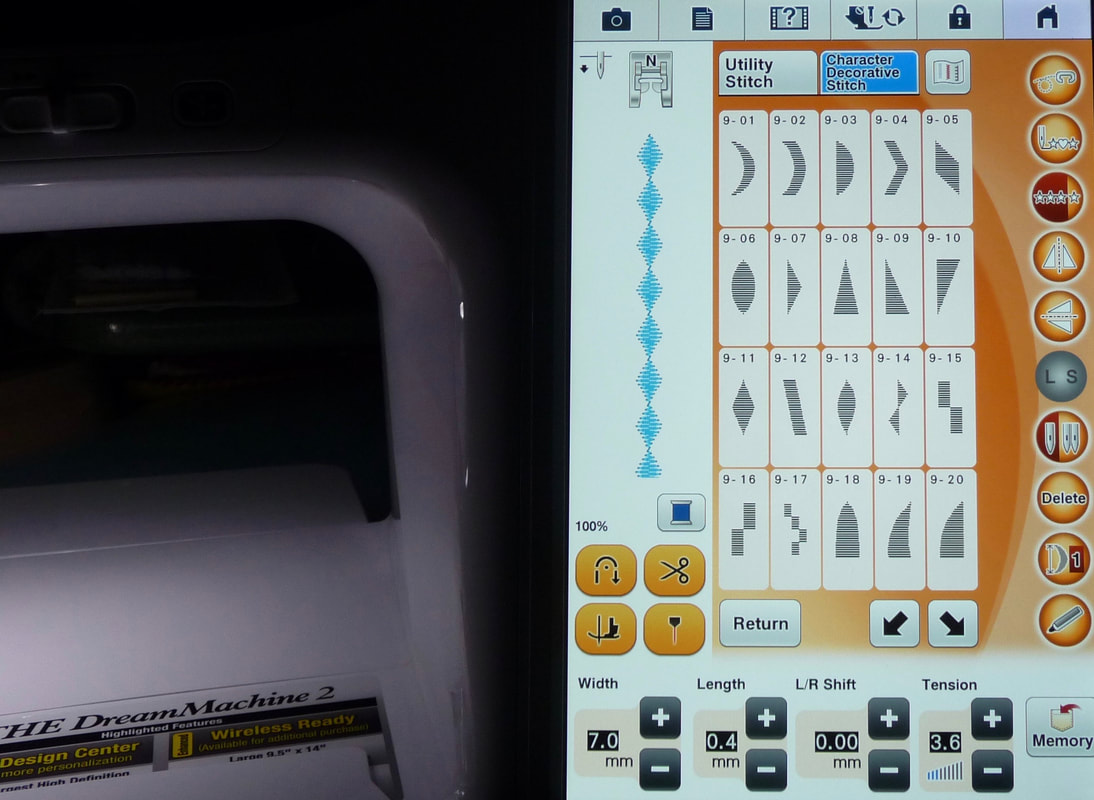
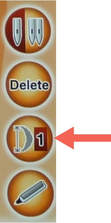
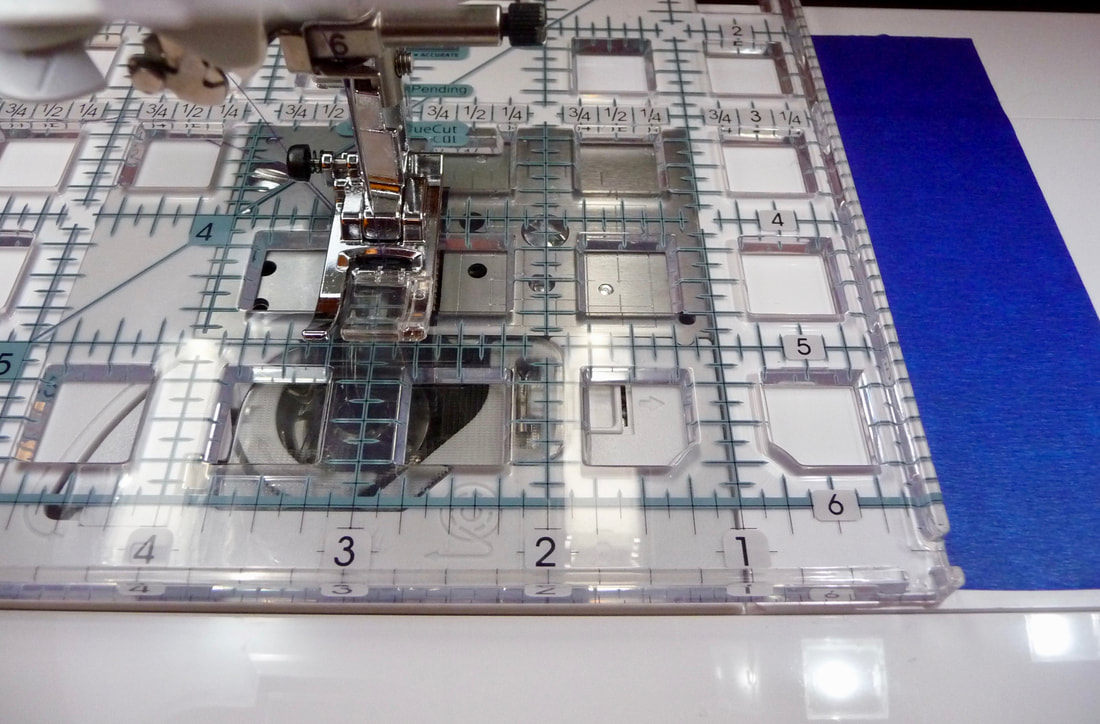
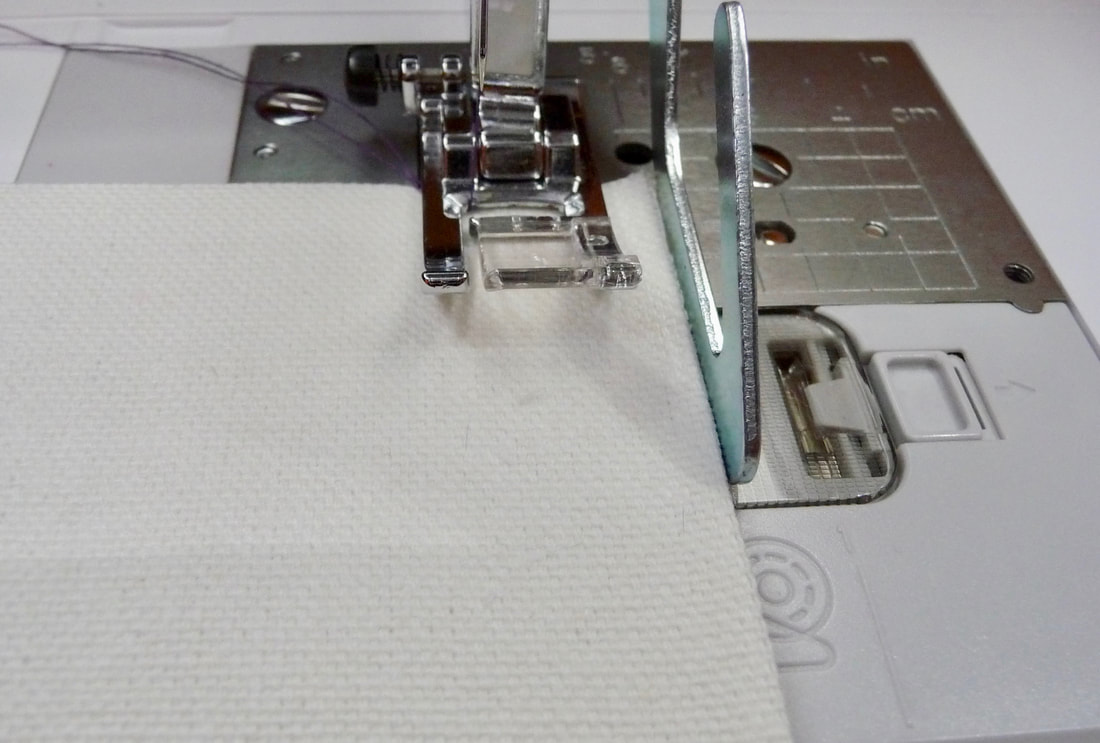
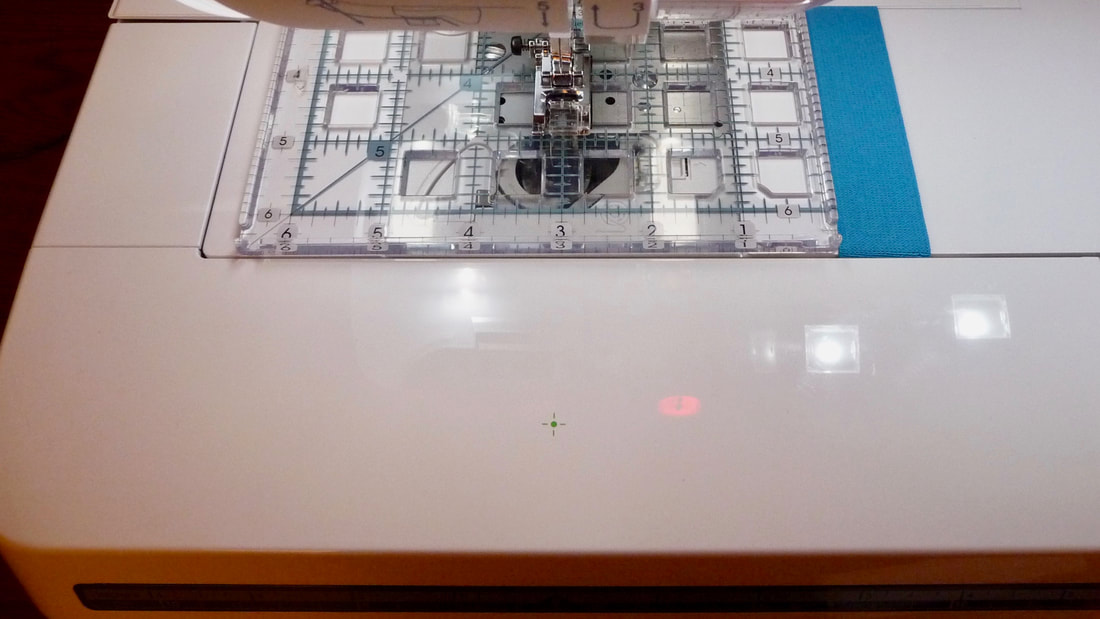
It's important to note that when the stitch is first selected the default size is (3). Touch the size key to scroll through and make a different selection. In the above photo you see the smallest size, size (1).

For the trim on the red denim jacket I wanted the diamond shapes to be dense, with good coverage on the high contrast fabric.
Picture
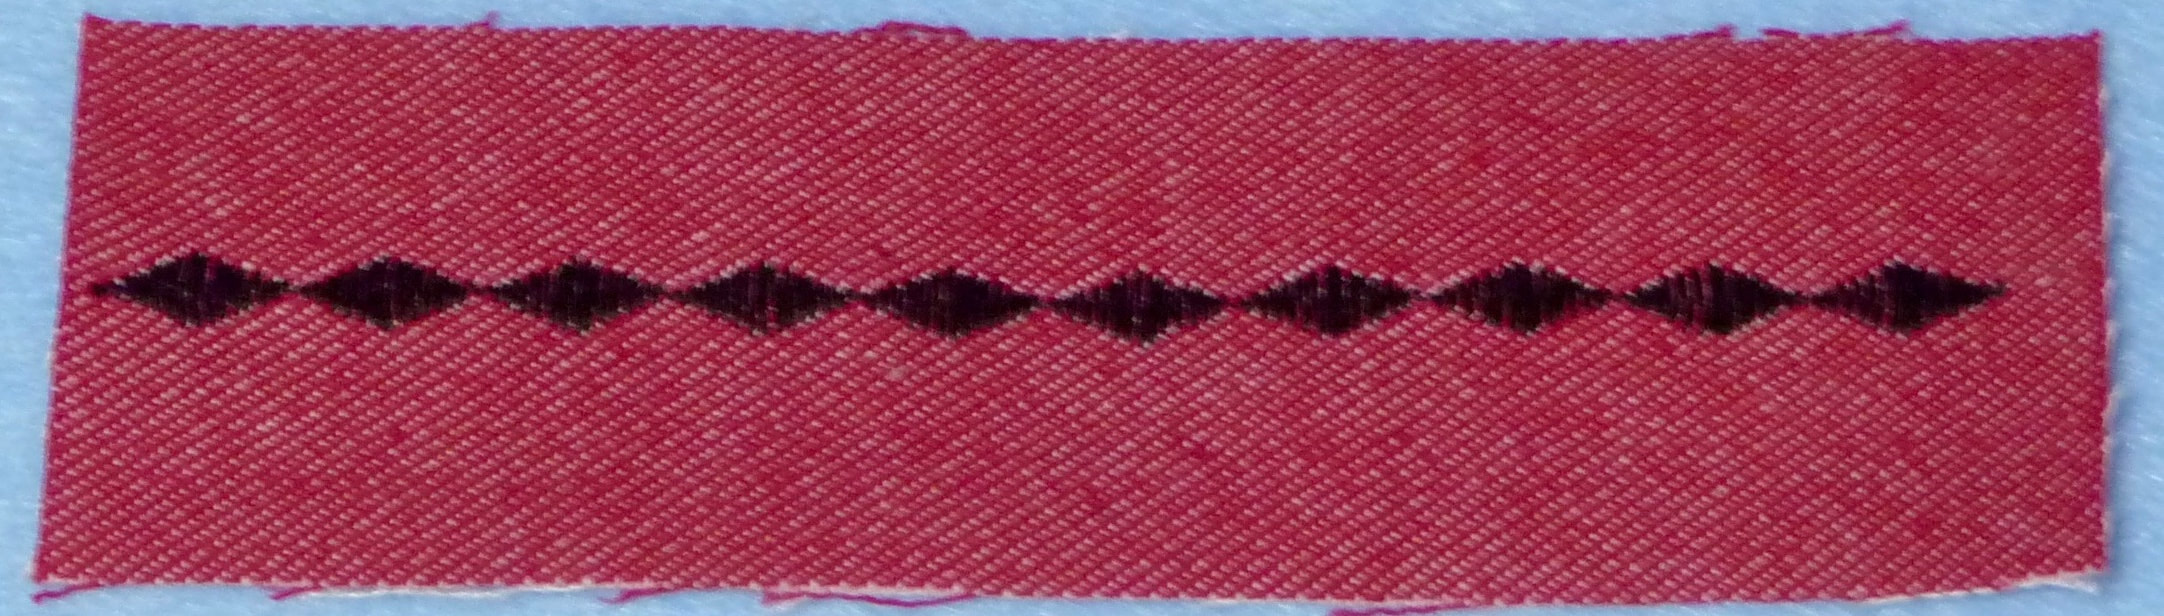
I started by selecting size (5), but I wanted the pattern to look like a size (3).
Picture
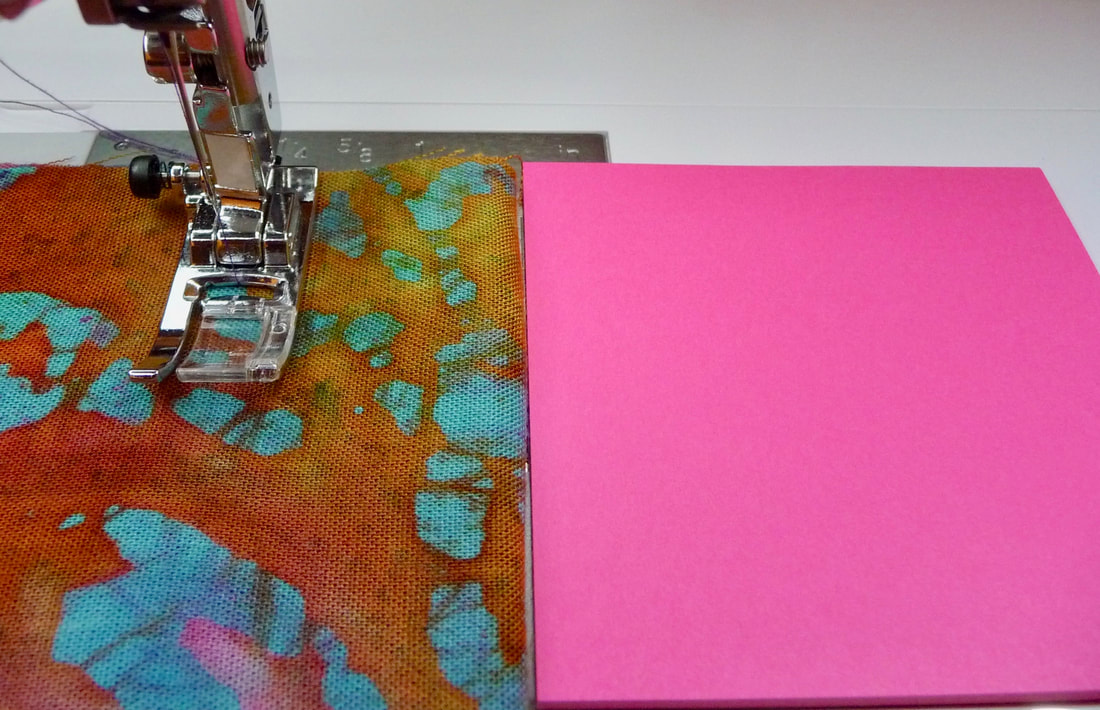
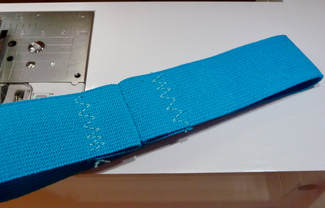
To achieve this I simply decreased the stitch length to 0.2. This shortens the stitch length but also shortens the actual pattern shape. The resulting stitch looks like a (3) and is also more dense, so it covers the fabric better and looks richer. Below you see an example of this combination of size (5) with a stitch length of 0.2. 
Picture
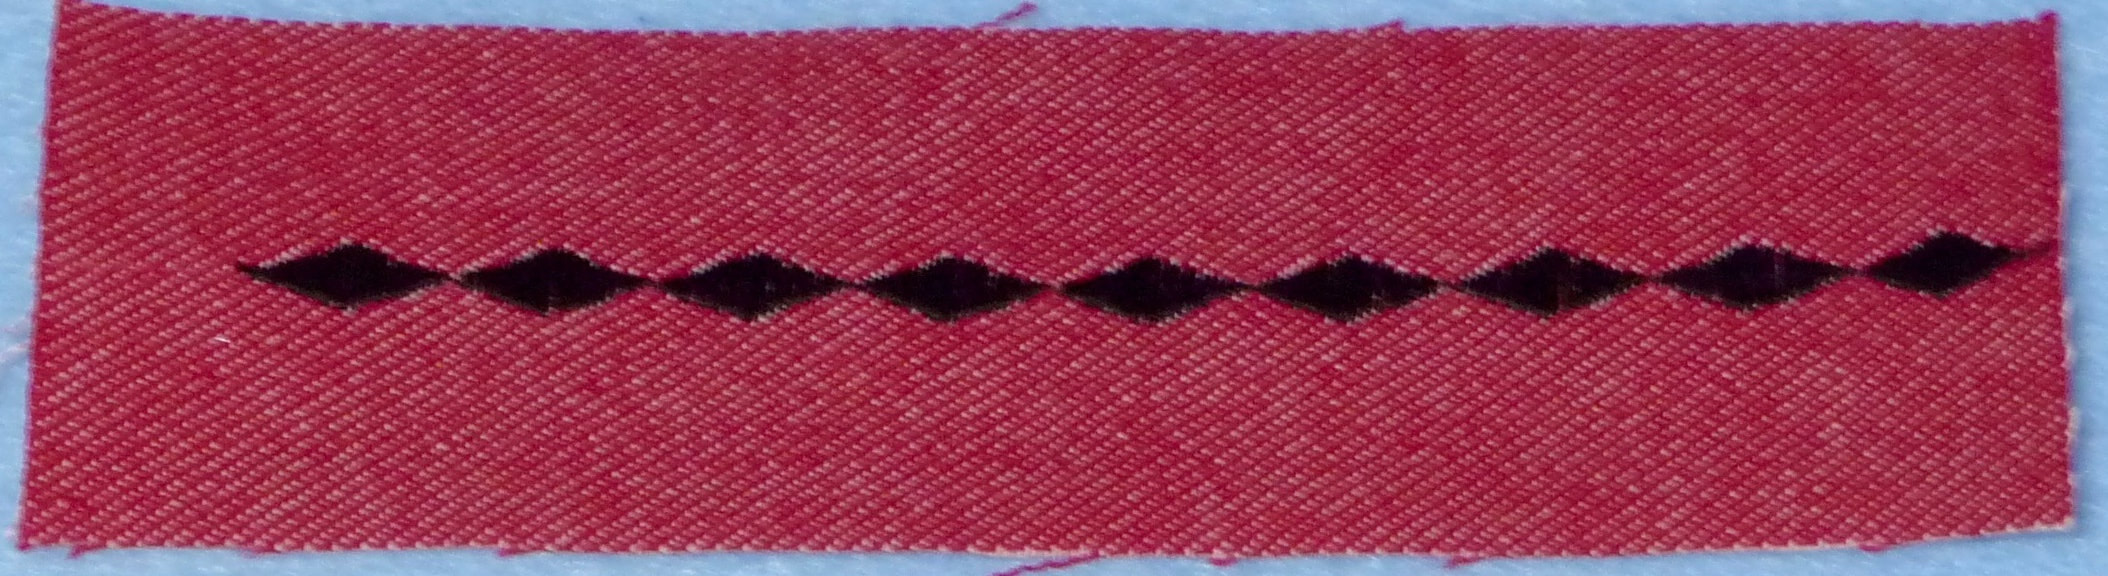
There is yet another way to achieve this effect and that is to switch to thicker thread. The sample below was size (3) stitched with 30 weight embroidery thread and no change in the stitch length. Be sure to use a size 14 embroidery needle with this thicker thread. Side by side these samples look nearly identical yet the results were achieved with two different methods.
Picture
I encourage you to experiment with these ideas. I'm hoping you'll find a way to use satin element stitches for some of your own special masterpieces. You are welcome to share your thoughts, questions, and ideas in the comments box.

P.S. You can see a blue denim version of this jacket when you click here to watch a repeat of It's Sew Easy TV episode 1008-1. You'll see additional sewing and embroidery embellishment techniques!
10 Comments

September is National Sewing Month

9/9/2018

6 Comments

 
Picture
September is National Sewing month! Are you celebrating??? I know, I know, we celebrate our passion for all things made with needle and thread 365 days a year but it's nice to know that the art and craft of sewing is nationally recognized during the month of September. As the story goes, Ronald Reagan made the declaration in 1982. Thanks to the Sewing and Craft Alliance and the American Sewing Guild, sewing has been put in the spotlight for the whole month of September. You can read the full history HERE.
To help you celebrate your own priceless sewing skills in September, I've compiled a short list of projects with a sewing theme that are archived on the official Brother blog. Click on the links below to view each one. Some of these include links to free embroidery designs. I'm hoping that one or more spark your interest and help you revel in the joy of sewing as we celebrate today and every day.
Upcycle a shirt for scrap storage
Embroidered jar covers for sewing room notions
I Love Sewing key fob
Going Sewing Circle bag
Embroidered needle case
Picture
The National Sewing Month site has sewing  information you may want to take a look at too! Click on the image for more info.

I like to consider myself a Sewing Cheerleader! There are many life changing benefits that make us all glad we know how to sew. Personally, I could make a very long list. When I first learned to sew it was just the sheer thrill of making something from scratch. Before I took sewing in "Home Ec" I had never really experienced the joy of "building" something from start to finish with my own two hands. Then I got hooked on the idea that I could customize everything I made and put my own stamp on it. Making gifts for others has also been a rewarding experience that's produced many happy memories. And yes, over the years I've saved a lot of money sewing and had a ton of fun making all kinds of items that are so much better than store bought!

It would be fun to know what some of the biggest benefits are for each of you! Feel free to leave a comment and share some of the ways sewing improves your life. I invite you to five a shout out to sewing and tell us all why knowing how to sew is an important part of life for you!
6 Comments

Superstar Sewing Part Two: Surely, Sewing Straight is Essential for Quality Results!

9/3/2018

0 Comments

 
A recent trip to Kent State Fashion Museum reinforced my belief that great garments are the result of careful, planned, precision sewing.  Of course, the ability to sew straight is top priority for all garment construction as well as many other types of projects. continue reading and you'll find that this post includes tips to help you with precision sewing.
Picture


Here you see the exhibit list for the museum which includes a Fashion Timeline, with a collection of clothing that spans 200 years of styles and inventions that not only changed history but had an earth-shattering impact as far as clothing is concerned. If you are interested in further exploration you can view the timeline ​HERE.

Picture
The next display that sparked thoughts of quality resulting from careful sewing was the collection of Katherine Hepburn stage & screen garments, which included clothing from her own closet. Seems that many of the star status garments made their way into her closet as clothing she wore in everyday life. Known for her penchant for pants, each pair in the exhibit were utterly classic and obviously well-crafted with details like multiple rows of top-stitching at the waistband. 
 
​So how does all of this tie into modern day machines and the everyday sewing many of us enjoy on a regular basis? Well, straight sewing makes up a large portion of the seams we construct for garments, crafts, quilting, and home decor. The rest of this post is dedicated to highlighting some simple solutions to keep you on the straight and narrow when it comes to guiding fabric through your machine.
Picture
Let's start with the tried and true role that ordinary painter's tape can take. It's inexpensive for sure, and likely that you have a roll or two handy for household projects. 
Picture
For perfect placement of the tape I like to use a 6-inch square quilt ruler. Simply line up the tip of the needle with the distance you need on the ruler and then make certain it is level with the front plate of your machine. You can then place the tape along the ruler's edge with assurance that the tape will be equidistant from the beginning to the end. Use a longer ruler if you need the tape to extend in a longer line.

Picture
For another option, a pack of post it style sticky paper notes can be used to the right or left of the presser foot as well. This method is one that my quilter friends adopted long ago. Yes, there are "gadgets" you can purchase that do a similar job and they do have merit, but this idea works very well.
Picture
Speaking of quilters, if you are an avid quilter, or if you happen to own a walking foot you may already have the Quilt Guide accessory for your walking foot. Designed to fit in the small hole behind the walking foot, it also fits in the foot holder used for attaching snap-on feet. The red arrow in the photo above shows the exact spot for inserting this handy gadget. 
Picture
Use it with the standard foot for sewing seams and you'll appreciate the accuracy it provides from the extended metal guide. You can slide it for a long distance or a short one to use as a seam guide or edge guide for many sewing situations.
Picture
This next idea came as a result of necessity being the mother of invention.

I needed to stitch something using the free arm and wanted to be certain I could maintain the distance from the needle to the folded edge of my fabric for multiple pieces. 
Picture
Sewing a piece of colorful elastic into a band and slipping it onto ​the free arm gave me a simple guide to follow and proved to be especially helpful for a wide distance. Once again, you can use the quilt ruler to help align the band on the machine. You'll find a full tutorial for this option on the Brother Stitching Sewcial blog.
Picture
Depending on your machine and the elastic you use you may even be able to get the extension bed back on the machine like I did here. That gives you a flat surface so you can also use this for items that don't need a free arm.
Last but not least, you may own a machine that boasts the Sew Straight™ Laser Vision Guide option as an onboard aid to sewing straight in a variety of situations. This feature opens up a world of possibilities! Available on a variety of models, you can see how it works on a Dream Machine by watching this YouTube video. I could easily write six more posts showing how I like to use the laser guide. However, related to the topic at hand I'd like to share just one of my personal favorite ways to use this feature to sew an accurate seam allowance. CLICK HERE to download a free tip sheet on this topic.
I hope you found this information helpful. Feel free to leave your comments below :-)
0 Comments
    Picture

    Author:

    Joanne Banko
    Freelance Sewing Educator

    I'd love to stay in touch with you!

    Click Here
    and Sign up for
    ​Sewing News, plus tips, tricks, and notifications about new blog posts.

    Archives

    June 2025
    May 2025
    March 2025
    February 2025
    December 2024
    October 2024
    September 2024
    March 2024
    February 2024
    September 2023
    July 2023
    June 2023
    May 2023
    March 2023
    February 2023
    January 2023
    December 2022
    November 2022
    October 2022
    September 2022
    August 2022
    July 2022
    June 2022
    May 2022
    April 2022
    March 2022
    January 2022
    December 2021
    October 2021
    August 2021
    July 2021
    June 2021
    May 2021
    April 2021
    March 2021
    February 2021
    November 2020
    October 2020
    June 2020
    May 2020
    April 2020
    March 2020
    February 2020
    January 2020
    November 2019
    August 2019
    July 2019
    June 2019
    May 2019
    March 2019
    February 2019
    January 2019
    December 2018
    September 2018
    August 2018
    July 2018
    June 2018
    March 2018
    February 2018
    December 2017
    September 2017
    August 2017
    June 2017
    April 2017
    February 2017
    January 2017
    December 2016
    September 2016
    July 2016
    June 2016
    May 2016
    March 2016
    February 2016
    January 2016
    December 2015
    October 2015
    September 2015
    July 2015
    June 2015
    May 2015
    March 2015
    January 2015
    October 2014
    July 2014
    May 2014
    March 2014
    January 2014

    *As a believer in full disclosure, I'd like you to know that Blog posts may contain affiliate links for products and services I know and trust. Purchasing items through a link marked * results in a small commission for me, with no extra charges for you.

    Categories

    All

    RSS Feed

© Copyright 2025 by Joanne Banko. All rights Reserved