letsgosew.com
  • Home
  • Contact
  • Privacy Policy
  • Sign Up for Sewing News, Freebies, & Updates
  • Order Just Jackets Embroidery Collection
  • Just Jackets FAQ
  • Order Wrapped in Embroidery Book by Joanne Banko
  • Joanne Banko's Blog
  • Machine Embroidery Survey
  • FREE Tutorials and Tip Sheets
    • NEW! Serger Sample Sheet
    • NEW! 2-Thread Serger Techniques-Pt.1
    • NEW! Basic Serger Stitches
    • New! Sew with Your Feet_Resources
    • New Project! Chic Triangle Scarf
    • New! Embroidered Sachet Envelope Project
    • Denim Re-design Hanging Organizer
    • Sewing a Cargo Pocket
    • NEW! Interfacings for Embroidery Tip Sheet
    • Making Kitchen Towels & FREE Cornucopia Applique Design
    • NEW! Embroidery Placement Positioning Tips
    • Tip sheet - 5 Reasons Quilters Need A Serger
    • Free In-the-Hoop Patch Pocket Design
    • Serging versus Sewing
    • FREE Project-Embroidered Gift Tag with Gift Bag
    • Tip Sheet - Pillow Pointers
    • Tip sheet_Sew Straight Laser for Seams
    • Embelishment Tips from dime V.111
    • Tip sheet - Shannon Embrace Double Gauze
    • Tip sheet - Fun with Fonts
    • Fabric Tip Sheet- Sewing Faux Suede
    • Tip sheet for Sewing & Embroidering with Metallic Thread
    • Fleece Ruana Pattern: As seen on PBS It's Sew Easy TV
    • Fabric Tip Sheet - Crepe Back Satin
    • Fabric Tip Sheet-Sewing Slinky Type Knit
    • Fabric Tip Sheet - Fleece
    • Fancy Footwork Tipsheet - About the Walking Foot
    • Fancy Footwork Tip Sheet_Basic Appliqué
    • Fancy Footwork Tip sheet - Ruffler Attachment
    • Fancy Footwork Tip Sheet - Narrow Hems with a Standard Foot
    • Fancy Footwork Tip Sheet - Non Stick Foot
    • Tip sheet - Machine Embroidery Pattern Connection Resources
    • Tutorial_Embroidered Greeting Card Project
    • Tip Sheet - Machine Set up for Shirring
    • Tip sheet - Snowman and Target Markers
    • Tip Sheet for Printing on Fabric
    • Tip sheet-Five Ways to Finish Fleece Blankets
    • T-Shirt Transformation Tutorial
    • Project- Serge a Little Girl's Sweet Summer Dress
    • Tip Sheet for Fleece Frame Shape Appliqué
    • Tip Sheet - Bobbin Work Sewing & Embroidery
    • Tip Sheet - Custom Covered Buttons
    • Tip Sheet - Liquid Stabilizers
    • Tip sheet - Appliqué with Brother XV8500D & ScanNCut
    • Project - Sheer Chiffon Wrap
    • Project - Pearl Trimmed Candle Ring
    • Tip Sheet -Mitered Satin Blanket Binding
    • Fabric Tip Sheet_Knit Know How
    • Tool School Tip Sheets
    • ITH Project Planner
  • As seen in DiME Magazine - Photo Gallery
  • Sewing and Embroidery Events
  • My Sewing Story
  • It's Sew Easy TV Online Blog
  • IT'S SEW EASY TV Videos & Bonus Files
    • NEW! It's Sew Easy TV Series 2100
    • It's Sew Easy TV_Series 2000
    • It's Sew Easy TV_Series 1500
    • It's Sew Easy TV - Series 1600
    • It's Sew Easy TV_Series 1700
    • It's Sew Easy TV Series 1800
    • It's Sew Easy TV Series 1900
    • NEW! Superstar Sewing Stitches
    • NEW! Classy Textured Cape
    • NEW! Baby Bath Wrap
    • NEW! Detachable Collar
    • Sew a Swimsuit
    • Machine Embroidered Garments
    • Kimono Blouses
    • Custom Covered Hangers
    • Sewing Beautiful Belts
    • Felted Flower Hat Trim
    • Sew a Waffle Weave Robe
    • Learn about Couching accessories!
    • Turn a Pashmina into a Trendy Topper
    • Machine Embroidered Reverse Applique
    • Machine Embroidered Knit Dress
    • Use Non-Stick Foot to sew a Custom Luggage Tag
    • Serge & Sew Broomstick Skirt
    • Machine Embroidered Western Jacket
    • Machine Embroidered Bobbin Work Pashmina
    • Embroidered Pajamas
    • Sewing Pearls and Sequins
    • Learn how to use the Fringe Foot
    • Quilted Pinwheel Patchwork Tote
    • Machine Embroidered Lace for Lingerie
    • Sewing Circles with a Circular Attachment
    • Sew with the Edge Joining Foot
    • Re-style Tops for Little Girls
    • Short Style Tip- Blouse Embellishment
    • Learn how to make pretty piping using the Piping Foot
    • Embellish with the Three Slot Cording Foot
    • Facebook Live Interview 12-4-2018
    • Machine Embroidery - Starter Tips

Embellish a Blouse with My Design Center

7/28/2018

3 Comments

 
Picture
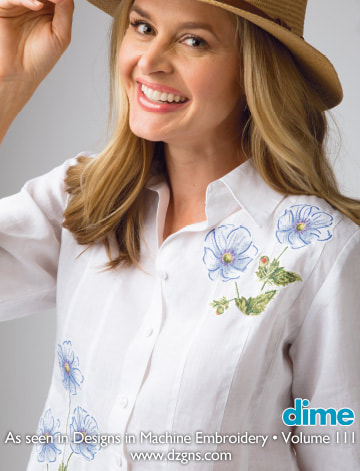
The embellished white blouse in Volume 111 of Designs in Machine Embroidery magazine features delicate appliqués accented using tools found in My Design Center. Complete instructions for the project can be found in V.111.
 
Follow along here as I show you a few more details with options for creating projects that take advantage of this unique feature built-in to the Brother Dream Machine.
Picture
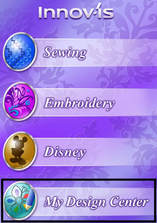
My Design Center is filled with creative tools for drawing and creating shapes, filling shapes with a variety of stitches, and includes drawing tools for adding fine details. The Premium PackII upgrade expanded these options even further, making it easier than ever to make unique embroidery designs right at the machine! Create completely new designs or add elements to existing designs using My Design Center. Your local Brother dealer will have more info on this exciting upgrade option.                   

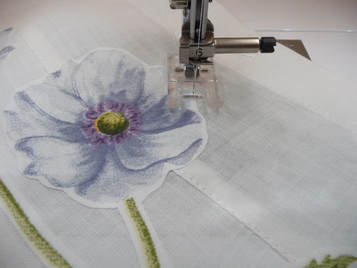
For the blouse featured in V.111 I opted to add small accents to pieces of pre-printed fabric. I started by adding a fusible backing and then I stitched the flowers to the blouse as appliques, using a fine thread and a very narrow zigzag stitch. This technique produces a very soft, lightweight design that’s perfect for light weight garments.

Picture
Experiment on scrap fabric using the process below:
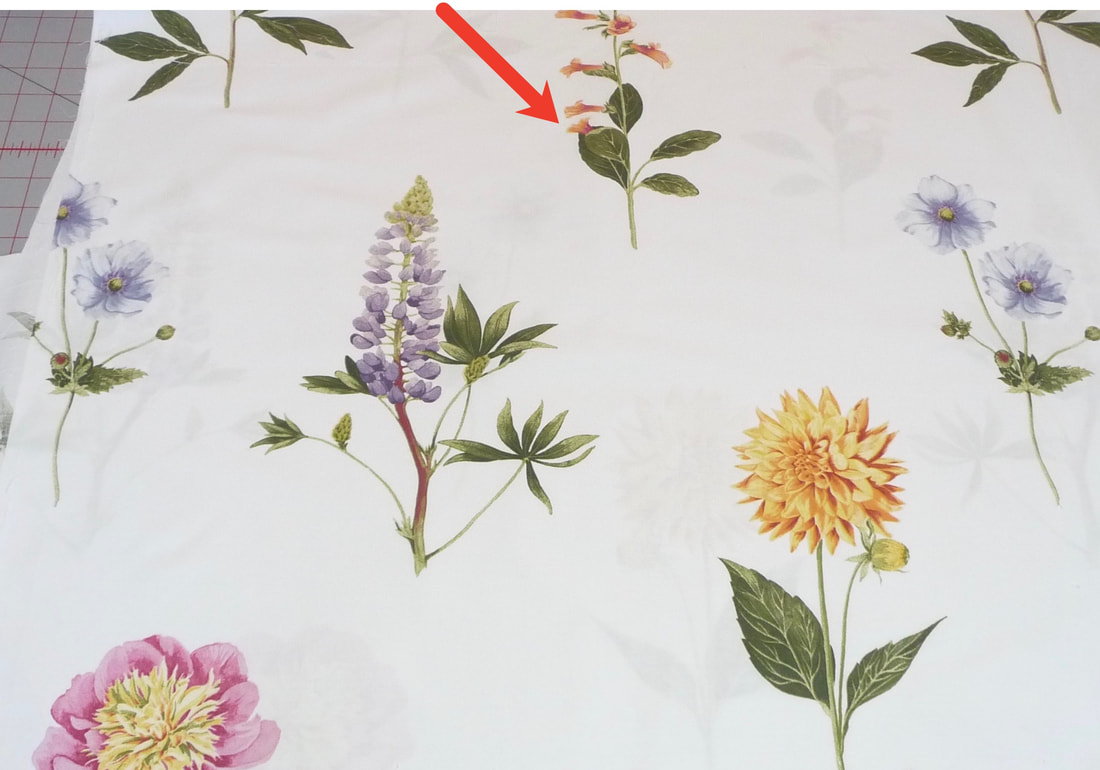
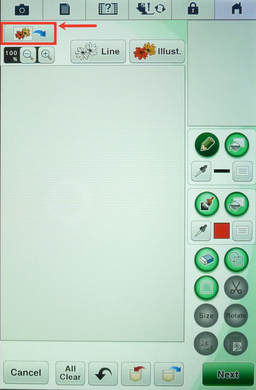
Choose a fabric piece printed on a light color with space around the motifs you want to accent. Look for prints that are very clear, almost “photo like.” I’ve selected the leaves below to use as an example, cutting a piece large enough to fill the hoop.  Open My Design Center.
Picture
Picture
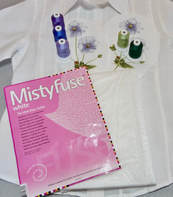
Tip: If you want to make fusible appliques when you’re finished with the embroidered accents, I highly recommend Misty fuse.

​Place fabric in the hoop with a layer of stabilizer underneath. Touch the icon to scan the fabric in the hoop. Touch Scan>OK.
Picture
Picture
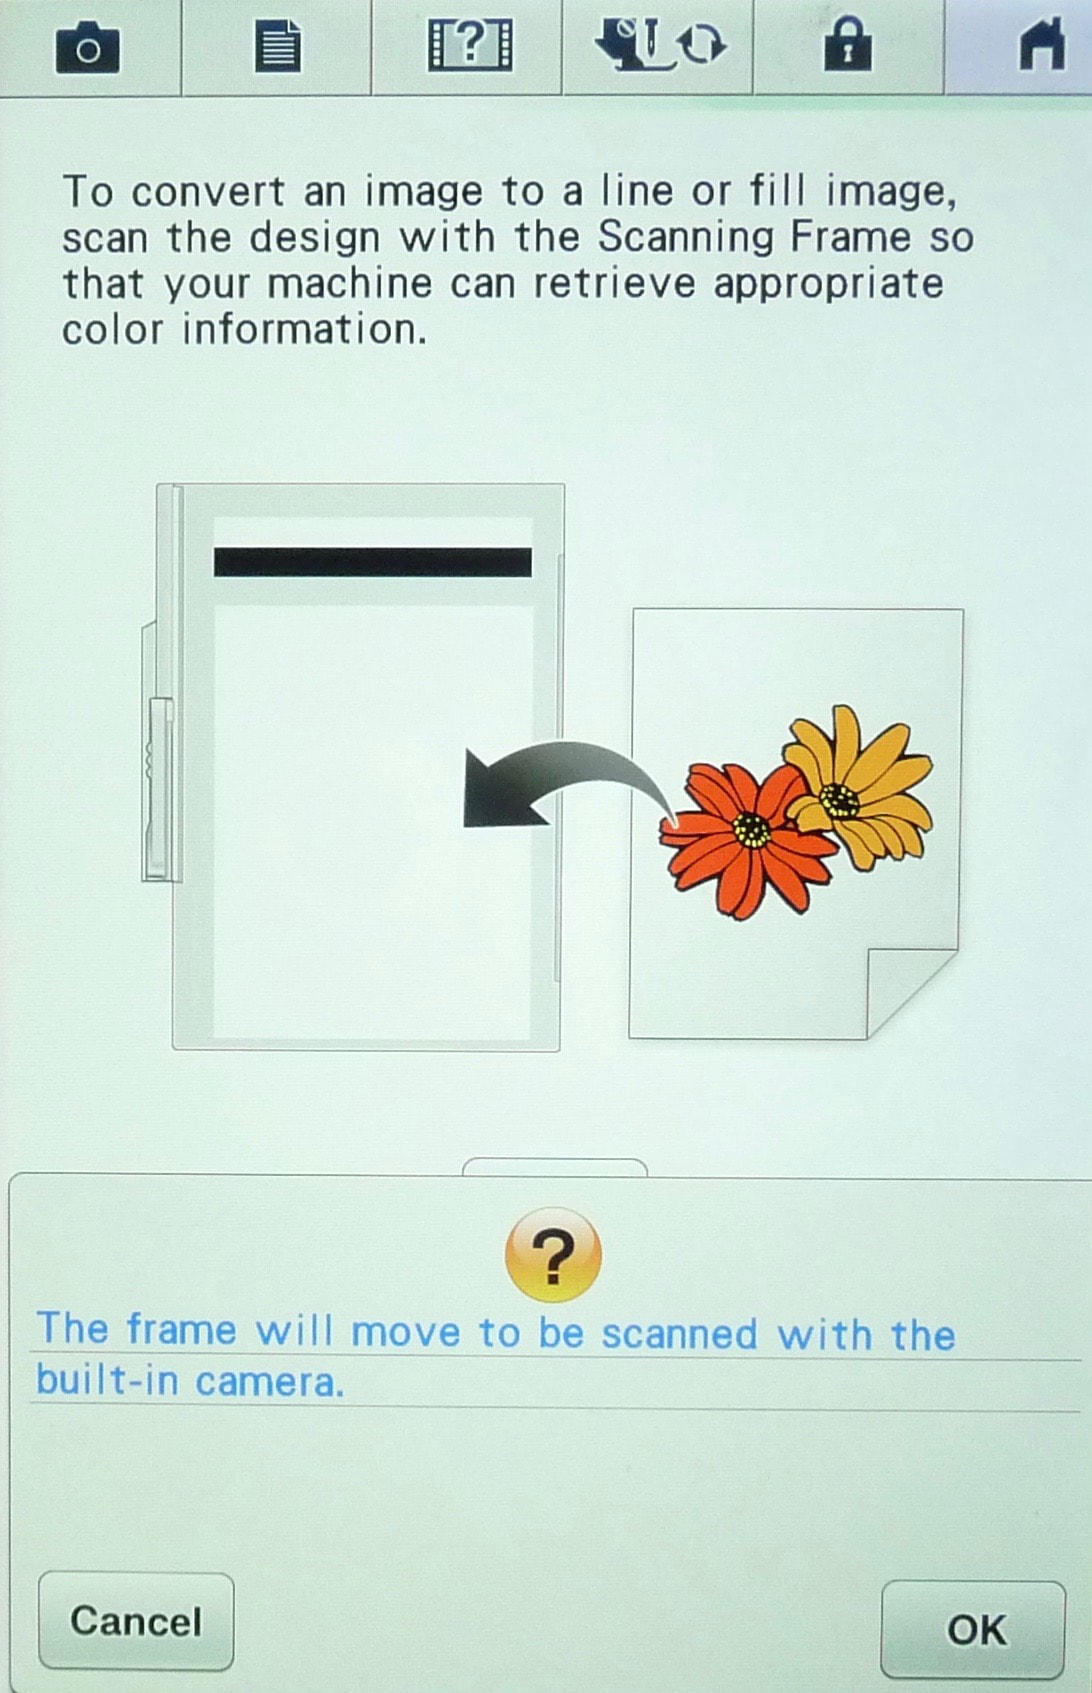
 The fabric image appears on the screen.
Picture
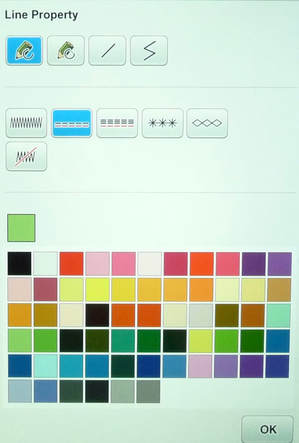
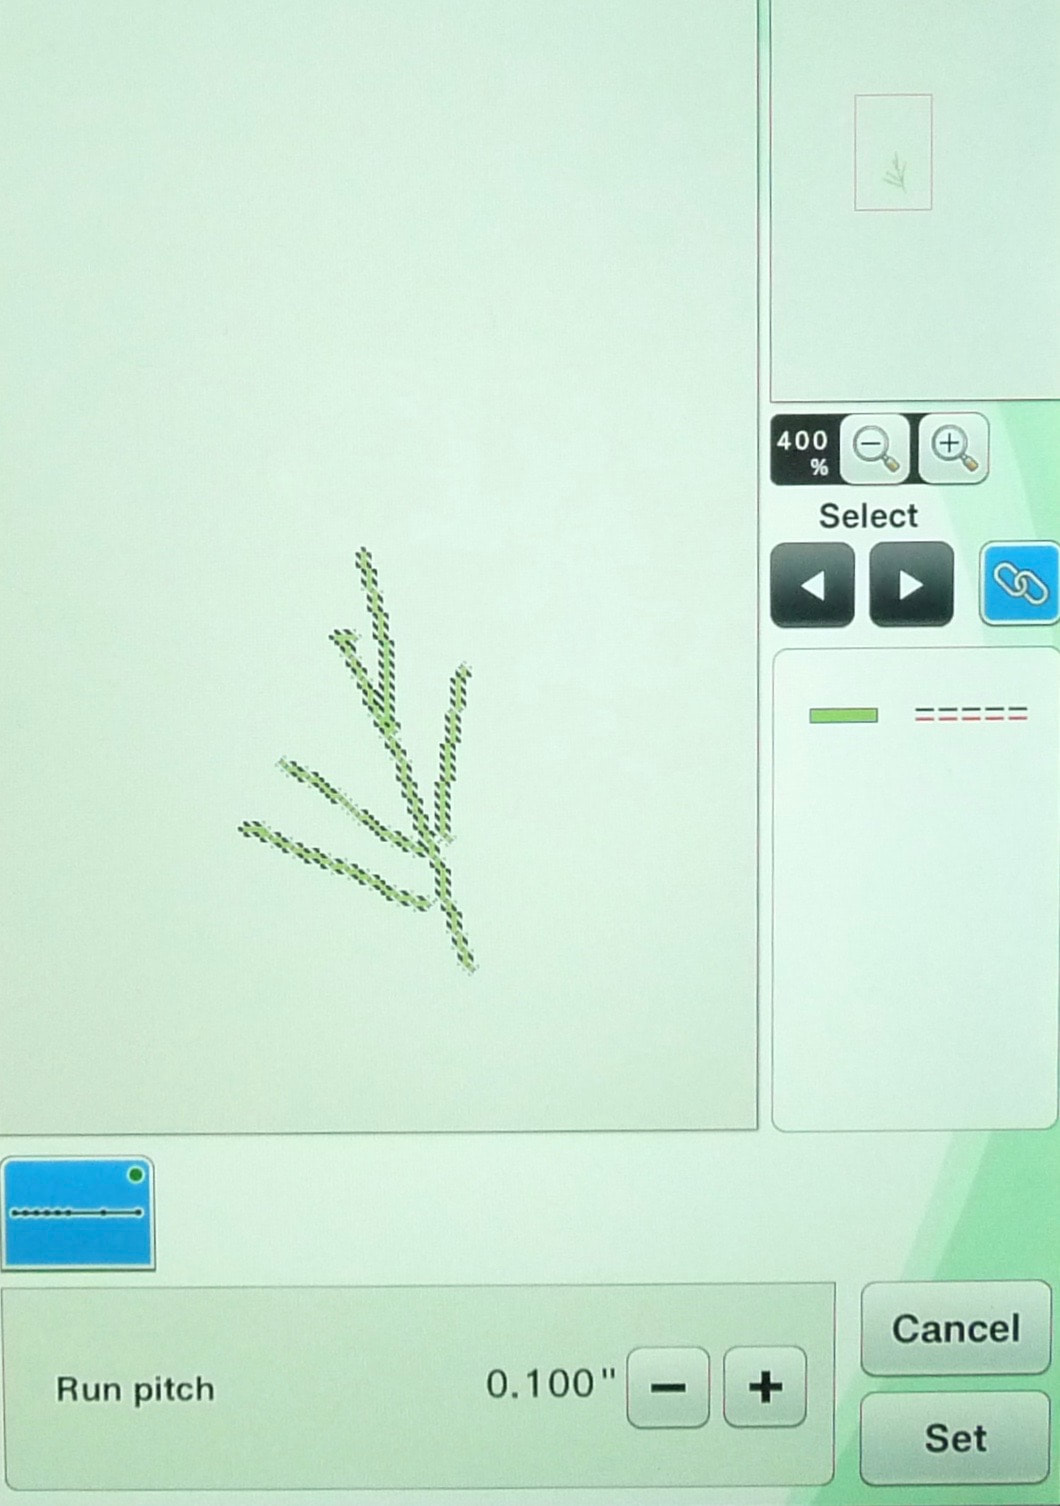
With the pencil tool highlighted, add lines by touching the line settings key. 
Picture
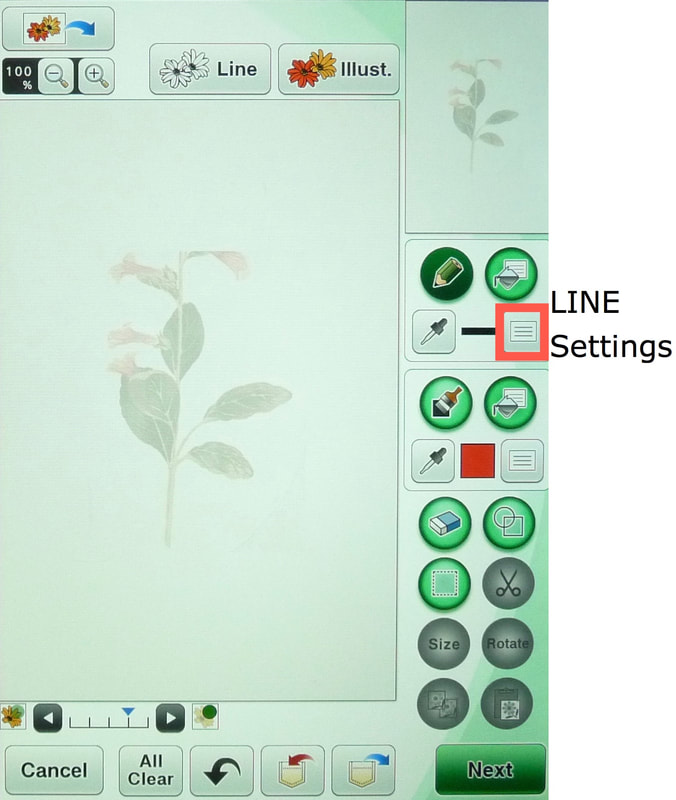
For the blouse project I used a combination of the first two stitch options, straight stitches and zigzag satin stitches.  You can choose any color you want to work with but it’s a good idea to use a color you can readily see.
Picture
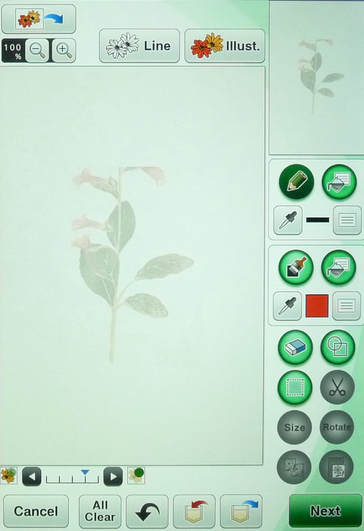
​Notice how the zoom feature helps you get close up for drawing on the screen. Increase the percentage, and then drag the box in the upper right hand corner of the screen directly over the section you want to work with.
Picture
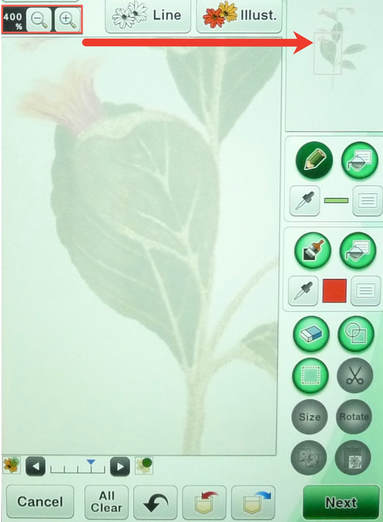
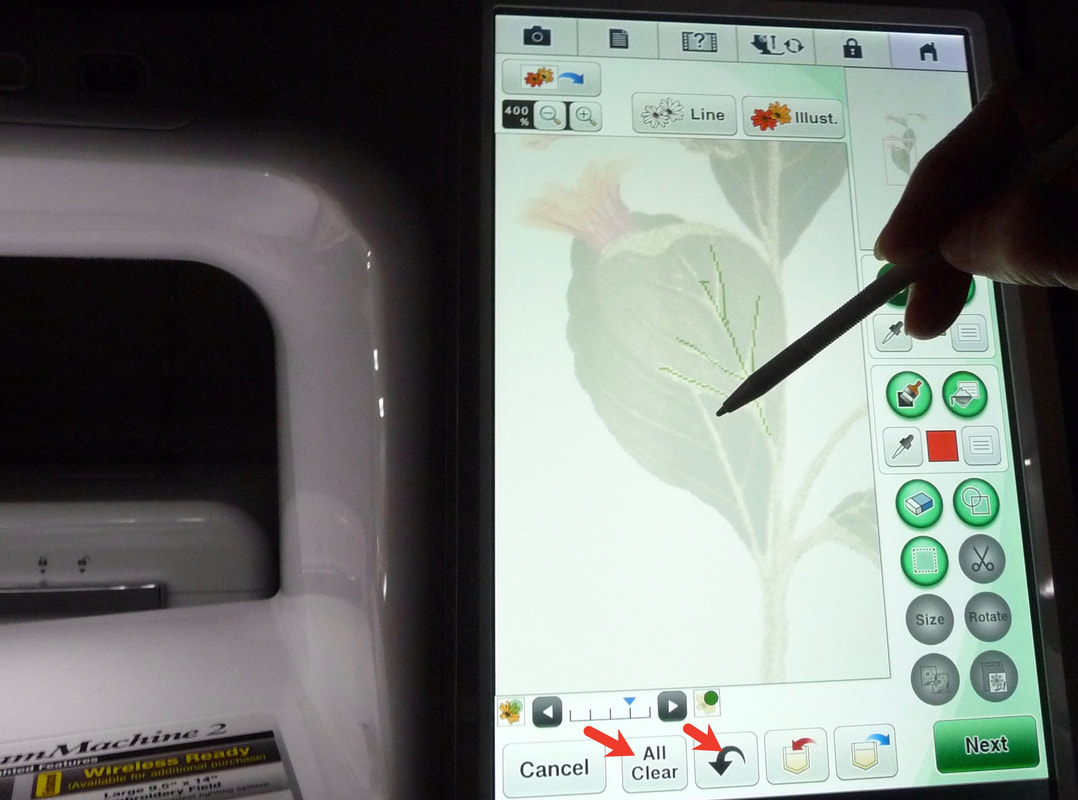
I like to use the stylus to draw the accent lines. Remember that you can use the UNDO key at any time to delete your last step, or touch All Clear to begin again.  
Picture
Touch NEXT and then touch Preview when you’re ready to set the stitches. Note: the optional Premium Pack II for the XV8500D and XV8550D included new and updated features for this type of design work. Review the Brother Dream Machine II Operation Manual Addendum for the most updated and complete instructions.
Picture
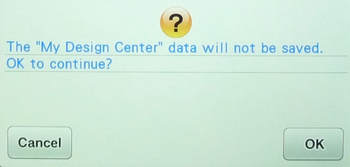
Touch Set to go directly to the Embroidery mode to test your stitches. You’ll get the Uh -Oh, is this okay type message you see here. Basically, the machine wants you to know that you can’t go back once you go beyond this screen. When you’re working on an actual project you’ll want to save the stages of your work, so you can go back and edit without starting all over again.
Picture
The process for adding satin style zigzag stitches is the same as you see here. You’ll simply select the zigzag in place of straight stitches. You’ll see that there are other options as well. I suggest you start with simple applique shapes, simple stitches, and then move on to more detailed designs once you have played with this a little bit.
Picture
I hope you’ll check out the entire blouse article for more ideas, information, and inspiration. Feel free to leave your comments below. Enjoy!
3 Comments
    Picture

    Author:

    Joanne Banko
    Brother Ambassador


    I'd love to stay in touch with you!

    Click Here
    and Sign up for
    ​Sewing News, plus tips, tricks, and notifications about new blog posts.

    Archives

    May 2025
    March 2025
    February 2025
    December 2024
    October 2024
    September 2024
    March 2024
    February 2024
    September 2023
    July 2023
    June 2023
    May 2023
    March 2023
    February 2023
    January 2023
    December 2022
    November 2022
    October 2022
    September 2022
    August 2022
    July 2022
    June 2022
    May 2022
    April 2022
    March 2022
    January 2022
    December 2021
    October 2021
    August 2021
    July 2021
    June 2021
    May 2021
    April 2021
    March 2021
    February 2021
    November 2020
    October 2020
    June 2020
    May 2020
    April 2020
    March 2020
    February 2020
    January 2020
    November 2019
    August 2019
    July 2019
    June 2019
    May 2019
    March 2019
    February 2019
    January 2019
    December 2018
    September 2018
    August 2018
    July 2018
    June 2018
    March 2018
    February 2018
    December 2017
    September 2017
    August 2017
    June 2017
    April 2017
    February 2017
    January 2017
    December 2016
    September 2016
    July 2016
    June 2016
    May 2016
    March 2016
    February 2016
    January 2016
    December 2015
    October 2015
    September 2015
    July 2015
    June 2015
    May 2015
    March 2015
    January 2015
    October 2014
    July 2014
    May 2014
    March 2014
    January 2014

    *As a believer in full disclosure, I'd like you to know that Blog posts may contain affiliate links for products and services I know and trust. Purchasing items through a link marked * results in a small commission for me, with no extra charges for you.

    Categories

    All

    RSS Feed

© Copyright 2025 by Joanne Banko. All rights Reserved