letsgosew.com
  • Home
  • Contact
  • Privacy Policy
  • Sign Up for Sewing News, Freebies, & Updates
  • Book Ordering Info - Wrapped in Embroidery by Joanne Banko
  • Joanne Banko's Blog
  • It's Sew Easy TV Online Blog
  • Machine Embroidery Survey
  • IT'S SEW EASY TV Videos & Bonus Files
    • It's Sew Easy TV_Series 1500
    • It's Sew Easy TV - Series 1600
    • It's Sew Easy TV_Series 1700
    • It's Sew Easy TV Series 1800
    • It's Sew Easy TV Series 1900
    • It's Sew Easy TV_Series 2000_COMING SOON!
    • It's Sew Easy TV Series 2100_COMING SOON!
    • NEW! Superstar Sewing Stitches
    • NEW! Classy Textured Cape
    • NEW! Baby Bath Wrap
    • NEW! Detachable Collar
    • Sew a Swimsuit
    • Machine Embroidered Garments
    • Kimono Blouses
    • Custom Covered Hangers
    • Sewing Beautiful Belts
    • Felted Flower Hat Trim
    • Sew a Waffle Weave Robe
    • Learn about Couching accessories!
    • Turn a Pashmina into a Trendy Topper
    • Machine Embroidered Reverse Applique
    • Machine Embroidered Knit Dress
    • Use Non-Stick Foot to sew a Custom Luggage Tag
    • Serge & Sew Broomstick Skirt
    • Machine Embroidered Western Jacket
    • Machine Embroidered Bobbin Work Pashmina
    • Embroidered Pajamas
    • Sewing Pearls and Sequins
    • Learn how to use the Fringe Foot
    • Quilted Pinwheel Patchwork Tote
    • Machine Embroidered Lace for Lingerie
    • Sewing Circles with a Circular Attachment
    • Sew with the Edge Joining Foot
    • Re-style Tops for Little Girls
    • Short Style Tip- Blouse Embellishment
    • Learn how to make pretty piping using the Piping Foot
    • Embellish with the Three Slot Cording Foot
    • Facebook Live Interview 12-4-2018
    • Machine Embroidery - Starter Tips
  • FREE Tutorials and Tip Sheets
    • NEW! Free Embroidered Snowflake Coasters
    • NEW! Tip sheet - 5 Reasons Quilters Need A Serger
    • NEW! Free In-the-Hoop Patch Pocket Design
    • NEW! Serging versus Sewing
    • FREE Project-Embroidered Gift Tag with Gift Bag
    • Tip Sheet - Pillow Pointers
    • Tip sheet_Sew Straight Laser for Seams
    • Embelishment Tips from dime V.111
    • Tip sheet - Shannon Embrace Double Gauze
    • Tip sheet - Fun with Fonts
    • Fabric Tip Sheet- Sewing Faux Suede
    • Tip sheet for Sewing & Embroidering with Metallic Thread
    • Fleece Ruana Pattern: As seen on PBS It's Sew Easy TV
    • Fabric Tip Sheet - Crepe Back Satin
    • Fabric Tip Sheet-Sewing Slinky Type Knit
    • Fabric Tip Sheet - Fleece
    • Fancy Footwork Tipsheet - About the Walking Foot
    • Fancy Footwork Tip Sheet_Basic Appliqué
    • Fancy Footwork Tip sheet - Ruffler Attachment
    • Fancy Footwork Tip Sheet - Narrow Hems with a Standard Foot
    • Fancy Footwork Tip Sheet - Non Stick Foot
    • Tip sheet - Machine Embroidery Pattern Connection Resources
    • Tutorial_Embroidered Greeting Card Project
    • Tip Sheet - Machine Set up for Shirring
    • Tip sheet - Snowman and Target Markers
    • Tip Sheet for Printing on Fabric
    • Tip sheet-Five Ways to Finish Fleece Blankets
    • T-Shirt Transformation Tutorial
    • Project- Serge a Little Girl's Sweet Summer Dress
    • Tip Sheet for Fleece Frame Shape Appliqué
    • Tip Sheet - Bobbin Work Sewing & Embroidery
    • Tip Sheet - Custom Covered Buttons
    • Tip Sheet - Liquid Stabilizers
    • Tip sheet - Appliqué with Brother XV8500D & ScanNCut
    • Project - Sheer Chiffon Wrap
    • Project - Pearl Trimmed Candle Ring
    • Tip Sheet -Mitered Satin Blanket Binding
    • Fabric Tip Sheet_Knit Know How
    • Sew a Sheer Wrap
    • Tool School Tip Sheets
    • ITH Project Planner
  • As seen in DiME Magazine - Photo Gallery
  • Sewing and Embroidery Events
  • About Joanne Banko

Serger Do's and Dont's

4/17/2021

2 Comments

 
Picture
As seen on It's Sew Easy TV show 2101-1
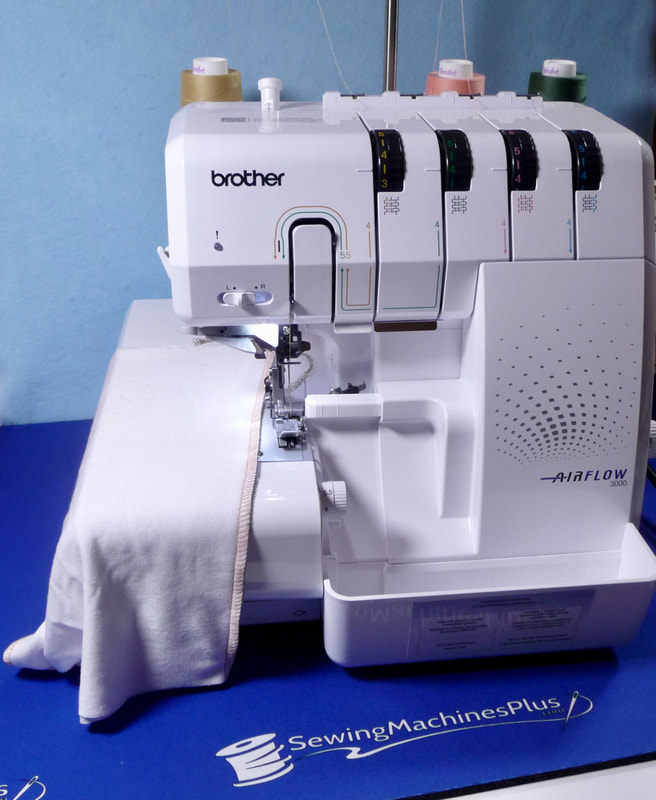
Is your serger collecting dust? Recently, I asked a group of sewing enthusiasts what they have been doing with their serger. One honest friend replied collecting dust! I'm afraid this is all too common, especially when someone is new to the world of serging and is intimidated by the dials, knobs, and general strangeness of this machine when compared to a sewing machine. After all, most of us can sit down at just about any sewing machine, thread it up and at least sew a straight seam.

Sergers, also known as overlockers, seem to look just a bit different and while there are some similarities between sergers and sewing machines, they are truly two different animals. 

In this post I'll share some simple Do's and Don'ts to follow. Whether you are a seasoned serger stitcher or a newbie when it comes to overlockers, I think you'll find a tip or two that will work for you.
Picture
Do's and Don'ts for Standard 4-thread Sergers
Serger do's - What you should do.
  • Use good quality synthetic cone thread. Lesser quality threads are made up of short fibers, break easily, and leave more fuzz. You can also use regular spools of sewing thread in your serger if you're in a pinch for color matching your fabric. In this case, I prefer to use a thinner thread such as Mettler or Guttermann.
  • Practice serging with threads that are color matched to your machine's tension dials to become familiar with making tension adjustments. 
  • Change needles frequently, using correct type & size for your machine. A universal size 14 is considered pretty standard but I sometimes use a size 11 or 12.
  • Insert needles in the proper direction and up as far as they will go. When removing needles use the appropriate screwdriver and loosen the screw just enough to remove the needle. Leave the screw at that semi-loose position until you put another needle in its place. If you tighten down the screw each time you remove a needle you may form a burr that can prevent needles form going all the way up into the hole.
  • For most sergers you will want to thread machine in this order: Upper looper first, Lower looper second, and Needles last. In general, the right needle is threaded first and the left needle second. If either of your loopers need to be re-threaded it is best to unthread the needle(s), rethread the looper(s), and then re-thread the needles last. If you don't want to unthread and re-thread  then you will need to make sure the needle threads are brought to the top of the throat plate and placed under the foot to the back of the machine. This is VERY important! If needle threads are caught behind a looper when your looters are re-threaded, the looper thread will simply break again. Following this rule will prevent lots of serger frustration.
  • Oil as specified in the manual. Clean face and lower area of machine with a soft brush. I like to use a 1-inch paint brush for cleaning the face and a stiffer nylon sewing machine brush to clean the blades and lower area. I also use a vacuum while brushing and avoid canned air.
  • Change needles regularly. You can usually "hear" a needle get dull. a dull needle makes a popping sound. Dull or damaged needles can also snag fabric and cause runs or holes.
  • When re-threading or starting off with a new stitch formation, take the first few stitches by hand to make sure the stitch forms and everything is running smoothly before using the foot control. 
  • Make some sort of obvious notation to serve as a warning if you disengage the cutting blade for a particular technique. I like to write a note on post it note paper that says Warning! Blade Disengaged! I leave it on my machine until I have re-engaged the cutting blade. 
  • Test your stitches on long scraps of the same fabric before sewing on the actual project. You will waste more thread with short test pieces as you'll have to chain on and off while testing. Use a long piece, stitch a few inches, check, adjust as necessary, and continue until you're satisfied with your adjustments. 
  • Avoid using pins with a serger or be sure to use them parallel to the seam, far away from the blades. Pins and serger blades are mortal enemies. Keep them away from each other at all costs! 
Serger don'ts - What you should NOT do.
  • ​Turn the handwheel backwards once the needles have been threaded. You will tangle the threads and make a mess. 
  • Pull hard on the fabric from the front or back. This can cause the needles to hit the loopers, causing burrs on one or both. 
  • Sew beyond the edge of the throat plate when the cutting blade has been disengaged. Remember the warning system described above.
  • Re-thread the machine without following the proper threading order. Remember the rule about always threading needles last!
  • Use inferior quality threads or old cotton threads. Cotton thread is usually a poor choice for any serger project. Tension on serger thread can make cotton snap and break easily.
  • Neglect oiling! Most sergers require some, if not more oiling than you may think. If your serger has been sitting for a while be sure to oil before using. Again, check your manual for details. Too little oil is not a good thing but too much is not good either. I like to periodically oil the blades of the serger with a cotton swab. This helps clean off residue and makes blades last longer.
  • Serge at an erratic pace, meaning fast, slow, fast, slow. Instead, stitch at a steady, even pace. Stitching at an even pace will make the threads jiggle less and the tension will be more even. This is particularly important on sergers that are more in the budget range price wise.
My final don't? Don't let your serger collect dust. Stay tuned for more tips and tricks for using your serger to the fullest. CLICK HERE and check out this Let's Go Sew tip sheet and learn more about how sergers and sewing machines differ.

Want to see a video with tips for when to sew and when to serge? CLICK HERE to watch Sew it or Serge it, as seen on It's Sew Easy TV show 2101-1. On this show you'll see me demonstrate a variety of techniques using both the sewing machine and serger.
2 Comments

Walkin and Rollin Feet - Even Feed Accessories Make Your Sewing Easier, And More Efficient!

4/10/2021

6 Comments

 
Picture
Brother Ambassador
As a Brother Ambassador, I enjoy helping sewing enthusiasts make the most of their machines and the available accessories that come pre-packed with the machine or are found as optional accessories. If one of these accessories interest you, I suggest checking with your local sewing machine shop to see what's available for your make and model.

We answered lots of questions during the show, and I welcome any additional questions in the comment section at the end of this post.

Below, I'd like to provide links to a few extra resources to compliment information presented on the show.
More About the Walking foot
Picture
For more details on the walking foot I invite you to CLICK HERE to download Let's Go Sew Tip sheet titled the Wonders of the Walking Foot.

What's this?!? A Newfangled Walking Foot!
SA101 - The Brother Dynamic Walking Foot
Picture
Designed for computerized machines with a 7mm throat plate opening, you'll learn more about what makes this foot special during the show. One big advantage is the ability to sew decorative patterns with this foot. Standard walking feet were only designed to sew forward with a straight stitch or a normal zig zag. Below you'll find a link to the actual manual that comes with the foot:

SA101 Dynamic Walking Foot Manual

This manual shows how to attach this low shank foot to a high shank Brother machine, using the "S" adapter. Learn more about this adapter HERE in a previous Brother Stitching Sewcial blog post.

​Looking for some videos showing the Dynamic foot in action? Check out these links form the Brother Support Sewing YouTube channel:
Set-up Basics for Dynamic Walking Foot
Needle and Thread Combinations
for Sewing with Dynamic Walking Foot

Adjusting Decorative Stitches for use with the Dynamic Walking Foot

Next up, the Digital Dual Feed Foot
The Digital Dual Feed Foot, also known as the Brother MuVit Foot, was included in the tutorial. Below, you'll find a video showing basic set-up for this attachment from the Brother Support Sewing YouTube channel.
This foot has several accessory options that snap on, including a couching attachment for embellishment with cording and yarns, an open toe sole, and 1/4-inch sole with guide, and a Stitch-in-the-Ditch sole. You'll also find quilt guides that attach to the foot. There's a lot to learn about this very unique attachment. I invite you to explore the links below to learn more.
Getting to know the MuVit Dual Feed Foot Part One
posted on the Brother blog CLICK HERE

Getting to know the MuVit Dual Feed Foot Part Two
Accessory SA206 Quilting Guide Set

posted on the Brother blog CLICK HERE

MuVit Dual Feed Foot
Accessory SA204 
Ditch Quilting Foot
posted on the Brother blog CLICK HERE

Quilt-in-a-Pillow created with various
MuVit Dual Feed Foot accessories

posted on the Brother blog CLICK HERE​

Coat with couched collar as seen on
​It's Sew Easy TV show 1405-3,
​featuring Dual Feed couching attachment.
CLICK HERE for a tip sheet that coordinates with the above video.

I hope all of the above info helps you make the most of whatever "walkin" or "rollin" foot is available for your machine. Feel free to leave your comments and questions below.
6 Comments

Sew With Your Feet - Explore the wonders of eight different Accessories

4/1/2021

8 Comments

 
Hello sewing friends! This blog contains highlights of a presentation that took place during the fourth anniversary celebration of the Quilts and Lace sewing shop in Melbourne Florida.

I had a virtual meet-up with Beth Sweet, owner of Quilts and Lace, as customers and friends shopped and celebrated in her store on April 1st, 2021! If you missed the live show, you can catch a replay HERE on Facebook. Below you'll find a re-cap of many of the tips I shared for using eight different sewing machines accessories. I matched up each accessory with a blue hyperlink link to a project or set of instructions. Simply click the links to learn more about each accessory. Enjoy!
Picture
So many accessories for so many different machines! Follow along as I outline each one, sharing projects and ideas for using these accessories for embellishment and utility sewing. Remember, there's a tool for every task! Knowing the power and potential of each accessory will help you experience successful sewing! These tools make sewing faster, easier, and more accurate so you can have more fun when you sit down to sew!

The Felting Attachment
SA280
Picture
This flower accent was created with wool felt as the base, with wool roving and yarn felted into the base. A big center bead and feathers finish off the accessory.

As seen on It's Sew Easy TV show 1411-2. You can watch this show on my YouTube channel HERE.
Picture
​To set up for the felting attachment, barbed needles replace the machine needle and the machine is fitted with a new bobbing cover and dust cup, plus a finger guard that serves as a feeding attachment for felting with yarn. All the pieces and parts you need for machine felting come inside the box, including extra needles.

This accessory is specifically made for certain machine models. I can count a combination of about ten past and current Brother models compatible with the felting attachment. Brother dealers have the most updated information with a list of models that work with this attachment.
Picture
Pay attention to the machine set up outlined in the manual included with the package. You won't be using any thread in the top or bottom, and the bobbin case gets replaced with a special cover and a small cup to catch excess fuzz. Selecting stitch C-01 and checking the position of the barbed needles is essential before you start felting.

Felting is really a very simple process. You may have seen the tools used to create felting by hand. Machine felting is much faster and doesn't require the muscles it takes to felt using the hand method.

For felting, fibers, yarns, and materials are pushed into a base as you layer them and move across the base as if you were darning or doing free motion stitchery.

Here is a list of suitable fabrics for the base:
  • Craft Felt
  • Wool Felt
  • Denim
  • Fleece
  • Silk Dupioni
  • Lutradur
  • Non-tear Stabilizers
Don't be afraid to experiment with a variety of combinations.
​
​For more information, you'll find a detailed video presented by Quilts and Lace expert instructor Aira Kekäle on their Facebook page HERE.

Five Foot Embellishment Pack
Picture
This box includes five fabulous feet in one package! I reach for many of these feet on a regular basis. Let's talk about one at a time. 

#1 Gathering Foot
Pajama Bag with Ribbons and Ruffles
Picture
Picture
The gathering foot is the only one in this kit that attaches with a screw. It's a low shank machine, so you'll need the "S" adapter if you have a high shank Brother.

Th bottom of this foot is designed to push against the feed dogs on the machine.  When combined with an increased upper tension and a stitch length of 3-4, light weight fabrics are evenly gathered with this foot. If you'd like to gather one layer while sewing to a second, un-gathered layer, simply place layer to be gathered against the feed dogs and guide flat, un-gathered layer into the slot on the foot. Note that these gathers are not adjustable when finished.

Tip: Keep your index finger behind the foot as the fabric strip advances to push in slightly more gathers.

#2 Non-Stick Roller Foot
PVC Apron
Picture
The Non-Stick roller foot is designed to help in what I call "sticky situations." There are times when a regular presser foot gets stuck on unusual fabrics such as vinyl, leather, suede, and waterproof tablecloth material.  

Materials like the PVC used for the apron have a vinyl coating and this slick foot will glide and roll right across the fabric without sticking. It's ideal for topstitching, or any time you are sewing against a surface that clings to the standard foot. 

Tips: For sticky fabrics that must be sewn against the feed dogs, layer with a piece of tear away stabilizer for smooth sewing, and carefully tear away when finished. Consider making your own vinyl coated fabric using Therm-o-Web Iron-on clear adhesive vinyl. 
#3 Stitch-in-the-Ditch Foot
Patchwork Placemat
Picture
Picture
The Stitch-in-the-Ditch foot has a long, prominent blade directly in the center of the foot. It's designed to run right along the point where the seam is joined, also known as the ditch, or well of the seam. The blade is springy so it can cross over layers with seams.

I used this foot to anchor the layers of my black and white pieced placemat, sewing each square where the seams are joined together. By the way, the placemat itself is made from cut up napkins, decorated with rows of fancy stitches. I wanted my coordinating napkins to match so I bought extra napkins and used them as fabric.

This is a "must have" foot for anyone who does quilting or patchwork. 

Tip: Most of the time this foot is used with a center needle straight stitch, but you can move the needle to a different position to sew  a specific distance from the seamline.

#4 The Edge Joining Foot
Pashmina with Ribbon Trim
​As seen on It's Sew Easy TV show 1703-1
Picture
I love decorating pashmina scarves with embroidery and added ribbon! My book titled Wrapped in Embroidery includes three pashmina scarves with added accents from embroidered fabric and silk ribbons. I created another version for the TV show, using the edge joining foot to easily and accurately add ribbon trim. I lined up the guide on the foot with the edge of the ribbon and moved the needle off center for even edge stitching on the ribbon.

​Watch the entire show HERE on my YouTube channel.
Picture
This foot can be used with both utility and decorative stitches. It's perfect for joining multiple strips of fabric, trim, lace, and ribbon. The completed strip below was used as a border for a pillowcase.

See more about the edge going foot HERE on It's Sew Easy TV show 905-3.
Picture

#5 Piping Foot 3mm - 6mm
Pretty Piped Potholders
Picture
This newer style piping foot allows for piping cord that's thicker than the standard dressmaker weight found in packages. It's easy to make your own piping with fabric and cording 3mm to 6mm in diameter. The potholder projects shows how to make bias trimmed piping from a small square of fabric.

​Notice the dual channels on the bottom of the foot. These channels come in handy when you want to sew your piping on the right or left side as you position the layers at the machine.
Check out the piped chair cushion project for It's Sew Easy TV show HERE. I think you'll find the decorative piping technique an interesting way to perk up home decor projects.
Picture

Adjustable Blind Hem Foot
​SA133
Take it Anywhere Tote
Picture
Naturally, the blind hem foot work perfectly for standard blind hems. The adjustable guide helps fine tune the foot for a wide variety of fabric types and weights.

I like to use this blind hem foot as adjustable edge guide for topstitching and edge stitching. You can't see it in the photo, but this foot helped me stitch the tote very close to the finished edge, giving a fine finish and keeping the lining layer tucked inside the tote bag.

I also used this foot to stitch the self-fabric fish on the double layer flannel baby blanket shown below:
Serge & Sew Baby Blanket
Picture

Picot Foot
​SA149
Children's Custom Hanger Cover
Picture
The Picot foot is designed to create a narrow rolled hem on lightweight fabrics. The small scroll on the foot rolls the raw edge under as fabric is fed into the slot. While a standard rolled hem foot is suited for a straight stitch, this foot is designed to be used with a small zig zag stitch. The deeper groove on the bottom lets the fabric slide under the foot while the hem is formed.

​Check the settings shown below and you'll see that the upper tension is increased to pull the zig zag over the rolled edge. The resulting hem has a scalloped appearance. 
Picture
I hope you enjoyed this summary of eight different Brother accessories! Feel free to leave comments or questions below.
8 Comments

Sew Tell Me Interview with Jaime Ruckel from The Sewcial Bee

3/27/2021

0 Comments

 
Picture
Conversations with Industry Experts and fellow Sewing and Embroidery Enthusiasts just like YOU!
This is a followup to the live show presented on the fourth Monday of March. Each month you can look forward to a Live YouTube show on my Let's Go Sew with Joanne Banko YouTube channel HERE. If you haven't already, I encourage you to subscribe and get notifications for future shows.
​
Monday's show featured Jaime Ruckel. Jaime is known for running her own Sewcial Bee Facebook page and The Sewcial Bee Etsy shop, where she sells some very unique patterns, including slippers for the entire family, specialized caps to sew for welders, bikers, and more! Jaime is also founder of the Facebook Sew it's for Sale group, where fellow sewing enthusiasts can buy and sell sewing related items. It's a popular spot for finding fabric treasures and for selling your stash.

Jaime and I had a delightful conversation that lasted well over an hour. ​Live chat during the show was full of active, fun, and friendly, folks! 

This
post includes a few highlights and links we talked about during the show. You'll also find the video posted here too. If you come up with any questions while watching please feel free to leave them here and I'll make sure they get answered.
Watch the replay below!

Lots of tips, tricks and resources were part of the conversation, not only from Jaime and myself but also from those who joined us. Here are some highlights:

Jaime's favorite 1 yard T-shirt top:
Ellie and Mac patterns - Everyday Tee pattern

We talked about sewing undergarments and swimwear. Here is a link to a great resource for notions including rubber elastic: SewSassy.com

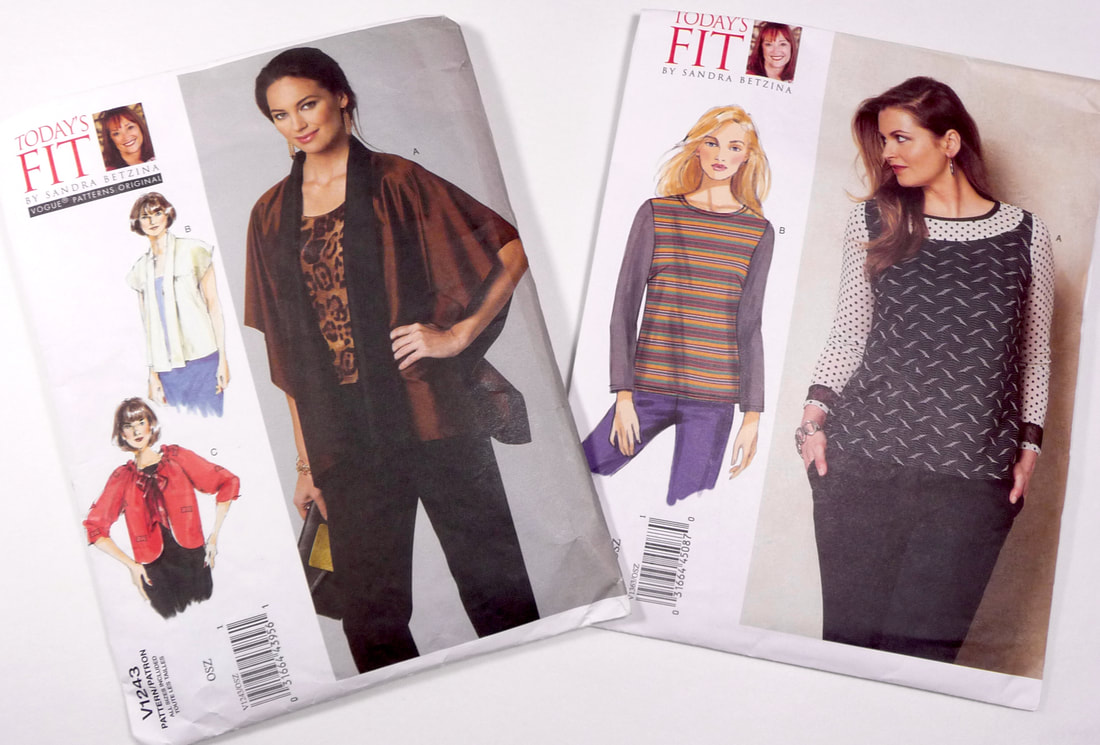
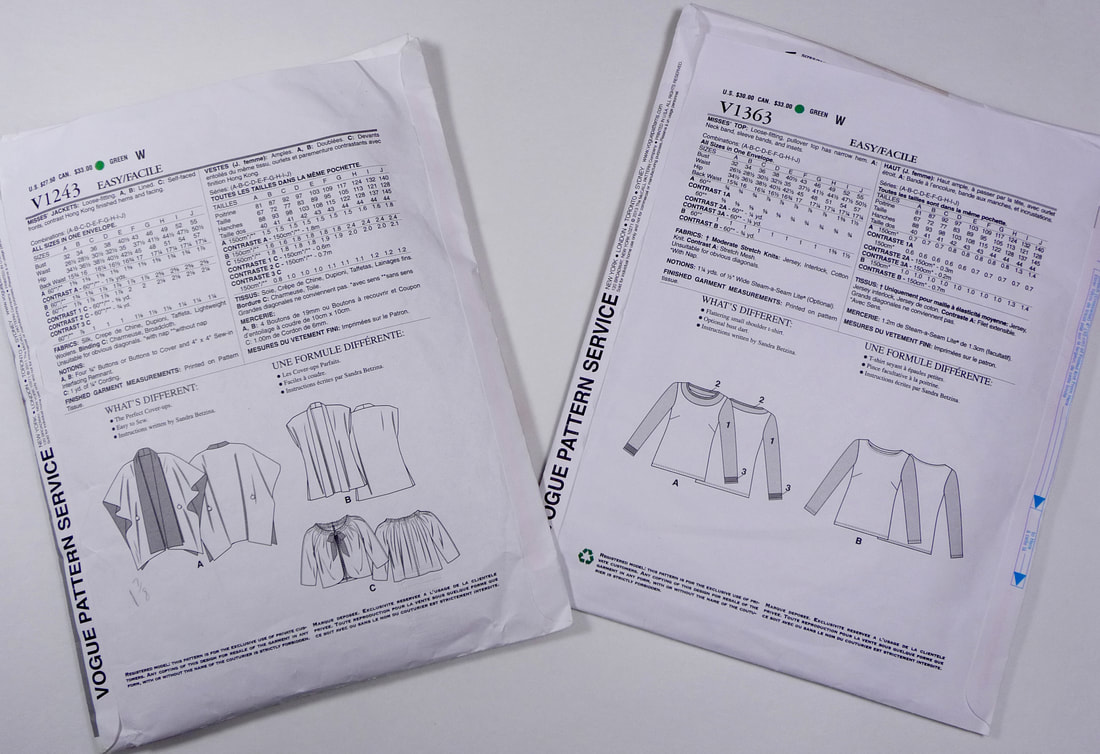
Favorite leggings patterns came up as a topic and two were mentioned, Sandra Betzina's Vogue pattern 1376 and Emily Thompson's Life Sew Savory leggings pattern HERE.

Special pressing tools came up, made by Cheryl Avery's husband. You can find out more directly when you visit Jaime's The SEWcial Bee Facebook page.

Last but not least, the burrito method for making pillowcases came up and I promised to share  instructions I contributed to the Brother blog as a Brother Ambassador. You'll find a full post HERE.


Looking to connect with Jaime? You'll find her at the links below:

Etsy shop: 
www.etsy.com/shop/TheSewcialBee

Facebook The SEWcial Bee site:
​www.facebook.com/SEWcialBee/

Private SewItsForSale Facebook Group:
www.facebook.com/groups/sassysewingsales/about

(Note: You'll need to request being added to the group)

You'll find Jaime's YouTube channel HERE

Many thanks go to Jaime for being such a wonderful guest!
0 Comments

Let's Go Sew Snippets and Sewing News

3/21/2021

1 Comment

 
Picture
Sew with your feet!!! Accessory feet can make ordinary sewing tasks easier and more mistake free. Bit by bit and blog by blog, I seek to share tips and tricks for accessories that help you enjoy your sewing time each and every time you sit down to sew. Let's start with a peek at the possibilities of sewing with a Stitch Guide foot.
Picture
You'll find this foot with guidelines highlighted in red and labeled as the Brother SA189 "V" foot. This particular foot was designed to work with a former top of the line Brother Quattro series and a special feature known as automatic edge sewing. Since this is past history, I won't go into all the details but if you had or have a Quattro, this foot came packed in your standard accessory box. Details on using this feature begin on page 140 of the original Quattro manual.
Picture
The almost identical twin of the V foot is the Brother SA160 Stitch Guide Foot, as seen the photo above. They both work the same, but the red lines are really nice to have for extra visibility. Lines are spaced 2mm apart, giving you lots of options for seams and topstitching. You'll find that this snap-on foot fits many machines. If in doubt, consider heading to your Brother dealer with your machine in tow and give it a trial fitting. CLICK HERE to visit the official Brother blog and read a full post on the many ways to use this foot. It can help you sew straight in a variety of sewing situations. 

​I've seen a generic version of this foot too, sometimes called a ruler foot. 
The big wide world of sewing!
Picture
The sewing world is full folks that are interesting, fun, and full of information! Some have a platform to share their enthusiasm and others have a smaller sphere of outreach and influence. I count myself one of the fortunate ones to serve both as a free-lance sewing educator and also play a role as a Brother Ambassador.

Along with regular visits to letsgosew.com, Many of you have been following my posts on Stitching Sewcial, the official Brother blog. In actuality, I've been designing projects for Brother for many years, contributing monthly content for their presence on the web since 2011.

Brother is in the process of revamping Stitching Sewcial to make it easier for you to access all your favorite sewing, embroidery, quilting, and crafting projects, free designs, and tutorials. Stay tuned for more news coming soon! In the meantime, I'd love to hear your thoughts on future projects and tutorials. What accessories and machine features would YOU like to see me expound on? Leave your comments below or drop me a note HERE.

Speaking of fun folks in the world of sewing, I recently connected with Becky Thompson, the creative genius behind Power Tools with Thread.
Picture
Becky's enthusiasm and energy shine through in all her YouTube videos as she shares her quilting expertise, and teaches tricks on machines like the ScanNCut and ten needle embroidery machine. 
Picture
She reached out to me recently with the idea of doing a book give-away. Sure enough, one day her video popped up with Wrapped in Embroidery in her hand. Becky and I plan to collaborate on some things in the future. You can be sure I'll keep you posted. In the meantime, click the pic you see above and check out her channel.
While we're on the topic of YouTube, last month was the debut of the Let's Go Sew live show called Sew Tell Me. Watch for a new show going live the fourth Monday of each month at 7PM Eastern Standard time on my YouTube channel HERE.

If you missed the first show where I interviewed Reen Wilcoxson, you can read all about it and watch the video HERE.

My special guest on Monday March 22, 2021 is Jaime O'Berry Ruckel,  The Sewcial Bee Etsy shop owner, pattern designer of some very unique and special items, and founder of the Facebook Sew it's for Sale Facebook group. Hope you can make it to the live show but if not, that's okay. I'll post a link to the replay for you next week.
Okay! I'm ready to knot this thread and tie off this post. Happy Sewing!
1 Comment

Top Tips For EmBellishing With Machine Embroidery

2/27/2021

0 Comments

 
Recently, I had the opportunity to be a guest on Eileen Roche's weekly live show. We had a great time chatting about machine embroidery, a favorite topic for both of us!

​I invite you to watch the show to
 see and hear some behind the scenes stories from the Set of It's Sew Easy TV, along with tips for planning, prepping, and achieving perfect placement for your own embroidery design projects! 
Enjoy the show!
0 Comments

Sew Tell Me With Reen Wilcoxson Of Embroidery Garden

2/27/2021

2 Comments

 
Picture
Conversations with Industry Experts and fellow Sewing and Embroidery Enthusiasts just like YOU!
Picture
Sew tell me is back! Formerly presented in written format, the show now comes to you via a Live YouTube show, with the replay on my YouTube channel.

My debut guest for this new show is none other than my friend Reen Wilcoxson. Specializing in machine embroidery designs created for stitching entirely in the embroidery hoop, her designs stitch out so that little to no finishing is required at the sewing machine. This makes her designs ideal for both newbie embroidery enthusiasts and seasoned stitchers alike! embroiderygarden.com website is a treasure trove full of downloadable designs for machine embroidery enthusiasts!  
Reen and I worked together at a supersized embroidery event in Louisiana several years ago and made fast friends. 
Picture
Here we are on the set of It's Sew Easy TV where Reen presented some of her in-the hoop projects to the TV show audience for show 1704.

I'd like to invite you to watch the one hour show where I had the chance ask Reen about her sewing life both past and present. Highlights include behind the scenes stories plus tips and tricks to help you enjoy embroidering in your own sewing space.

Please feel free to leave your comments about the video below. You’re welcome to leave your questions for Reen too! She promised to answer any that roll in.
Here is the video, enjoy!
2 Comments

Snack Mat with Sweet Hearts And A message in the Middle

2/10/2021

22 Comments

 
Picture
Example stitched with the Brother Luminaire 10 5/8-inch X 10 5/8-inch hoop. Finished snack mat measures approximately 10 ½-inches wide X 8-inches long.
I designed this snack mat as an In-the-Hoop embroidery project. Project features a free scrolling heart design download courtesy of Brother sewing machine company, along with the free multi-sized designs I digitized in the Brother PE Design 11 program. You'll find links to files and step-by-step instructions below. Are you ready? Lets go sew!

Picture
You can read about my first version of the snack mat, produced for the Brother blog as a Brother Ambassador.

​View instructions and download the scrolling heart design shown by clicking on the image below to visit the blog. 


Now, let's get started with steps for creating my In-the-Hoop Snack Mat.
Step 1. Download the free design files from Let’s Go Sew. 
Note: This mat comes in three sizes in the Brother .pes format. You’ll need to use conversion software for other formats. Be sure to check each file to see if it's compatible with your hoop size. No software? Designs in Machine Embroidery has a free program you can download. CLICK HERE if you are interested in more information on their Embroidery Tool Shed program.

Important: Depending on hoop size files may stitch in a vertical layout.

 * * * * * * * * * * * * * * * * * * * * * *
Picture
SIZE A files combined.
Approximate finished size for size A: 10" wide X 8" long.

Size A files for 10 5/8-inch X 10 5/8-inch or 10 5/8-inch X 16-inch hoop:

LGS_Snack Mat_SizeA.pes
LGS_Snack Mat Outline_SizeA.pes
lgs_snack_mat_sizea.pes
File Size: 40 kb
File Type: pes
Download File

lgs_snack_mat_outline_sizea.pes
File Size: 8 kb
File Type: pes
Download File


 * * * * * * * * * * * * * * * * * * * * * *
Picture
Size B files combined.
Approximate finished size for size B: 9 1/2" wide X 7" long.
​

Size B files for 8-inch X 12-inch hoop:
LGS_Snack Mat_SizeB.pes
LGS_Snack Mat Outline_SizeB.pes 
lgs_snack_mat_sizeb.pes
File Size: 72 kb
File Type: pes
Download File

lgs_snack_mat_outline_sizeb.pes
File Size: 9 kb
File Type: pes
Download File

 * * * * * * * * * * * * * * * * * * * * * *

Picture
Size C files combined.
Approximate finished size for size C: 9 1/4" wide X 6" long.
​

Size C files for 6-inch X 10-inch hoop:

LGS_Snack Mat_SizeC.pes
LGS_Snack Mat Outline_SizeC.pes
lgs_snack_mat_sizec.pes
File Size: 55 kb
File Type: pes
Download File

lgs_snack_mat_outline_sizec.pes
File Size: 7 kb
File Type: pes
Download File

Step 2. Cut a piece of solid or tone on tone print fabric to fully fit in your hoop. Cut a matching piece of 987 Pellon Fusible craft fleece and fuse to wrong side of fabric.
Step 3. Cut two additional pieces of fabric for creating the envelope style back closure. Fold each piece in half crosswise and press. See fabric sizes for each snack mat file below:
  • Snack Mat Size A: 13" wide X 9" long, fold to equal 6 1/2" wide X 9" long.
  • Snack Mat Size B: 12" wide X 8 1/2" long, fold to equal 6" wide X 8 1/2" long.
  • Snack Mat Size C: 12" wide X 7 1/4" long, fold to equal 6" wide X 7 1/4" long.
Step 4. Download and transfer both snack mat files sized for your hoop, along with the free Brother February 2021 embroidery design shown below. Click on image to download file from blog.brothersews.com.
Picture
Step 5. Create a combination design as follows:
  • Begin with Snack Mat file sized for your hoop. this file includes the four rectangular fill shapes.
  • Add hearts to blank fabric areas, mirror imaging designs as needed and centering each one in the blank spaces.
  • Add desired lettering in the center.
  • Add the outline file last. Note that the thread color for the outline file is blue. You'll want to stitch this file with embroidery thread that matches your fabric.
See example of complete design combination below.
Picture
Step 6. Hoop fabric backed with fleece with right side facing up. 
Picture
Embroider completed design for front side of snack mat, stopping before final rectangular outline. Tip: For best results stitch fancy fill sections at 600 stitches per minute or less when possible.
Picture
Step 7. Center folded pieces over the embroidered front, overlapping by 1-inch in the middle. Note: Excess covers the design, leaving room for seam allowance. Use low tack, removable  tape to secure folded edges.  It’s important to keep folded edges flat so embroidery foot doesn’t catch while stitching. Stitch final outline. 

Tip: 3M Transpore tape is my preferred low tack tape. It's easy to find, you can stitch right through it if necessary, it's reusable, and removable. Just remember to take it off the fabric as soon as you're finished stitching.
Picture
Step 8. Time to finish! Carefully peel away tape. Remove fabric from hoop. Trim seam allowance and clip corners to reduce bulk. Turn right side out through back opening. Press and then topstitch close to the edge. You are finished! Enjoy!
Picture
22 Comments

Sew Some Great Gift BAgs

11/28/2020

7 Comments

 
Picture
Wearing my Brother Ambassador hat, I recently contributed this project to the official Brother Stitching Sewcial Blog. I named the bag you see in the photo above the Confetti Gift Bag. It's easy and fun to make with little more than a strip of organza, snippets of fabric, and strands of colorful thread! You can re-size this bag and use it for hostess gifts, thank you gifts, party favors, and more!

Instructions and a full tutorial are available when you CLICK HERE.

Wrapping gifts in something other than standard tissue and fancy paper has always been a "thing" for me. I've used colored comic strips from the newspaper, brown butcher paper decorated with stamps and stickers, and even fabric yardage in place of gift wrap. How about you? It would be fun to hear similar tales for recycling and using ordinary wrappers as coverings for gifts hidden inside.  

In the last few years, I've challenged myself to make some bags that are worthy of being kep and reused, or at least put on display for a period of time. Today I want to share a few more from past archives, in the hope of inspring you to make some of your own.

​Below you'll find some photos and links to full instructions. Most of these are from the archives of Brother Sews projects. When you see specialty feet mentioned, check your machine options to see if you have similar accessories to tackle specialty sewing tasks.
Picture
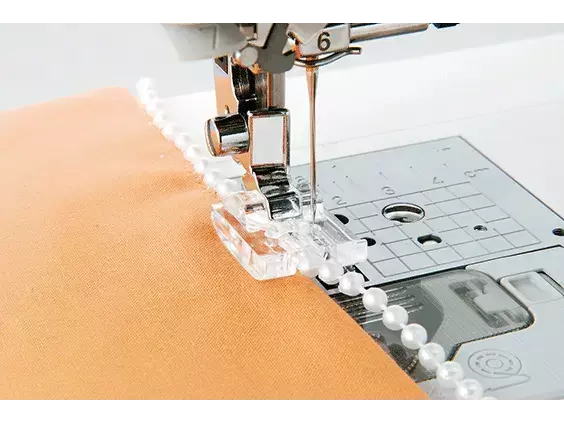
This Paisley Pearl trimmed bag features the two accessory feet, the SA150 Pearls & Sequins foot and SA184, Edge Joining foot. This one is a super easy to make! CLICK HERE for instructions.

Picture
I had so much fun decorating this one! It's almost like making a gingerbread house. Perfect for "housing" (sorry, I couldn't resist the pun) home-made goodies, this bag is sure to be a keeper. All you need is a bit of fabric, a few trims, and a piece of felt. CLICK HERE for instructions.

Picture
This bag and tag project shows you how to make an in-the-hoop tag using the Brother BES software program. The tag design is one of the built-in appliqués. It's perfect for a quick embellishment on a simple bag or any holiday package. You'll find instructions HERE on my site.

I hope these bags brighten up your holidays! Let me know if you plan to create your own pretty package wraps for gift giving season.
7 Comments

Sewing in Circles with the Circular Sewing Attachment

10/24/2020

8 Comments

 
This 45-minute video features tips and techniques shared on a recent Quilts & Lace Facebook live show.

We talked specifically about the Brother Circular Sewing Attachment for sewing and embellishment. There are other simple circle sewing tools available for generic use. Check with your sewing machine dealer to learn about options for your particular machine.

Below you'll find addtional circular sewing ideas and project links. I hope this video and the ideas presented here will inspire you to make something special with a circular attachment!

​In the first part of this post I'm showing the parts included with the Brother Circular Sewing Attachment bundle, (SACIRC1). This accessory item works on a wide variety of Brother machines. Check with your dealer for a current catalog of Brother accessories and compatible models. SAMDRIVER1, the Brother multi-purpose screwdriver is ideal for attaching the screw for the circular attachment.
Picture
The bundle includes the circular attachment and placement pin for the machine, two embellishment feet (SA110, the 3 slot Cording foot & SA141, the Braiding foot), a protractor for figuring exact spacing for decorative stitching on circles, and two screws. Note: You only need one screw to secure the attachment. The second one is "just in case" you misplace the first one.
Picture
In the above photo you can see a circular sample where I used both embellishment feet to add interest and texture to the circle. These are two of my favorite embellishment feet and I use them for much more than circle stitching.
Picture
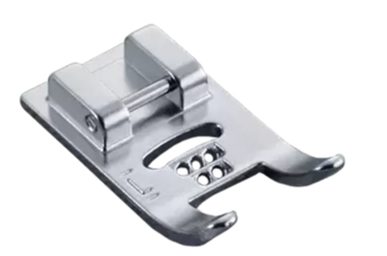
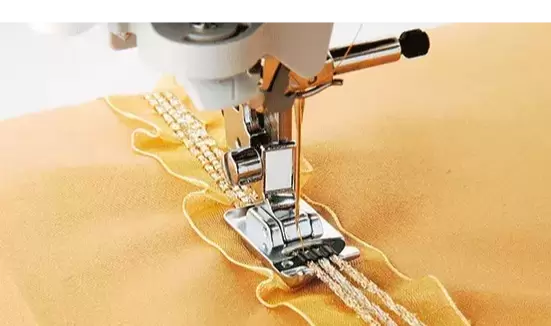
The three slot cording foot on the left is perfect for couching cords that are on the thin side. You can learn more about this foot HERE. The braiding foot is ideal for couching narrow ribbons. I used 4mm silk ribbon for this example.
Picture
This attachment makes it really easy to sew a perfect appliqué in the shape of a circle. I started with a square backed with interfacing and placed it in the center of my felt practice piece.
Picture
Picture
I set the circular attachment to sew a small circle using a straight stitch and then trimmed close to the stitching.
Picture
Next, I selected a zig zag stitch and set it for a medium width and a short stitch length to make it into a satin stitch. I switched to the Clearview foot and sewed all around the circle to cover the raw edge.

Picture
Picture
To couch down the cording I selected a stitch from the Character/Decorative menu. I love using this checkerboard style stitch to couch cords with the cording foot. The circular attachment makes it easy to do this in a perfect circle!
Picture
I started by threading the cords in the foot, knotting them at the back to keep them from slipping out.
Picture
I stitched all around the circle overlaping  stitches just a "smidge."
Picture
After using the tie off feature for decorative stitches, I fed the tails of the cord to the wrong side of the fabric using a tapestry needle.
Picture
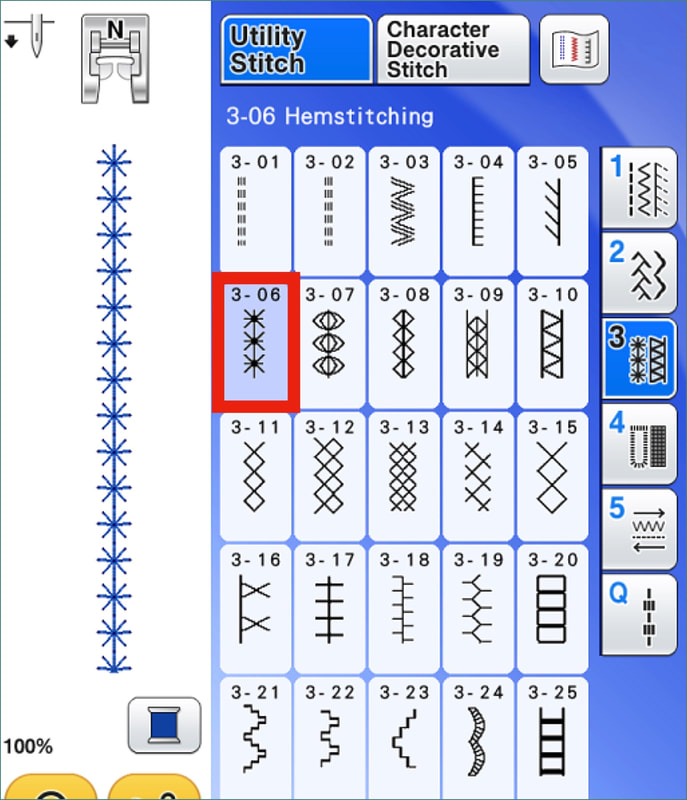
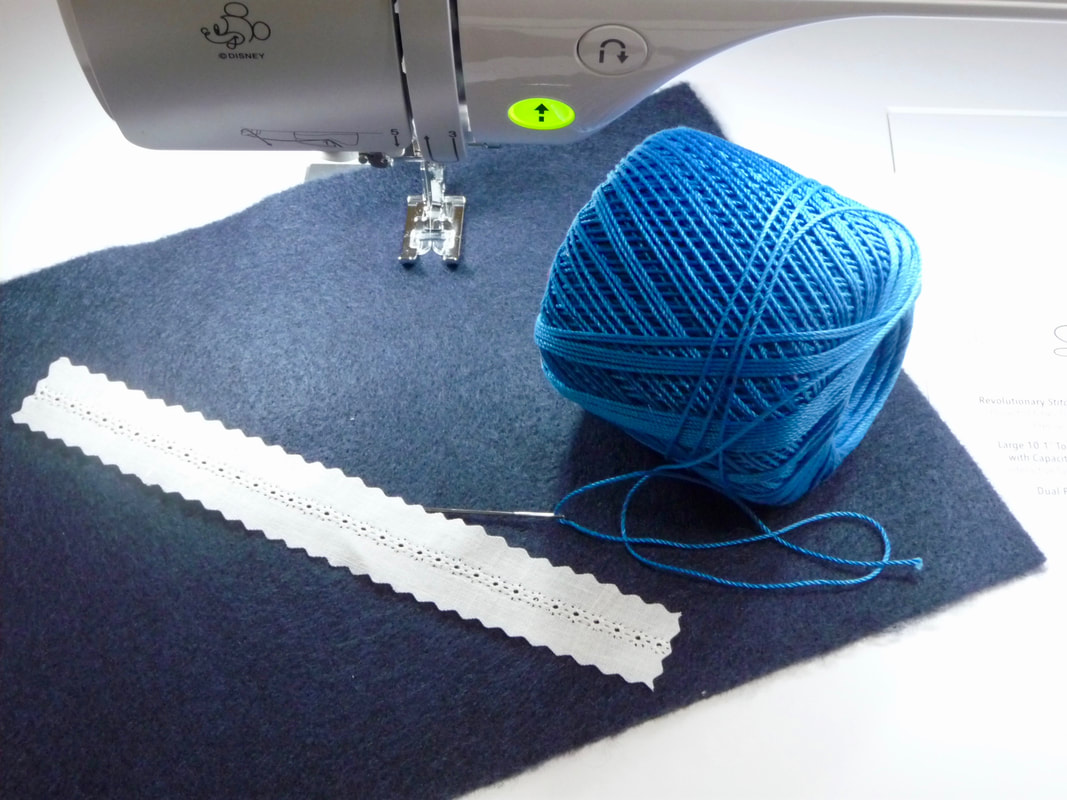
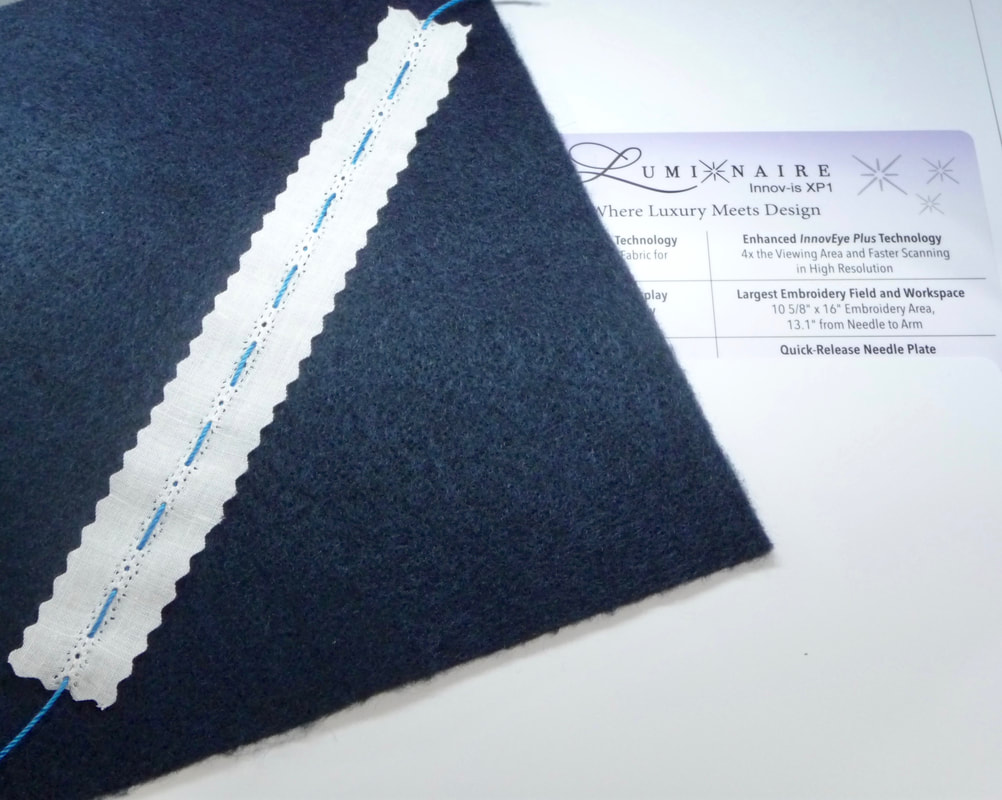
For the next circle I selected yet another favorite stitch. This one is considered an heirloom hemstitch but I htink it's perfect for couching down thin cords. Tip: In my example I used Pearl Crown Rayon, a decorative serger thread. A similar, easy to find alternative would be pearl cotton sold on skeins for hand embroidery.
Picture
This time I left tails of cording at the beginning and the end of the stitching.

Picture
Tie loose cords together and for a tassel effect.

Picture
I decided to tie them in a knot, add a bead, and then tie more knots to keep the bead in place.

Picture
Picture
For my final row I threaded 4mm silk ribbon into the braiding foot. I selected another stitch that works well to couch ribbon in place. This time I started stitching at the side of the circle, sewing two half circles, leaving a tail of ribbon free at each end.
Picture

Picture
See how I started and stopped at the half-way point, left tails, and then sewed a second half circle.
Picture
I finished by tying the ribbons in pretty bows.

Looking for more circular sewing projects?
Here are a few links to explore on the Brother blog, where I contributed projects wearing my Brother Ambassador hat. Click on each image and it will take you directly to the project.
Picture
Going Sewing Circle Bag

Picture
Glamourous Circular Rosette

Picture
Circular Potholders

If you have any comments or questions please let me know. I'd love to know if you have played with sewing in circles on your machine!
8 Comments

Tips for Sewing With a Twin Needle

10/10/2020

0 Comments

 
Picture
Twin or "double" needles ​have been around for a long time. Machines with even the most basic stitches can use a twin needle. As long as the machine has zig zag capability a twin needle will work on most all modern machines. Of course machines with extra stitches means extra opportunities! this post will introduce you to some of the many ways a twin needle can expand your sewing repertoire!
Decorative stitches from the utility menu look spectacular when stitched with a 2mm twin needle!
Picture
​​The tips are 2mm apart on this twin needle. Many machines come with this twin needle in the box of included accessories.
Picture
Check your machine for a twin needle key.
On Brother machines activating this key prevents you from choosing an improper stitch or stitch width.

IMPORTANT!!! Machine “thinks” you’re using a needle no larger than the 2mm version when you select this key.

Manually test other twin needles with all stitches to be sure needle does not hit the throat plate.
Picture
This blouse with corded 2mm pintucks was recently featured on It’s Sew Easy TV show 2002-1. CLICK HERE to read instructions and you'll find a link to watch the show!
Looking for more twin needle tips?
Picture
Wearing my Brother Ambassador hat I contributed a blog post on the topic of twin needle decorative stitching. You can read the post HERE.
But wait . . . there's more!
As a follow up to the original Brother blog post, I appeared on the Brother sponsored Facebook/YouTube Live show where we had a lively discussion on the topic of twin needles. I've posted the re-run here for you to watch.
This 55 minute video aired on the BrotherSews YouTube channel.
​I hope you enjoy watching it!
As I promised in the above video, here is my top ten list for twin needle techniques:
Top Ten Tips for Twin Needle Stitchery

  1. Check your machine manual for proper threading with a twin needle. Note that you cannot use any needle threader mechanism with twin needles.
  2. For best results use two identical spools of thread, same weight, same fiber content, and same brand if possible. Match the bobbin thread with your top thread. If you are doing only a small amount of stitching, and you have only one spool of thread, you can wind a bobbin to use as your second spool. You may need to be a bit creative as to how you position this extra bobbin on the machine. Make sure the thread reels off the bobbin smooth and easy, as it would for a standard spool of thread.
  3. Choose needle size and style based on your fabric. Twin needles are commonly found in the following types and sizes: Universal needles for a wide variety of woven fabrics, 1.6/70, 2.0/80, 2.5/80, 3.0/90, 4.0/100, and Stretch needles for knits, 2.5/75 and 4.0/75. If you are sewing on multiple layers of fabric or fabrics that are heavier such as canvas or denim, you may want to use a larger size needle. In my experience, stretch needles are essential when hemming knits. The style and tip of the stretch needle helps prevent skipped stiches and does not damage fine knitted fabrics.
  4. Topstitching with a 4.0 STRETCH TWIN needle on knits imitates the look of a cover hem stitch, although it is not nearly as “stretchy. With a twin needle, each needle shares the bobbin thread making a slight zigzag on the wrong side of the stitch.
  5. Topstitching is a common use for twin needles, resulting in a professional “ready made” look. With a twin needle you can sew two perfectly spaced rows. However, this stitch only looks good on the right side of the fabric. It is not suitable as a topstitch where the wrong side may show.
  6. Pretty little pintucks are possible when you use 1.6 or 2.0 needle. Pair the needle with a seven groove pintuck foot for heirloom style evenly spaced tucks. Note that tightening the upper tension may be necessary for pintucks that stand up. Use optional cording on the underside for a raised effect. Also, consider colored cording for “shadow pintucks” on translucent fabric.
  7. Thread slowly and carefully. If your machine has just one tension disc, both threads will share the disc. If there are two separate disks, at the point of the tension discs you will separate the threads, placing one thread on each side of the center tension disc.
  8. If your twin needle stitch is tunneling or not laying as flat as you like, simply loosen the upper tension a small amount at a time until the stitch is smooth and flat. On some lighter weight fabrics this may not be possible. If that is the case, consider addling permanent or temporary stabilizer to the wrong side of the fabric. Firming up the fabric will help keep the stitch flat.
  9. Sew at a slower speed when stitching with a twin needle, especially if you have threaded the machine with decorative (embroidery) thread.
  10. For straight stitching, be sure to use the center needle position on your machine. When zigzag or decorative stitches are selected, begin with a stitch width of 4.0mm and hand walk the needle as a precautionary measure before stitching to ensure that your needle will not hit the side of the throat plate. If you increase the stitch width you will need to keep checking to make sure the needles have clearance. Many decorative stitches are suitable. Some heavy or dense stitches may need to have the stitch length adjusted. Always test the stitch first on a fabric scrap.
If you have questions or comments I'd love to hear from you!
0 Comments

First Machine Brings Back Memories

6/13/2020

45 Comments

 
Picture
Machine design from Rhonda Sigrist A Stitch in Time Embroidery Designs
Did you know that the thirteenth of June is National Sewing Machine Day? It's designated as a day to celebrate the invention of the sewing machine. According to the National Days Today website, the origin is unknown but I'm happy to celebrate the day anyway, how about you?!?
How I Met My First Sewing Machine
Many of you have heard me tell the story of learning to sew in Junior High school and finding it love at first stitch! I had the chance to share this story and honor my Mom HERE in this It's Sew Easy TV segment. This super short clip also tells the tale of how I got my first, mine all mine sewing machine!

I have fond and vivid memories of the hunt for that first machine. Mom and I traveled to two independent sewing shops before visiting the machine department at Sears. You see, Mom was a savvy shopper and sought to find a machine that would be made to last and provide good value. I can't say why we settled on Sears, but I do remember my Mom being unimpressed with the other well-known brand at the time and even less impressed with the store personnel. Mom was a tough sell and I know she had my best interest at heart. Just goes to show you how important it is to trust the person helping you to select a machine. Back then Sears was staffed with well trained, knowledgeable staff.  Sears won her over. I suspect their warranty and satisfaction guaranteed motto also had something to do with it.

My first machine was green, the quintessential color so prominent in the 1970's. Complete with a "jewel box" full of intriguing cams, this machine was promoted as ready to handle all the newest knits coming into vogue at that time.

Buying a Sears Kenmore, it meant I was entitled to free lessons in the classroom tucked into a corner of the upstairs section of the mall store.  ​Mom came along with me for each of the lessons and it was a fun time together.

At that particular time in her life, Mom had pretty much abandoned sewing. Like many in that era, sewing wasn't really a necessity anymore. Being the last of five children, with a big gap between myself and my siblings, all of my sisters were married, and Mom didn't feel the need to sew for me or herself. However, the rest of the story is quite amazing! Seeing my enthusiasm for sewing, Mom decided she would give it a go again too. After installing my machine in my bedroom, remember, this one was mine all mine, she brought her old Singer out into an open space at the end of the living room. Soon, she was making many new outfits for herself too! While I happily sewed in my own space, she happily sewed in hers! Her fabric/pattern choices were mostly Stretch and Sew and double knits while I opted for the latest teen scene fashions of the day, but we encouraged each other's creativity.

I could go on with many more sewing tales and recollections of sewing stories that led to where I am now. However, what I'd really like to hear is the story of your first sewing machine. Please share your memories in the comments so we can all enjoy the tale of how you met up with your first machine!
45 Comments

Shall I Sew Or Shall I Cook Apron

6/6/2020

34 Comments

 
Continuing with apron show and tell, this time I have a two-sided/reversible apron for you. An oldie but a goodie, this one let's you choose your mood and flip to the side that suits you, whether it's stitchin or cookin in the kitchen! 
Picture
Let's start with the sewing side, shall we? Featuring the same FREE sewing lady design you saw in my previous blog post HERE, I  combined lettering created in software and a sewing machine design from an old floppy disk pack. I told you this was an oldie!
Picture
Time for a quick flip! Now you see the "cookin" side of the apron, with kitchen themed redwork designs from the Brother iBroidery.com site.

​This double duty apron is easy to make following the basic steps below:
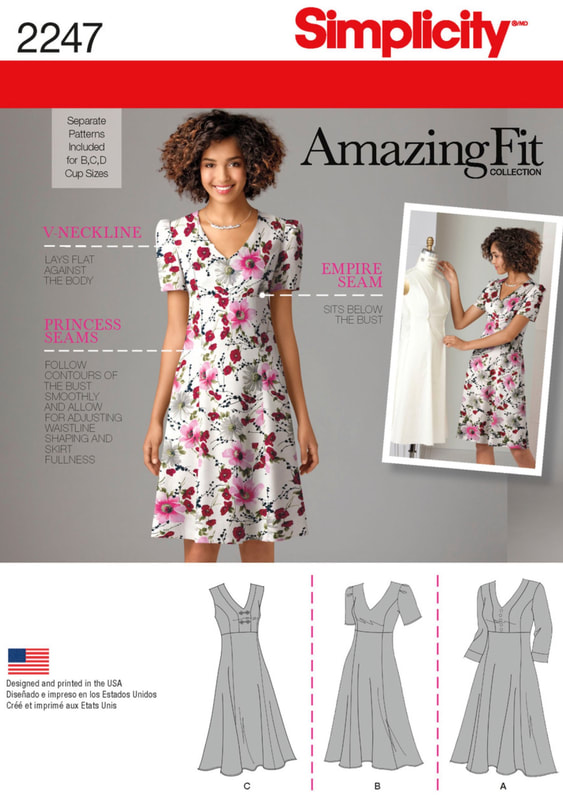
  • Select a pattern with a simple shape. Currently, Simplicity pattern company has a whole page of apron patterns with tons of inspiring styles to choose from.
  • Choose two coordinating fabrics. I used lightweight denim on one side and a medium weight cotton plaid for the other.
  • Embellish eash side using a single layer of fabric.
  • Sew one neck strap and one set of belt pieces.
  • Sew apron pieces with right sides together, sandwiching the neck strap and belt pieces in between, and leaving the top edge open for turning right sides out.
Done!
So, which side of the apron would you wear the most if you had the choice? If both sides suit your fancy I'd like to know that too!

Let me know in the comments below!
34 Comments

Cupcake Apron

5/30/2020

2 Comments

 
Written by Joanne Banko - Brother Ambassador
Picture
Posted in the Foot of the Month archives on brothersews.com.
Continuing with the apron theme, I thought I would share this cupcake and polka dot one with you today. There's a story to tell about this apron. It's a bit of a blast from the past. This unique apron was originally featured in a Brother Foot of the Month post back in 2016. It's a fun apron to make with wipe clean fabric. We'll talk more about fabric options later in this post. If you'd like to make one like this, you'll find the full instruction file I created for this project on the www.brothersews website, inside the Brother Foot of the Month archives. Just click on the apron image to read or download the file.

If you're not familiar with Brother Foot of the Month projects, I contribute these tutorials on a regular basis. FOM as I call it, is now posted on the official Brother blog called Stitching Sewcial. Recently, FOM had a title change to Accessory Spotlight. Hope I haven't confused you with titles and websites! Suffice it to say that I've been creating these foot of the month projects, monthly of course, since 2010. Within the various links and archives, you'll find lots of techniques for using various presser feet!
Picture
At the time the apron was published, Brother was celebrating a relationship with the Laura Ashley Company and I was commissioned to create a few special items with their fabric. I received a roll of pink with white polka dots and a roll of pretty pink cupcakes along with free rein to come up with samples to showcase the material.

I checked the fabric section of the Laura Ashley site today and believe it or not these two fabric coordinates are still listed there. CLICK HERE if you'd like to take a look at them. In the photo above you can see how cute these two fabrics look together. While I had sewed with some similar fabric before, I never thought about what it was called. Laura Ashley had it listed as PVC and I went with the term. Now I see that their category listing for the fabric says Oil Cloth. I think there's some confusion with these two terms, along with another similar wipe clean fabric called laminated cotton. I'll try to sort out these fabric terms in the next couple paragraphs so stick with me.

I have worked with cotton coated with clear vinyl, also known as Laminated Cotton. In fact, I've even made my own version by adding therm-o-web iron-on vinyl to the front side of cotton fabrics. In my experience, this is a great way to make your own version of a wipe clean fabric that has a smooth backing. If you haven't done this yourself, I highly suggest you give it a try! It's perfect for items like cosmetic cases, travel bags, pouches, wallets, and more! Curious about laundering this unique combination? I have washed small items treated with the afore-mentioned vinyl, it may be a little trickier with larger items because you don't want them to be wrinkled up. Keep the fabric piece as flat as you can and you should be okay. Obviously, since the top side wipes clean, laundering can be kept to a minimum and  depending on the project may be totally unnecessary. CLICK HERE and you'll find instructions for laundering coated fabric directly from therm-o-web, the manufacturer of the clear iron on vinyl.

I'm sharing this apron with you today to give you both inspiration and instructions. I think once you see how easy it is to make your own coated fabric you won't have to hunt for pretty prints in the Oil Cloth aisle of the fabric store. Yes, I switched my terminology from PVC to Oil cloth. Seems they are sometimes used together or as interchangeable terms. Technically, PVC, or polyvinyl chloride is a vinyl fabric that comes in a variety of different forms. Herculite.com is a site that provides more technical information if that interests you.  As a laminated fabric, you may think of diaper covers when you hear someone talk about PVC material.

Oil cloth material is different. It is rather stiff and has a mesh like backing. It is readily available if you do some searching online and comes in some pretty prints.

Whatever fabric you choose, this apron is easy and fun to make! Purchase wipe clean fabric or make it yourself by fusing iron-on vinyl to the front side of a cotton fabric. 
​
Picture
So, at the beginning of this post I told you the apron was a Foot of the Month project. A focal point for the project was the use of the non-stick rolling foot.  It's really essential for smooth stitching on this sticky fabric. This foot is also perfect for sewing on leather and suede. You'll also find the non-stick foot in a flat, non-rolling version.

I hope you're inspired by the apron photo and the instructions linked at the beginning of this post. If you'd like to take a peek at a coordinating project, hop on over to the official Laura Ashley blog post archives. I see that they still have the napkin, napkin rings, and placemat project I submitted in September of 2016. Although you won't see my name, you will see the cupcake and polka dot fabric used in some unique ways. CLICK HERE to view the project and instructions. I think this set is just as endearing today as it was back then.

I'd love to hear your thoughts in the comments below!
2 Comments

Apron Inspiration A La Molly made Artisan apron

5/23/2020

10 Comments

 
Written by Joanne Banko- Brother Ambassador
Picture
As seen in Designs in Machine Embroidery Magazine Volume 104
By popular request, I'm sharing details and free downloads for my version of this Molly Made special apron pattern featured on a recent Brother sponsored live stream. 
Originally, this apron was published in Designs in Machine Embroidery magazine. In collaboration with Brother, the Sewing Lady design on the bib pocket, and one other design featured on the lower pocket were linked as free downloads. In addition to that, I digitized an  In-the-Hoop pocket design to help you make the perfect patch pocket for the apron bib. You'll find all the details for creating the pocket HERE.

Follow along as I outline all the detials and share the links you'll need to create a similar apron for yourself.
Picture
Let's start with the Sewing Lady Redwork design I used as a decoration for the patch pocket on the bib. Follow the path outlined below to access this design from the archives of the Brother website. 
Go to www.brothersews.com and click on the drop down arrow for Inspirations & Events. 
Picture
Next, click on the Crafting Projects tab. 
Picture
Click on the image to explore the Free pattern archives.
Picture
Fill out the form to access free downloads.
Picture
Select the Special designs tab. Click on Redwork Sewing Lady to download to your computer.
Picture
Picture
Take another look at the apron and you'll see that I used a string of redwork designs to decorate lower pocket "M" from Molly's Apron pattern. This pocket features more beautiful Brother Redwork designs! To create this pocket I cut an oversized piece of fabric and marked off lines for the pattern piece and the pocket stitching lines. I embroidered the designs, cut the pocket using the pattern piece with a modified top foldline, and finished construction of the pocket on the apron.
Picture
You'll find the pin cushion  motif (second one from the left), available as yet another free design from Brother. The rest of the Redwork motifs are available for purchase in the Redwork design section of the Brother exclusive iBroidery.com design download site. Photos below show each individual design.
Picture
To access the free Brother pincushion design follow the same path as you did for the Sewing Lady but this time select from the archives of the Free Design of the Month menu shown below:

Picture
Picture
Last but not least, here is a link to instructions and free downloads for the perfect patch pocket used on the apron bib.
Picture
Click on the above image and you'll find everything you need, including an option for converting this pocket design to other machine formats. Enjoy!
By the way, you can learn more about Molly, the designer of this apron pattern HERE in an archived blog post.
10 Comments

Sew & Serge Three Tiered Skirt

5/13/2020

1 Comment

 
Picture
Need a mid-week pick me up? Here's a new video for you to watch on my YouTube channel. This video highlights differential feed, one of my favorite features on a serger! You'll see how I serged and sewed a three tiered "broomstick" skirt.

I've scheduled this video as a Premiere event on YouTube. I thought it would be fun to have you watch it along with me at 7:00PM on Thursday May 13th. I'll be there to answer your questions and comments.

Click on the image below to watch Triple Tiered Boho Skirt  as seen on It's Sew Easy TV show 1012-1, starting on May 14 at 7:00 PM Eastern Standard time.
Picture
I would call this skirt a classic. It actually is quite historic. Along with a unique pullover blouse, this skirt style was part of the Navajo woman's wardrobe as described in Folkwear pattern 120. It was influenced by similar styles popular in the post Civil war days. They say the three tiers on the Navajo skirt represent three periods of a woman's lifetime, infancy/childhood, adulthood, and senior years.
 
​I've made several of these over the years. When selecting fabrics, you want to choose a fabric that will wrinkle. My show sample is made from a lightweight chambray, but I've used quilt cotton, and even lightweight denim in the past. Soft cottons are the best choice for a skirt that wrinkles yet falls softly on the body. I like wearing this skirt with sandals in the summer and boots in cooler months!
Look around and you'll see the "prairie look" showing up in a variety of spring and summer clothing collections. In both prairie and "boho" style garments, gathers continue to be in fashion on both bottoms and tops.
Picture
If you look closely at the strips for the skirt, you'll see how neat and even the gathers are.

​Watching this video will give you some great tips for getting nice full gathers on your serger. With differential feed and the right settings on your serger you can quickly gather fabric for a wide variety of sewing situations.

Coordinating instructions are found HERE on the It's Sew Easy TV website. 

Looking for more serger info? CLICK HERE to download a new free Let's Go Sew tip sheet titled Serging Versus Sewing.

You can CLICK HERE to watch the video. I'd love to hear from you with any comments or questions you might have. Enjoy!
1 Comment

A Tribute to Mom And Ideas For A Last Minute Greeting

5/9/2020

21 Comments

 
Picture
Many moons ago I was interviewed by Eileen Roche for a special blog post. You can read it HERE if you like. I'm mentioning it today because the final, wrap up question she asked me was this:

​Finish the sentence:
My mother taught me . . .

My answer: 
Enough to write a book, but above all she taught me to be thankful and to stick to your core beliefs and values.
Picture
Every day, but today especially, I'm missing Mom as she has been gone for quite some time now. Being the "baby" of the family, Mother’s Day brings many cherished memories to mind. I look back and think of gifts both hand-crafted and purchased that I gave to my appreciative mom.

Sometimes it can be difficult to come up with appropriate gifts. One year I was looking to present her with something totally unique. I had already been using my embroidery machine for lots of things, so I embroidered a card with a calico cat design. My mom was a big cat lover and I have a sentimental story about a calico kitten my sister found on the playground that later came to live with us for a full 18 years. I knew she would love a three dimensional image of a cat resembling the one we adopted into the family many years before. Wanting to make the card even more special, I wrote a letter inside thanking my mom for giving me my own birthday. As you may well guess, she kept that card forever!
Picture
​If you’re looking for a last-minute card idea or a package decoration, I have one here that you may want to try. 
PictureDesign size: 3.78" W X 2.78" H, fits within a 4-inch hoop.
Take this pretty rose design provided as an archived free design on the Brother blog, stitch it on netting or white felt, and attach to a vase like you see in the photo, place it on an envelope or gift card, or use it as a package decoration. You'll have something special for Mom in just a few minutes!

Click on the photo of the vase and it will take you directly to the project instructions archived on the Brother Stitching Sewcial site. You'll find a link to the free design courtesy of Brother International within the instructions.

If you're looking for a way to make greeting cards with embroidery designs I have a full, free tutorial for you HERE.

​Happy Mother's Day to all the moms out there!

I hope you'll take the time to leave a comment here and finish the sentence below:

My Mother taught me . . .
21 Comments

My visit with Eileen Roche

4/24/2020

6 Comments

 
Watch and listen in as we chat about one of our favorite subjects, Machine Embroidery!

Eileen gave tons of tips for using her PAL2 Perfect Alignment Laser for ease of placement with embroidery and shared unique ways quilters can use this tool too!

We also had the chance to reminisce about  places our paths have crossed over the many years we have known each other.

Eileen invited me to provide a sneak peek at the wraps and scarves inside Wrapped In Embroidery, published by DIME. You'll learn some simple ways to link designs for continuous embroidery and get tips for embellishing your embroidered projects so they rival the best in ready-to-wear!

Click the arrow to watch the replay video on YouTube. I'd love to hear your comments. Enjoy!

Would you like to review the photos and tips I shared during the show? You can view the presentation below. Please contact me if you have any questions. I'm happy to help in any way I can!
More resources! In the back of the Wrapped in Embroidery book you'll find a list of suppliers for fabrics and notions. Here are a few more to update the list:
  • ​Brother Snowman Embroidery Positioning Markers for marking design center points and using targeting technology on select Brother machine models.
  • Target Stickers for perfect placement: DiME Target Stickers
  • Paper for printing re-usable templates: DiME Print & Stick Target Paper
  • ​Narrow silk ribbon: Threadart.com
  • Rayon Batik fabric: Look for a piece with a subtly dyed design so the embroidery shows up on the fabric. Sewbatik.com
​
6 Comments

Making Masks and Personal Face  coverings

4/19/2020

5 Comments

 
Picture
Like many other sewists navigating this "not so normal time," I've found myself involved in a mask making adventure. I thought I would share my experience. Let me start by telling you I've researched the mask making subject until my eyes were crossed! I tried many different styles in an attempt to make some to please myself, family and friends. I'm also currently in a campaign to contribute masks to the Cleveland Clinic. These masks are for the general public, not for medical workers.
 
I'd like you to 
know that this post represents my personal opinions only. I am not giving any advice on the making of masks, the usefulness of them, or making any claims for protection against any illness. None of the masks shown here are designed for PPE (Personal Protectiion Equipment). For guidelines on wearing and caring for masks and face coverings please list the government website, CDC.gov.

If you'd like to get involved with the mask making effort for Cleveland Clinic please HERE.
Mask Making Reviews
There is certainly a measure of controversy surrounding the "wearing of the mask." I encourage you to do your own research on the whole subject, but please don't be lulled into thinking that this makes you bullet proof. We have all seen masks warn improperly and this alone can be a hot topic. If however, you need to wear one sometime, somewhere, it might as well be comfortable. Whether you are a fan of wearing these or not, it seems we will all be asked to cover our face if we want to enter certain establishments.
​

The one you see me wearing at the beginning of this post is my personal favorite as far as comfort, coverage, adjustability, and ease of laundering. You'll find instructions near the bottom of the page when you CLICK HERE.

As for the rest of the ones shown below, they are based on some variations of the many blog posts floating around the web these days. My guess is that you've probably seen most of these in some form or another.
Picture
This was my first mask. It has the traditional three pleats and is finished with binding at the sides. This side binding forms a casing you can use to loop elastic or ties through. The binding makes it a bit time consuming to make, but it does make a neat, smooth finish because the bukly pleats are enclosed within the binding.
Picture
Picture
Next, I made my version of what is known as the Olson Mask. This one is shaped to fit the curves of the face. The inside pocket makes it easy to slip in a filter.  Actually, on the green version above, I sewed this lining the wrong way. The zig-zagged ends should be tucked under the side flanges. 
Picture

Picture
Next up, in the search for an adjustable fit, I opted to make the common rectangular pleated style, modifying it by adding two small buttonholes to thread knoted elastic through. This one is pretty quick to make and may do the trick if you need adjustability. 
Picture
Making the lining in an obvious contrast fabric seems like a good idea so the wearer can distinguish between the front and back side. This pleated button hole style one has a pocket opening for an added filter.
Picture
This last one is the same style I'm wearing in the photo at the beginning of this post, with two exceptions. The finished size is one inch smaller from side to side, and I did not bother to make a contrast lining.
Picture
If you look closely you'll see a seam on the wrong side of the back piece. I also wrote the word bottom and and drew an arrow on the fabric with a sharpie marker. Hands down, this is my favorite style. I think it can be resized to fit most any face, it's easy to sew, and relatively comfortable to wear.

Originally, I saw this one created by homemadeonourhomestead on YouTube. Her version is more detailed with a pocket for a filter and a place for a nose wire. I saw another one similar to this, simplified the style, eliminated the nose wire, and posted my own instructions on this page. 

Personally, I haven't had much success with adding nose wires. While it may make the mask fit more closely to the face, it makes the piece harder to launder, and it seems the wearer "fusses" too much to get it conformed to the nose. Part of the purpose of wearing a face covering is to help you avoid touching the face so that very fussing may defeat the purpose. 

As you can see, I've been on the mask making merry go round for a while now. 
Picture
This last one only has only one drawback. You really need to instruct the wearer on how to wear it. I hope my face friendly photos help you see this face covering in action. 

I'll close by wishing you all good health and happy sewing!
Picture
UPDATE! I wore this mask for an entire day and found it to be very comfortable.
5 Comments

Scrap Happy Hankie Bags

4/11/2020

6 Comments

 
Picture
Recently, I got an email from my friend Joan M. in Prescott Arizona. She has been making the most of her stay at home time and is churning out great gifts to tuck away for holiday time later in the year. Joan's hankie bags are simply delightful!!! I know I would cherish owning one of these myself. Another one of the bags is made from a dresser scarf. I believe Joan has inspired us to look at those hand-me-down linens in a whole new way!

​Curious as to what kinds of gifts Joan is busy making? I'll let Joan tell you more in her own words, shown in purple below:
"I have been enjoying having more time to spend in my favorite room and making some Christmas gifts for my family.  We do not exchange gifts any more (too many in the family now) but we have a white elephant exchange that everyone loves. 

Last Christmas I decided to make something for everyone, so they got: bowl cozies, steering wheel covers (great for protections against the hot sun in Arizona), key chains made with zippers, and splash guards for the microwave. It was so much fun to see their faces because no one knew what these were. My son thought his steering wheel cover was a hat!

Next Christmas the gals are getting one of these zipper bags made from doilies my Grandmother and Aunts made in the 40's and 50's. I have a chest full and almost donated them to charity because none of my family will want them - I don't even use them. The bag in the upper right - hard to see- is made in the style of a crazy quilt using pieces of doilies used in other bags."
I don't know about you, but I was awestruck by Joan's creative use of vintage hankies and her re-purposing of a doily to make crazy patchwork for another bag. Each one is so unique! What a way to preserve family history and bring precious heirlooms into the fore front instead of keeping them locked away in a dark drawer or dusty box.

By the way, Joan's cheerful note had the title "Making Lemonade" in the subject line of her email :-)

When you're done reading about Joan's creative adventures and you have finished oohing and aahing over her beautiful heirloom style bags, please take the time to leave a comment at the end of this post. 
6 Comments
<<Previous
    Picture

    Author:

    Joanne Banko
    Brother Ambassador


    I'd love to stay in touch with you!

    Click Here
    and Sign up for
    ​Sewing News, plus tips, tricks, and notifications about new blog posts.

    Archives

    April 2021
    March 2021
    February 2021
    November 2020
    October 2020
    June 2020
    May 2020
    April 2020
    March 2020
    February 2020
    January 2020
    November 2019
    August 2019
    July 2019
    June 2019
    May 2019
    March 2019
    February 2019
    January 2019
    December 2018
    September 2018
    August 2018
    July 2018
    June 2018
    March 2018
    February 2018
    December 2017
    September 2017
    August 2017
    June 2017
    April 2017
    February 2017
    January 2017
    December 2016
    September 2016
    July 2016
    June 2016
    May 2016
    March 2016
    February 2016
    January 2016
    December 2015
    October 2015
    September 2015
    July 2015
    June 2015
    May 2015
    March 2015
    January 2015
    October 2014
    July 2014
    May 2014
    March 2014
    January 2014

    *As a believer in full disclosure, I'd like you to know that Blog posts may contain affiliate links for products and services I know and trust. Purchasing items through a link marked * results in a small commission for me, with no extra charges for you.

    Categories

    All

    RSS Feed

© Copyright 2021 by Joanne Banko. All rights Reserved