letsgosew.com
  • Home
  • Contact
  • Privacy Policy
  • Sign Up for Sewing News, Freebies, & Updates
  • Order Just Jackets Embroidery Collection
  • Just Jackets FAQ
  • Order Wrapped in Embroidery Book by Joanne Banko
  • Joanne Banko's Blog
  • Machine Embroidery Survey
  • FREE Tutorials and Tip Sheets
    • NEW! Serger Sample Sheet
    • NEW! 2-Thread Serger Techniques-Pt.1
    • NEW! Basic Serger Stitches
    • New! Sew with Your Feet_Resources
    • New Project! Chic Triangle Scarf
    • New! Embroidered Sachet Envelope Project
    • Denim Re-design Hanging Organizer
    • Sewing a Cargo Pocket
    • NEW! Interfacings for Embroidery Tip Sheet
    • Making Kitchen Towels & FREE Cornucopia Applique Design
    • NEW! Embroidery Placement Positioning Tips
    • Tip sheet - 5 Reasons Quilters Need A Serger
    • Free In-the-Hoop Patch Pocket Design
    • Serging versus Sewing
    • FREE Project-Embroidered Gift Tag with Gift Bag
    • Tip Sheet - Pillow Pointers
    • Tip sheet_Sew Straight Laser for Seams
    • Embelishment Tips from dime V.111
    • Tip sheet - Shannon Embrace Double Gauze
    • Tip sheet - Fun with Fonts
    • Fabric Tip Sheet- Sewing Faux Suede
    • Tip sheet for Sewing & Embroidering with Metallic Thread
    • Fleece Ruana Pattern: As seen on PBS It's Sew Easy TV
    • Fabric Tip Sheet - Crepe Back Satin
    • Fabric Tip Sheet-Sewing Slinky Type Knit
    • Fabric Tip Sheet - Fleece
    • Fancy Footwork Tipsheet - About the Walking Foot
    • Fancy Footwork Tip Sheet_Basic Appliqué
    • Fancy Footwork Tip sheet - Ruffler Attachment
    • Fancy Footwork Tip Sheet - Narrow Hems with a Standard Foot
    • Fancy Footwork Tip Sheet - Non Stick Foot
    • Tip sheet - Machine Embroidery Pattern Connection Resources
    • Tutorial_Embroidered Greeting Card Project
    • Tip Sheet - Machine Set up for Shirring
    • Tip sheet - Snowman and Target Markers
    • Tip Sheet for Printing on Fabric
    • Tip sheet-Five Ways to Finish Fleece Blankets
    • T-Shirt Transformation Tutorial
    • Project- Serge a Little Girl's Sweet Summer Dress
    • Tip Sheet for Fleece Frame Shape Appliqué
    • Tip Sheet - Bobbin Work Sewing & Embroidery
    • Tip Sheet - Custom Covered Buttons
    • Tip Sheet - Liquid Stabilizers
    • Tip sheet - Appliqué with Brother XV8500D & ScanNCut
    • Project - Sheer Chiffon Wrap
    • Project - Pearl Trimmed Candle Ring
    • Tip Sheet -Mitered Satin Blanket Binding
    • Fabric Tip Sheet_Knit Know How
    • Tool School Tip Sheets
    • ITH Project Planner
  • As seen in DiME Magazine - Photo Gallery
  • Sewing and Embroidery Events
  • My Sewing Story
  • It's Sew Easy TV Online Blog
  • IT'S SEW EASY TV Videos & Bonus Files
    • NEW! It's Sew Easy TV Series 2100
    • It's Sew Easy TV_Series 2000
    • It's Sew Easy TV_Series 1500
    • It's Sew Easy TV - Series 1600
    • It's Sew Easy TV_Series 1700
    • It's Sew Easy TV Series 1800
    • It's Sew Easy TV Series 1900
    • NEW! Superstar Sewing Stitches
    • NEW! Classy Textured Cape
    • NEW! Baby Bath Wrap
    • NEW! Detachable Collar
    • Sew a Swimsuit
    • Machine Embroidered Garments
    • Kimono Blouses
    • Custom Covered Hangers
    • Sewing Beautiful Belts
    • Felted Flower Hat Trim
    • Sew a Waffle Weave Robe
    • Learn about Couching accessories!
    • Turn a Pashmina into a Trendy Topper
    • Machine Embroidered Reverse Applique
    • Machine Embroidered Knit Dress
    • Use Non-Stick Foot to sew a Custom Luggage Tag
    • Serge & Sew Broomstick Skirt
    • Machine Embroidered Western Jacket
    • Machine Embroidered Bobbin Work Pashmina
    • Embroidered Pajamas
    • Sewing Pearls and Sequins
    • Learn how to use the Fringe Foot
    • Quilted Pinwheel Patchwork Tote
    • Machine Embroidered Lace for Lingerie
    • Sewing Circles with a Circular Attachment
    • Sew with the Edge Joining Foot
    • Re-style Tops for Little Girls
    • Short Style Tip- Blouse Embellishment
    • Learn how to make pretty piping using the Piping Foot
    • Embellish with the Three Slot Cording Foot
    • Facebook Live Interview 12-4-2018
    • Machine Embroidery - Starter Tips

Beautiful Bobbin Work Stitchery

7/30/2022

4 Comments

 
Picture
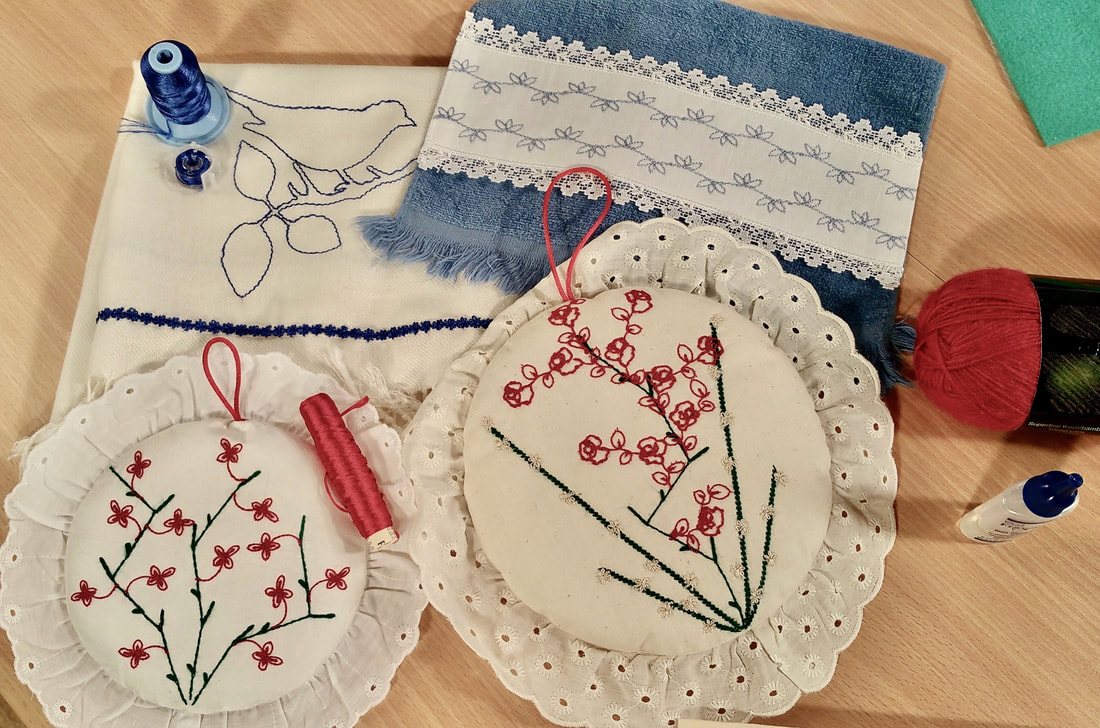
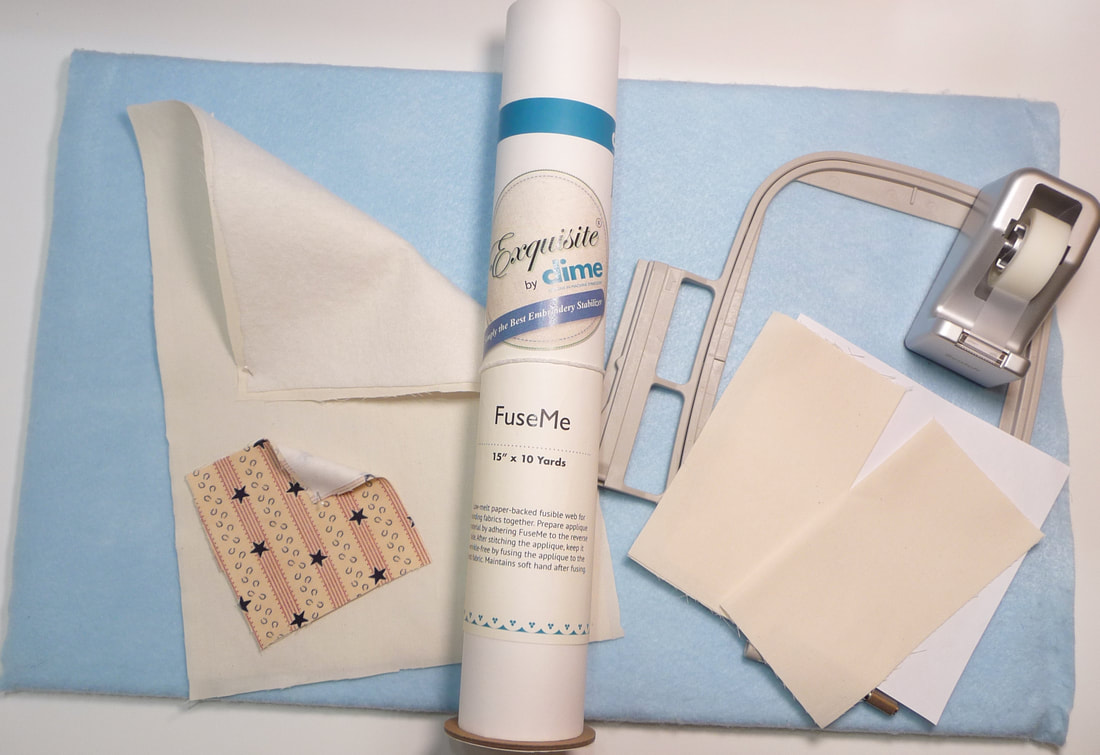
It’s fun and easy to use upside down stitchery, (also known as bobbin work), to embellish tea towels, table runners, pillows, scarves, jean jackets, & more! These are all ideal projects for embellishing with bobbin work. 

Just what is bobbin work and why is this technique called upside down stitchery? Simply put, bobbin work is an embellishment technique created with thick threads and novelty yarns that would never go through the eye of a needle and are not suitable for the thread path and tension mechanism of a sewing machine. 
Picture
Bobbin work is accomplished by winding thick thread onto a bobbin, and then changing out the bobbin case of the machine with an alternative bobbin case set for thick thread and a tension much looser than normal. You'll sew with the right side of the fabric facing the throat plate, therefore, sewing "upside down."
Bobbin work is possible for virtually any machine, as long as you have an alternative bobbin case with the tension loosened for the the thicker threads. Simply switch out your standard bobbin case for the one with loosened tension when you want to do bobbin work. You will need to adjust the bobbin case for various kinds of thick threads. Some will require looser tension than others. This technique is easy but it does require some time and experimentation as you are learning the nuances of using different threads and making adjustments.

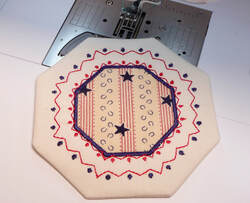
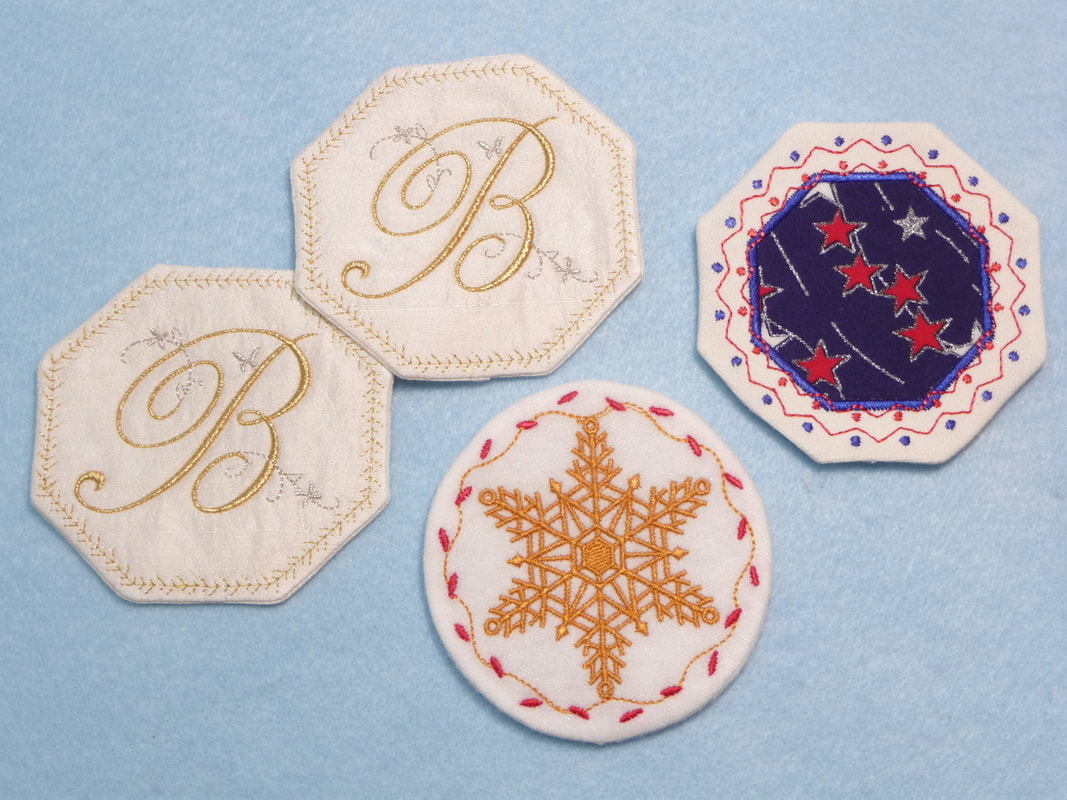
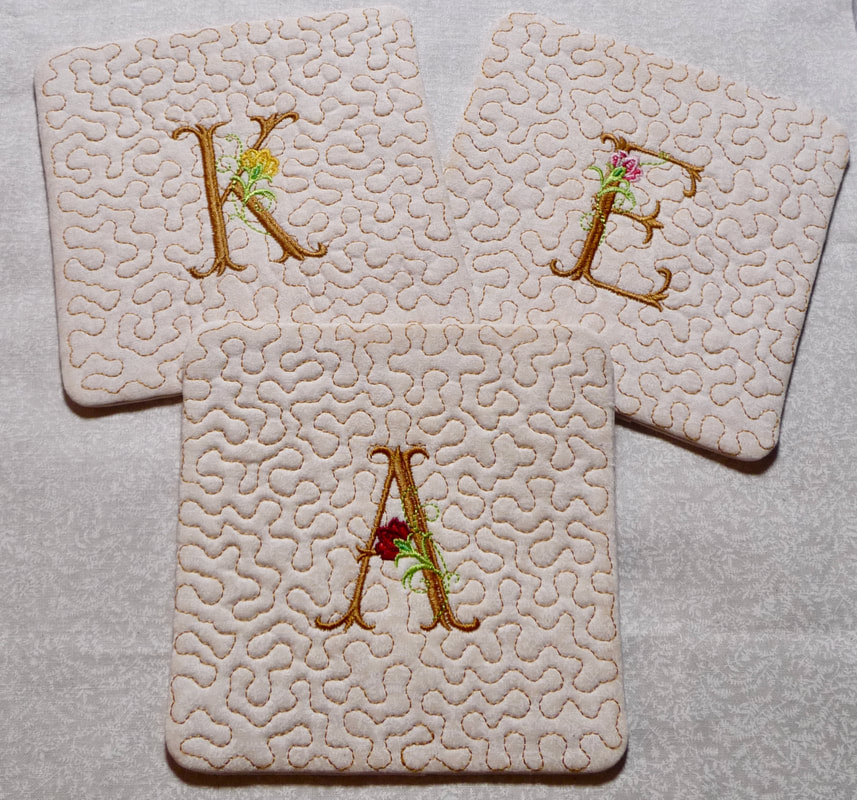
Some Brother machine models include a bobbin work bobbin case and there have been some past models with embroidery style bobbin work designs built-in to the machine. Bobbin work embroidery designs seem to be in short supply these days but there's still a lot you can do with bobbin work on the sewing side of the machine. Below is an image of designs found is past Brother machines such as the Quattro and Dream Machine models.
Picture
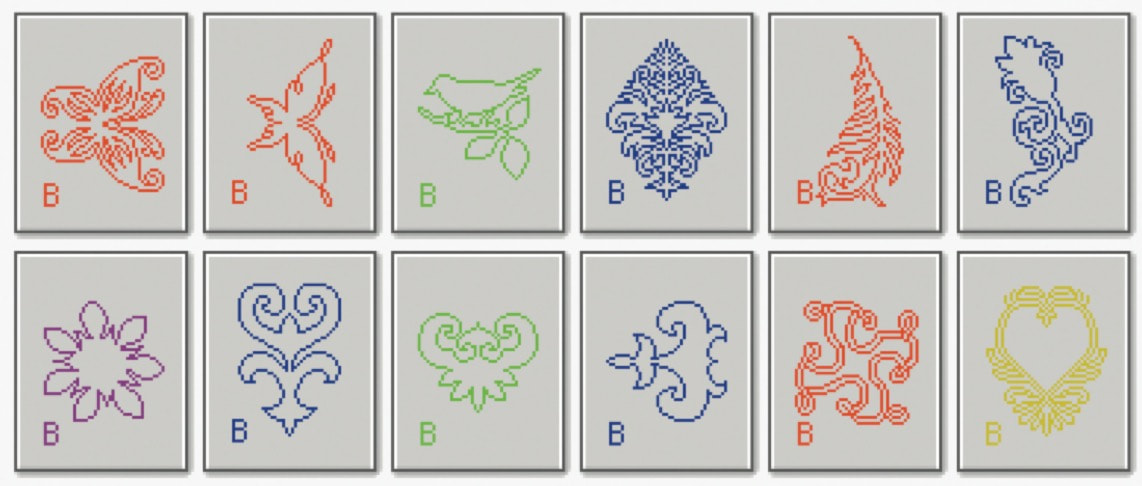
 ​The special Brother bobbin case is grey, making it very noticeable and distinctive from an ordinary bobbin case. To learn lore about the optional Brother Bobbin Work Kit CLICK HERE to view the description on their website, and see compatible models. 
Here is a short video showing how to wind the bobbin for bobbin work:
The top of the machine is threaded with regular sewing thread, embroidery thread, or even monofilament type thread. A bobbin with thick thread is placed in the machine, and should flow freely from the bobbin case with the loosened tension. With a few tweaks and tests for tension, you're on your way to stitching hand drawn patterns or rows of decorative and straight stitches. If you're good at free motion stitchery, you could set up your machine for free-form sewing and create patterns by stitching over templates or traced images or free motioning like you would for quilting.

I recently did a live show tutorial for my friends at Sewing Machines Plus, with an overview of bobbin work, showing various samples I hope will inspire you. You can watch the video below. I've also created a written tutorial to go along with the video. Download the PDF file for more details and information that coordinates with the video.
lets_go_sew_with_joanne_banko_bobbinwork_stitchery.pdf
File Size: 7430 kb
File Type: pdf
Download File

Feel free to leave your comments and questions below!
Interested in learning even MORE about bobbin work?
  • Brother has a short, silent video showing how to insert the bobbin case here: Brother has a short, silent video showing how to insert the bobbin case here: https://bit.ly/3zLgEvr
  • Check out my It's Sew Easy TV video about bobbin work  on the embroidery side of the machine when you click the following link: Machine Embroidered Bobbin Work Pashmina​
4 Comments

Embroider A Friendship Zipper Bag

7/28/2022

9 Comments

 
Picture
Picture
Making personalized gifts for friends is so rewarding!!! I created the featured zipper bag with the Brother Luminaire, using several special features, including the ability to create a stamp outline in embroidery edit mode, create an original design using stamp shapes & decorative fill stitches in My Design Center, and select a specific hoop area to fill with the region fill tool. If you have a machine with options like those found in My Design Center you can create a similar bag design.

​Of course, you can certainly use my basic instructions to create a bag using an embroidery design you already have in your repertoire.
This zipper bag was created for the July 21, 2022 Brother Live show, Episode 284,  broadcast on the Brother Sews USA Facebook page and the Brother Sews USA YouTube channel.
Watch the video below to see each step.
With a full lining and neatly covered zipper ends this bag is as pretty on the inside as it is on the outside. Leave it flat or choose to box the corners. Either way, this bag has plenty of room for a variety of items. Finished bag measures approximately 9-inches wide at the top edge, 6.5-inches at the bottom boxed edge, and 7 -inches long from top to bottom.

Take a peek at the inside of the bag and you'll see my custom label created using the special scanning mat. You’ll find a video showing the steps when you CLICK HERE to visit my Let’s Go Sew with Joanne Banko YouTube channel. While you're there, I'd love to have you subscribe and hit the bell for notifications if you haven't already.
Download a coordinating PDF of instructions below:
friendship_bag.pdf
File Size: 4708 kb
File Type: pdf
Download File

Enjoy this project and have fun making this for friends. Please leave your comments and questions below. Happy sewing!
9 Comments

Stitch it or Ditch it!

7/9/2022

16 Comments

 
Get rid of unfinished projects that are giving you a guilt complex!
​I've on a mission to tackle some unfinished projects (AKA UFO's), and move on to new shiny objects that I'm more interested in right now. Can you relate to having partially made projects stuffed away in a closet or bin? If I was dishing out advice to a new sewing enthusiast I would encourage them to follow the rule of three. That is, “try” to have no more than three projects you are working on at once. And, if you start something, and it isn't working out, and has no chance of working out, forgive yourself for starting and not finishing, then promptly get rid of it!
 
Forgive yourself you say? Yes! You see, I think sewing folks are some of the most kind hearted and generous folks in the world, but that also means we are good at piling guilt on ourselves when we perceive something is wasteful. I'm a big fan of recycling and hate to just throw things away. How to get rid of the guilt? If you can finish the item and donate it, great! Perhaps someone else will wear it or use it with joy. I remember a suit I made long ago that turned out great but just wasn't me. What was I thinking was all I could thing when I tired it on. I finished it up, promptly donated it, and always wondered who fell in love with it at the thrift shop.

Can't stand to finish up a UFO? A local thrift shop in town collects fabric scraps by the bagful. Not quite sure how they re-purpose the materials but I was told by one person that they re-cycle it, and then a clerk told me they can use it for packing material. Check your local thrift shops and ask if they take fabric remnants and scraps.
 
If I would have received and heeded the “rule of three” advice, I would not be in the predicament I am right now. I readily admit that I have way to many so called UFO's. I'm happy to say that I've been motivated to finish a few this week and finishing is a sure way to get rid of the guilt. I found three unfinished baby blankets stored away when I was doing lots for the Project Linus organization. While I did finish quite a few. My enthusiasm for the project meant that I cut more than I sewed. These UFO's have been hanging around for too long and weighed on my conscience. So, I finished then as quickly as I could and they are now ready for a new home where they can be used and loved. Thought I'd share a few photos with a description of each, with the hope of inspiring you. 
Picture
Blankie #1 is made of waffle weave cotton knit. This is the same kind of fabric that used to be common for long underwear. Somewhere in my past, I came across this pretty purplish/pink yardage. I thought it would be a soft and cozy blanket, but it did prove to be a little difficult to handle as it's very stretchy. I stabilized the embroidered area with medium weight cut-away attached with adhesive spray, and embroidered this cute applique from who knows where. Yes, that part was done many moons ago but came out quite nice. I had two identically sized pieces of the fabric all cut and layered together so I simply sewed right sides together leaving an opening, turned, pressed, and topstitched along the edge with a two step zig zag stitch. I knew the fabric would be hard to keep flat. The zigzag actually made it wave a bit on purpose and gave it a cute and durable finish, with opening closed up with the topstitching. Lining the entire piece gave the blanket extra body and covered up all the "uglies" from the backside of the embroidery.
Picture
Blankie #2 was a result of my desire to pair a cotton fabric panel with a backing cut from Minky. I remember wanting to try quilting the layers using the Brother Digital Dual Feed foot as it seemed perfect for the task. Indeed, it was! I sewed, turned, and topstitched the two pieces like I did for the previous blanket, this time, using the Dual Feed foot to control the unusual combination of fabrics. Then I quilted it, using a  3.5 straight stitch, stitching down the horizontal and vertical centers and then stitching more lines around the pre-printed blocks. The result was nice smooth Minky backing with virtually no ripples.
Picture
My third and final blankie was just a small pice of unfinished fleece. But oh my! What a cute print!  To get this one done in a flash I threaded my serger for a three thread balanced stitch and zipped all around the edge, finishing in less than five minutes! By the way, if you're looking for more fleece finishing ideas I have a Five Ways to Finish Fleece tip sheet HERE.

I'm so happy to see these finished and ready to go to a good home! I'm even happier that a friend of mine who specializes in sewing for charity will see that they are taken to a local hospital that welcomes the donations.

Hope you enjoyed reading about the blankets. Please share your UFO stories an ideas you have for getting rid of the guilt!
16 Comments

Embroidering Creative Coasters

7/3/2022

4 Comments

 
Picture
Coasters, coasters, and more coasters! Creating coasters with an embroidery machine is so easy and so much fun! These in-the-hoop style coasters finish up fast and make great gifts. Below, you'll see a sampling of some of my favorite coasters styles.

Picture
Holiday themes are always appreciated and making a set with a monogram or holiday design can be the perfect hostess gift. And who doesn't love a coaster personalized with their first initial? A single coaster is easy to include with a card and a wonderful way to say thank you or "I'm thinking of you today." Recently, I collected a list of names from my dental office and made one for everyone who works there. The smiles on the gift recipient's faces were priceless. Below are a few examples.
Picture
The stipple style coaster design shown above is available for you to download here on my site for free. I originally offered these as a bonus to coordinate with It's Sew Easy TV show 1506-2. You'll find them in different sizes and shapes, with the smallest one sized to fit a 4-inch embroidery hoop.

On show 1506-2, I created coasters with silk dupioni, metallic thread, and included a sheer organza gift bag. You can watch this episode HERE on my YouTube channel.
Picture
Visit the Let's Go Sew with Joanne Banko YouTube channel and you'll see two additional coordinating videos showing detailed steps to create in-the-hoop coasters using built-in frame shapes on Brother machines. Basic steps and supplies for creating all the coasters shown here are pretty similar. Watch the two videos and you can confidently create any of these coaster styles.

​Link to video #1: Create Custom Coasters using Brother Built-in Frame Shapes

Link to video #2: Extra Tips for Re-sizing Appliqué and conserving Fabric

Let's me outline general supplies you'll need and the steps to create:
  • Select fabric & batting. Quilting cottons, fancy fabrics like silk dupioni, and even ordinary craft felt will work. My preferred method is to cut coaster fabric to fit required hoop size and add a layer of cotton batting or fusible craft fleece, hooping the fabric and fleece together for the top side of the coaster. If you're creating a coaster using my method for adding an appliqué, you'll need contrasting fabric pieces, cut slightly larger than your appliqué shape.  Steps for adding an appliqué shape are  detailed in the video. I prefer to back my appliqué fabric with fusible web such as the Exquisite FuseMe fusible webbing by DiME. Once the coaster is all finished I give it a good press and my appliqué piece is throughly bonded to the coaster.
  • Select fabric for backing the coaster. I prefer to use the same fabric on the back as I did for the top part of the coaster. Back pieces need to be cut to meet in the middle if you want to add a water resistant filler to your coaster, but they can be cut larger to overlap at the back if you wish. Felt can be cut single layer but woven fabric needs to be cut on a fold. The video shows how to create a custom pattern to determine size for back coaster pieces. Be sure to securely tape pieces in place to avoid shifting during embroidery. I used ordinary Scotch® Magic™ Tape and stitched right through the tape.
  • ​Decorative frame shapes and lettering can easily be added to your coasters. Just remember, you'll want to stitch decorative frame patterns before adding the back pieces. In addition, for stipple fill coasters you'll add the monogram after the stippling is done on top, but before the backing is added to finish the coaster.
  • Insert a piece of vinyl shelf liner or cork to make your coaster water resistant.

Follow the steps shown on the video to create custom coasters you'll be proud to use or give as gifts! Feel free to leave your comments or questions below!

4 Comments
    Picture

    Author:

    Joanne Banko
    Brother Ambassador


    I'd love to stay in touch with you!

    Click Here
    and Sign up for
    ​Sewing News, plus tips, tricks, and notifications about new blog posts.

    Archives

    May 2025
    March 2025
    February 2025
    December 2024
    October 2024
    September 2024
    March 2024
    February 2024
    September 2023
    July 2023
    June 2023
    May 2023
    March 2023
    February 2023
    January 2023
    December 2022
    November 2022
    October 2022
    September 2022
    August 2022
    July 2022
    June 2022
    May 2022
    April 2022
    March 2022
    January 2022
    December 2021
    October 2021
    August 2021
    July 2021
    June 2021
    May 2021
    April 2021
    March 2021
    February 2021
    November 2020
    October 2020
    June 2020
    May 2020
    April 2020
    March 2020
    February 2020
    January 2020
    November 2019
    August 2019
    July 2019
    June 2019
    May 2019
    March 2019
    February 2019
    January 2019
    December 2018
    September 2018
    August 2018
    July 2018
    June 2018
    March 2018
    February 2018
    December 2017
    September 2017
    August 2017
    June 2017
    April 2017
    February 2017
    January 2017
    December 2016
    September 2016
    July 2016
    June 2016
    May 2016
    March 2016
    February 2016
    January 2016
    December 2015
    October 2015
    September 2015
    July 2015
    June 2015
    May 2015
    March 2015
    January 2015
    October 2014
    July 2014
    May 2014
    March 2014
    January 2014

    *As a believer in full disclosure, I'd like you to know that Blog posts may contain affiliate links for products and services I know and trust. Purchasing items through a link marked * results in a small commission for me, with no extra charges for you.

    Categories

    All

    RSS Feed

© Copyright 2025 by Joanne Banko. All rights Reserved