letsgosew.com
  • Home
  • Contact
  • Privacy Policy
  • Sign Up for Sewing News, Freebies, & Updates
  • Order Just Jackets Embroidery Collection
  • Just Jackets FAQ
  • Order Wrapped in Embroidery Book by Joanne Banko
  • Joanne Banko's Blog
  • It's Sew Easy TV Online Blog
  • Machine Embroidery Survey
  • IT'S SEW EASY TV Videos & Bonus Files
    • NEW! It's Sew Easy TV Series 2100
    • It's Sew Easy TV_Series 2000
    • It's Sew Easy TV_Series 1500
    • It's Sew Easy TV - Series 1600
    • It's Sew Easy TV_Series 1700
    • It's Sew Easy TV Series 1800
    • It's Sew Easy TV Series 1900
    • NEW! Superstar Sewing Stitches
    • NEW! Classy Textured Cape
    • NEW! Baby Bath Wrap
    • NEW! Detachable Collar
    • Sew a Swimsuit
    • Machine Embroidered Garments
    • Kimono Blouses
    • Custom Covered Hangers
    • Sewing Beautiful Belts
    • Felted Flower Hat Trim
    • Sew a Waffle Weave Robe
    • Learn about Couching accessories!
    • Turn a Pashmina into a Trendy Topper
    • Machine Embroidered Reverse Applique
    • Machine Embroidered Knit Dress
    • Use Non-Stick Foot to sew a Custom Luggage Tag
    • Serge & Sew Broomstick Skirt
    • Machine Embroidered Western Jacket
    • Machine Embroidered Bobbin Work Pashmina
    • Embroidered Pajamas
    • Sewing Pearls and Sequins
    • Learn how to use the Fringe Foot
    • Quilted Pinwheel Patchwork Tote
    • Machine Embroidered Lace for Lingerie
    • Sewing Circles with a Circular Attachment
    • Sew with the Edge Joining Foot
    • Re-style Tops for Little Girls
    • Short Style Tip- Blouse Embellishment
    • Learn how to make pretty piping using the Piping Foot
    • Embellish with the Three Slot Cording Foot
    • Facebook Live Interview 12-4-2018
    • Machine Embroidery - Starter Tips
  • FREE Tutorials and Tip Sheets
    • NEW! Embroidery Placement Positioning Tips
    • Free Embroidered Snowflake Coasters
    • Tip sheet - 5 Reasons Quilters Need A Serger
    • Free In-the-Hoop Patch Pocket Design
    • Serging versus Sewing
    • FREE Project-Embroidered Gift Tag with Gift Bag
    • Tip Sheet - Pillow Pointers
    • Tip sheet_Sew Straight Laser for Seams
    • Embelishment Tips from dime V.111
    • Tip sheet - Shannon Embrace Double Gauze
    • Tip sheet - Fun with Fonts
    • Fabric Tip Sheet- Sewing Faux Suede
    • Tip sheet for Sewing & Embroidering with Metallic Thread
    • Fleece Ruana Pattern: As seen on PBS It's Sew Easy TV
    • Fabric Tip Sheet - Crepe Back Satin
    • Fabric Tip Sheet-Sewing Slinky Type Knit
    • Fabric Tip Sheet - Fleece
    • Fancy Footwork Tipsheet - About the Walking Foot
    • Fancy Footwork Tip Sheet_Basic Appliqué
    • Fancy Footwork Tip sheet - Ruffler Attachment
    • Fancy Footwork Tip Sheet - Narrow Hems with a Standard Foot
    • Fancy Footwork Tip Sheet - Non Stick Foot
    • Tip sheet - Machine Embroidery Pattern Connection Resources
    • Tip Sheet - Machine Set up for Shirring
    • Tip sheet - Snowman and Target Markers
    • Tip Sheet for Printing on Fabric
    • Tip sheet-Five Ways to Finish Fleece Blankets
    • T-Shirt Transformation Tutorial
    • Project- Serge a Little Girl's Sweet Summer Dress
    • Tip Sheet for Fleece Frame Shape Appliqué
    • Tip Sheet - Bobbin Work Sewing & Embroidery
    • Tip Sheet - Custom Covered Buttons
    • Tip Sheet - Liquid Stabilizers
    • Tip sheet - Appliqué with Brother XV8500D & ScanNCut
    • Project - Sheer Chiffon Wrap
    • Project - Pearl Trimmed Candle Ring
    • Tip Sheet -Mitered Satin Blanket Binding
    • Fabric Tip Sheet_Knit Know How
    • Tool School Tip Sheets
    • ITH Project Planner
  • As seen in DiME Magazine - Photo Gallery
  • Sewing and Embroidery Events
  • About Joanne Banko

My visit with Eileen Roche

4/24/2020

6 Comments

 
Watch and listen in as we chat about one of our favorite subjects, Machine Embroidery!

Eileen gave tons of tips for using her PAL2 Perfect Alignment Laser for ease of placement with embroidery and shared unique ways quilters can use this tool too!

We also had the chance to reminisce about  places our paths have crossed over the many years we have known each other.

Eileen invited me to provide a sneak peek at the wraps and scarves inside Wrapped In Embroidery, published by DIME. You'll learn some simple ways to link designs for continuous embroidery and get tips for embellishing your embroidered projects so they rival the best in ready-to-wear!

Click the arrow to watch the replay video on YouTube. I'd love to hear your comments. Enjoy!

Would you like to review the photos and tips I shared during the show? You can view the presentation below. Please contact me if you have any questions. I'm happy to help in any way I can!
More resources! In the back of the Wrapped in Embroidery book you'll find a list of suppliers for fabrics and notions. Here are a few more to update the list:
  • ​Brother Snowman Embroidery Positioning Markers for marking design center points and using targeting technology on select Brother machine models.
  • Target Stickers for perfect placement: DiME Target Stickers
  • Paper for printing re-usable templates: DiME Print & Stick Target Paper
  • ​Narrow silk ribbon: Threadart.com
  • Rayon Batik fabric: Look for a piece with a subtly dyed design so the embroidery shows up on the fabric. Sewbatik.com
​
6 Comments

Making Masks and Personal Face  coverings

4/19/2020

5 Comments

 
Picture
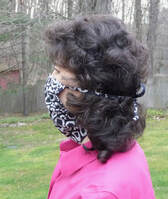
Like many other sewists navigating this "not so normal time," I've found myself involved in a mask making adventure. I thought I would share my experience. Let me start by telling you I've researched the mask making subject until my eyes were crossed! I tried many different styles in an attempt to make some to please myself, family and friends. I'm also currently in a campaign to contribute masks to the Cleveland Clinic. These masks are for the general public, not for medical workers.
 
I'd like you to 
know that this post represents my personal opinions only. I am not giving any advice on the making of masks, the usefulness of them, or making any claims for protection against any illness. None of the masks shown here are designed for PPE (Personal Protectiion Equipment). For guidelines on wearing and caring for masks and face coverings please list the government website, CDC.gov.

If you'd like to get involved with the mask making effort for Cleveland Clinic please HERE.
Mask Making Reviews
There is certainly a measure of controversy surrounding the "wearing of the mask." I encourage you to do your own research on the whole subject, but please don't be lulled into thinking that this makes you bullet proof. We have all seen masks warn improperly and this alone can be a hot topic. If however, you need to wear one sometime, somewhere, it might as well be comfortable. Whether you are a fan of wearing these or not, it seems we will all be asked to cover our face if we want to enter certain establishments.
​

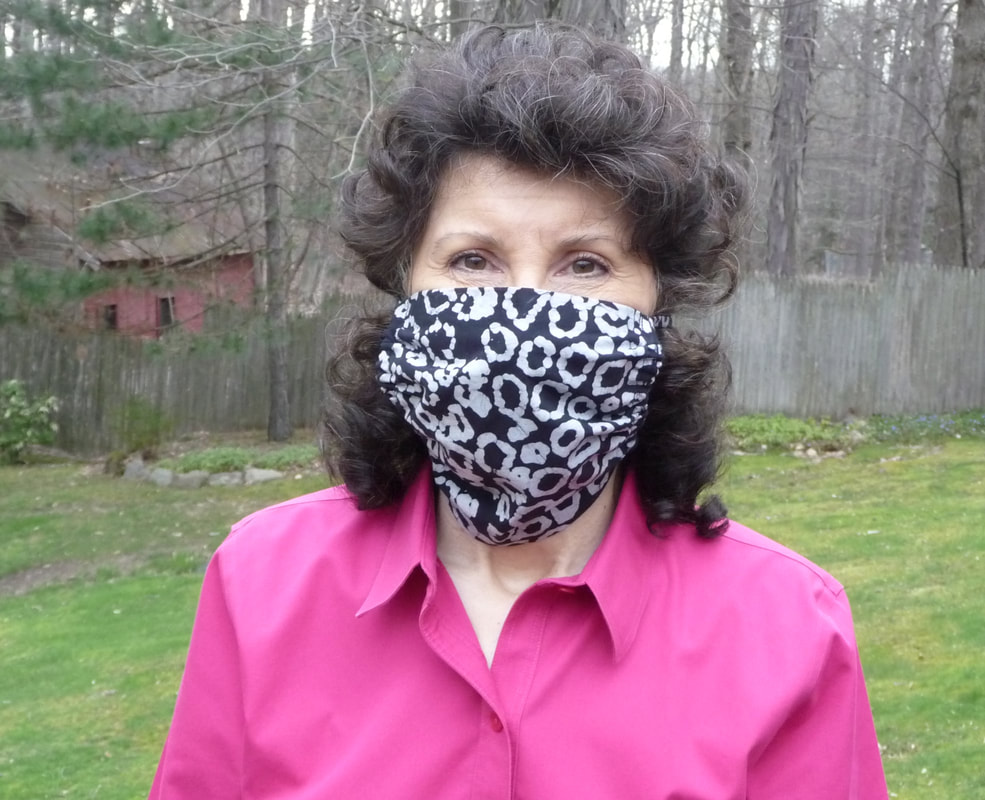
The one you see me wearing at the beginning of this post is my personal favorite as far as comfort, coverage, adjustability, and ease of laundering. You'll find instructions near the bottom of the page when you CLICK HERE.

As for the rest of the ones shown below, they are based on some variations of the many blog posts floating around the web these days. My guess is that you've probably seen most of these in some form or another.
Picture
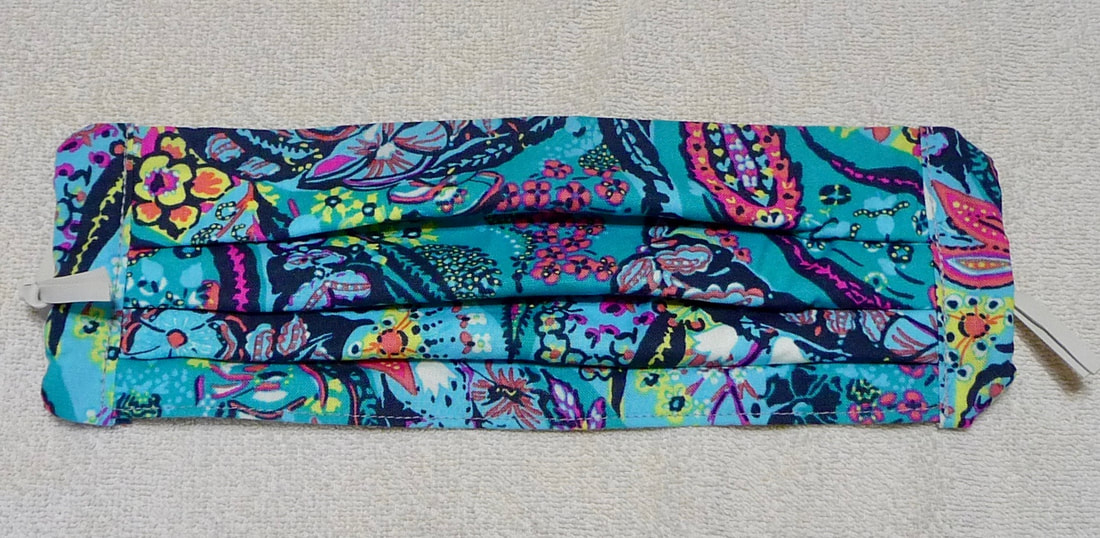
This was my first mask. It has the traditional three pleats and is finished with binding at the sides. This side binding forms a casing you can use to loop elastic or ties through. The binding makes it a bit time consuming to make, but it does make a neat, smooth finish because the bukly pleats are enclosed within the binding.
Picture
Picture
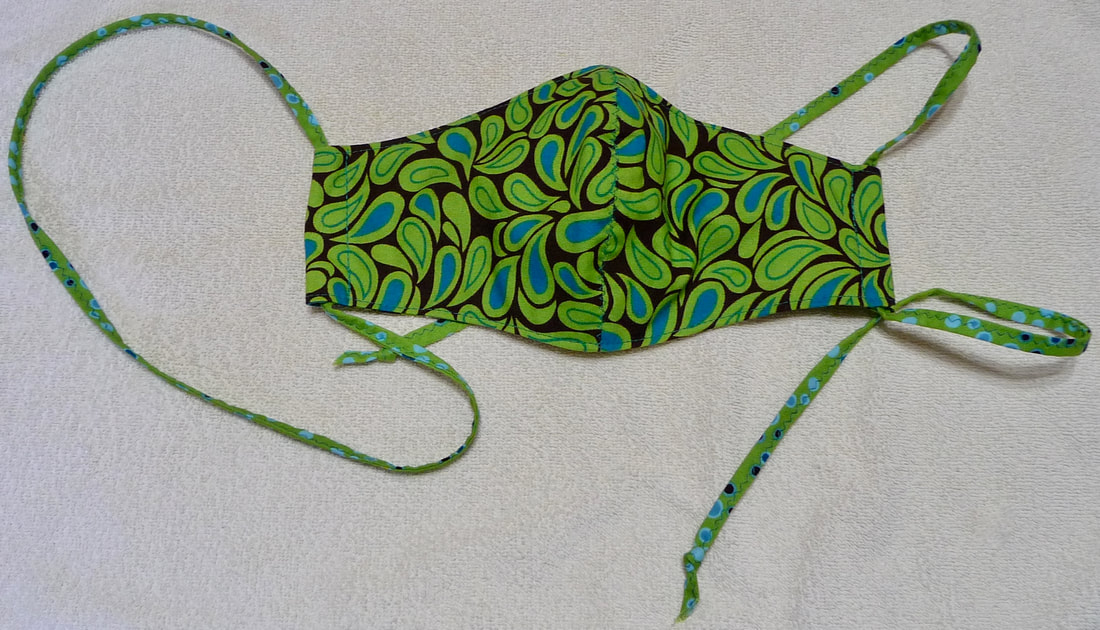
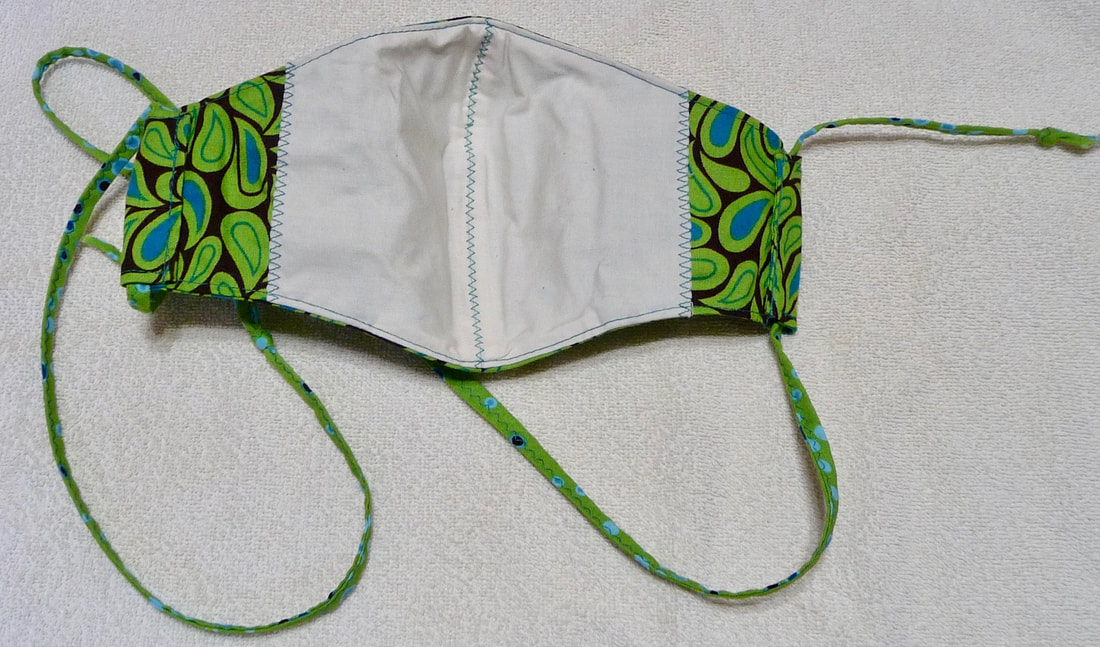
Next, I made my version of what is known as the Olson Mask. This one is shaped to fit the curves of the face. The inside pocket makes it easy to slip in a filter.  Actually, on the green version above, I sewed this lining the wrong way. The zig-zagged ends should be tucked under the side flanges. 
Picture

Picture
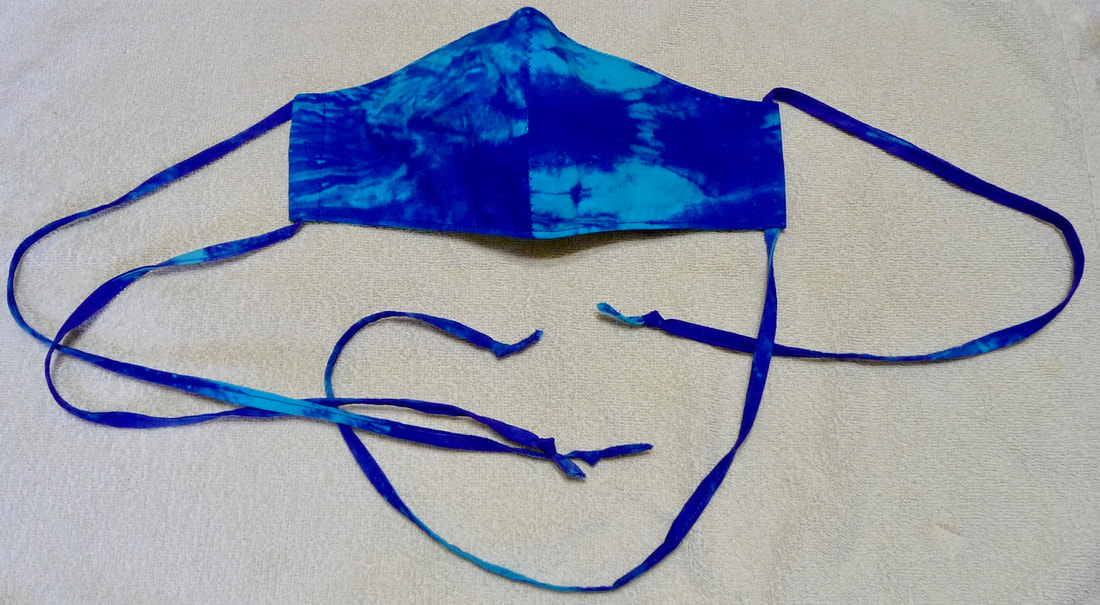
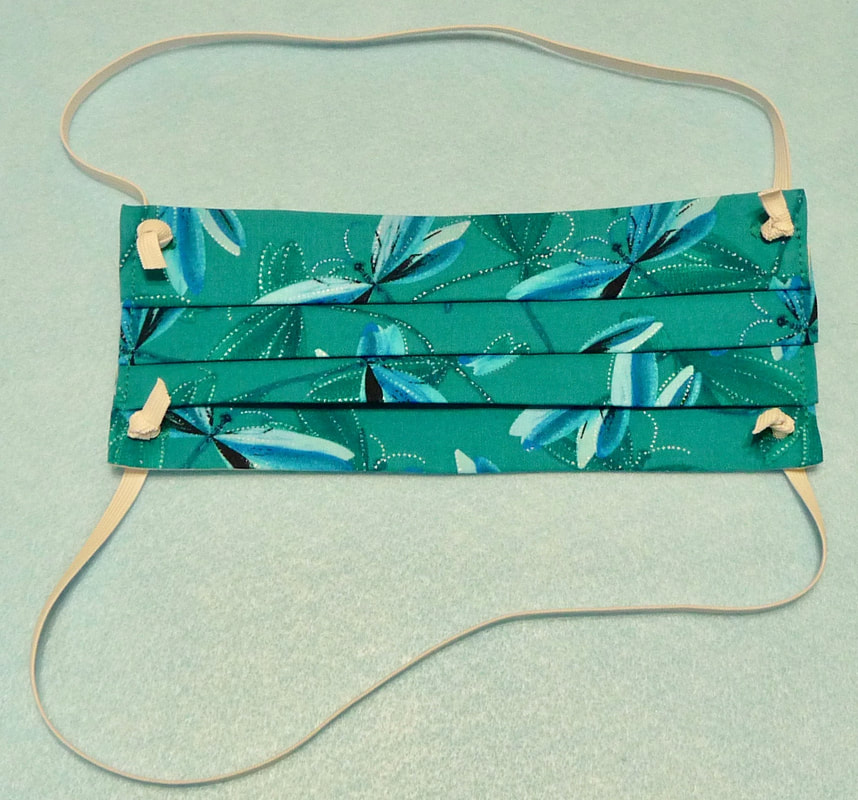
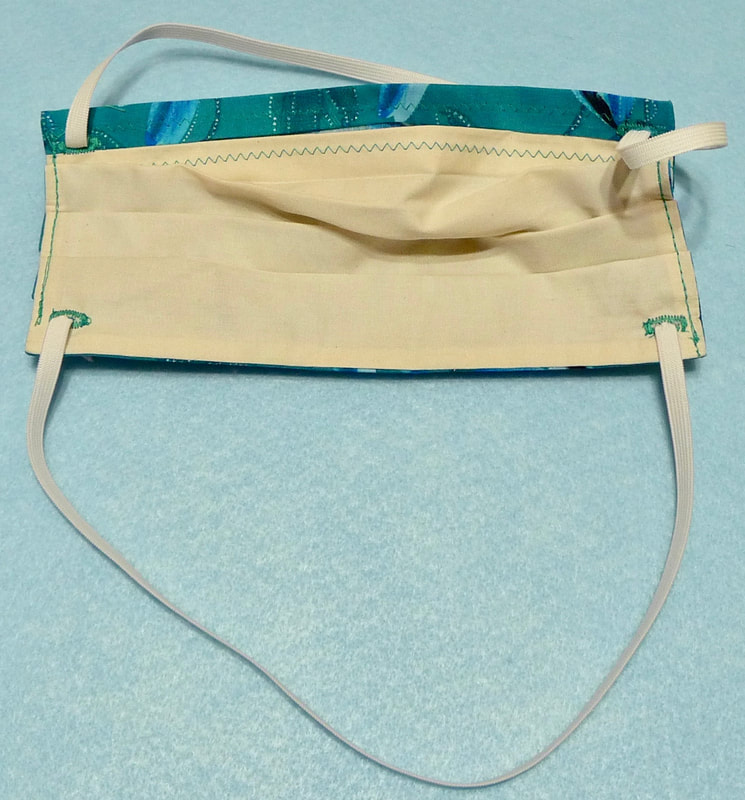
Next up, in the search for an adjustable fit, I opted to make the common rectangular pleated style, modifying it by adding two small buttonholes to thread knoted elastic through. This one is pretty quick to make and may do the trick if you need adjustability. 
Picture
Making the lining in an obvious contrast fabric seems like a good idea so the wearer can distinguish between the front and back side. This pleated button hole style one has a pocket opening for an added filter.
Picture
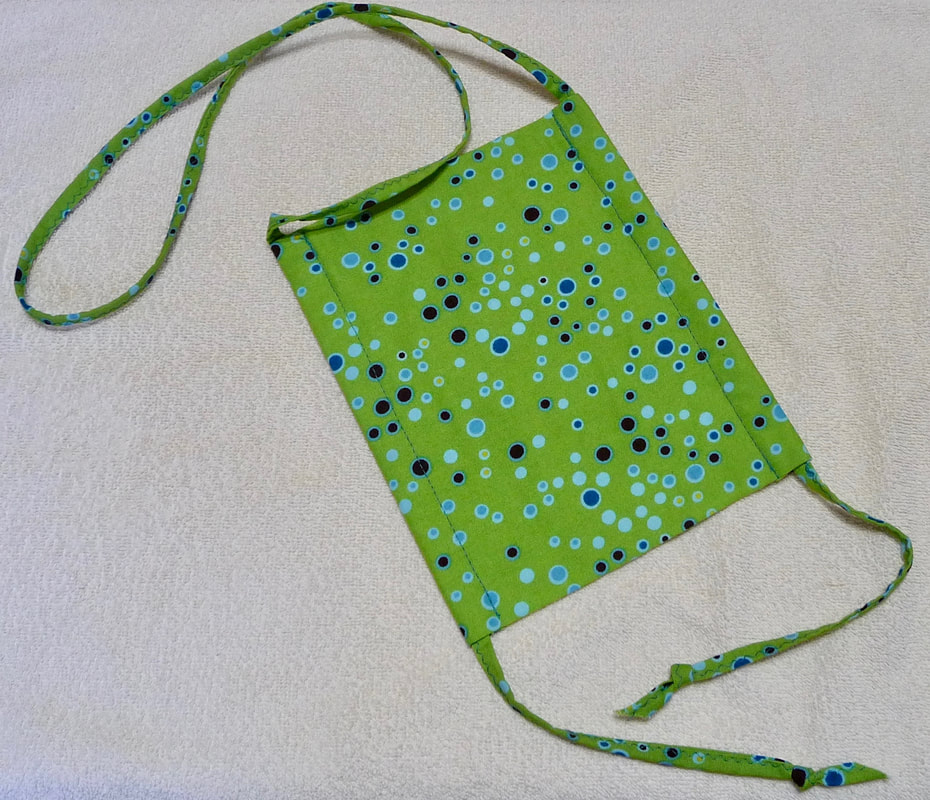
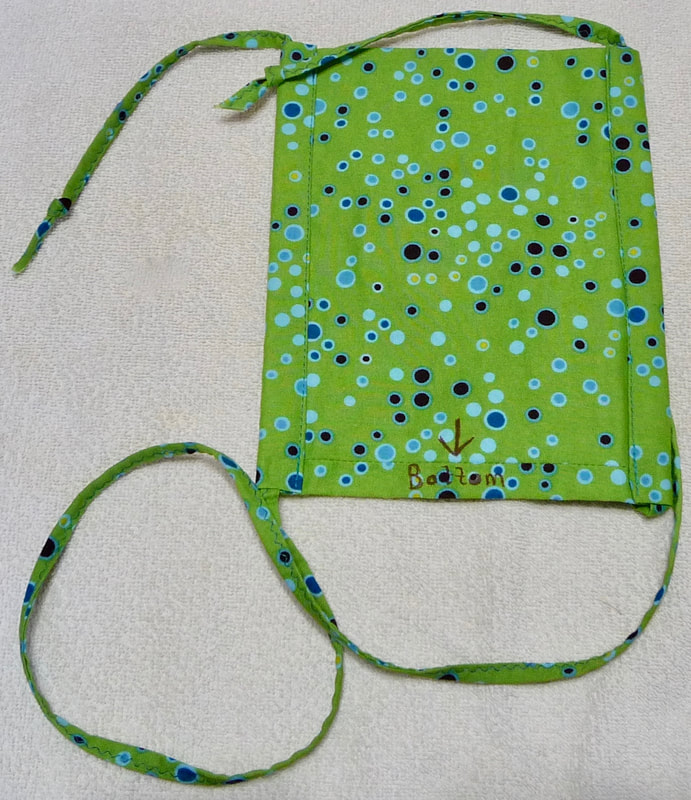
This last one is the same style I'm wearing in the photo at the beginning of this post, with two exceptions. The finished size is one inch smaller from side to side, and I did not bother to make a contrast lining.
Picture
If you look closely you'll see a seam on the wrong side of the back piece. I also wrote the word bottom and and drew an arrow on the fabric with a sharpie marker. Hands down, this is my favorite style. I think it can be resized to fit most any face, it's easy to sew, and relatively comfortable to wear.

Originally, I saw this one created by homemadeonourhomestead on YouTube. Her version is more detailed with a pocket for a filter and a place for a nose wire. I saw another one similar to this, simplified the style, eliminated the nose wire, and posted my own instructions on this page. 

Personally, I haven't had much success with adding nose wires. While it may make the mask fit more closely to the face, it makes the piece harder to launder, and it seems the wearer "fusses" too much to get it conformed to the nose. Part of the purpose of wearing a face covering is to help you avoid touching the face so that very fussing may defeat the purpose. 

As you can see, I've been on the mask making merry go round for a while now. 
Picture
This last one only has only one drawback. You really need to instruct the wearer on how to wear it. I hope my face friendly photos help you see this face covering in action. 

I'll close by wishing you all good health and happy sewing!
Picture
UPDATE! I wore this mask for an entire day and found it to be very comfortable.
5 Comments

Scrap Happy Hankie Bags

4/11/2020

6 Comments

 
Picture
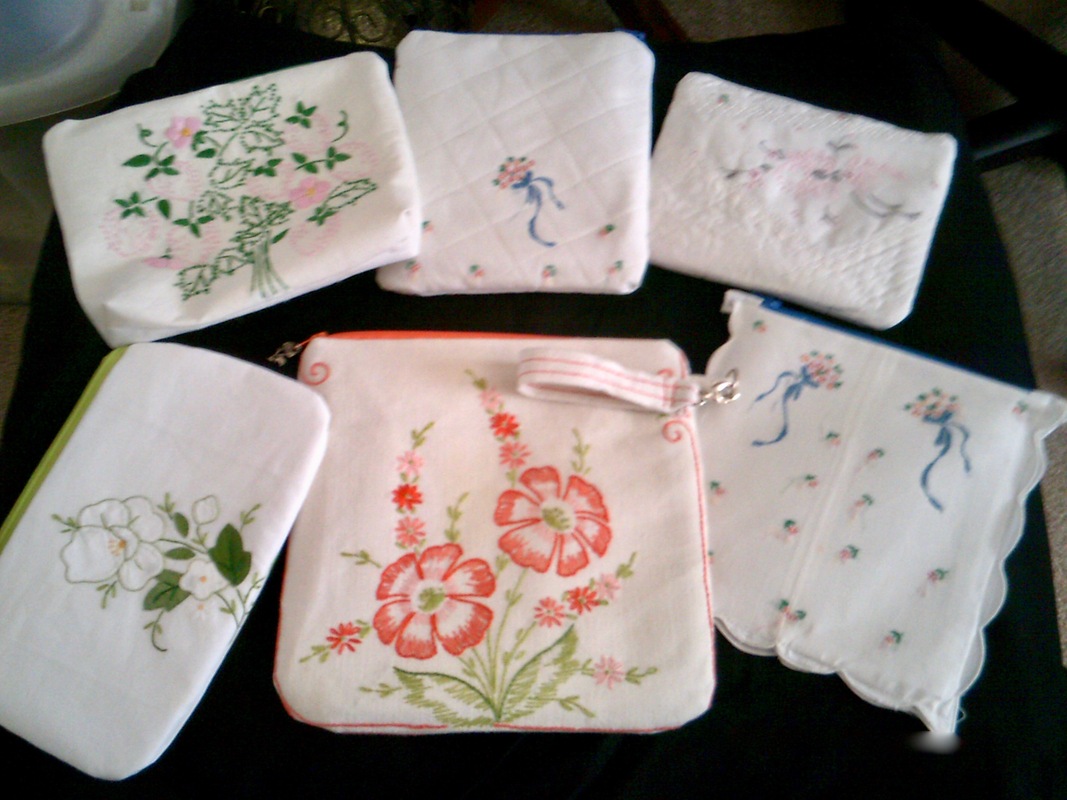
Recently, I got an email from my friend Joan M. in Prescott Arizona. She has been making the most of her stay at home time and is churning out great gifts to tuck away for holiday time later in the year. Joan's hankie bags are simply delightful!!! I know I would cherish owning one of these myself. Another one of the bags is made from a dresser scarf. I believe Joan has inspired us to look at those hand-me-down linens in a whole new way!

​Curious as to what kinds of gifts Joan is busy making? I'll let Joan tell you more in her own words, shown in purple below:
"I have been enjoying having more time to spend in my favorite room and making some Christmas gifts for my family.  We do not exchange gifts any more (too many in the family now) but we have a white elephant exchange that everyone loves. 

Last Christmas I decided to make something for everyone, so they got: bowl cozies, steering wheel covers (great for protections against the hot sun in Arizona), key chains made with zippers, and splash guards for the microwave. It was so much fun to see their faces because no one knew what these were. My son thought his steering wheel cover was a hat!

Next Christmas the gals are getting one of these zipper bags made from doilies my Grandmother and Aunts made in the 40's and 50's. I have a chest full and almost donated them to charity because none of my family will want them - I don't even use them. The bag in the upper right - hard to see- is made in the style of a crazy quilt using pieces of doilies used in other bags."
I don't know about you, but I was awestruck by Joan's creative use of vintage hankies and her re-purposing of a doily to make crazy patchwork for another bag. Each one is so unique! What a way to preserve family history and bring precious heirlooms into the fore front instead of keeping them locked away in a dark drawer or dusty box.

By the way, Joan's cheerful note had the title "Making Lemonade" in the subject line of her email :-)

When you're done reading about Joan's creative adventures and you have finished oohing and aahing over her beautiful heirloom style bags, please take the time to leave a comment at the end of this post. 
6 Comments

Scrap Happy Sewing Chatelaine

4/5/2020

2 Comments

 
Picture
Sometimes it's a challenge to find the supplies you need, so how about searching for something you already have and making something new out of it?

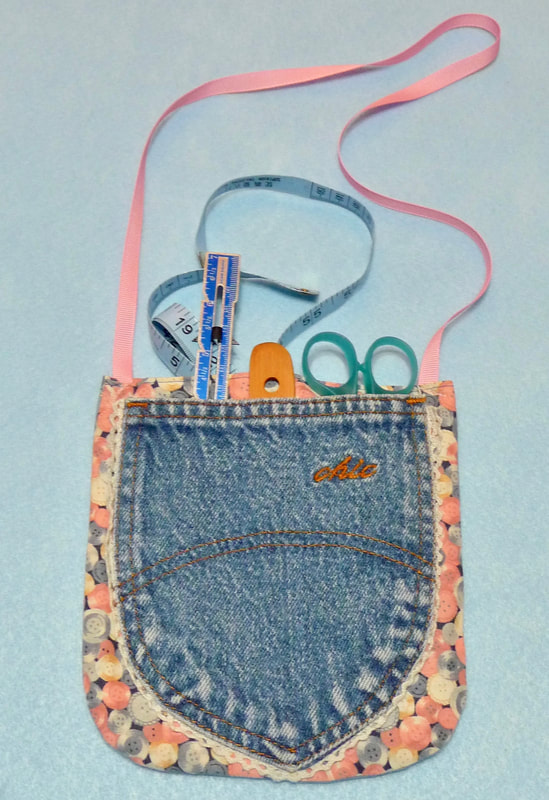
For this project I took a junk jean pocket, made another pocket from scraps, added them together, and turned it into a sewing "chatelaine." This is something you can hang around your neck and have much needed notions ready for the task at hand.

Here are the basic supplies you'll need:
  • Two 8-inch squares of cotton print for front pocket.
  • One 8-inch square of pre quilted fabric for back pocket.
  • One old jean's pocket, cut with 1/2-inch additional seam allowance beyond the finished pocket for outer pocket.
  • 3/8-inch grosgrain ribbon approximately 28-inches long.
  • Optional narrow lace trim to add to pocket.

Note: If your pocket is larger than approximately 6-inches wide X 6-inches long, you'll need to cut larger squares for your front and back pockets. 

Steps to make:
  1. Round off bottom corners on each of the 8-inch squares.
  2. Place cotton print pieces with right sides together and sew a small seam along the straight top edge. Turn to the right side and press.
  3. Hem or bind the quilted piece, making sure it measures the same size as the printed cotton piece.
  4. Turn under the raw edges of the denim pocket and center on the cotton print. Sew in place, adding lace trim if desired. Note: If you have a hard time sewing through the denim, use a permanent fabric glue to attach denim pocket piece.
  5. Sew additional pocket lines on the denim pocket to form narrow channels to hold small tools, or leave it as one large pocket, your choice! I sewed narrow pockets on mine but the thread color blends in so well you can't see it.
  6. Place front and back right sides together and sew a 1/2-inch seam along sides and bottom. Trim curves slightly, finish raw edges with zig zag or overcast, and turn right side out.
  7. Tuck 1-inch of each ribbon end between pocket layers at each side. Securely stitch ribbon in place to form a loop to hang around your neck. See example below:
Picture
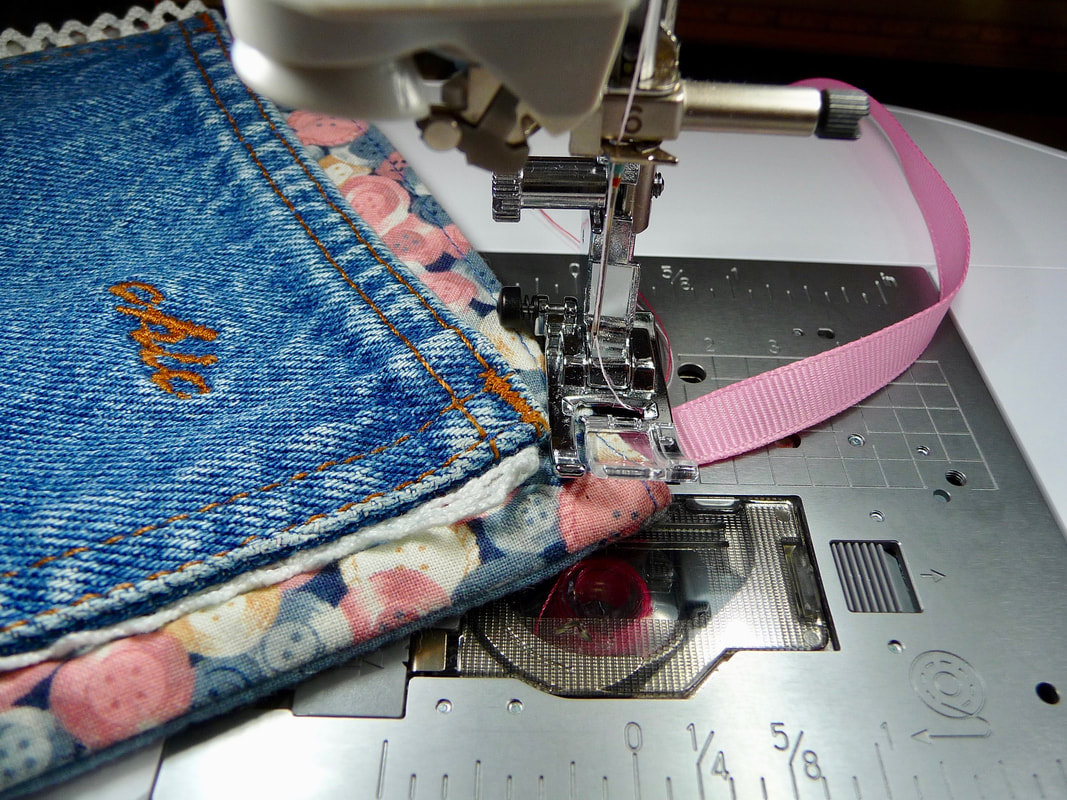
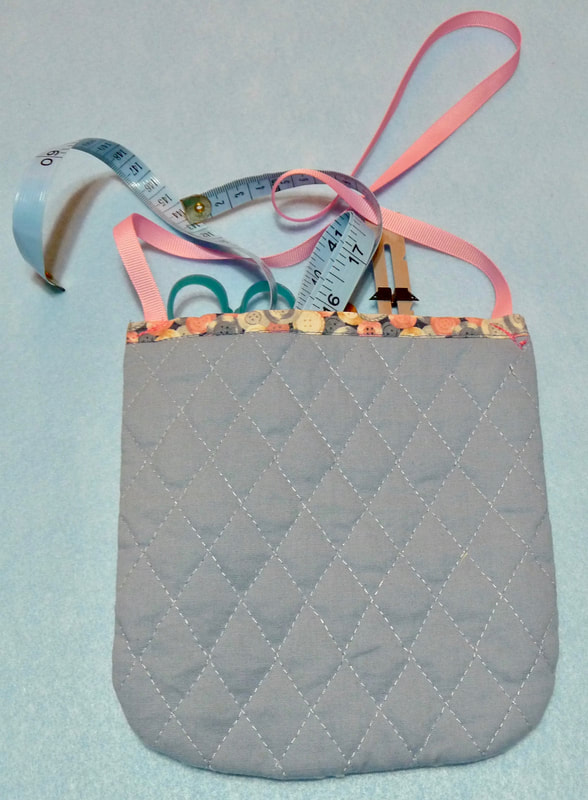
You're finished! Here is what the piece looks like on the back side.
Picture
Enjoy!
2 Comments
    Picture

    Author:

    Joanne Banko
    Brother Ambassador


    I'd love to stay in touch with you!

    Click Here
    and Sign up for
    ​Sewing News, plus tips, tricks, and notifications about new blog posts.

    Archives

    March 2023
    February 2023
    January 2023
    December 2022
    November 2022
    October 2022
    September 2022
    August 2022
    July 2022
    June 2022
    May 2022
    April 2022
    March 2022
    January 2022
    December 2021
    October 2021
    August 2021
    July 2021
    June 2021
    May 2021
    April 2021
    March 2021
    February 2021
    November 2020
    October 2020
    June 2020
    May 2020
    April 2020
    March 2020
    February 2020
    January 2020
    November 2019
    August 2019
    July 2019
    June 2019
    May 2019
    March 2019
    February 2019
    January 2019
    December 2018
    September 2018
    August 2018
    July 2018
    June 2018
    March 2018
    February 2018
    December 2017
    September 2017
    August 2017
    June 2017
    April 2017
    February 2017
    January 2017
    December 2016
    September 2016
    July 2016
    June 2016
    May 2016
    March 2016
    February 2016
    January 2016
    December 2015
    October 2015
    September 2015
    July 2015
    June 2015
    May 2015
    March 2015
    January 2015
    October 2014
    July 2014
    May 2014
    March 2014
    January 2014

    *As a believer in full disclosure, I'd like you to know that Blog posts may contain affiliate links for products and services I know and trust. Purchasing items through a link marked * results in a small commission for me, with no extra charges for you.

    Categories

    All

    RSS Feed

© Copyright 2023 by Joanne Banko. All rights Reserved