letsgosew.com
  • Home
  • Contact
  • Privacy Policy
  • Sign Up for Sewing News, Freebies, & Updates
  • Order Just Jackets Embroidery Collection
  • Just Jackets FAQ
  • Order Wrapped in Embroidery Book by Joanne Banko
  • Joanne Banko's Blog
  • It's Sew Easy TV Online Blog
  • Machine Embroidery Survey
  • IT'S SEW EASY TV Videos & Bonus Files
    • NEW! It's Sew Easy TV Series 2100
    • It's Sew Easy TV_Series 2000
    • It's Sew Easy TV_Series 1500
    • It's Sew Easy TV - Series 1600
    • It's Sew Easy TV_Series 1700
    • It's Sew Easy TV Series 1800
    • It's Sew Easy TV Series 1900
    • NEW! Superstar Sewing Stitches
    • NEW! Classy Textured Cape
    • NEW! Baby Bath Wrap
    • NEW! Detachable Collar
    • Sew a Swimsuit
    • Machine Embroidered Garments
    • Kimono Blouses
    • Custom Covered Hangers
    • Sewing Beautiful Belts
    • Felted Flower Hat Trim
    • Sew a Waffle Weave Robe
    • Learn about Couching accessories!
    • Turn a Pashmina into a Trendy Topper
    • Machine Embroidered Reverse Applique
    • Machine Embroidered Knit Dress
    • Use Non-Stick Foot to sew a Custom Luggage Tag
    • Serge & Sew Broomstick Skirt
    • Machine Embroidered Western Jacket
    • Machine Embroidered Bobbin Work Pashmina
    • Embroidered Pajamas
    • Sewing Pearls and Sequins
    • Learn how to use the Fringe Foot
    • Quilted Pinwheel Patchwork Tote
    • Machine Embroidered Lace for Lingerie
    • Sewing Circles with a Circular Attachment
    • Sew with the Edge Joining Foot
    • Re-style Tops for Little Girls
    • Short Style Tip- Blouse Embellishment
    • Learn how to make pretty piping using the Piping Foot
    • Embellish with the Three Slot Cording Foot
    • Facebook Live Interview 12-4-2018
    • Machine Embroidery - Starter Tips
  • FREE Tutorials and Tip Sheets
    • NEW! Embroidery Placement Positioning Tips
    • Free Embroidered Snowflake Coasters
    • Tip sheet - 5 Reasons Quilters Need A Serger
    • Free In-the-Hoop Patch Pocket Design
    • Serging versus Sewing
    • FREE Project-Embroidered Gift Tag with Gift Bag
    • Tip Sheet - Pillow Pointers
    • Tip sheet_Sew Straight Laser for Seams
    • Embelishment Tips from dime V.111
    • Tip sheet - Shannon Embrace Double Gauze
    • Tip sheet - Fun with Fonts
    • Fabric Tip Sheet- Sewing Faux Suede
    • Tip sheet for Sewing & Embroidering with Metallic Thread
    • Fleece Ruana Pattern: As seen on PBS It's Sew Easy TV
    • Fabric Tip Sheet - Crepe Back Satin
    • Fabric Tip Sheet-Sewing Slinky Type Knit
    • Fabric Tip Sheet - Fleece
    • Fancy Footwork Tipsheet - About the Walking Foot
    • Fancy Footwork Tip Sheet_Basic Appliqué
    • Fancy Footwork Tip sheet - Ruffler Attachment
    • Fancy Footwork Tip Sheet - Narrow Hems with a Standard Foot
    • Fancy Footwork Tip Sheet - Non Stick Foot
    • Tip sheet - Machine Embroidery Pattern Connection Resources
    • Tip Sheet - Machine Set up for Shirring
    • Tip sheet - Snowman and Target Markers
    • Tip Sheet for Printing on Fabric
    • Tip sheet-Five Ways to Finish Fleece Blankets
    • T-Shirt Transformation Tutorial
    • Project- Serge a Little Girl's Sweet Summer Dress
    • Tip Sheet for Fleece Frame Shape Appliqué
    • Tip Sheet - Bobbin Work Sewing & Embroidery
    • Tip Sheet - Custom Covered Buttons
    • Tip Sheet - Liquid Stabilizers
    • Tip sheet - Appliqué with Brother XV8500D & ScanNCut
    • Project - Sheer Chiffon Wrap
    • Project - Pearl Trimmed Candle Ring
    • Tip Sheet -Mitered Satin Blanket Binding
    • Fabric Tip Sheet_Knit Know How
    • Sew a Sheer Wrap
    • Tool School Tip Sheets
    • ITH Project Planner
  • As seen in DiME Magazine - Photo Gallery
  • Sewing and Embroidery Events
  • About Joanne Banko
  • What's New? Let's Get Creative Club Meetings

Machine Embroidery Mixed With Decorative Stitches

9/15/2018

10 Comments

 
Picture
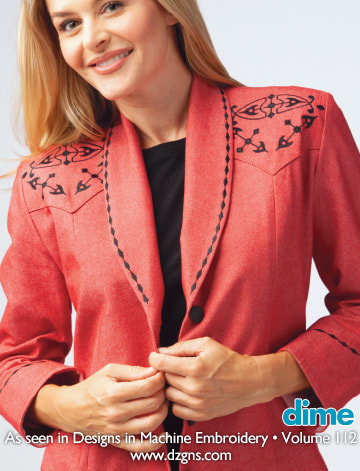
Have you seen the red denim jacket titled Western Flair in Volume 112 of Designs in Machine Embroidery magazine? If you have, then you know that machine embroidery is the focal point of the pretty pointed yokes. 
Picture
Picture
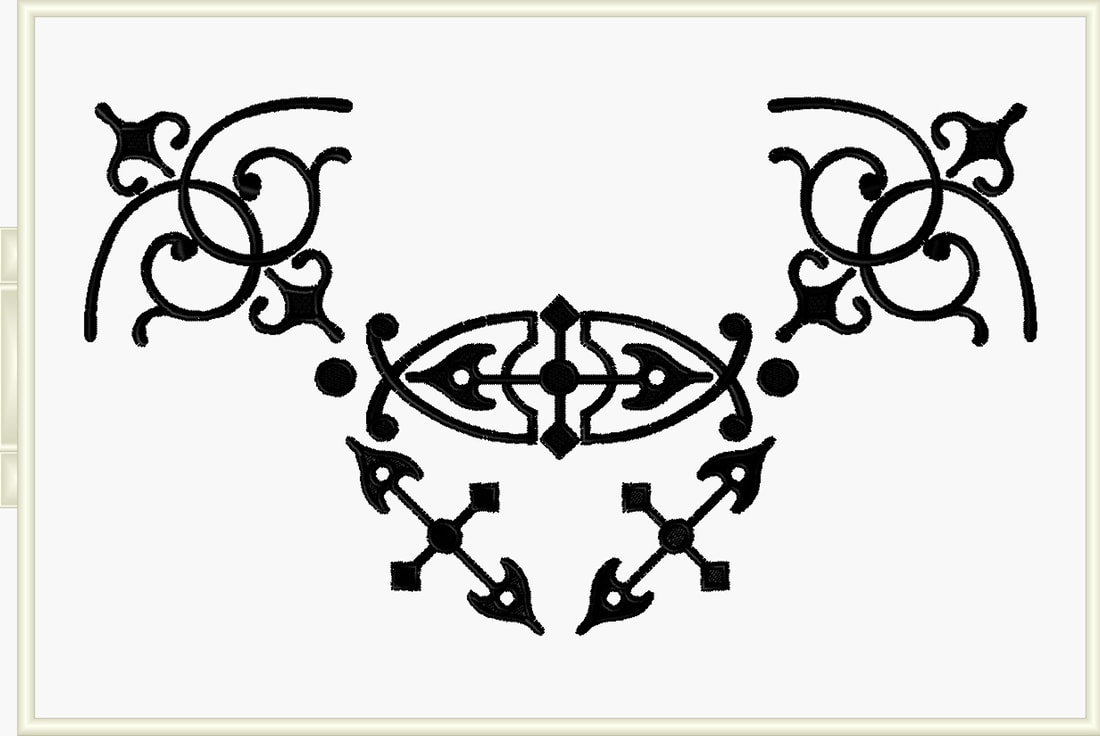
The jacket pattern I selected, Folkwear Pattern #242, inspired me to create a design combination to compliment the shape of the yokes on the front and back. I had fun decorating these yokes by mixing motifs from the design collection included in Wrapped in Embroidery. This group of classic designs has proved to be quite versatile as they've found their way onto many garments hanging in my closet! 
This article includes ideas and tips I think you'll find useful for designing your own machine embroidered masterpieces. You'll see exactly how the yokes were made and get a glimpse of the decorative stitching added to compliment the embroidery motifs. I like to think of decorative stitches as itty-bitty embroidery patterns. They are plentiful on the sewing side of the machine and compliment embroidery motifs quite nicely. Keep reading and I'll tell you more about these decorative stitches and how you can successfully stitch similar designs.
Picture
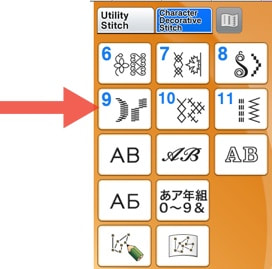
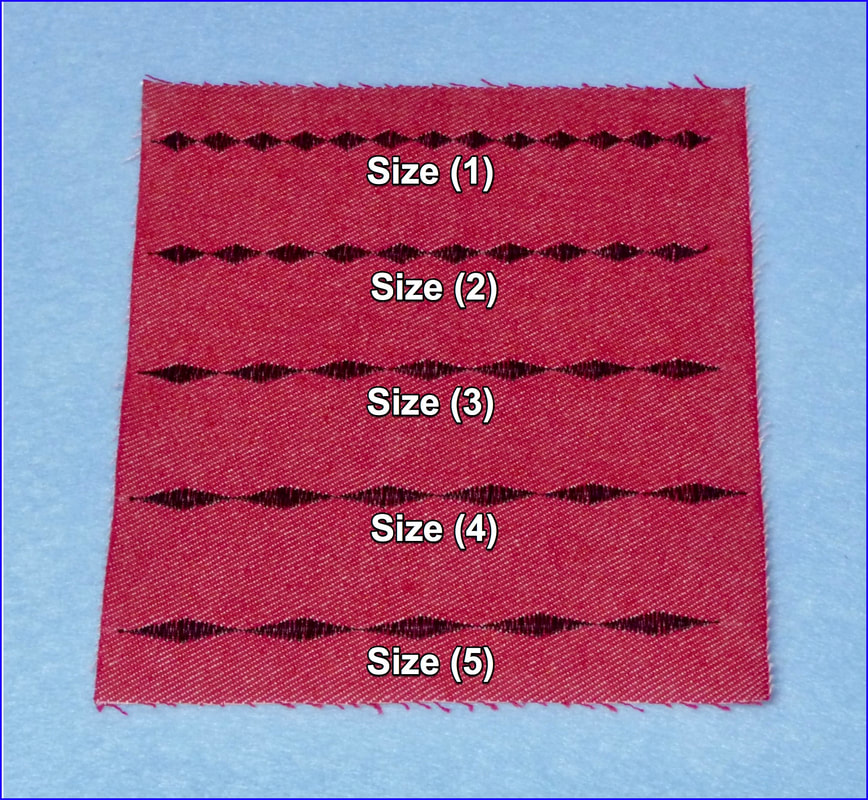
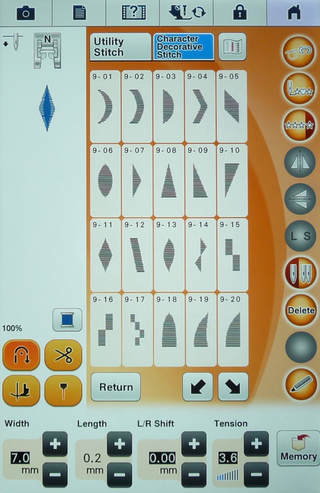
The diamond shaped stitch you see on the shawl collar and cuffs is from the Satin Element stitch menu on the Brother Dream Machine. These stitches are known as elongation patterns because the shapes can be stitched in five elongated sizes. The shape itself remains the same, whether it is a diamond, scallop, or geometric shape. However, the pattern is stretched out or "elongated" while maintaining the same density of the original pattern. You'll find these stitches in the decorative menu of many different machine models. They're actually quite common and have been around for a long time. I encourage you not to overlook them just because they're common. They can make an extraordinary accent on many different projects!
Picture
In the photo above you see an example of all five different sizes. 

Since these are made up of satin stitches the needle moves from right to left to form the pattern. If there is a high contrast between the thread color and the fabric itself you may notice a bit of fabric showing through the space between the stitches. While it's possible to shorten the stitch length you'll find that this also alters the size of the elongated shape. Today you'll learn mare about these stitches and learn a few tricks to get the look you want, maintain the size, and get a nice dense look on contrasting fabric.
Picture
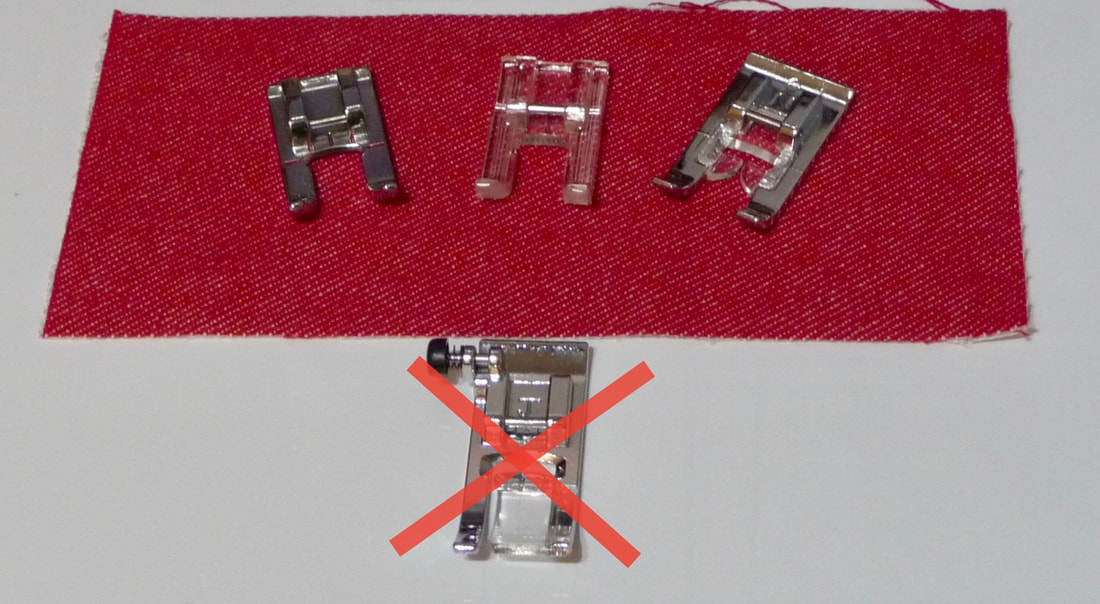
First let's talk about some presser foot possibilities for successful stitching. The foot on the right is the "N" foot and this is the one the machine will tell you to use. It works fine but I prefer an open toe foot for these. Here you see a clear foot in the center and a metal version on the left. It's important to know that all three of these feet have one thing in common, they have a groove or a channel on ​the underside which helps the thickness of the stitch easily flow under the foot. It's also important to know that you never want to use the standard "J" foot for satin stitching. This foot is too flat and will surely get stuck on the stitches. The big red X is here to remind you to put this foot away while satin stitching.
Picture
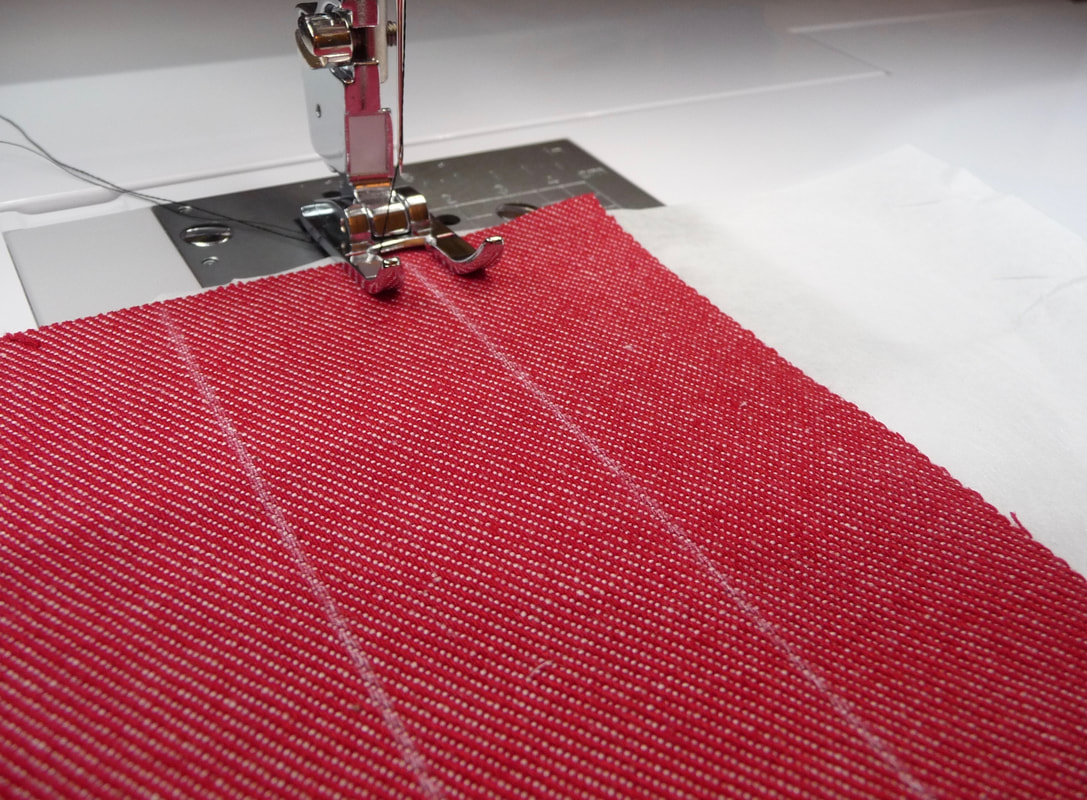
You'll also want to add stabilizer for successful stitching. Here I added a layer of tear-way underneath before stitching the samples. It's important to know that this type of stitching should be done on a single layer of fabric. The collar and cuffs for the jacket were decorated before construction.
Picture
Picture
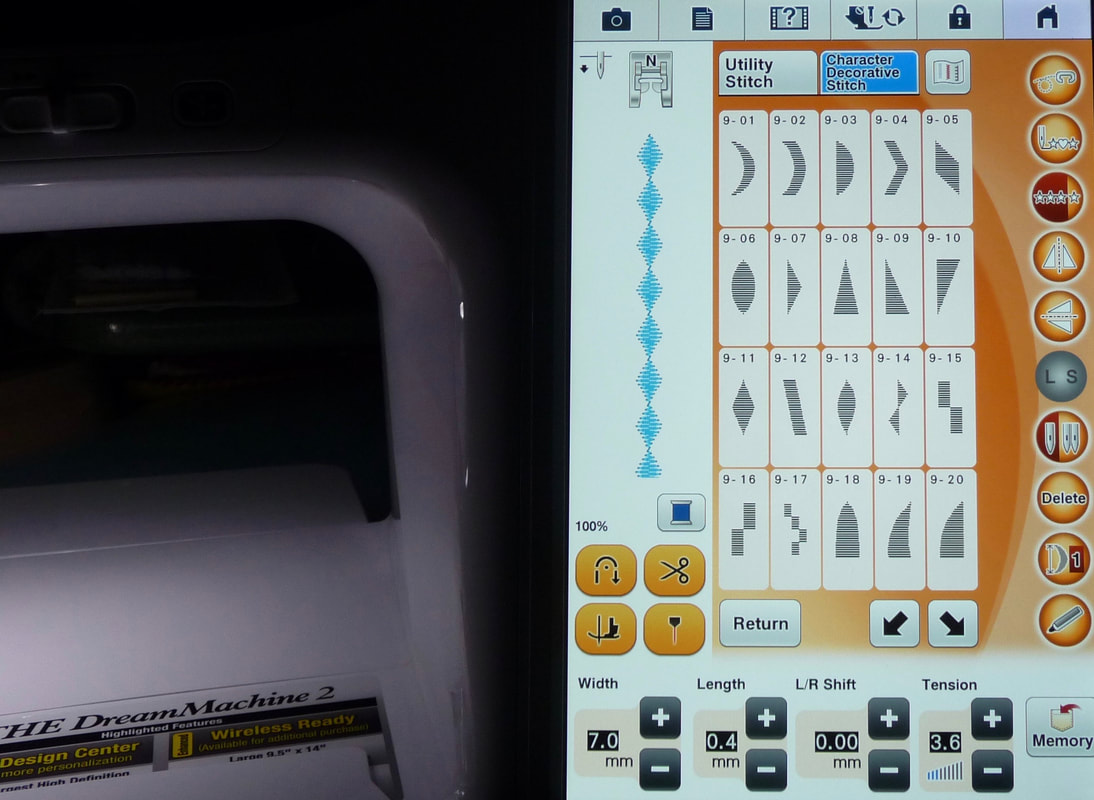
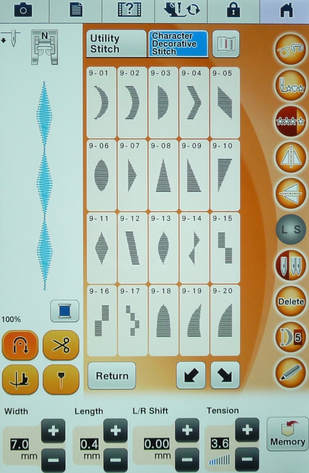
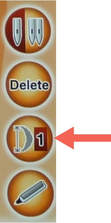
It's important to note that when the stitch is first selected the default size is (3). Touch the size key to scroll through and make a different selection. In the above photo you see the smallest size, size (1).

For the trim on the red denim jacket I wanted the diamond shapes to be dense, with good coverage on the high contrast fabric.
Picture
I started by selecting size (5), but I wanted the pattern to look like a size (3).
Picture
To achieve this I simply decreased the stitch length to 0.2. This shortens the stitch length but also shortens the actual pattern shape. The resulting stitch looks like a (3) and is also more dense, so it covers the fabric better and looks richer. Below you see an example of this combination of size (5) with a stitch length of 0.2. 
Picture
There is yet another way to achieve this effect and that is to switch to thicker thread. The sample below was size (3) stitched with 30 weight embroidery thread and no change in the stitch length. Be sure to use a size 14 embroidery needle with this thicker thread. Side by side these samples look nearly identical yet the results were achieved with two different methods.
Picture
I encourage you to experiment with these ideas. I'm hoping you'll find a way to use satin element stitches for some of your own special masterpieces. You are welcome to share your thoughts, questions, and ideas in the comments box.

P.S. You can see a blue denim version of this jacket when you click here to watch a repeat of It's Sew Easy TV episode 1008-1. You'll see additional sewing and embroidery embellishment techniques!
10 Comments
Elizabeth
9/17/2018 02:56:05

Great demo thanks for the Dream tips!

Reply
Joanne Banko link
9/17/2018 16:40:49

Hi Elizabeth! Glad to know these Dream tips were helpful. Stay tuned, there's more where that came from ;-)

Reply
Di link
9/17/2018 07:51:30

I get so involved in the embroidery function of my DM2 that I forget about the decorative stitches built in my machine. I love your demos!

Reply
Joanne Banko link
9/17/2018 17:28:03

Hi Di!
Thanks for letting me know the demos and such are helpful for you! It's easy to understand how you get "lost" in embroidery mode. That is a big playground! The sewing side of the machine is yet another vacation destination and full of fun as well :-)

Reply
Joy
9/17/2018 08:55:54

Thanks for all the information and tips.Your jacket has inspired me
to start using my decorative stitches on clothing.

Reply
Joanne Banko link
9/17/2018 17:32:05

Thanks for taking the time to comment Joy! I aim to inspire, that's for sure! Glad to know this info helped you. The subject of decorative stitching is one of my favorite topics to teach and write about. You inspried me to write more about it!

Reply
Judy
9/17/2018 16:38:59

Another great tutorial based on a beautiful stitch-out. Many thanks for the inspiration.

Reply
Joanne Banko link
9/17/2018 17:34:26

It was kind of you to send your comments Judy! I'm happy you enjoyed this post.

Reply
Sarai Pitchford
10/3/2018 17:14:11

I am enjoying getting your tips and tricks. I watch you regularly on TV, but just recently starting following your website. I am getting back into sewing after many years (learned in high school economics..way back when?, and I still love it as much as I ever did. Thank you for helping me renew this passion for sewing!

Reply
Joanne Banko link
10/3/2018 23:31:07

Hello Sarai!
It was so great to read your note! Thanks for writing and letting me know you are watching and reading too! I think the love of sewing never really leaves you, even if there's a gap between when you started initially and when you got a new start down the road. I'm happy I can be of some help. Stay tuned! There's lots more to come :-)

Reply


Leave a Reply.

    Picture

    Author:

    Joanne Banko
    Brother Ambassador


    I'd love to stay in touch with you!

    Click Here
    and Sign up for
    ​Sewing News, plus tips, tricks, and notifications about new blog posts.

    Archives

    June 2022
    May 2022
    April 2022
    March 2022
    January 2022
    December 2021
    October 2021
    August 2021
    July 2021
    June 2021
    May 2021
    April 2021
    March 2021
    February 2021
    November 2020
    October 2020
    June 2020
    May 2020
    April 2020
    March 2020
    February 2020
    January 2020
    November 2019
    August 2019
    July 2019
    June 2019
    May 2019
    March 2019
    February 2019
    January 2019
    December 2018
    September 2018
    August 2018
    July 2018
    June 2018
    March 2018
    February 2018
    December 2017
    September 2017
    August 2017
    June 2017
    April 2017
    February 2017
    January 2017
    December 2016
    September 2016
    July 2016
    June 2016
    May 2016
    March 2016
    February 2016
    January 2016
    December 2015
    October 2015
    September 2015
    July 2015
    June 2015
    May 2015
    March 2015
    January 2015
    October 2014
    July 2014
    May 2014
    March 2014
    January 2014

    *As a believer in full disclosure, I'd like you to know that Blog posts may contain affiliate links for products and services I know and trust. Purchasing items through a link marked * results in a small commission for me, with no extra charges for you.

    Categories

    All

    RSS Feed

© Copyright 2022 by Joanne Banko. All rights Reserved