letsgosew.com
  • Home
  • Contact
  • Privacy Policy
  • Sign Up for Sewing News, Freebies, & Updates
  • Order Just Jackets Embroidery Collection
  • Just Jackets FAQ
  • Order Wrapped in Embroidery Book by Joanne Banko
  • Joanne Banko's Blog
  • It's Sew Easy TV Online Blog
  • Machine Embroidery Survey
  • IT'S SEW EASY TV Videos & Bonus Files
    • NEW! It's Sew Easy TV Series 2100
    • It's Sew Easy TV_Series 2000
    • It's Sew Easy TV_Series 1500
    • It's Sew Easy TV - Series 1600
    • It's Sew Easy TV_Series 1700
    • It's Sew Easy TV Series 1800
    • It's Sew Easy TV Series 1900
    • NEW! Superstar Sewing Stitches
    • NEW! Classy Textured Cape
    • NEW! Baby Bath Wrap
    • NEW! Detachable Collar
    • Sew a Swimsuit
    • Machine Embroidered Garments
    • Kimono Blouses
    • Custom Covered Hangers
    • Sewing Beautiful Belts
    • Felted Flower Hat Trim
    • Sew a Waffle Weave Robe
    • Learn about Couching accessories!
    • Turn a Pashmina into a Trendy Topper
    • Machine Embroidered Reverse Applique
    • Machine Embroidered Knit Dress
    • Use Non-Stick Foot to sew a Custom Luggage Tag
    • Serge & Sew Broomstick Skirt
    • Machine Embroidered Western Jacket
    • Machine Embroidered Bobbin Work Pashmina
    • Embroidered Pajamas
    • Sewing Pearls and Sequins
    • Learn how to use the Fringe Foot
    • Quilted Pinwheel Patchwork Tote
    • Machine Embroidered Lace for Lingerie
    • Sewing Circles with a Circular Attachment
    • Sew with the Edge Joining Foot
    • Re-style Tops for Little Girls
    • Short Style Tip- Blouse Embellishment
    • Learn how to make pretty piping using the Piping Foot
    • Embellish with the Three Slot Cording Foot
    • Facebook Live Interview 12-4-2018
    • Machine Embroidery - Starter Tips
  • FREE Tutorials and Tip Sheets
    • NEW! Embroidery Placement Positioning Tips
    • Free Embroidered Snowflake Coasters
    • Tip sheet - 5 Reasons Quilters Need A Serger
    • Free In-the-Hoop Patch Pocket Design
    • Serging versus Sewing
    • FREE Project-Embroidered Gift Tag with Gift Bag
    • Tip Sheet - Pillow Pointers
    • Tip sheet_Sew Straight Laser for Seams
    • Embelishment Tips from dime V.111
    • Tip sheet - Shannon Embrace Double Gauze
    • Tip sheet - Fun with Fonts
    • Fabric Tip Sheet- Sewing Faux Suede
    • Tip sheet for Sewing & Embroidering with Metallic Thread
    • Fleece Ruana Pattern: As seen on PBS It's Sew Easy TV
    • Fabric Tip Sheet - Crepe Back Satin
    • Fabric Tip Sheet-Sewing Slinky Type Knit
    • Fabric Tip Sheet - Fleece
    • Fancy Footwork Tipsheet - About the Walking Foot
    • Fancy Footwork Tip Sheet_Basic Appliqué
    • Fancy Footwork Tip sheet - Ruffler Attachment
    • Fancy Footwork Tip Sheet - Narrow Hems with a Standard Foot
    • Fancy Footwork Tip Sheet - Non Stick Foot
    • Tip sheet - Machine Embroidery Pattern Connection Resources
    • Tip Sheet - Machine Set up for Shirring
    • Tip sheet - Snowman and Target Markers
    • Tip Sheet for Printing on Fabric
    • Tip sheet-Five Ways to Finish Fleece Blankets
    • T-Shirt Transformation Tutorial
    • Project- Serge a Little Girl's Sweet Summer Dress
    • Tip Sheet for Fleece Frame Shape Appliqué
    • Tip Sheet - Bobbin Work Sewing & Embroidery
    • Tip Sheet - Custom Covered Buttons
    • Tip Sheet - Liquid Stabilizers
    • Tip sheet - Appliqué with Brother XV8500D & ScanNCut
    • Project - Sheer Chiffon Wrap
    • Project - Pearl Trimmed Candle Ring
    • Tip Sheet -Mitered Satin Blanket Binding
    • Fabric Tip Sheet_Knit Know How
    • Tool School Tip Sheets
    • ITH Project Planner
  • As seen in DiME Magazine - Photo Gallery
  • Sewing and Embroidery Events
  • My Sewing Story

Creating cording with Thread For Bustling On A Bridal Gown

3/25/2023

20 Comments

 
Picture
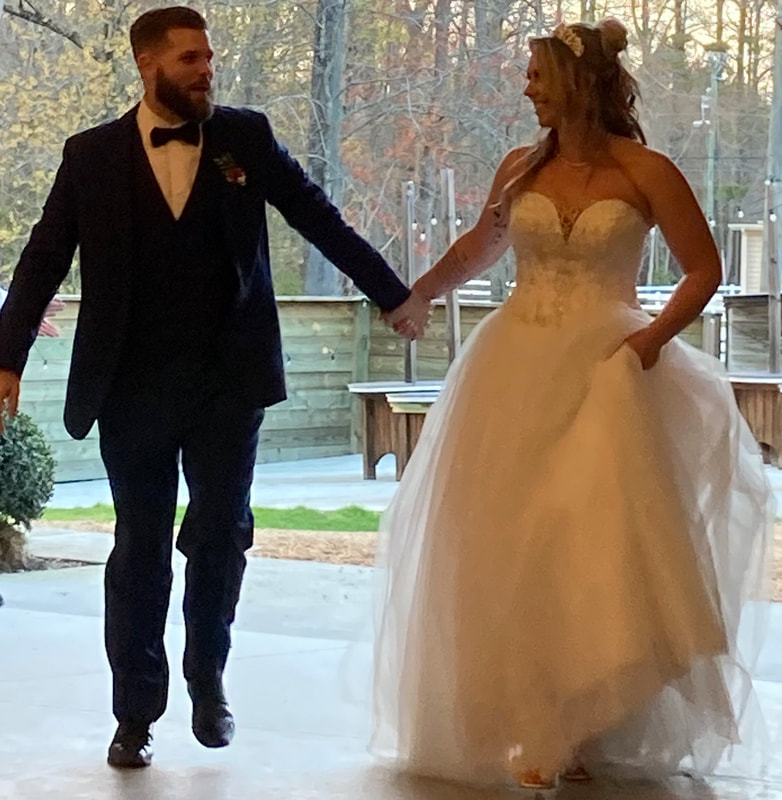
The new Mr. and Mrs. - David and Naomi House!
I recently bustled the dress for this beautiful bride. The groom is the son of Deb, and step son of Don, my special friends who live out of State. You can learn more about them and their own sewing adventures in the replay of this YouTube show HERE.

I volunteered somewhat last minute to be the official "bustler." Originally, I thought they just needed me to figure out how to drape the dress and make it hang nice. Indeed, the draping part is quite an art in an of itself. Turns out, there were no loops or "bustling buttons" in place when I arrived 2 days before the wedding. While the family was busy with last minute preparations, I scoured the sewing room for something to make this work. I should mention that the sewing room is well stocked due to the fact that both Deb and her hubby Don sew, embroider, and craft the most amazing things. However, it was not full of much in the way of dressmaking supplies.

I searched the drawers and cubbies and found coarse crafting yarn but no silken cord or pearl like buttons like I happen to have at home in my own stash. Believing that necessity is the mother, father, sister, brother, and first cousin of invention, I ended up making cording from thread, sewing loops to the lining and then the netting layers on the dress, stabilizing the four layers of fine netting with little circles of embroidery stabilizer. Deb was tasked with hunting for some sparkling buttons to add to the back bodice to hook the loops onto. She came home with some stunning button options from good ole Hobby Lobby. 
Picture
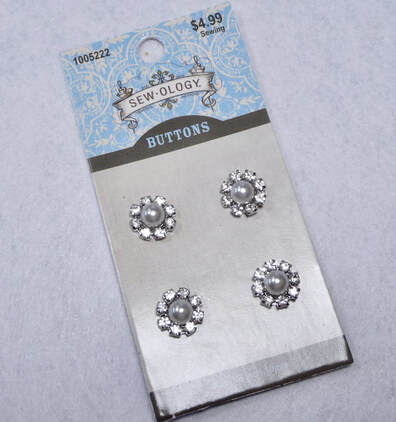
These gorgeous buttons were stitched on the night before the big day. The end result was a beautiful bustle that held tight through a night of joyful dancing.
​
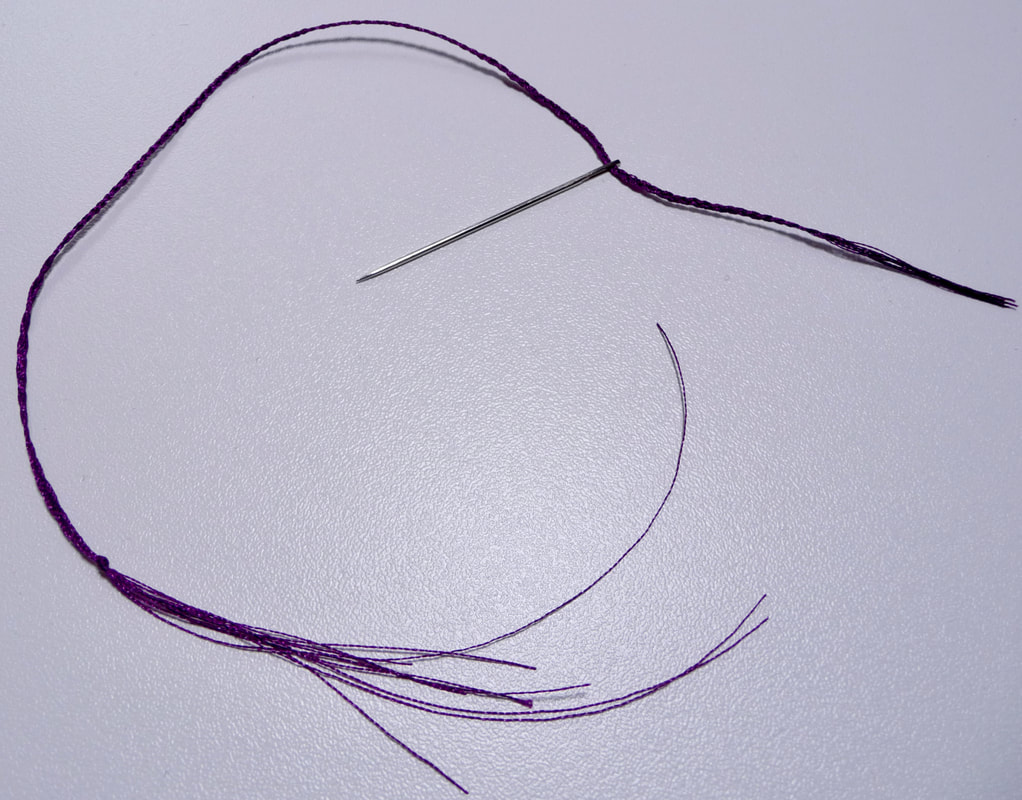
Braiding nine cords together was the trick to making a strong, silky, thin cord with lots of strength. The idea of creating cording from nothing more than thread can work for other applications such as belt loops, loops for buttons on a garment, and even a thread chain to connect lining to the face garment such as a lined skirt or coat. Take a look at the simple steps I devised to make cording below.
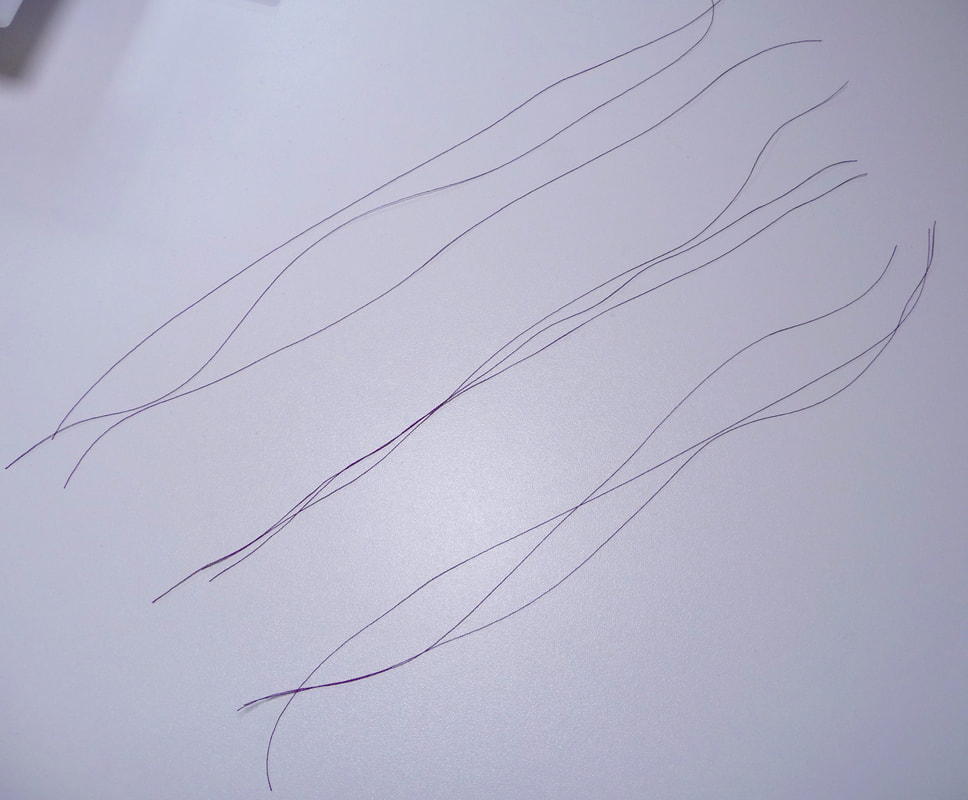
Step One: Cut three sets of three strands of smooth, strong thread. I used polyester machine embroidery thread. Tip: Cut strands about 12-inches long. Any longer and you risk tangling while braiding.

P.S. While braiding the strands, the groom's beloved grandmother June reminded me of Ecclesiastes 4:12 where it says that a cord of three strands is not easily broken. How true!!!
Picture
Step Two: Tape to a flat surface.
Picture
Step Three: Carefully braid the strands together into a smooth, tight cord.
Picture
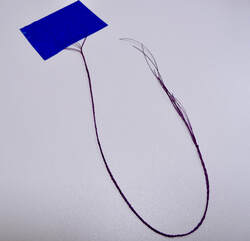
Step Four: Thread cording into a large eyed needle to insert where ever you need it. Be sure to anchor the ends with secure knots.

Picture
20 Comments
Linda
3/26/2023 00:17:26

That's a great idea for a bustle cord. I made one by single crocheting a lightweight cotton cording but half way through the night it broke. The braiding would have made it stronger.

Reply
Joanne Banko
3/26/2023 20:33:49

Hello Linda! Thanks for taking the time to leave a comment. The braiding trick really worked! I've done crocheted cords before but I think I'll use this method from now on. I think you'll like the fine (and strong) finish you get from using polyester embroidery thread.

Reply
Rene McFarland
3/26/2023 09:46:39

Gorgeous bride and gown! The bustling cord technique is amazing! JoAnne, your dress is absolutely beautiful and love the fabric and teal color!

Reply
Joanne Banko
3/26/2023 20:35:52

Thanks for all your kind comments Rene! I'm so glad you enjoyed the post. I'll try to get a photo of me actually "in" the dress in the future.

Reply
Donna Strode
3/26/2023 20:53:47

Oh how beautiful. What a wonderful story. Please let me know how to prepare as the mother of the bride going to a destination wedding. Island. Your advice would be so much appreciated actually wonderful. We all have our dresses and pray it all goes well❤️

Reply
Joanne Banko
3/26/2023 21:03:17

Hi Donna! Glad to see your comment. What can I do to help you? Are you the mother of the bride? Here are some thoughts . . . It's my understanding that wedding dresses do not always come ready for bustling and that is an extra that some bridal shops or seamstresses will provide. I had the bride try on the dress, then I played around with lifting it and draping it. For the lining, I selected three spots to sew loops on the lining, then attached one button in the center of the back bodice to hang all three loops onto. For the dress itself, I pulled up four evenly spaced places and kept adjusting until the drape was nice and the dress came up off the floor. Everything got marked with safety pins and then the loops were sewn on. Then I sewed four buttons, evenly spaced along the seam on the back bodice. Each button held one loop from the dress. I did watch a YouTube video on bustling options beforehand that was a bit helpful. Quite honestly, a lot of it was trial and error and done by "feel," but it all worked out beautifully!

Reply
Vicky Isliefson
3/26/2023 22:31:32

Thank you for this, Joanne. It is very timely for me, as I will be altering a wedding dress for my neighbour this spring, including adding bustling. Do you have any close up photos of what you did, and do you have a link to the video you watched?

Reply
Joanne Banko
3/28/2023 20:01:51

Hi Vicky! Unfortunately, I did not take any photos. I was "living in the moment" and not really thinking of relating the story until it ended up with a happy ending. Here is the video I watched: https://youtu.be/Lsd7WxVTxpI
Feel free to reach out to me with any more questions. I'm more than happy to help you in any way I can!

Reply
Martha
3/26/2023 23:22:34

I bustled wedding dress for my daughter's sister-in-law from underneath using cording for Venetian blinds and plastic rings, then when pulled up to bustle the length of cording was tied off to a loop around hip level ...best I remember after 20+ years. I'd had no experience with that type alteration. My daughter did the adjustments for her after ceremony and it stayed in place and bride was satisfied.
That was easier than making 3 bridesmaids dresses from sateen fabric in a strapless full skirted dress with cropped, fitted long sleeved jacket with bare shoulders and no fabric above the collar bone...of course all I had was a picture from a magazine... was for daughter's wedding. Fun times 30 years ago.

Reply
Joanne Banko
3/27/2023 23:08:31

What an amazing story Martha! Where there's a will, there's a way! There are all kinds of ways to bustle but it was a new experience for me :-) Thanks for sharing your thoughts.

Reply
Clovis
3/27/2023 01:21:57

Beautiful couple. I have never heard of bustling. Good job. Now, I know how to make cording with thread.

Reply
Joanne Banko
3/27/2023 23:09:07

Thanks Clovis! The cording idea really works well. Enjoy!

Reply
Carrie C
3/27/2023 12:47:31

Wow! Isn't it interesting how us creatives adapt when we don't have the tools or supplies we need for a project! Love what you did! I'm sure the beautiful bride was thrilled!

Reply
Joanne Banko
3/27/2023 23:10:39

You said it Carrie! We find ways to make and make do, don't we?!? The Bride, Groom, & family were grateful, and it was my pleasure to help out.

Reply
Deborah House-Strahan
3/27/2023 13:29:01

I am the mother of the groom and we had the distinct honor of having Joanne with us! Something none of my family and friends will ever forget! Naomi had alterations done, then had a very good friend, Wendy, hem it for her. But, we then realized it needed bustling. My Mom, (June) that Joanne references, was telling how a "wrist loop" near the bottom of the train is what they did in her day. Naomi stood like a trooper while Joanne pinned and measured and calculated! It was beautifully done and hung just perfect!! Her thought to create the "cord of three strands" for the loops just went with Naomi and David's entire theme. Another very close friend, Cindy Cerda of Creative Heart and Hands, did the actual engraving and board for that portion of the ceremony. Needless to say, Joanne was with us from that Thursday night...thru the wedding...and then left on Tuesday...much to our dismay! We are "sew" blessed to have ever been introduced to her. There is a story on that many blogs back. Thank you, Joanne for making the bride, the mother-in-love, and the grandmother happy. You are one of God's true treasures..she definitely emulates Proverbs 31:13...she seeketh wool, and flax, and works willingly with her hands.

She definitely had to do that because, no...I don't have dressmaking supplies!! Just embroidery/ quilting paraphernalia!!

Reply
Joanne Banko
3/27/2023 23:13:38

You brought tears to my eyes Deb! Such special memories. You are a cherished friend and I'm ever so grateful to be a part of your tight knit circle :-)

Reply
Jan O'Malley
3/27/2023 14:13:10

Your talents are endless and you saved the day being able to bustle the wedding gown. That truly is a gift, for sure. Your tips are always so helpful and priceless!

Reply
Joanne Banko
3/27/2023 23:14:50

Thanks so much for your sweet comments Jan!!! Hearing those words from you mean so much to me!

Reply
Christy pocek
3/28/2023 01:01:02

Love reading comments about your willingness to help others and be involved in their big day. We appreciate you!!!!!

Reply
Joanne Banko
3/28/2023 20:02:49

Thanks so much Christy! You are such a dear friend!

Reply


Leave a Reply.

    Picture

    Author:

    Joanne Banko
    Brother Ambassador


    I'd love to stay in touch with you!

    Click Here
    and Sign up for
    ​Sewing News, plus tips, tricks, and notifications about new blog posts.

    Archives

    May 2023
    March 2023
    February 2023
    January 2023
    December 2022
    November 2022
    October 2022
    September 2022
    August 2022
    July 2022
    June 2022
    May 2022
    April 2022
    March 2022
    January 2022
    December 2021
    October 2021
    August 2021
    July 2021
    June 2021
    May 2021
    April 2021
    March 2021
    February 2021
    November 2020
    October 2020
    June 2020
    May 2020
    April 2020
    March 2020
    February 2020
    January 2020
    November 2019
    August 2019
    July 2019
    June 2019
    May 2019
    March 2019
    February 2019
    January 2019
    December 2018
    September 2018
    August 2018
    July 2018
    June 2018
    March 2018
    February 2018
    December 2017
    September 2017
    August 2017
    June 2017
    April 2017
    February 2017
    January 2017
    December 2016
    September 2016
    July 2016
    June 2016
    May 2016
    March 2016
    February 2016
    January 2016
    December 2015
    October 2015
    September 2015
    July 2015
    June 2015
    May 2015
    March 2015
    January 2015
    October 2014
    July 2014
    May 2014
    March 2014
    January 2014

    *As a believer in full disclosure, I'd like you to know that Blog posts may contain affiliate links for products and services I know and trust. Purchasing items through a link marked * results in a small commission for me, with no extra charges for you.

    Categories

    All

    RSS Feed

© Copyright 2023 by Joanne Banko. All rights Reserved