Depending on your connection and your device, this video may take a minute to fully load.
Click the arrow to watch.
Click the arrow to watch.
I know my readers have a wide variety of machine models with either manual or computerized buttonholes built in. Click on the super short video above and you'll see a computerized "one step" buttonhole in action on a Brother machine. I'll talk more about buttonhole set-up in a minute but first let me describe what you are seeing when you watch the video.
At the starting point the buttonhole sews backwards with a straight stitch, tracing the exact length of the buttonhole as determined by the button inserted at the back of the foot. Next, the same straight stitch is sewn forward, followed by the left "leg" of the buttonhole which consists of narrow zigzag stitches forming from front to back. The machine straight stitches forward, a bar tack forms at the front end of the buttonhole and then the machine stitches backward to form the right leg of the buttonhole with narrow zig zag stitches, and finally finishes with the bar tack at the back end.
What's important to note is that the zigzag stitching for both the right and left leg of the buttonhole form in the same direction, stitching from front to back. This prevents shifting that occurs when a buttonhole stitches out in a "box" formation, moving in different directions for each side.
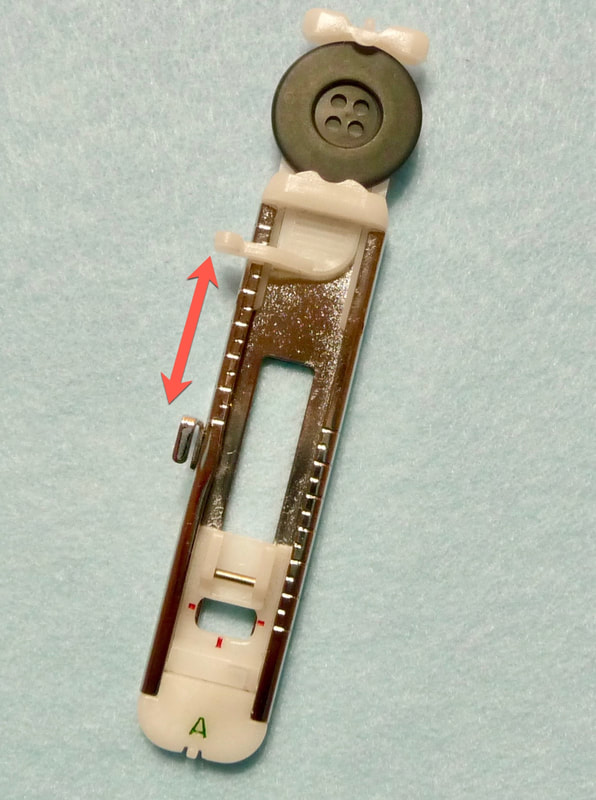
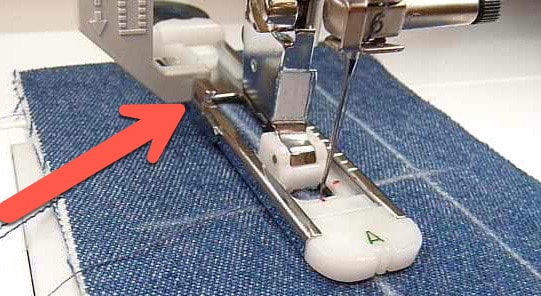
Notice how the button sits snugly in a slot at the back of the buttonhole foot. The spacing created between the white and the silver protrusions coordinate with the buttonhole lever mechanism on the machine, sensing the length. The buttonhole lever (identified with the red arrow below) comes in contact with these two parts and that makes the magic happen.

Now, how about a few more tips for building better buttonholes?
- Buttonholes are essentially a heavy, dense satin stitch and need to be supported with interfacing. Normally interfacing is required in areas where buttonholes are stitches such as plackets, waistbands, and facings. I prefer Pellon Shir-Tailor for medium to heavier fabrics. If interfacing is not part of the plan you can use a temporary stabilizer on the wrong side. You'll want to note that unless the stabilizer washes aways some will remain under the buttonhole.
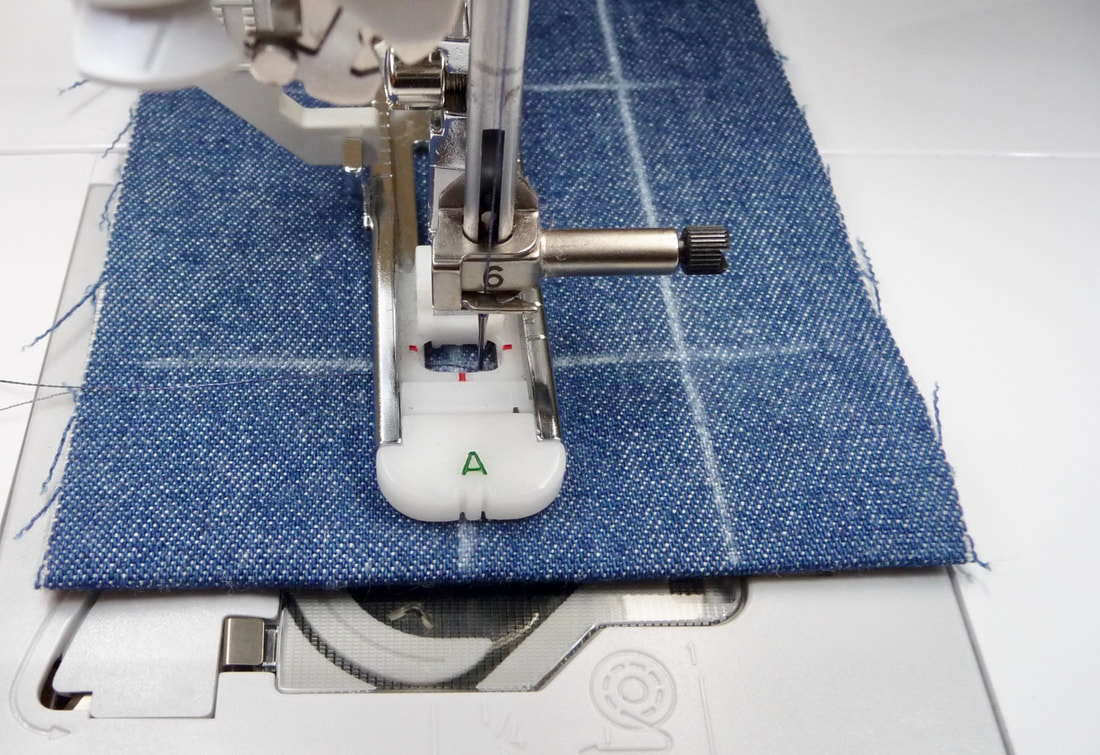
- Mark the position for the center of the buttonhole as well as the beginning. I like to mark one more parallel line to help align the buttonhole foot on the fabric. If the side of the buttonhole foot and the parallel line alongside the foot are on track you are sure to end up with a buttonhole that forms perfectly straight. Notice how the the red marks on the inside opening of the foot show where the center of the buttonhole will be, and also where the buttonhole needs to begin.
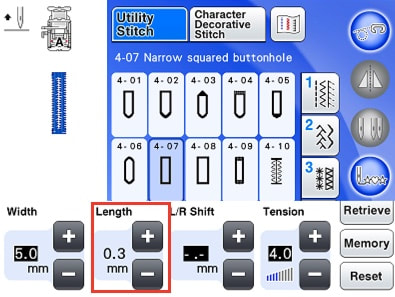
- When stitching buttonholes you always want to make a sample or tow to warm up and check your settings. I have an unusual thread choice when it comes to buttonholes with the recommendation for using embroidery thread in place of ordinary sewing thread. I thread top and bobbin with the embroidery thread and then shorten the stitch length for the buttonhole by one click, reducing it from (0.4) to (0.3).
I think the sheen of the embroidery thread has a smooth look and mimics the old time silk buttonhole twist used for hand worked buttonholes in days gone by. In addition, embroidery thread is smoother than ordinary sewing thread.
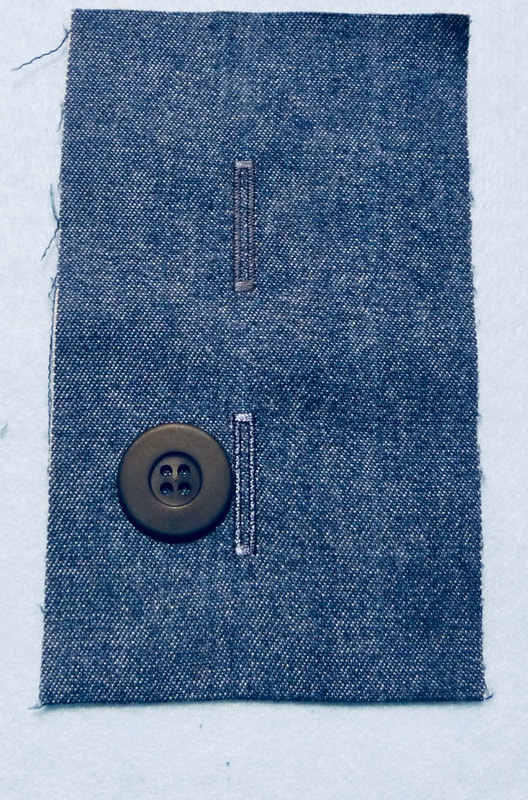
Take a look at the example below and you'll see ordinary sewing thread on top and embroidery thread on the bottom buttonhole next to the button. On the actual fabric sample the regular thread looks dull and the embroidery thread looks smooth and a little glossy. You decide what you prefer.
Take a look at the example below and you'll see ordinary sewing thread on top and embroidery thread on the bottom buttonhole next to the button. On the actual fabric sample the regular thread looks dull and the embroidery thread looks smooth and a little glossy. You decide what you prefer.
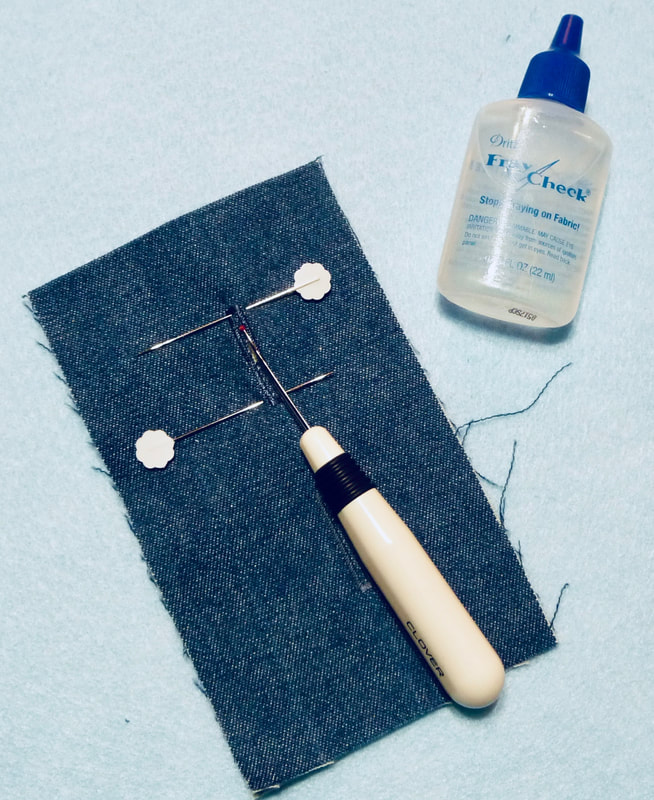
- Seam sealant is especially helpful to control fraying thread on open buttonholes. Apply sparingly to the unopened buttonhole, pat with a tissue or paper towel to absorb excess and let dry. When it's time to open the buttonhole it's a good idea to place pins at each end and then slice open the buttonhole from the center to the end using a sharp seam ripper. the pins will prevent you from cutting too far.
I hope you found these tips helpful! If you have buttonhole questions or comments feel free to leave them below :-)

 RSS Feed