letsgosew.com
  • Home
  • Contact
  • Privacy Policy
  • Sign Up for Sewing News, Freebies, & Updates
  • Order Just Jackets Embroidery Collection
  • Just Jackets FAQ
  • Order Wrapped in Embroidery Book by Joanne Banko
  • Joanne Banko's Blog
  • It's Sew Easy TV Online Blog
  • Machine Embroidery Survey
  • IT'S SEW EASY TV Videos & Bonus Files
    • NEW! It's Sew Easy TV Series 2100
    • It's Sew Easy TV_Series 2000
    • It's Sew Easy TV_Series 1500
    • It's Sew Easy TV - Series 1600
    • It's Sew Easy TV_Series 1700
    • It's Sew Easy TV Series 1800
    • It's Sew Easy TV Series 1900
    • NEW! Superstar Sewing Stitches
    • NEW! Classy Textured Cape
    • NEW! Baby Bath Wrap
    • NEW! Detachable Collar
    • Sew a Swimsuit
    • Machine Embroidered Garments
    • Kimono Blouses
    • Custom Covered Hangers
    • Sewing Beautiful Belts
    • Felted Flower Hat Trim
    • Sew a Waffle Weave Robe
    • Learn about Couching accessories!
    • Turn a Pashmina into a Trendy Topper
    • Machine Embroidered Reverse Applique
    • Machine Embroidered Knit Dress
    • Use Non-Stick Foot to sew a Custom Luggage Tag
    • Serge & Sew Broomstick Skirt
    • Machine Embroidered Western Jacket
    • Machine Embroidered Bobbin Work Pashmina
    • Embroidered Pajamas
    • Sewing Pearls and Sequins
    • Learn how to use the Fringe Foot
    • Quilted Pinwheel Patchwork Tote
    • Machine Embroidered Lace for Lingerie
    • Sewing Circles with a Circular Attachment
    • Sew with the Edge Joining Foot
    • Re-style Tops for Little Girls
    • Short Style Tip- Blouse Embellishment
    • Learn how to make pretty piping using the Piping Foot
    • Embellish with the Three Slot Cording Foot
    • Facebook Live Interview 12-4-2018
    • Machine Embroidery - Starter Tips
  • FREE Tutorials and Tip Sheets
    • NEW! Embroidery Placement Positioning Tips
    • Free Embroidered Snowflake Coasters
    • Tip sheet - 5 Reasons Quilters Need A Serger
    • Free In-the-Hoop Patch Pocket Design
    • Serging versus Sewing
    • FREE Project-Embroidered Gift Tag with Gift Bag
    • Tip Sheet - Pillow Pointers
    • Tip sheet_Sew Straight Laser for Seams
    • Embelishment Tips from dime V.111
    • Tip sheet - Shannon Embrace Double Gauze
    • Tip sheet - Fun with Fonts
    • Fabric Tip Sheet- Sewing Faux Suede
    • Tip sheet for Sewing & Embroidering with Metallic Thread
    • Fleece Ruana Pattern: As seen on PBS It's Sew Easy TV
    • Fabric Tip Sheet - Crepe Back Satin
    • Fabric Tip Sheet-Sewing Slinky Type Knit
    • Fabric Tip Sheet - Fleece
    • Fancy Footwork Tipsheet - About the Walking Foot
    • Fancy Footwork Tip Sheet_Basic Appliqué
    • Fancy Footwork Tip sheet - Ruffler Attachment
    • Fancy Footwork Tip Sheet - Narrow Hems with a Standard Foot
    • Fancy Footwork Tip Sheet - Non Stick Foot
    • Tip sheet - Machine Embroidery Pattern Connection Resources
    • Tip Sheet - Machine Set up for Shirring
    • Tip sheet - Snowman and Target Markers
    • Tip Sheet for Printing on Fabric
    • Tip sheet-Five Ways to Finish Fleece Blankets
    • T-Shirt Transformation Tutorial
    • Project- Serge a Little Girl's Sweet Summer Dress
    • Tip Sheet for Fleece Frame Shape Appliqué
    • Tip Sheet - Bobbin Work Sewing & Embroidery
    • Tip Sheet - Custom Covered Buttons
    • Tip Sheet - Liquid Stabilizers
    • Tip sheet - Appliqué with Brother XV8500D & ScanNCut
    • Project - Sheer Chiffon Wrap
    • Project - Pearl Trimmed Candle Ring
    • Tip Sheet -Mitered Satin Blanket Binding
    • Fabric Tip Sheet_Knit Know How
    • Tool School Tip Sheets
    • ITH Project Planner
  • As seen in DiME Magazine - Photo Gallery
  • Sewing and Embroidery Events
  • About Joanne Banko
  • What's New? Let's Get Creative Club Meetings
  • November Pinecone Project

Serger Do's and Dont's

4/17/2021

30 Comments

 
Picture
As seen on It's Sew Easy TV show 2101-1
Is your serger collecting dust? Recently, I asked a group of sewing enthusiasts what they have been doing with their serger. One honest friend replied collecting dust! I'm afraid this is all too common, especially when someone is new to the world of serging and is intimidated by the dials, knobs, and general strangeness of this machine when compared to a sewing machine. After all, most of us can sit down at just about any sewing machine, thread it up and at least sew a straight seam.

Sergers, also known as overlockers, seem to look just a bit different and while there are some similarities between sergers and sewing machines, they are truly two different animals. 

In this post I'll share some simple Do's and Don'ts to follow. Whether you are a seasoned serger stitcher or a newbie when it comes to overlockers, I think you'll find a tip or two that will work for you.
Picture
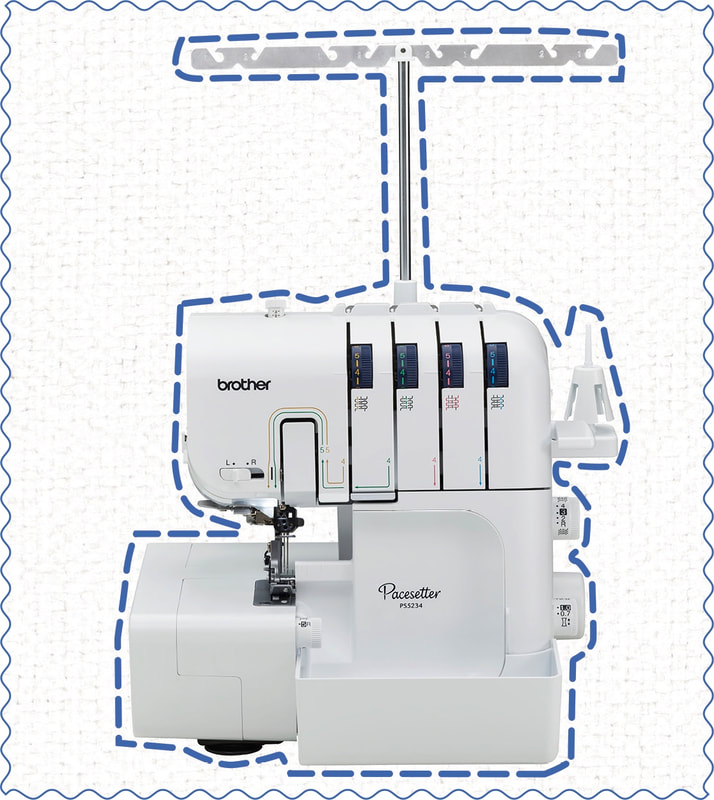
Do's and Don'ts for Standard 4-thread Sergers
Serger Do's - What you should do.
  • Use good quality synthetic cone thread. Lesser quality threads are made up of short fibers, break easily, and leave more fuzz. You can also use regular spools of sewing thread in your serger if you're in a pinch for color matching your fabric. In this case, I prefer to use a thinner thread such as Mettler or Guttermann.
  • Practice serging with threads that are color matched to your machine's tension dials to become familiar with making tension adjustments. 
  • Change needles frequently, using correct type & size for your machine. A universal size 14 is considered pretty standard but I sometimes use a size 11 or 12.
  • Insert needles in the proper direction and up as far as they will go. When removing needles use the appropriate screwdriver and loosen the screw just enough to remove the needle. Leave screw at that semi-loose position until you put another needle in its place. If you tighten down the screw each time you remove a needle you may eventually form a burr. A burr can prevent needles from going all the way up into the hole.
  • For most sergers you will want to thread machine in this order: Upper looper first, Lower looper second, and Needles last. In general, the right needle is threaded first and the left needle second. If either of your loopers need to be re-threaded it is best to unthread the needle(s), rethread the looper(s), and then re-thread the needles last. If you don't want to un-thread and re-thread, then you’ll need to make sure the needle threads are brought to the top of the throat plate and placed under the foot to the back of the machine, after you re-thread a looper and before forming a stitch. This is VERY important! If needle threads are caught behind a looper when your loopers are re-threaded, the looper thread will simply break again. Following this rule will prevent lots of serger frustration.
  • Oil as specified in the manual. Clean face and lower area of machine with a soft brush. I like to use a 1-inch paint brush for cleaning the face and a stiffer nylon sewing machine brush to clean the blades and lower area. I also use a vacuum while brushing and avoid canned air.
  • Change needles regularly. You can usually "hear" a needle get dull. a dull needle makes a popping sound. Dull or damaged needles can also snag fabric and cause runs or holes.
  • When re-threading or starting off with a new stitch formation, take the first few stitches by hand to make sure the stitch forms and everything is running smoothly before using the foot control. 
  • Make some sort of obvious notation to serve as a warning if you disengage the cutting blade for a particular technique. I like to write a note on post it note paper that says Warning! Blade Disengaged! I leave it on my machine until I have re-engaged the cutting blade. 
  • Test your stitches on long scraps of the same fabric before sewing on the actual project. You will waste more thread with short test pieces as you'll have to chain on and off while testing. Use a long piece, stitch a few inches, check, adjust as necessary, and continue until you're satisfied with your adjustments. 
  • Avoid using pins with a serger or be sure to use them parallel to the seam, far away from the blades. Pins and serger blades are mortal enemies. Keep them away from each other at all costs!
Serger Don'ts - What you should NOT do.
  • Don’t turn the handwheel backwards once needles have been threaded. You will tangle the threads and make a mess. 
  • Don’t pull hard on the fabric from the front or back. This can cause the needles to hit the loopers, causing burrs on one or both. 
  • Don’t sew beyond the edge of the throat plate when the cutting blade has been disengaged. Remember the warning system described above.
  • Don’t re-thread the machine without following the proper threading order. Remember the rule about always threading needles last!
  • Don’t use inferior quality threads or old cotton threads. Cotton thread is usually a poor choice for any serger project. Tension on serger thread can make cotton snap and break easily.
  • Don’t neglect oiling! Most sergers require some, if not more oiling than you may think. If your serger has been sitting for a while be sure to oil before using. Too little oil is not a good thing but too much is not good either. Check your manual for specific oiling details. I like to periodically oil the blades of the serger with a cotton swab. This helps clean off residue and makes blades last longer.
  • Don’t serge at an erratic pace, meaning fast, slow, fast, slow. Instead, stitch at a steady, even pace. Stitching at an even pace will make the threads jiggle less and the tension will be more even. This is particularly important on sergers that are more in the budget range price wise.
My final don't? Don't let your serger collect dust. Stay tuned for more tips and tricks for using your serger to the fullest. CLICK HERE and check out this Let's Go Sew tip sheet and learn more about how sergers and sewing machines differ.

Want to see a video with tips for when to sew and when to serge? CLICK HERE to watch Sew it or Serge it, as seen on It's Sew Easy TV show 2101-1. On this show you'll see me demonstrate a variety of techniques using both the sewing machine and serger.

Would you like a PDF version of the Do's and Don'ts to print and keep by your machine? CLICK HERE.
30 Comments
Gail Beam
4/18/2021 04:31:04

Thank you so much Joanne for all of these tips! I really learned a lot of dos and don'ts. Since my two sergers were used and bought online, my knowledge has been just through the manuals.

Reply
Joanne Banko
4/18/2021 13:40:48

Hi Gail! I'm so glad this was helpful. Serger manuals tend to be pretty skimpy. Aside from basic threading information and a few technical diagrams, they don't really inform the user about the ins and outs of serging. Stay tuned for more info to come :-)

Reply
Patricia Guerin
4/18/2021 05:53:34

Great reminders, especially oiling and needle sizes! And just plain using them!

Reply
Joanne Banko
4/18/2021 13:43:50

Great to hear from you Pat! I'm glad to know this info was helpful for you. Oiling is super important! I once had a student whose machine was frozen due to lack of oiling. She felt a little sheepish because she co-owned a machine shop with her husband and knew better. A good oiling and she was up and running again!

Reply
Paula A Groher
4/18/2021 11:21:23

Thank you for the do's and don'ts. I have been having trouble with my lower looper in which the thread keeps breaking. I used cheaper thread when I started with the serger. The lower looper started breaking after I worked on some fleece. So I took it into my Brother Dealer and they will give it a tune up. Thank you for the cleaning tip.

Reply
Joanne Banko
4/18/2021 13:46:14

Hi Paula! If timing is off or there are burrs somewhere, that can cause thread breakage too. Machines need TLC now and then. Consider it a trip to the sewing machine spa :-) Thanks for reading the post and leaving a comment.

Reply
Paula A Groher
4/23/2021 13:28:07

Hi Joann,
It's in the shop, thanks for your comment.

Reply
Joanne Banko
4/23/2021 13:40:51

Hope you're back to happily stitching soon Paula!

Clovis
4/18/2021 13:01:12

Thanks, Joann. I think I need to oil my Serger. Haven't done it in awhile.

Reply
Joanne Banko
4/18/2021 13:50:47

Hello Clovis! One of the reasons sergers need more oiling is because all the accumulated fuzz soaks it up. Your manual should show the important points. Essentially, it is wherever metal rubs against metal. While I've never seen advice to oil the blades, I've been doing it for years, just like I oil my scissors and shears. Give your serger some TLC and it will serve you well. Happy sewing!

Reply
Karen Meyer link
4/20/2021 12:50:04

Can you put the dues and don’ts into a PDF that I could laminate it and put under my surgery please I think it would help all of us to have it really handy next to our machine

Reply
Joanne Banko
4/20/2021 15:45:55

Your wish is granted Karen! I've added a link to a PDF download so you can print these tips. Enjoy!

Reply
brendalynne1
4/22/2021 02:22:28

thank you, I never recall seeing anything about oiling my serger and since my reg. machine says i do not need oil, i did the old assume thing and have NEVER oiled my serger. this is truly a treasure trove of information. I learn something new every blog post.thank you

Reply
Joanne Banko
4/22/2021 18:26:57

So glad to hear from you brendalynne1 :-) It's really helpful to know you are learning from each post. Thanks for taking the time to write!

Reply
Gail Beam
4/22/2021 02:28:59

Hi Joanne, I am looking forward to the SMP Virtual Hoop Fest that you are going to present at. Thanks for the Serger Dos and Don'ts. I printed off a copy for each one of my sergers

Reply
Joanne Banko
4/22/2021 18:28:06

Hello Gail! The SMP Hoop Fest will be a lot of fun, I'm sure of that! It was great to hear from you!

Reply
Theresa
4/22/2021 09:28:11

Thank you so much Joanne for your great information for our sergers. You are so generous with your knowledge and I appreciate all the information that you share with all of us. You are an earth angel....

Reply
Joanne Banko
4/22/2021 18:29:15

My oh my Theresa! Your kind comments made my day! Thank you!!!

Reply
Susan Fischer
4/22/2021 10:14:12

Great list of do's and don'ts, JoAnne! Thanks!

Reply
Joanne Banko
4/22/2021 18:31:21

I'm super glad to know you found these helpful Susan! My next tip sheet will have information about 2, 3, and 4 thread serger stitches. Stay tuned!

Reply
Genny Burkholder
4/22/2021 10:51:39

Joanne thanks for the reminders. The only place I have heard of oiling the blade was when I purchased my old Berninia serger in 1996. The one point was oil your blade! I have done it on all sergers since. After oiling I run a scrap of fabric through to make sure any excess oil is off before using my good fabric. I oil my machine as you said every where metal touches metal! Your comments are always so good on maintaining our valuable equipment! Thanks!

Reply
Joanne Banko
4/22/2021 18:34:38

Thanks for sharing your thoughts Genny! Knowing what TO do and what NOT to do can same lots of time and frustration. I just want you and everyone else to enjoy the time spent in your sewing space. Your tip for running scrap fabric through the machine is a very good one. Thanks for mentioning it!

Reply
Kathleen OLeary
4/22/2021 14:48:07

Thank you for the info. Gotta dust off my serger.

Reply
Joanne Banko
4/22/2021 18:36:26

Hello Kathleen! I'm glad to know this tip sheet prompted you to dust off that little baby! Happy stitching!

Reply
Janet Dees
4/22/2021 15:41:06

Thanks Joanne! Love your blog and all the detailed instructions.

Reply
Joanne Banko
4/22/2021 18:37:22

Your comments are very much appreciated Janet! Thanks so much for taking the time to write!

Reply
Christine Pocek
4/23/2021 13:05:31

Hi Joanne, Just printed the serger info. Will be so nice to have close by to review before I begin a new project. Thanks for the printed version, very helpful.

Reply
Joanne Banko
4/23/2021 13:25:45

Glad to offer something helpful for you Christy! It was great to hear from you :-)

Reply
Rachel
3/20/2022 12:43:40

I have a Brother overlocker and the loops are hitting each other and get jammed. Is there a way to fix this myself or do I need to take it to a technician?

Reply
Joanne Banko
4/4/2022 13:23:38

Hi Rachel, sorry for the delay in responding to your question. If your loopers are misaligned and actually touching, that is indeed a job for a technician. Sergers require perfect timing to form the stitch properly. Hope you get it fixed and are ready to serge some nice projects once again!

Reply


Leave a Reply.

    Picture

    Author:

    Joanne Banko
    Brother Ambassador


    I'd love to stay in touch with you!

    Click Here
    and Sign up for
    ​Sewing News, plus tips, tricks, and notifications about new blog posts.

    Archives

    January 2023
    December 2022
    November 2022
    October 2022
    September 2022
    August 2022
    July 2022
    June 2022
    May 2022
    April 2022
    March 2022
    January 2022
    December 2021
    October 2021
    August 2021
    July 2021
    June 2021
    May 2021
    April 2021
    March 2021
    February 2021
    November 2020
    October 2020
    June 2020
    May 2020
    April 2020
    March 2020
    February 2020
    January 2020
    November 2019
    August 2019
    July 2019
    June 2019
    May 2019
    March 2019
    February 2019
    January 2019
    December 2018
    September 2018
    August 2018
    July 2018
    June 2018
    March 2018
    February 2018
    December 2017
    September 2017
    August 2017
    June 2017
    April 2017
    February 2017
    January 2017
    December 2016
    September 2016
    July 2016
    June 2016
    May 2016
    March 2016
    February 2016
    January 2016
    December 2015
    October 2015
    September 2015
    July 2015
    June 2015
    May 2015
    March 2015
    January 2015
    October 2014
    July 2014
    May 2014
    March 2014
    January 2014

    *As a believer in full disclosure, I'd like you to know that Blog posts may contain affiliate links for products and services I know and trust. Purchasing items through a link marked * results in a small commission for me, with no extra charges for you.

    Categories

    All

    RSS Feed

© Copyright 2022 by Joanne Banko. All rights Reserved