Hello sewing friends! This blog contains highlights of a presentation that took place during the fourth anniversary celebration of the Quilts and Lace sewing shop in Melbourne Florida.
I had a virtual meet-up with Beth Sweet, owner of Quilts and Lace, as customers and friends shopped and celebrated in her store on April 1st, 2021! If you missed the live show, you can catch a replay HERE on Facebook. Below you'll find a re-cap of many of the tips I shared for using eight different sewing machines accessories. I matched up each accessory with a blue hyperlink link to a project or set of instructions. Simply click the links to learn more about each accessory. Enjoy!
I had a virtual meet-up with Beth Sweet, owner of Quilts and Lace, as customers and friends shopped and celebrated in her store on April 1st, 2021! If you missed the live show, you can catch a replay HERE on Facebook. Below you'll find a re-cap of many of the tips I shared for using eight different sewing machines accessories. I matched up each accessory with a blue hyperlink link to a project or set of instructions. Simply click the links to learn more about each accessory. Enjoy!
So many accessories for so many different machines! Follow along as I outline each one, sharing projects and ideas for using these accessories for embellishment and utility sewing. Remember, there's a tool for every task! Knowing the power and potential of each accessory will help you experience successful sewing! These tools make sewing faster, easier, and more accurate so you can have more fun when you sit down to sew!
The Felting Attachment
SA280
SA280

This flower accent was created with wool felt as the base, with wool roving and yarn felted into the base. A big center bead and feathers finish off the accessory.
As seen on It's Sew Easy TV show 1411-2. You can watch this show on my YouTube channel HERE.
As seen on It's Sew Easy TV show 1411-2. You can watch this show on my YouTube channel HERE.
To set up for the felting attachment, barbed needles replace the machine needle and the machine is fitted with a new bobbing cover and dust cup, plus a finger guard that serves as a feeding attachment for felting with yarn. All the pieces and parts you need for machine felting come inside the box, including extra needles.
This accessory is specifically made for certain machine models. I can count a combination of about ten past and current Brother models compatible with the felting attachment. Brother dealers have the most updated information with a list of models that work with this attachment.
This accessory is specifically made for certain machine models. I can count a combination of about ten past and current Brother models compatible with the felting attachment. Brother dealers have the most updated information with a list of models that work with this attachment.
Pay attention to the machine set-up outlined in the manual included with the package. You won't be using any thread in the top or bottom, and the bobbin case gets replaced with a special cover and a small cup to catch excess fuzz. Selecting stitch C-01 and checking the position of the barbed needles is essential before you start felting.
Felting is really a very simple process. You may have seen the tools used to create felting by hand. Machine felting is much faster and doesn't require the muscles it takes to felt using the hand method.
For felting, fibers, yarns, and materials are pushed into a base as you layer them and move across the base as if you were darning or doing free motion stitchery.
Here is a list of suitable fabrics for the base:
For more information, you'll find a detailed video presented by Quilts and Lace expert instructor Aira Kekäle on their Facebook page HERE.
Felting is really a very simple process. You may have seen the tools used to create felting by hand. Machine felting is much faster and doesn't require the muscles it takes to felt using the hand method.
For felting, fibers, yarns, and materials are pushed into a base as you layer them and move across the base as if you were darning or doing free motion stitchery.
Here is a list of suitable fabrics for the base:
- Craft Felt
- Wool Felt
- Denim
- Fleece
- Silk Dupioni
- Lutradur
- Non-tear Stabilizers
For more information, you'll find a detailed video presented by Quilts and Lace expert instructor Aira Kekäle on their Facebook page HERE.
Five Foot Embellishment Pack
This box includes five fabulous feet in one package! I reach for many of these feet on a regular basis. Let's talk about one at a time.
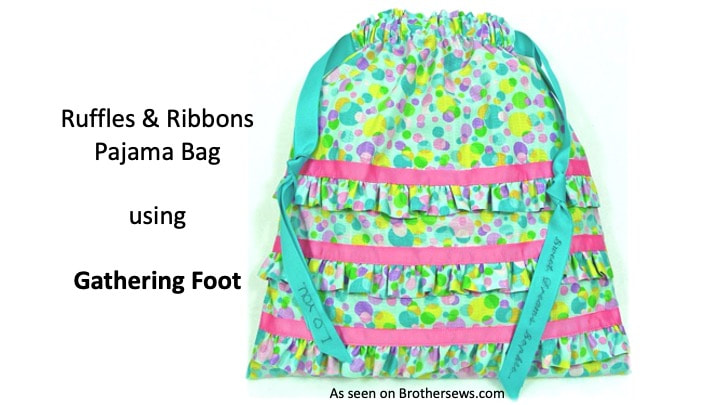
#1 Gathering Foot
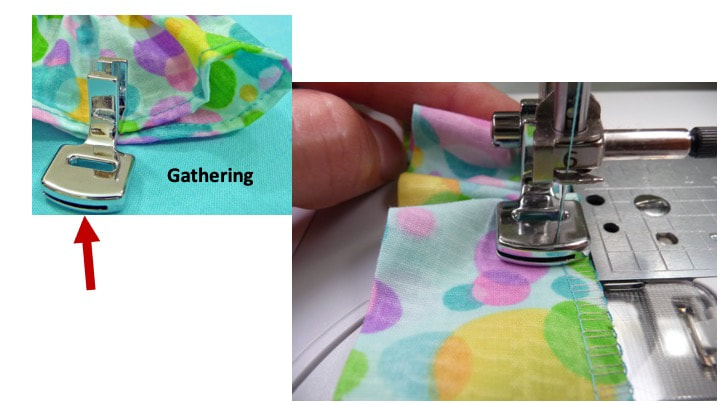
The gathering foot is the only one in this kit that attaches with a screw. It's a low shank machine, so you'll need the "S" adapter if you have a high shank Brother.
Th bottom of this foot is designed to push against the feed dogs on the machine. When combined with an increased upper tension and a stitch length of 3-4, light weight fabrics are evenly gathered with this foot. If you'd like to gather one layer while sewing to a second, un-gathered layer, simply place layer to be gathered against the feed dogs and guide flat, un-gathered layer into the slot on the foot. Note that these gathers are not adjustable when finished.
Tip: Keep your index finger behind the foot as the fabric strip advances to push in slightly more gathers.
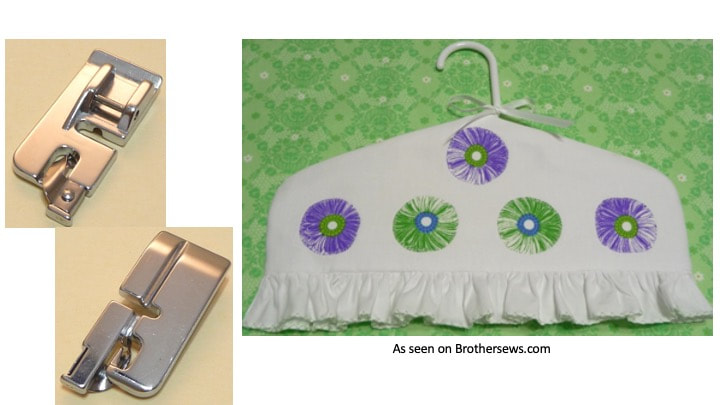
#2 Non-Stick Roller Foot
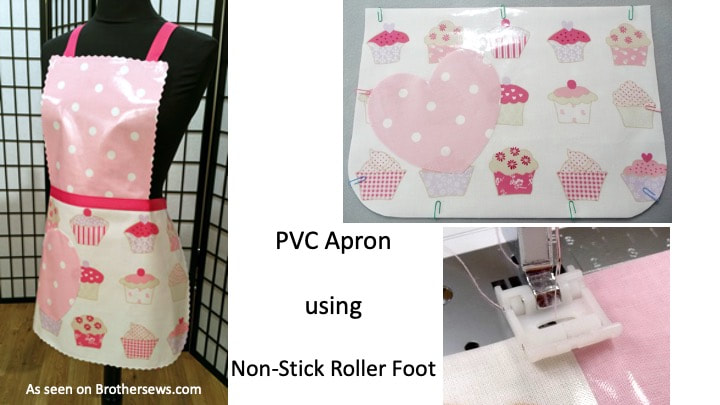
The Non-Stick roller foot is designed to help in what I call "sticky situations." There are times when a regular presser foot gets stuck on unusual fabrics such as vinyl, leather, suede, and waterproof tablecloth material.
Materials like the PVC used for the apron have a vinyl coating and this slick foot will glide and roll right across the fabric without sticking. It's ideal for topstitching, or any time you are sewing against a surface that clings to the standard foot.
Tips: For sticky fabrics that must be sewn against the feed dogs, layer with a piece of tear away stabilizer for smooth sewing, and carefully tear away when finished. Consider making your own vinyl coated fabric using Therm-o-Web Iron-on clear adhesive vinyl.
#3 Stitch-in-the-Ditch Foot
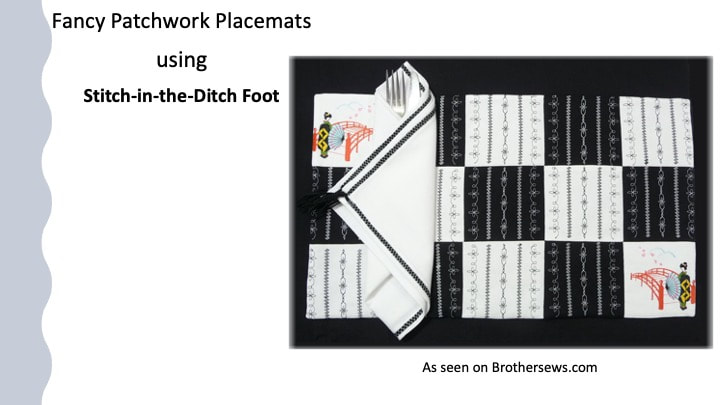
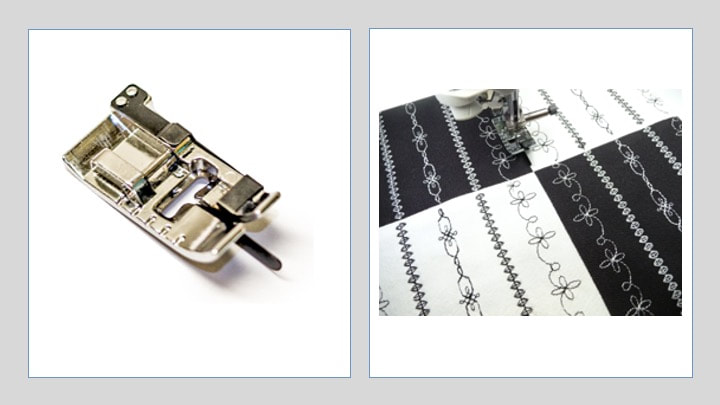
The Stitch-in-the-Ditch foot has a long, prominent blade directly in the center of the foot. It's designed to run right along the point where the seam is joined, also known as the ditch, or well of the seam. The blade is springy so it can cross over layers with seams.
I used this foot to anchor the layers of my black and white pieced placemat, sewing each square where the seams are joined together. By the way, the placemat itself is made from cut up napkins, decorated with rows of fancy stitches. I wanted my coordinating napkins to match so I bought extra napkins and used them as fabric.
This is a "must have" foot for anyone who does quilting or patchwork.
Tip: Most of the time this foot is used with a center needle straight stitch, but you can move the needle to a different position to sew a specific distance from the seamline.
#4 The Edge Joining Foot
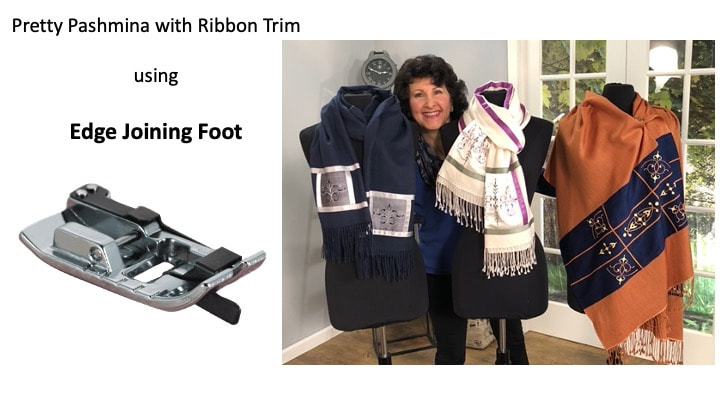
I love decorating pashmina scarves with embroidery and added ribbon! My book titled Wrapped in Embroidery includes three pashmina scarves with added accents from embroidered fabric and silk ribbons. I created another version for the TV show, using the edge joining foot to easily and accurately add ribbon trim. I lined up the guide on the foot with the edge of the ribbon and moved the needle off center for even edge stitching on the ribbon.
Watch the entire show HERE on my YouTube channel.
Watch the entire show HERE on my YouTube channel.
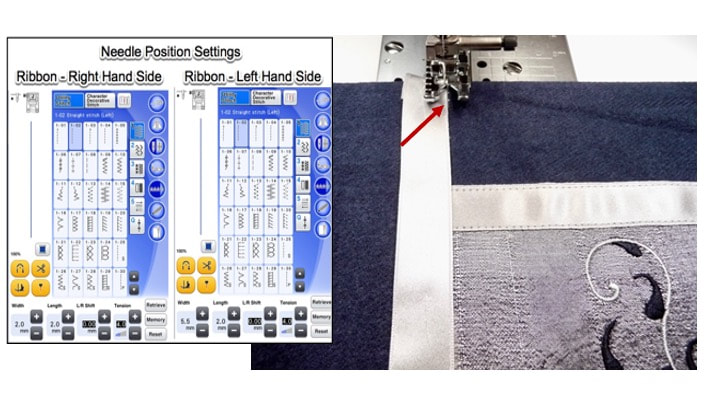
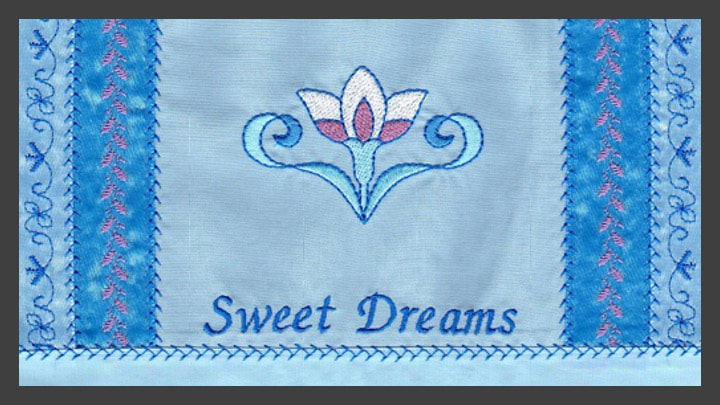
This foot can be used with both utility and decorative stitches. It's perfect for joining multiple strips of fabric, trim, lace, and ribbon. The completed strip below was used as a border for a pillowcase.
See more about the edge going foot HERE on It's Sew Easy TV show 905-3.
See more about the edge going foot HERE on It's Sew Easy TV show 905-3.
#5 Piping Foot 3mm - 6mm
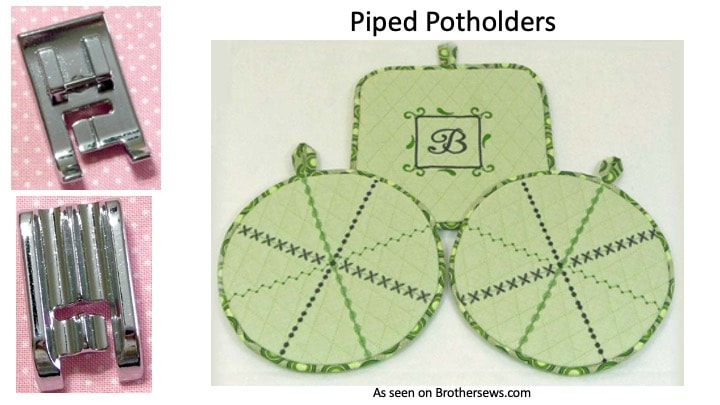
This newer style piping foot allows for piping cord that's thicker than the standard dressmaker weight found in packages. It's easy to make your own piping with fabric and cording 3mm to 6mm in diameter. The potholder projects shows how to make bias trimmed piping from a small square of fabric.
Notice the dual channels on the bottom of the foot. These channels come in handy when you want to sew your piping on the right or left side as you position the layers at the machine.
Notice the dual channels on the bottom of the foot. These channels come in handy when you want to sew your piping on the right or left side as you position the layers at the machine.
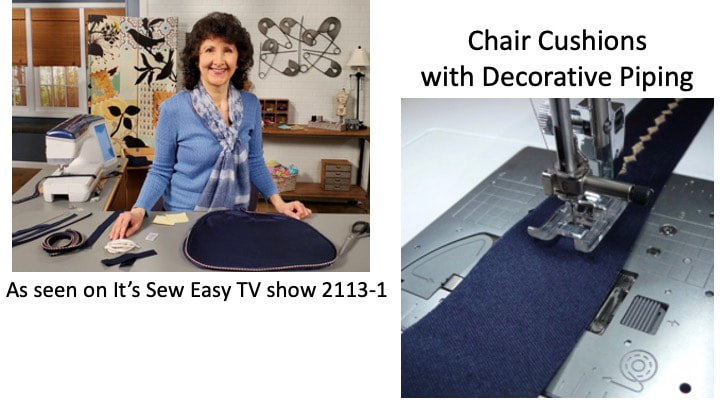
Check out the piped chair cushion project for It's Sew Easy TV show HERE. I think you'll find the decorative piping technique an interesting way to perk up home decor projects.
Adjustable Blind Hem Foot
SA133
SA133
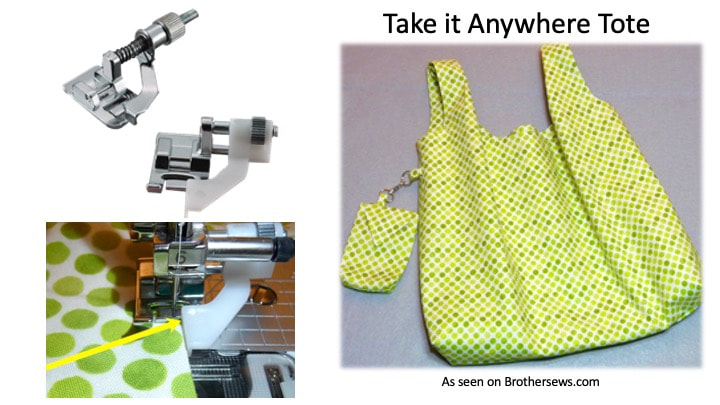
Naturally, the blind hem foot work perfectly for standard blind hems. The adjustable guide helps fine tune the foot for a wide variety of fabric types and weights.
I like to use this blind hem foot as adjustable edge guide for topstitching and edge stitching. You can't see it in the photo, but this foot helped me stitch the tote very close to the finished edge, giving a fine finish and keeping the lining layer tucked inside the tote bag.
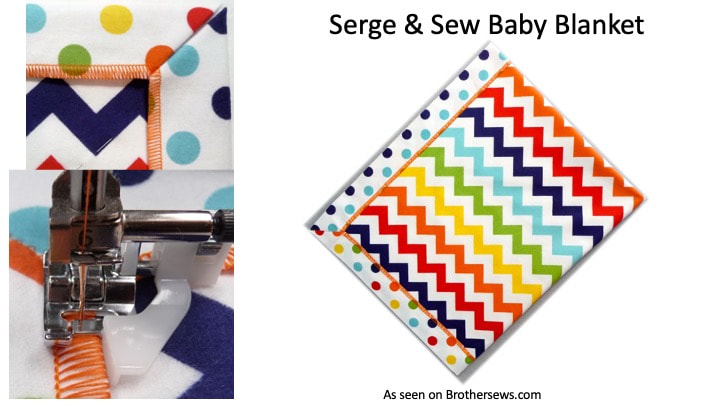
I also used this foot to stitch the self-fabric fish on the double layer flannel baby blanket shown below:
I like to use this blind hem foot as adjustable edge guide for topstitching and edge stitching. You can't see it in the photo, but this foot helped me stitch the tote very close to the finished edge, giving a fine finish and keeping the lining layer tucked inside the tote bag.
I also used this foot to stitch the self-fabric fish on the double layer flannel baby blanket shown below:
Picot Foot
SA149
SA149
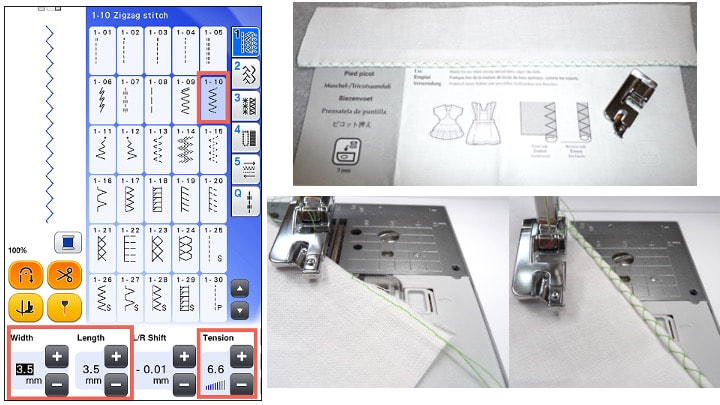
The Picot foot is designed to create a narrow rolled hem on lightweight fabrics. The small scroll on the foot rolls the raw edge under as fabric is fed into the slot. While a standard rolled hem foot is suited for a straight stitch, this foot is designed to be used with a small zig zag stitch. The deeper groove on the bottom lets the fabric slide under the foot while the hem is formed.
Check the settings shown below and you'll see that the upper tension is increased to pull the zig zag over the rolled edge. The resulting hem has a scalloped appearance.
Check the settings shown below and you'll see that the upper tension is increased to pull the zig zag over the rolled edge. The resulting hem has a scalloped appearance.
I hope you enjoyed this summary of eight different Brother accessories! Feel free to leave comments or questions below.

 RSS Feed