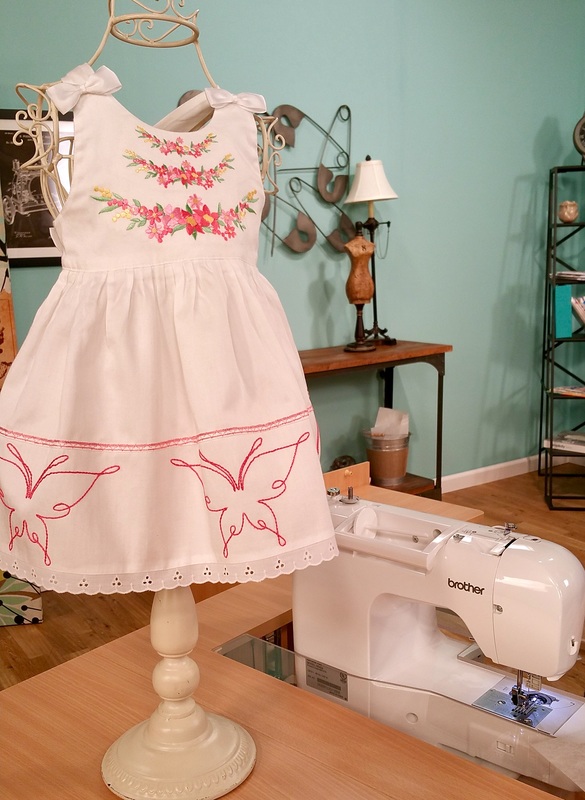
The pretty little pink and white dress featured on It’s Sew Easy episode 902 has generated a lot of interest! The segment featuring this dress lasted just a few minutes. Most of it focused on the cording technique, allowing me to demonstrate what I like to call "fancy footwork" with the Three Slot Cording Foot. If you watched the show you heard me say that this dress had quite a few special techniques. The cording was the icing on the cake and served to tie together the pretty pink theme.
I’ve been asked so many questions since this dress debuted on the show. Today I thought I would share a bit of information and give you more details about the creation of this dress. As you may have guessed, the embroidery embellishment was completed on a Brother machine. If you don't have this machine I invite you to stick with me. Read all the way to the end and you'll find tips included here for embellishments you can make with most any sewing machine. Perhaps you’ll want to create something similar for a special baby girl in your life!
Below you'll find several behind the scenes details, along with questions and answers in an easy to read list. Here goes . . .
Below you'll find several behind the scenes details, along with questions and answers in an easy to read list. Here goes . . .
Q. Where can I find the pattern for this dress?
A. The pattern is in the Laura Ashley designer line of McCall's patterns. It’s actually an infant dress but the sizing goes all the way up to 32-inches for height.
A. The pattern is in the Laura Ashley designer line of McCall's patterns. It’s actually an infant dress but the sizing goes all the way up to 32-inches for height.
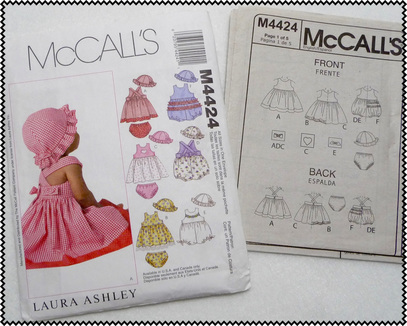
This wonderful pattern includes a hat and little baby pants too! The little pants weren’t on the show but you can see them here.
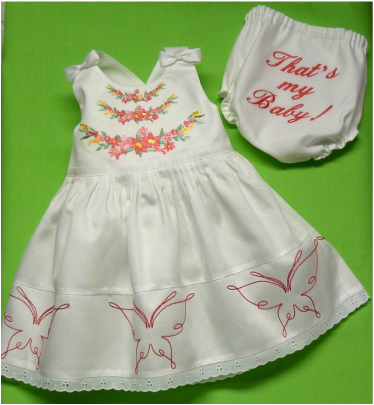
It was fun to add a message to the backside of the baby pants! This is such an adorable and versatile pattern, one you could find yourself using again and again. As of today, this pattern is still listed on the McCall's website. CLICK HERE to take a look.
Q. What kind of fabric is the dress made from?
A. It’s a rather basic fabric called cotton sateen. A little thicker than standard quilt weight cotton, the smooth & almost satin like finish makes it look just a tad “dressy.” You may find it along with the solids at your favorite quilt shop. To beef up the bodice and stabilize it for the embroidery I applied a lightweight fusible interfacing to an oversized rectangle of fabric. This was done prior to constructing the garment. I embroidered the bodice on the oversized rectangle before cutting. You'll see more about this in another Q & A.
A. It’s a rather basic fabric called cotton sateen. A little thicker than standard quilt weight cotton, the smooth & almost satin like finish makes it look just a tad “dressy.” You may find it along with the solids at your favorite quilt shop. To beef up the bodice and stabilize it for the embroidery I applied a lightweight fusible interfacing to an oversized rectangle of fabric. This was done prior to constructing the garment. I embroidered the bodice on the oversized rectangle before cutting. You'll see more about this in another Q & A.
Q. Where did the embroidery designs come from?
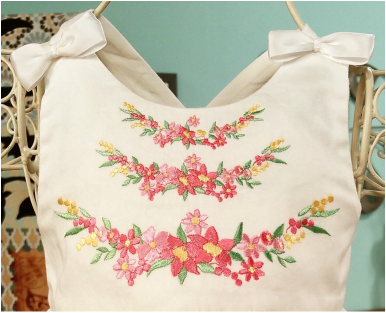
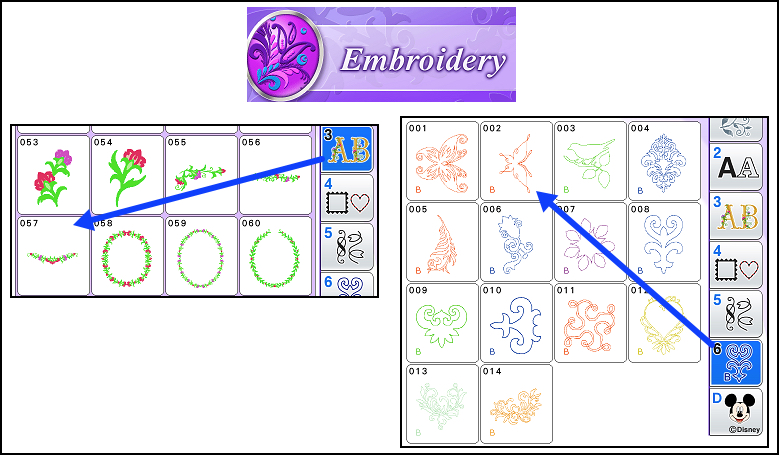
A. They are all original designs built in to the Brother Quattro model machine and part of the monogram accents menu. Here are some details about the bodice.
A. They are all original designs built in to the Brother Quattro model machine and part of the monogram accents menu. Here are some details about the bodice.
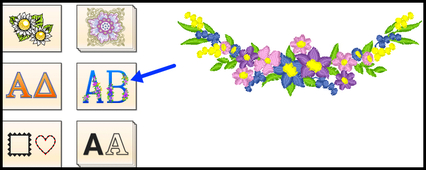
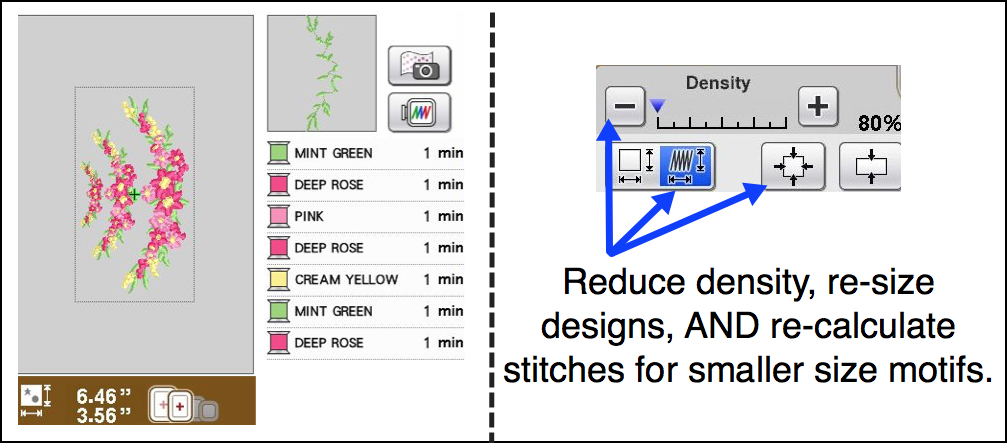
I repeated the same design motif three times and decreased the size by 50 percent for each added motif. In addition to decreasing the size I called upon another feature, one that allows for reducing density of a selected embroidery design. I used this special trick to make the designs more suitable for the lighter weight fabric. Adjusting sizing and density is as simple as touching a couple keys on the machine.
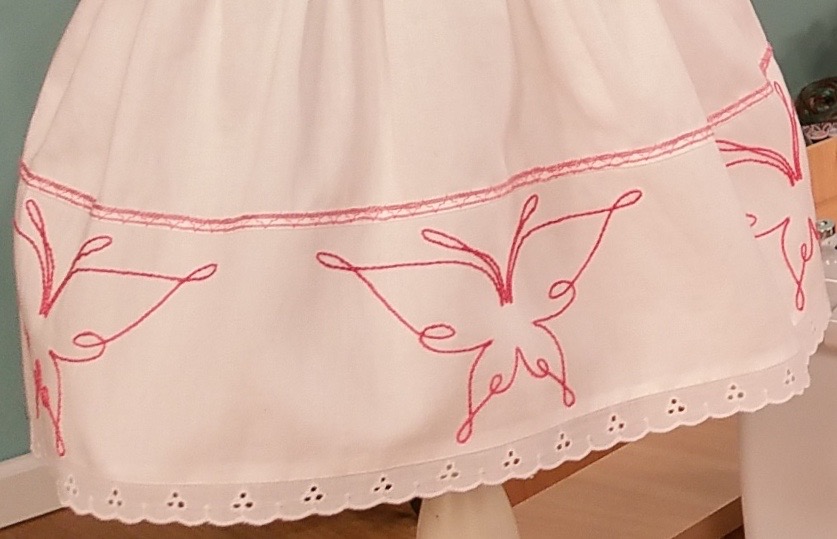
The bottom band is embroidered too, with built in bobbin work embroidery designs. This is definitely one of my all time favorite embroidery techniques. I used a border hoop to easily stitch the narrow strip. Instead of thread, ordinary pearl cotton is wound on the bobbin and the design is stitched with the wrong side facing up. This lightweight motif is ideal for a banded border.
You can CLICK HERE to watch a video lesson on embroidered bobbin work.
You'll find other Brother machine models include the very same bobbin work embroidery designs and have similar monogram accent designs built in. Check with your dealer to find out more about bobbin work possibilities and additional designs available for your machine.
Q. How were the designs embroidered on the bodice?
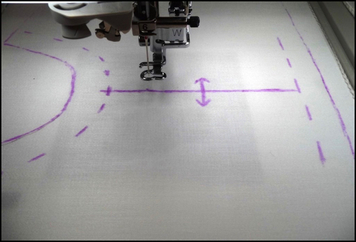
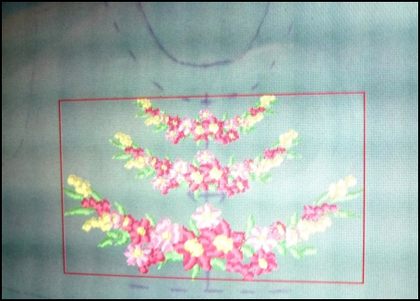
A. That was a special trick with the machine too! Several Brother embroidery models have the ability to scan the hoop and then project an image of what the scanner “sees” right on the screen of the machine. To take advantage of this feature, first I traced the pattern outline on the interfaced fabric rectangle, placed it in the largest available hoop, and then scanned outline to perfect the placement of my motifs. It's a little tough to view perfectly in the photos below but you can see the traced pattern outline and then the scanned image on the screen of the machine.
A. That was a special trick with the machine too! Several Brother embroidery models have the ability to scan the hoop and then project an image of what the scanner “sees” right on the screen of the machine. To take advantage of this feature, first I traced the pattern outline on the interfaced fabric rectangle, placed it in the largest available hoop, and then scanned outline to perfect the placement of my motifs. It's a little tough to view perfectly in the photos below but you can see the traced pattern outline and then the scanned image on the screen of the machine.
After embroidering I simply placed the pattern back over the piece, matched up the lines and cut. This resulted in goof proof placement on the finished garment.
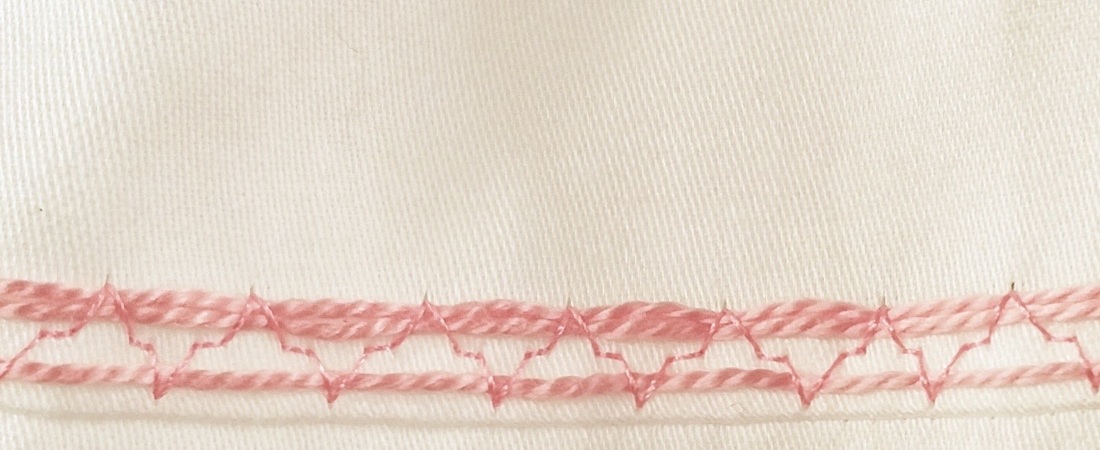
Q. What kind of cord was used for the trimming above the band?
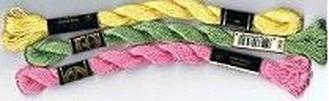
A. The corded trim was made with the three slot cording foot, using three strands of pearl cotton. It’s the same cording I used for the bobbin work.
CLICK HERE to read a previous post where you'll find more details and timely tips for embellishing with the three slot cording foot.
A. The corded trim was made with the three slot cording foot, using three strands of pearl cotton. It’s the same cording I used for the bobbin work.
CLICK HERE to read a previous post where you'll find more details and timely tips for embellishing with the three slot cording foot.
Q. How can I make something similar if I don't have the same special machine options?
A. There are lots of possibilities! Here are a few for you to think about:
A. There are lots of possibilities! Here are a few for you to think about:
- If you have an embroidery machine, substituting small floral designs for the bodice shouldn't be too difficult. For this style I suggest you look for something that isn't too heavy or dense.
- For the bobbin work designs it's possible to trace a simple outline on the wrong side of the fabric and then stitch over it with a basic straight stitch. CLICK HERE for a my tip sheet on bobbin work. You'll find that this can be accomplished with any machine!
- No embroidery, no problem . . . consider using a solid fabric for the skirt and a coordinating print for the bodice and the border on the hem.
- In place of embroidery you could also use purchased trim or add basic appliqué shapes. CLICK HERE for appliqué tips.
- Dress up the backside of the baby pants with a matching appliqué and add lace for extra trimming.
I hope you enjoyed reading this post. Be sure to let me know if you decide to make your own version of this adorable dress!

 RSS Feed