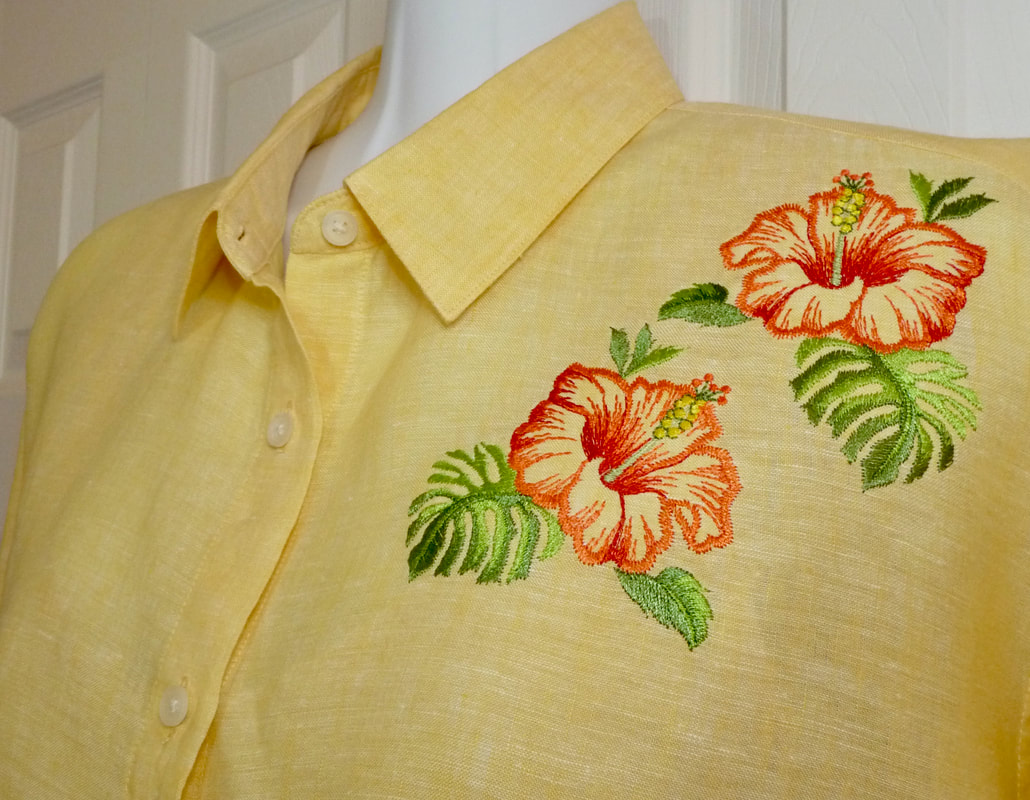
Blouse created for Stitching Sewcial, the official Brother blog. Click image for more.
Design for blouse shown above is from iBroidery, the official Brother design download site. CLICK HERE for design info. If you have access to iBroidery designs, you may want to check out some pretty hibiscus flowers HERE on Embroidery Library.
Today I'd like to share some information about embroidering garments sewn from scratch or store bought. Embellishing garments with machine embroidery is one of my favorite this to doin my own sewing space. How about you? Are you interested more about this topic? Recently, I covered this very topic as a guest educator on the 2022 Sewing Machines Plus Hoop Fest. This online, five day festival celebrated the love of machine embroidery with tons of product demonstrations, detailed machine features outlined and described by industry experts, plus dedicated educational segments twice a day every day! Broadcast on both Facebook and YouTube, you can find videos for all five days HERE on the Sewing Machines Plus YouTube channel. My segments aired on Tuesday and Thursday.
Tuesday's topic was "Pretty" Perfect Placement, with a show and tell of multiple sample garments, fashion ideas to illustrate flattering placement on garments, and methods to target the placement and prep for quality results. If you'd like to watch this particular segment, you'll find it on this YouTube video, with the 30 minute presentation starting at time stamp 4:34:00 HERE.
Thursday's topic was Tips & Tricks for embroidering on Ready-to-Wear, with the 30 minute presentation starting at time stamp 2:03:00 HERE. I followed up with a few more ideas for placement, tips for using templates, then showed some detailed ways to position and hoop garments. I also shared a special offer for a placement chart with some really specific guidelines for placement on garments and more! You'll find this in a downloadable PDF form HERE on my website.
By the way, if you're looking for a free software program you can use for printing templates plus a whole lot more, look no further than the website of my friends at Designs in Machine Embroidery. They offer a free software program called Embroidery Tool Shed. CLICK HERE to download this program from the Designs in Machine Embroidery website. There's even more to love about this software! It works on both Windows based and Mac computers! I love having embroidery software compatible with my Mac.
To compliment these two segments, you'll find a summary of tips for embroidering on ready mades below. For even more information, I encourage you to watch my It's Sew Easy TV segment from show 1402, with more on this same topic. You'll find it on my YouTube channel HERE!
Tips for adding machine embroidery to readymades:
- “It’s best to test!” I dig into my stash or purchase a small amount of fabric yardage that’s as close as possible to my ready-made and test the design and stabilizer combination before embellishing my actual garment. Of course, if you have a similar garment you can use for a test, that works too.
- Denim is ideal for many embroidery designs, usually needing only a layer or two of light to medium tear-away, or a layer of wash-away stabilizer on the back to achieve good results. Jean jacket backs are a great canvas for added embroidery. Steer clear of bulky seams and consider adding trim to compliment the design.
- Light weight fabrics and fabrics that stretch benefit from a stabilizer bonded to the fabric. My “go to” stabilizer for knits or fabric with a stretch factor is fusible no-show (cut-away) mesh. If you're using non-fusible no-show (cut-away) mesh, you’ll need to adhere stabilizer with temporary adhesive spray such as Sulky KK2000.
- If possible, pre-wash garments before embroidering. This takes care of any shrinkage issues and eliminates excess dye.
- Stock up on stabilizers. This subject is too big to cover in one short show but keep these general rules in mind: Knits and thin fabrics benefit from a stabilizer that is temporarily or permanently bonded to the fabric. Tear-away or wash-away generally works well for stable woven fabrics. Avoid hooping stiff tear-away with your garment. Use a medium weight stabilizer instead, or consider “floating” the tear-away under the hoop. Any fabric with nap or texture requires a water-soluble or iron-away topper to keep stitches from sinking into the nap or texture and getting lost in the fabric.
- Use the smallest hoop possible, whenever possible, and you will have better registration with your designs.
- For ease in embroidering, choose garments that can open up perfectly flat. However, don’t let lined garments stop you from adding embroidery. Carefully open up lining as much as needed to establish a generous flat area, and then either hoop traditionally or use wash-away or tear-away sticky stabilizer to temporarily hold fabric in place. Clip or tape excess fabric to keep it out of the way while stitching.
- If you have a piece that is impossible to hoop, embroider on a sheer or complimentary fabric, and then trim, treat with seam sealant if necessary, and use hand or machine stitches to apply to your piece as an appliqué. If sewing is not at all possible, select suitable fabric glue and glue in place.
- Design templates make embroidery easy and very accurate. Learn to use a software program to print templates and your embroidery life will be so much easier. Your design placement will be more accurate too!
I'd love to hear your comments and answer any questions you much have right here on this post. Please leave your comments below.

 RSS Feed