letsgosew.com
  • Home
  • Contact
  • Privacy Policy
  • Sign Up for Sewing News, Freebies, & Updates
  • Order Just Jackets Embroidery Collection
  • Just Jackets FAQ
  • Order Wrapped in Embroidery Book by Joanne Banko
  • Joanne Banko's Blog
  • It's Sew Easy TV Online Blog
  • Machine Embroidery Survey
  • IT'S SEW EASY TV Videos & Bonus Files
    • NEW! It's Sew Easy TV Series 2100
    • It's Sew Easy TV_Series 2000
    • It's Sew Easy TV_Series 1500
    • It's Sew Easy TV - Series 1600
    • It's Sew Easy TV_Series 1700
    • It's Sew Easy TV Series 1800
    • It's Sew Easy TV Series 1900
    • NEW! Superstar Sewing Stitches
    • NEW! Classy Textured Cape
    • NEW! Baby Bath Wrap
    • NEW! Detachable Collar
    • Sew a Swimsuit
    • Machine Embroidered Garments
    • Kimono Blouses
    • Custom Covered Hangers
    • Sewing Beautiful Belts
    • Felted Flower Hat Trim
    • Sew a Waffle Weave Robe
    • Learn about Couching accessories!
    • Turn a Pashmina into a Trendy Topper
    • Machine Embroidered Reverse Applique
    • Machine Embroidered Knit Dress
    • Use Non-Stick Foot to sew a Custom Luggage Tag
    • Serge & Sew Broomstick Skirt
    • Machine Embroidered Western Jacket
    • Machine Embroidered Bobbin Work Pashmina
    • Embroidered Pajamas
    • Sewing Pearls and Sequins
    • Learn how to use the Fringe Foot
    • Quilted Pinwheel Patchwork Tote
    • Machine Embroidered Lace for Lingerie
    • Sewing Circles with a Circular Attachment
    • Sew with the Edge Joining Foot
    • Re-style Tops for Little Girls
    • Short Style Tip- Blouse Embellishment
    • Learn how to make pretty piping using the Piping Foot
    • Embellish with the Three Slot Cording Foot
    • Facebook Live Interview 12-4-2018
    • Machine Embroidery - Starter Tips
  • FREE Tutorials and Tip Sheets
    • NEW! Embroidery Placement Positioning Tips
    • Free Embroidered Snowflake Coasters
    • Tip sheet - 5 Reasons Quilters Need A Serger
    • Free In-the-Hoop Patch Pocket Design
    • Serging versus Sewing
    • FREE Project-Embroidered Gift Tag with Gift Bag
    • Tip Sheet - Pillow Pointers
    • Tip sheet_Sew Straight Laser for Seams
    • Embelishment Tips from dime V.111
    • Tip sheet - Shannon Embrace Double Gauze
    • Tip sheet - Fun with Fonts
    • Fabric Tip Sheet- Sewing Faux Suede
    • Tip sheet for Sewing & Embroidering with Metallic Thread
    • Fleece Ruana Pattern: As seen on PBS It's Sew Easy TV
    • Fabric Tip Sheet - Crepe Back Satin
    • Fabric Tip Sheet-Sewing Slinky Type Knit
    • Fabric Tip Sheet - Fleece
    • Fancy Footwork Tipsheet - About the Walking Foot
    • Fancy Footwork Tip Sheet_Basic Appliqué
    • Fancy Footwork Tip sheet - Ruffler Attachment
    • Fancy Footwork Tip Sheet - Narrow Hems with a Standard Foot
    • Fancy Footwork Tip Sheet - Non Stick Foot
    • Tip sheet - Machine Embroidery Pattern Connection Resources
    • Tip Sheet - Machine Set up for Shirring
    • Tip sheet - Snowman and Target Markers
    • Tip Sheet for Printing on Fabric
    • Tip sheet-Five Ways to Finish Fleece Blankets
    • T-Shirt Transformation Tutorial
    • Project- Serge a Little Girl's Sweet Summer Dress
    • Tip Sheet for Fleece Frame Shape Appliqué
    • Tip Sheet - Bobbin Work Sewing & Embroidery
    • Tip Sheet - Custom Covered Buttons
    • Tip Sheet - Liquid Stabilizers
    • Tip sheet - Appliqué with Brother XV8500D & ScanNCut
    • Project - Sheer Chiffon Wrap
    • Project - Pearl Trimmed Candle Ring
    • Tip Sheet -Mitered Satin Blanket Binding
    • Fabric Tip Sheet_Knit Know How
    • Tool School Tip Sheets
    • ITH Project Planner
  • As seen in DiME Magazine - Photo Gallery
  • Sewing and Embroidery Events
  • My Sewing Story

Fast, Flat Serger T-Shirt And Sewing  Machine Tips Too!

9/23/2023

0 Comments

 
Picture
Brother Ambassador
Are you ready to learn more about stitching a t-shirt with a serger? Recently, I demonstrated the fast, flat method for serging a T-shirt on the Sewing Machines Plus Sew Fest GRAND FINALE Friday show. You can CLICK HERE to watch my one hour long serger segment on the SMP YouTube channel.

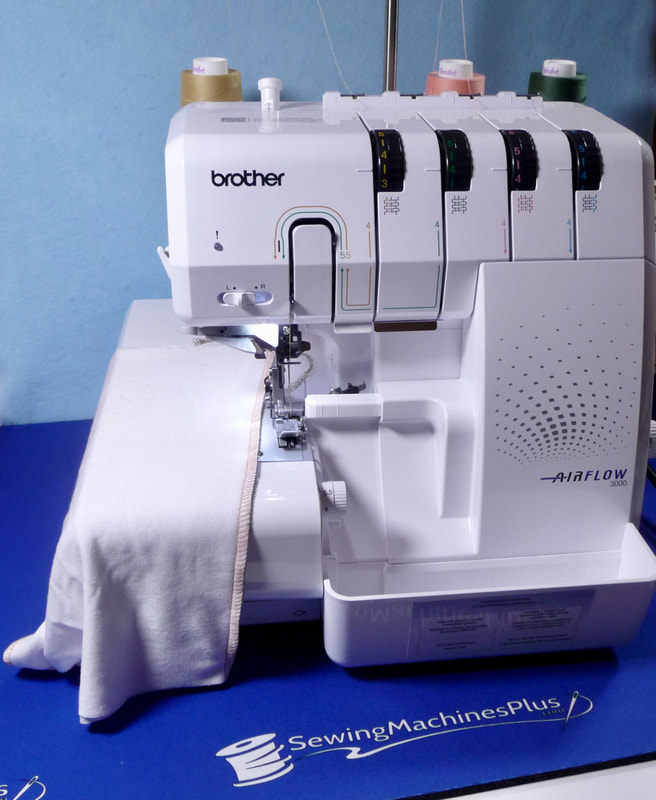
Using the Brother Airflow 3000 serger, I stitched the shirt from start to finish in less than one hour! You can too, if you're familiar with the basics on your own serger model and follow my instructions.
Picture
During the show I promised more info and resources for you so here we go!

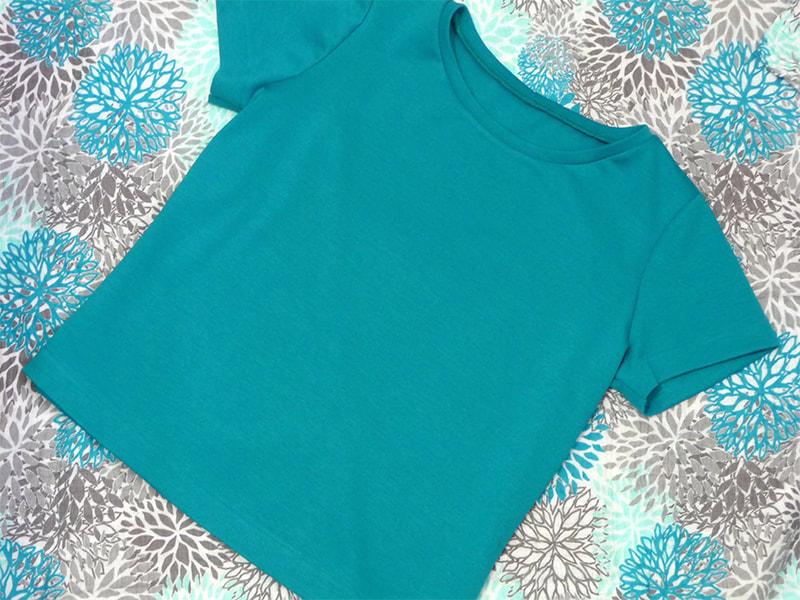
First things first, I have a complete T-Shirt tutorial archived on the Brother blog. In this tutorial you'll see detailed photos of the stitches and what they look like on the actual fabric. You'll find a link later in this post. Here's what the finished T-shirt in the tutorial looks like:
Picture
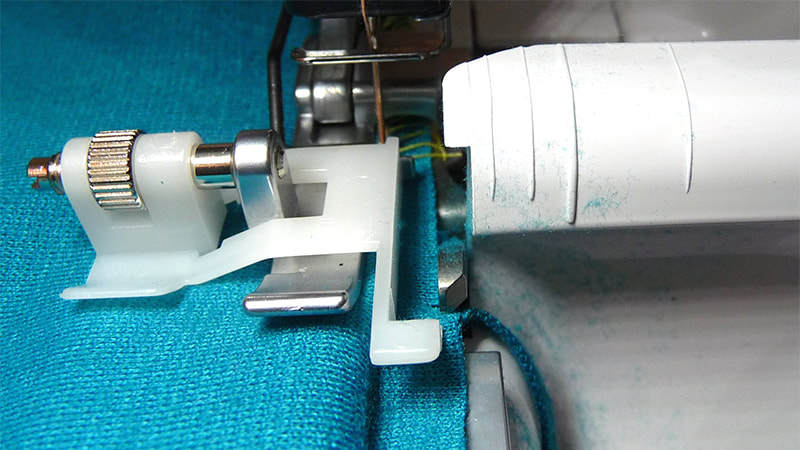
I stitched the hem of the sleeves and the bottom using a blind hem foot for the serger and a stitch called a flatlock stitch. Take a look at the serger blind hem foot below. If this was not included with your machine, chances are you can purchase one as an optional accessory.
Picture
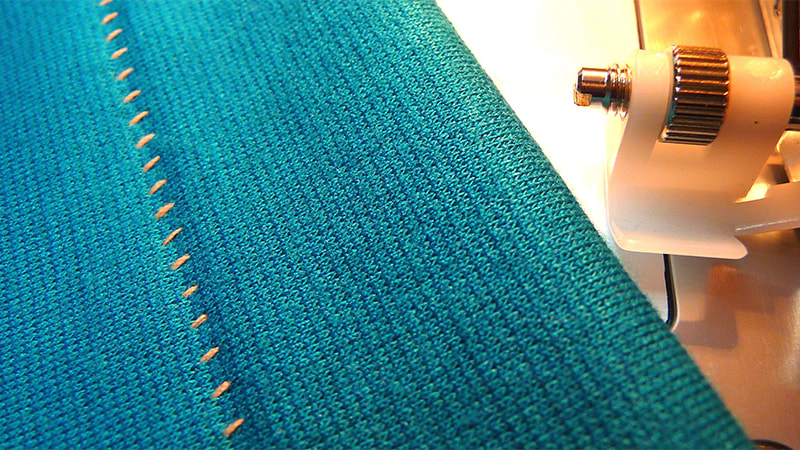
A flatlock setting is commonly used to join two pieces together, but it works equally as well as a blind hem stitch on the serger, especially when combined with the blind hem foot which makes it easy to guide the folded hem under the foot, keeping it in line with the guide for even stitching. A flatlock can be accomplished using two or three threads. I used the three thread stitch. Check your manual for flatlock settings. Generally, the left needle is set for zero, the upper looper stays about the same as it is for a balanced stitch, and the lower looper is relatively tight. Practice on scraps before starting your project.

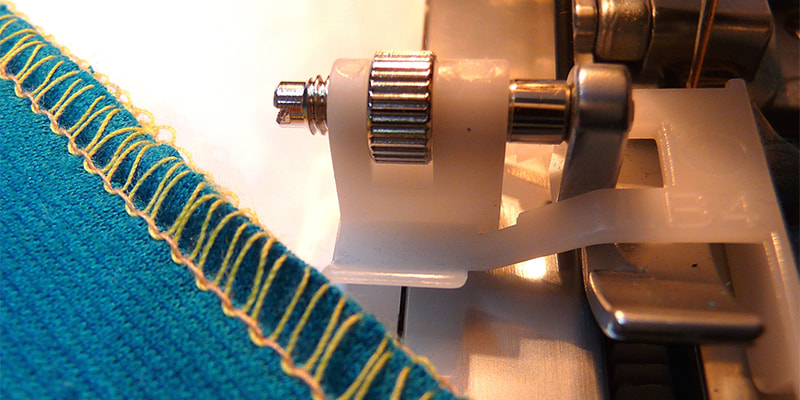
Here's what the flatlock stitch should look like on the top side of the stitch:
Picture
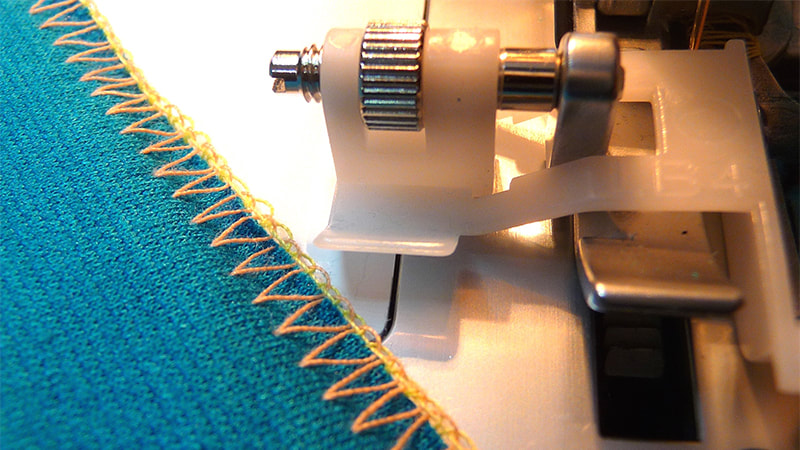
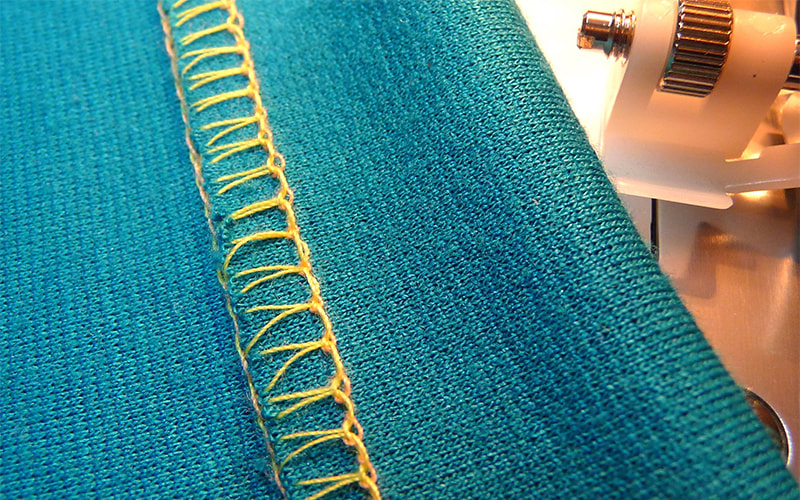
Here's what it should look like on the bottom side:
Picture
The "V" shaped stitch you see is formed by the loose needle thread. This is essential for allowing the stitch to be pulled flat. I used contrasting thread so you could readily see what it looks like but of course you would want to match your fabric as close as possible. Here is what the finished hem looks like on the outside of the T-Shirt:
Picture
And here is what it looks like on the wrong side:
Picture
You can follow all the steps for constructing the T-Shirt found in the tutorial HERE.

Now for a few more tips!
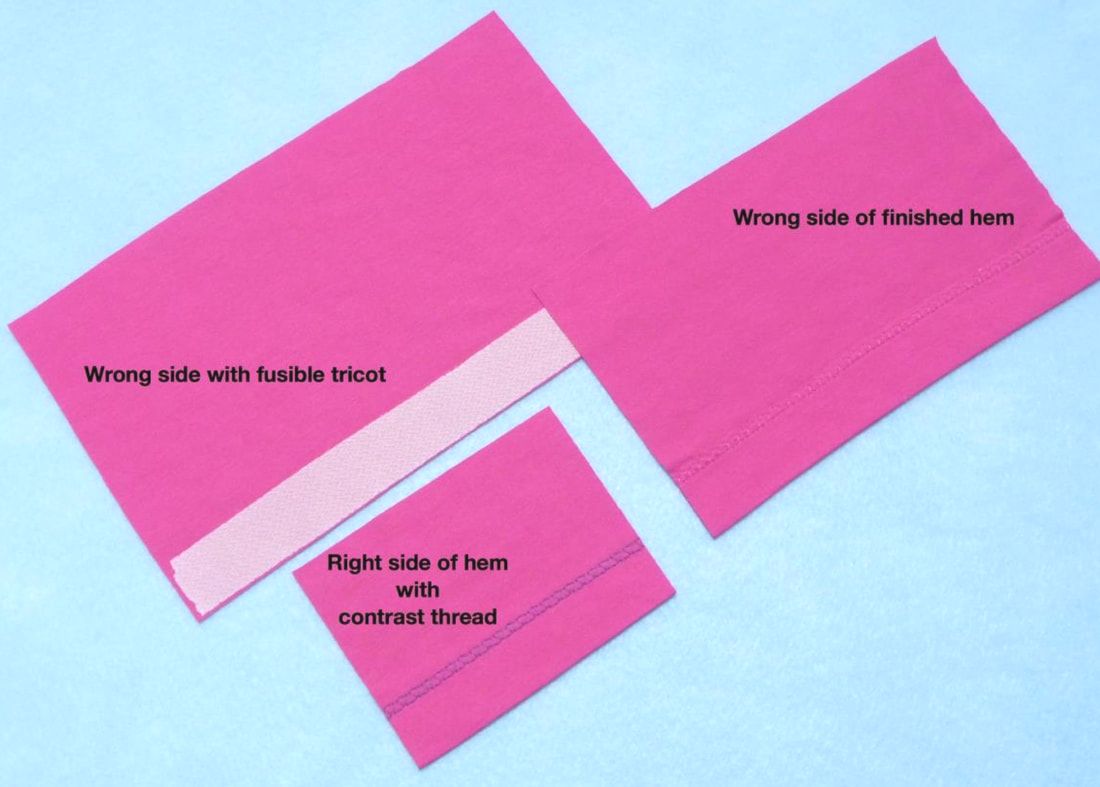
During the show I showed how my hem was stabilized prior to stitching with a strip of fusible interfacing. I cut one inch wide strips of tricot knit type interfacing, cutting them along the "stretchiest" grain of the interfacing.

Links to my favorite "knit interfacings are as follows:
Pellon SK135 - Fusible lightweight tricot with crosswise stretch and no stretch lengthwise. 
Pellon EK130 – Fusible, standard weight tricot. Same characteristics and use as above.
Pellon 460 - Very lightweight knit stabilizer with multi-directional stretch. (My favorite)

I fuse these strips to my knit hems, then turn up and press the one inch hem before hemming. This works well for hems that are topstitched with a twin needle, cover-hem machine, a stretch stitch on your machine, or the serger style blind hem.

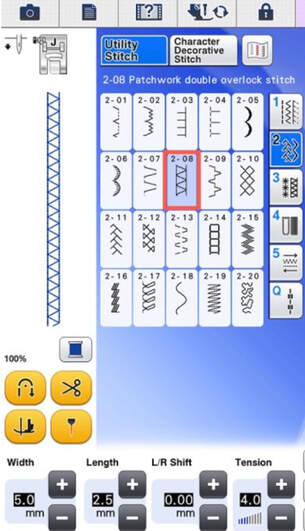
Below are pictures of an alternative T-Shirt hem with the hem stabilized with fusible tricot then stitched using a stitch on my machine that is not only pretty but has a bit of stretch. Note: Be sure to use a stretch needle size 11 for sewing knits on your sewing machine.
Picture
Picture
You can watch a video with more details for using this method, along with an alternative idea for stitching a neckline on a knit T-Shirt HERE on my YouTube Channel. This technique adds an elegant touch to a knit top! This video also includes tips for sewing a knit top on your standard sewing machine.
Pattern Tips
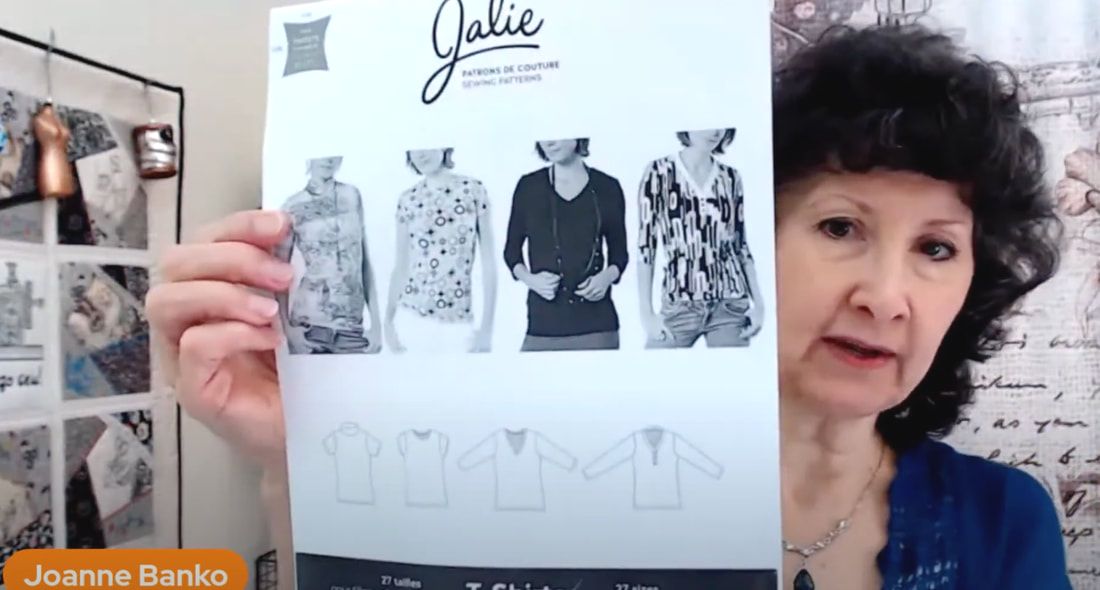
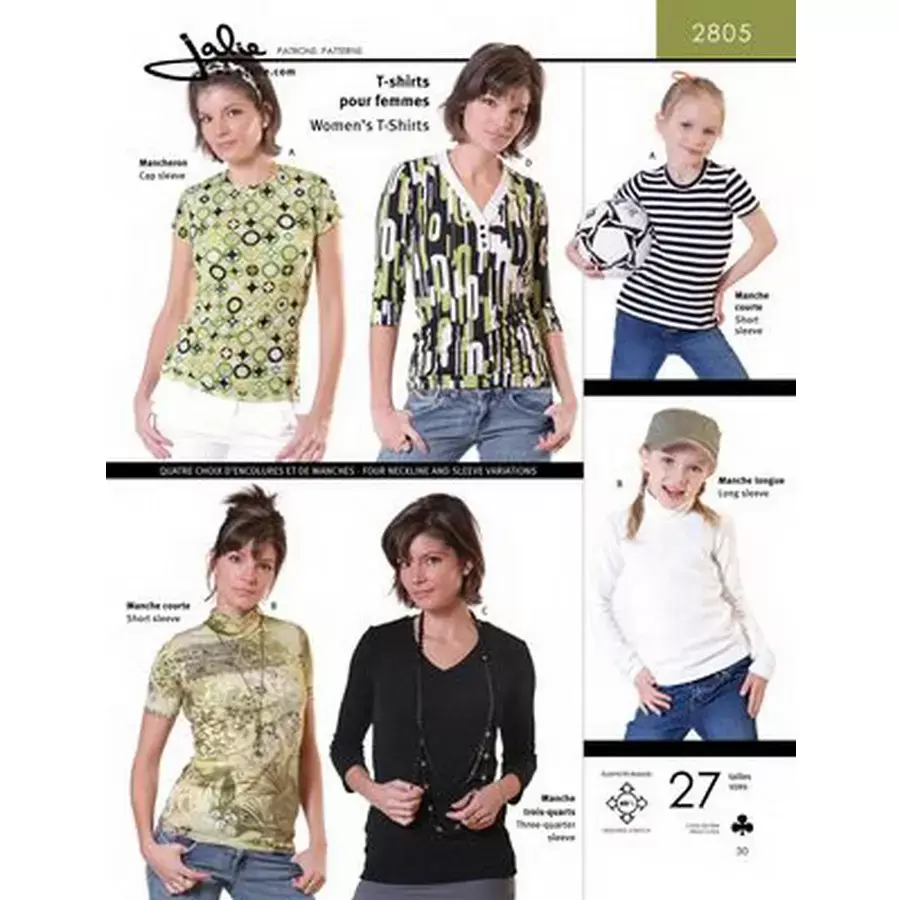
For the Sewing Machines Plus show, I used Jalie pattern 2805.
Picture

The 1/4-inch seam allowance included in this pattern makes it ideal for stitching with the serger. Take care to find fabric that meets the stretch requirements for this pattern. I always try to make a test garment when using a new pattern. Once I perfect the fit, I'm likely to use it over and over again so I transfer my perfected pattern to pattern transfer cloth such as Swedish Tracing Cloth, or Pellon 830 Easy Pattern.

For sizing my tiral garment, I like to pick my size using the measurements closest to my body, then add additional seam allowance so I have a total of 1-inch for side seams and corresponding sleeve seams, then I baste the seam at the one inch seamline, try on and adjust as necessary. That additional seam allowance can make or break the project as it's easier to take in that it sometimes is to let out a seam.

I hope this gives you some inspriation to make your own knit T-Top! If you'd like more serger sewing inspiration, check out this former live Q&A show titled What Can a Serger Do For You? on my YouTube channel HERE.

Oh wait! Just one more link to a serger Do's and Don'ts post. You'll find it HERE on my site.

As always, I welcome your questions and comments!
0 Comments

Fun With Your Sewing Machine Feet

9/17/2023

0 Comments

 
Picture
Brother Ambassador
​This post is an overview of information presented on Sewing Machines Plus Sew Fest 2023. You can CLICK HERE to watch my one hour long Fun with Your Feet segment on the SMP YouTube channel. You'll find all five days of this special broadcast on the SMP channel​.

​Everything you see that is highlighted in blue is a link that will take you to more information. I've packed a lot into this post so sit back and take some time to read, watch, and enjoy!
Picture
Picture
In this post I'll give you some additional information on each of the six featured embellishment feet shown in the live show, along with more video resources for you to check out on my Let's Go Sew with Joanne Banko YouTube channel. I would be honored if you would consider subscribing to the Let's Go Sew channel. Once you subscribe, click the bell for notifications for future live shows and new videos added to the channel!

Okay, let's get started with the feet, in the order I showed them at the machine during the video. NOTE: Each one is hyperlinked with the bold blue lettering so you can click directly on the part number to view the foot on the Brother site.

Generally, these feet are not included as standard accessories with the purchase of a Brother machine. They do work with the vast majority of Brother machine with a 7mm  throat plate opening. These are optional accessories and are not engraved with a letter like most included feet. 

For other brands, your machine accessory package may be different. Check with your machine manufacturer to see if there are similar feet for your machine, comparing them by the name of the foot and the image of the foot itself.


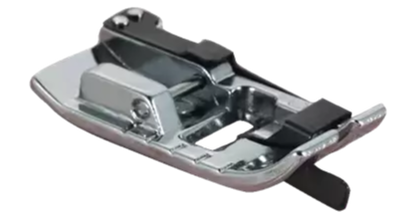
SA184 Brother Edge Joining Foot
Picture
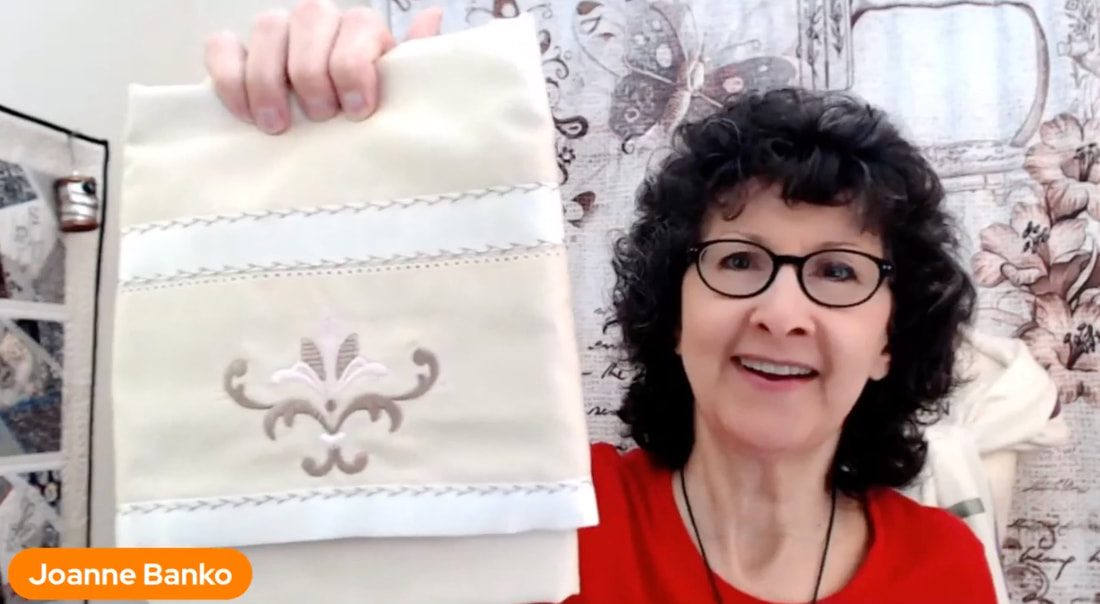
As you saw in the presentation, this foot is one of my favorites for the ultimate in accuracy! Whether you're stitching on an edge or using the foot to join pieces together, the edge guide keeps you on track and makes your finished stitching look flawless!

​CLICK HERE to watch a short video showing how to stitch silk ribbon to a pashmina, with designs from my Wrapped in Embroidery book. You'll find downloadable instructions for this project HERE.

For craft and general home decor project I use polyester satin ribbon or grossgrain ribbon. In particular, grossgrain ribbon is very durable and highly washable.

For special projects like the pashminas that need to drape, I use silk ribbon and have sucessfully washed it with delicate handling. Here is a resouce for the silk ribbon:https://www.mjtrim.com/ribbons-jacquards/silk


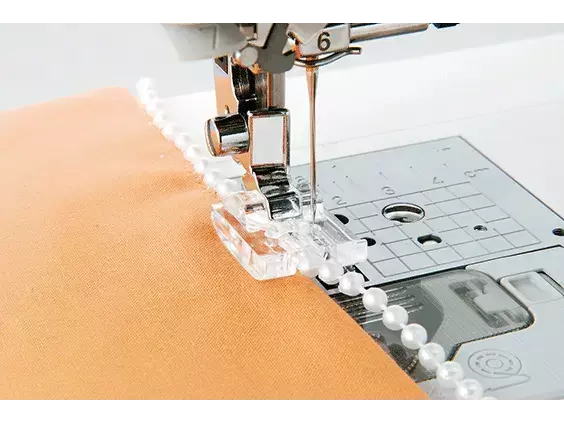
SA150 Pearls and Sequins Foot
Picture
Craft pearls on a string are generally available in 3-5mm width, perfect for sliding under the foot. Adding a string of pearls by machine gives such a special look to the simplest of projects! Making a simple fabric gift bag and adding pearls to the top edge makes the bag a "keeper" and worthy of any precious gift you wish to give.

CLICK HERE to watch a short video with more ideas and information for sewing pearls and sequins with this foot.

CLICK HERE to view instructions for the gift bag with pearl trim.

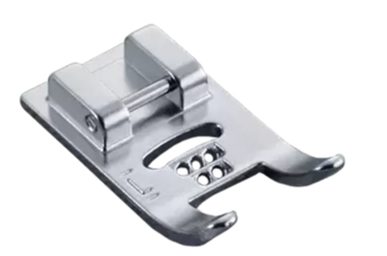
SA157 Five Hole Cording Foot
Picture
​Once again, this foot gives you options for stitching with your desired amount of cords, anywhere from one to five! Designed for thinner cording, use a dental floss threader to guide cords into the slot.

I used this foot for a cute swimsuit cover-up in an archived post on the Brother blog. You can view the instructions when you CLICK HERE.

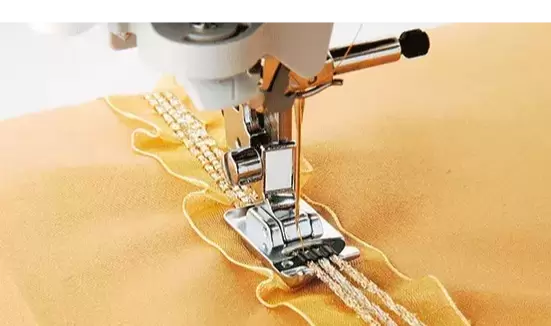
SA110 Three-Slot Cording Foot
Picture
I have used this foot a ton over the years! With three slots you have so much versatility, and this foot allows for a variety of cording weights. Remember, if the cord slides into the slot of the foot and slips back and forth easily, it is fair game to try with this foot!

​CLICK HERE  to watch a short video with more ideas and information for using this foot to add corded embellishment.

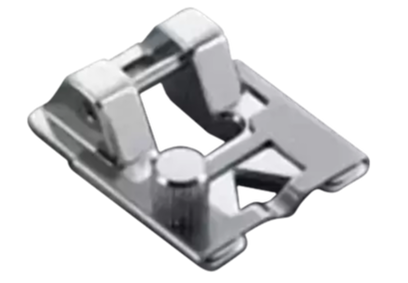
SA141 Braiding Foot
Picture
I've literally been using this foot for years! It may very well be one of the first embellishment feet I ever purchased.

The opening on this foot is adjustable to fit a variety of widths of cord, ribbon, and trim up to 1/4-inch wide. I like to use 1/4-inch bias trim with this foot. There are so many possibilities with this foot! 

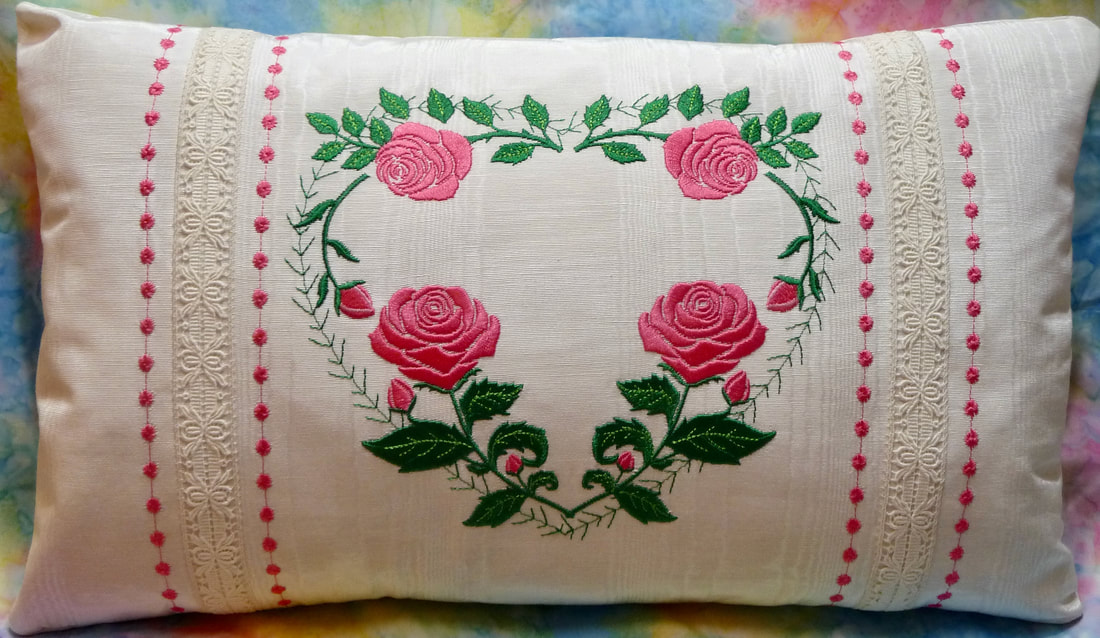
SA193 Candlewicking Foot
Picture
Yes indeed! This is another one of my favorites! This foot was specifically designed for use with Candlewicking stitches developed for the Brother machines. Take a look at the beautiful decorative candlewicking stitches on the  pillow below, with rose embroidery designs added from my Just Jackets embroidery design collection:
Picture
CLICK HERE to see how to use the My Custom Stitch feature found on many Brother machines to create your own candlewicking stitch.
IMPORTANT additional notes:

​Samples were stitched on blue medium weight linen. Any medium weight woven fabric is good for stitching these samples. I just happen to have a remnant leftover and the blue shows up well on camera.

Be sure to stabilize fabric that is not firm in and of itself. I use a tear away if the wrong side will not show, carefully tearing away the excess when my stitching is complete. Stay Perfect Tear Away stabilizer from Sewing Machines Plus is an ideal choice: https://www.sewingmachinesplus.com/stayperfect-precut-medium-tearaway.php 

Wash away stabilizer is another option when you need to be able to remove the stabilizer completely. Always test your combination before using on your actual project.

If your project allows for it, you can leave a little extra trim at each end and trim excess when you're finished stitching.

I did get some questions about needles and thread. Here are some tips: If my fabric or trim is shiny I use polyester embroidery thread. If I want my stitch to “disappear” I use good quality monofilament thread, clear (for lights), or smoke (for darks). Sewing machine shops will likely carry the best brand of monofilament so check there for availability first. I have also used Sulky Find .004 Soft monofilament on the 2,200 yard spool. Smaller spools tend to kink more so I prefer the larger ones. You may want to decrease the needle tension 1 number or so when using monofilament. A size 11-14 Top-stitch needle works best for monofilament thread. In addition, it is not recommended to use an automatic needle threader with monofilament.

Most often, I use an embroidery needle (size 11), with embroidery thread. Other times, I will match my needle type and size to the fabric I am stitching on, i.e. Jeans needle for denim, topstitch, micortex, or quilting needle when I need a sharp needle. For a full tutorial on selecting needles, visit my YouTube channel where I interviewed Rhonda Pierce, the needle expert from Schmetz Needle Co: CLICK HERE
I welcome any additional comments or questions you might have! Please leave them below.
0 Comments

Meet Inventive Denim Designer Heather Banks!

7/29/2023

2 Comments

 
Picture
My guest for the July Let's Go Sew Sew with Joanne Banko, Sew, Tell Me show was my friend Heather Banks. Heather is a quilt pattern designer, a partner with Accquilt and an educator for OESD, Oklahoma Embroidery Supply and Design.

Her passion is teaching and helping others to express their creativity through sewing and embroidery.  Heather and her husband live near Nashville, TN where they enjoy rural living with their three dogs and their bees!

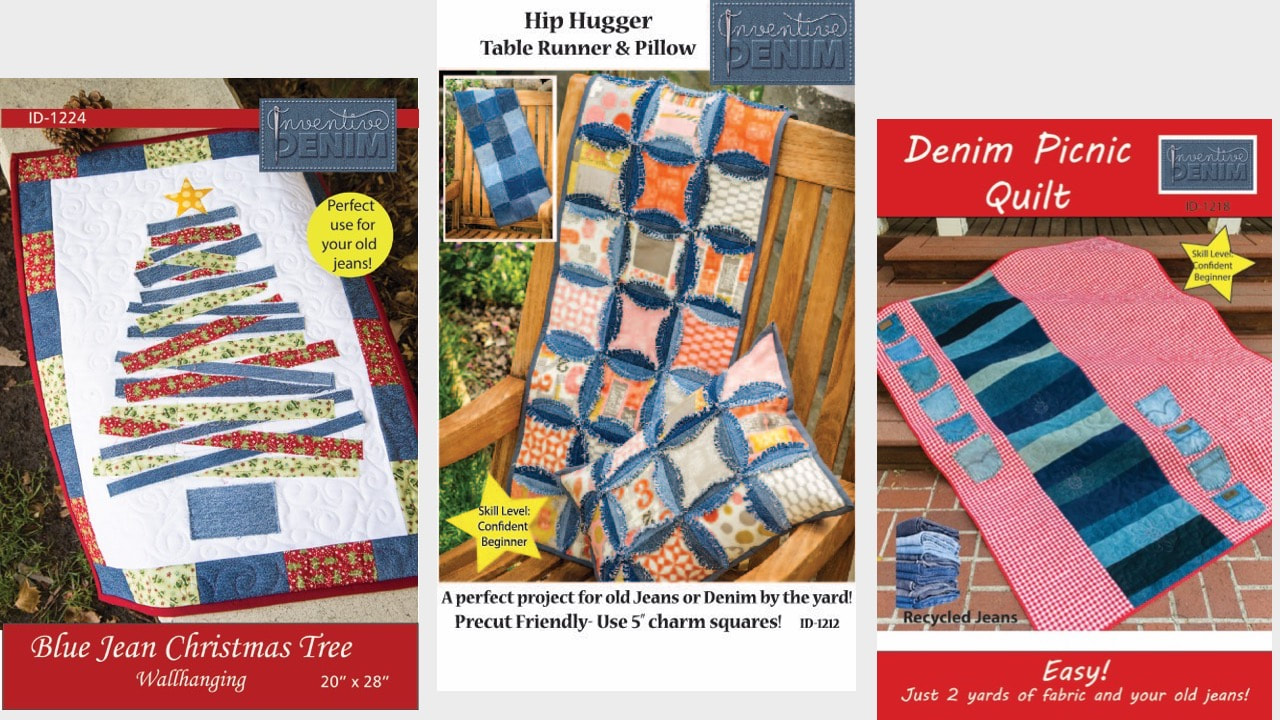
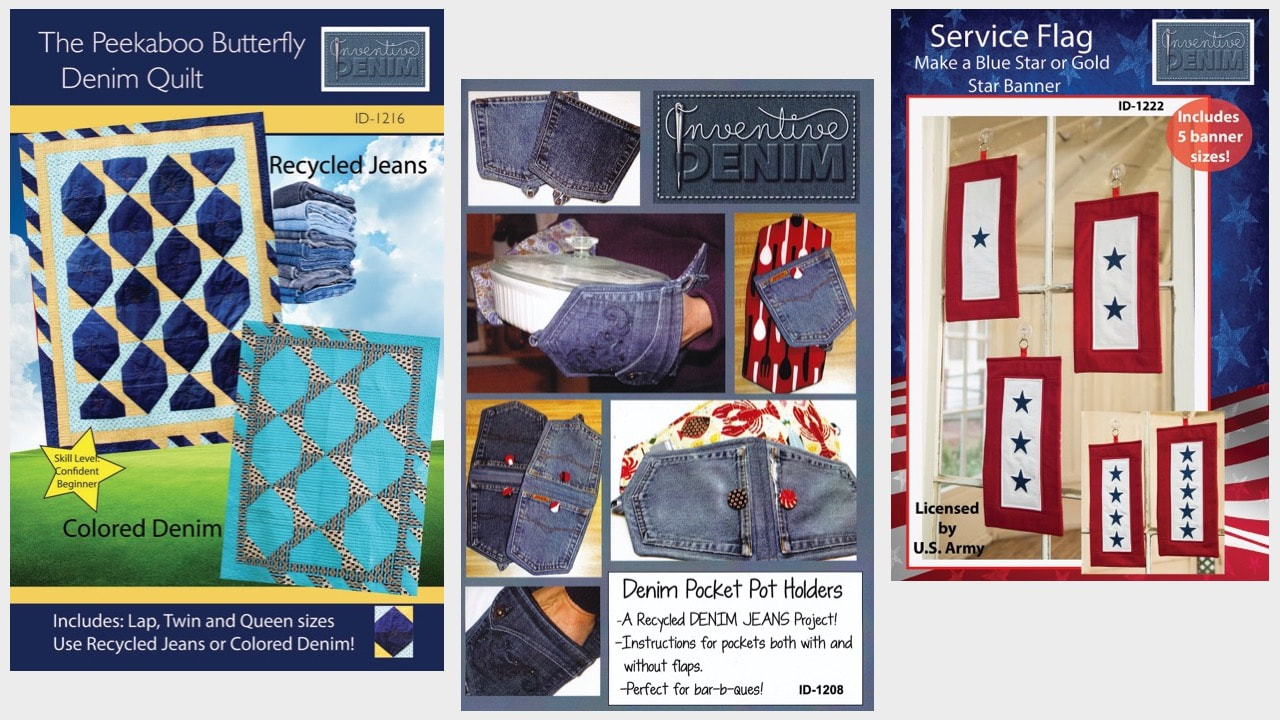
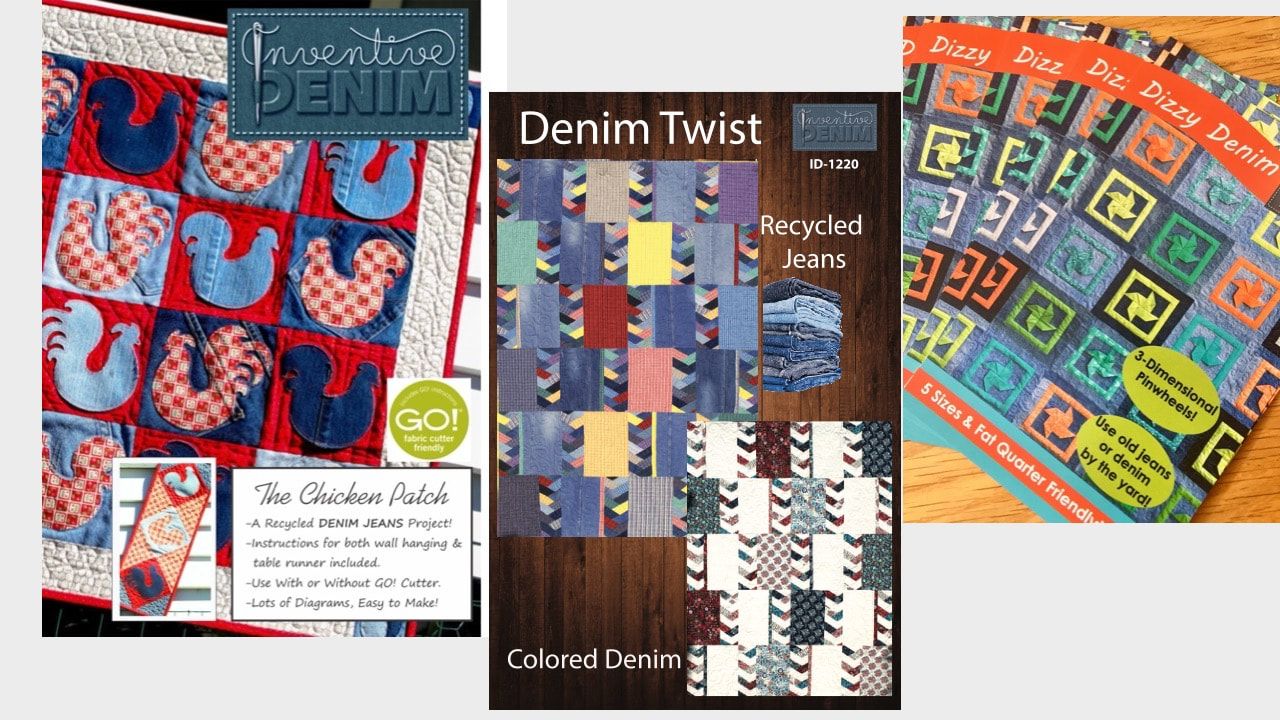
Heather shared lots of ideas for using old jeans in new ways. Here are some highlights from the show, with inspiring  pictures, resources for Inventive Denim project instructions, along with a few of Heather's tips for experiencing more enjoyment in your sewing space!

You'll find contact info for Heather and a link to watch a replay of the entire show at the end of this post.

Heather has over a dozen denim PDF patterns available on her Etsy site. You'll find them when you CLICK HERE.
Picture
Picture
Picture
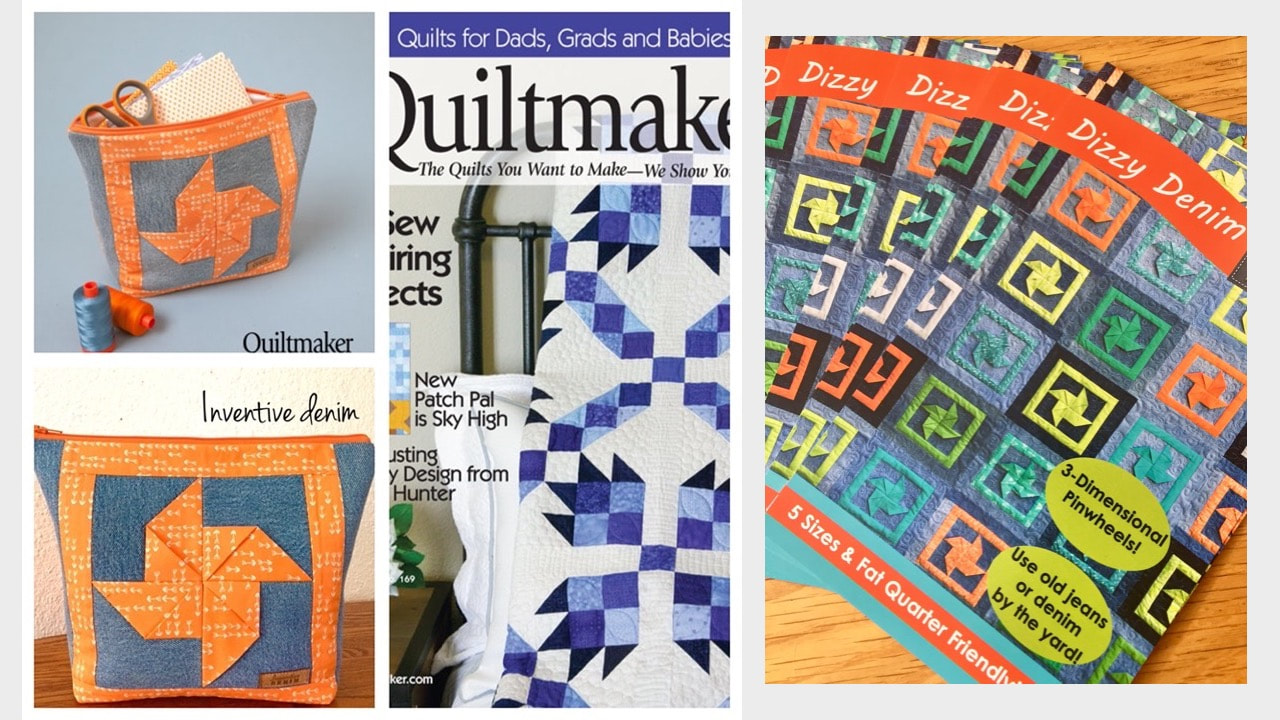
Her Dizzy Denim pattern was featured in an issue of Quiltmaker magazine. Not just for quilts, this block makes a great focal point for a colorful tote.
Picture
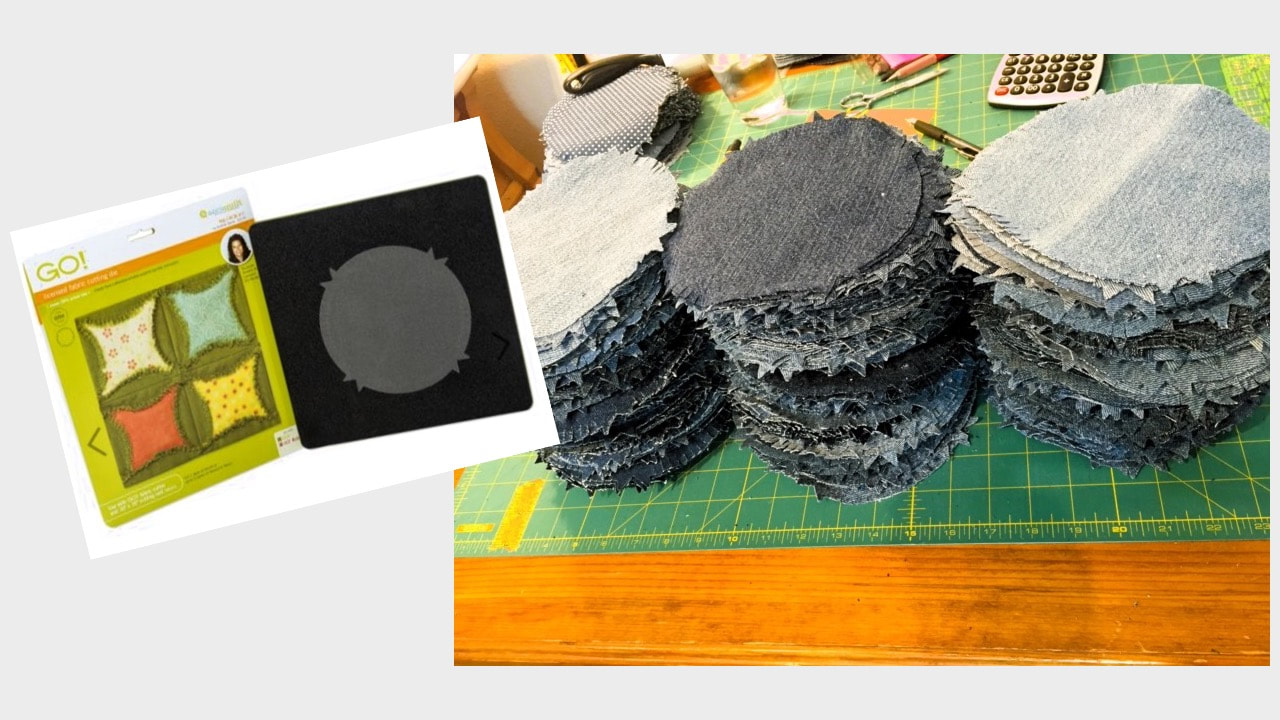
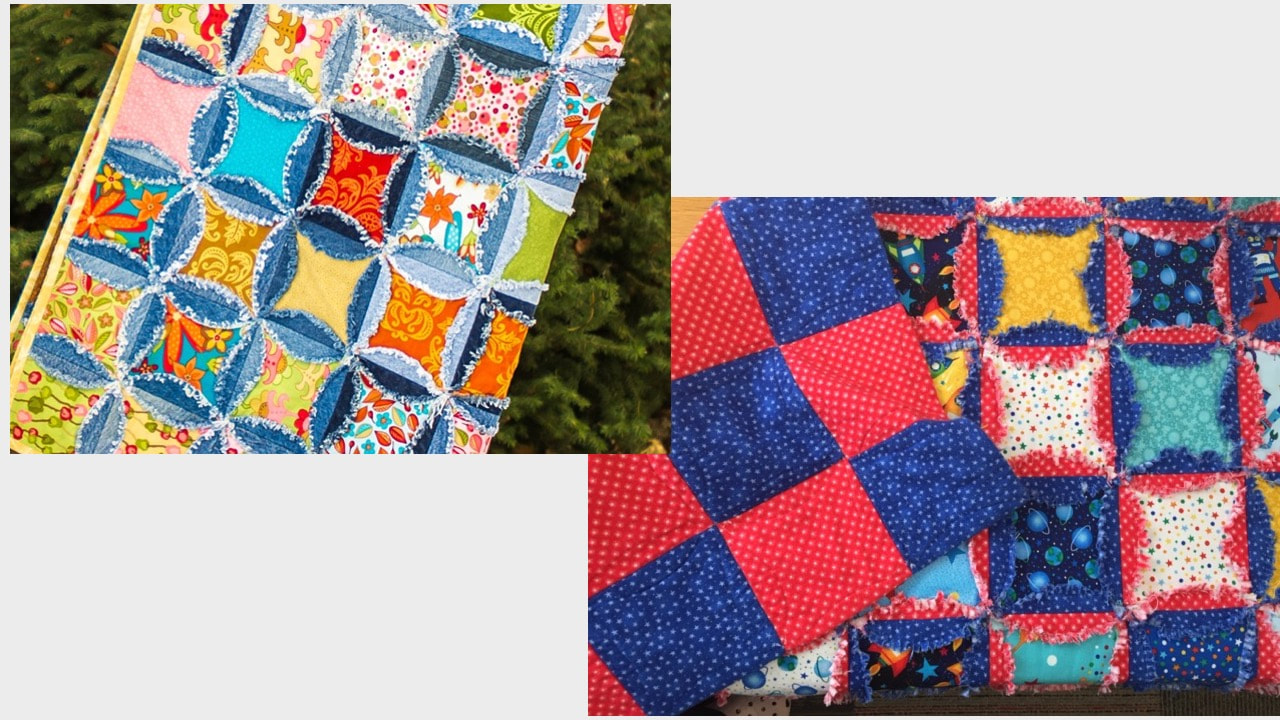
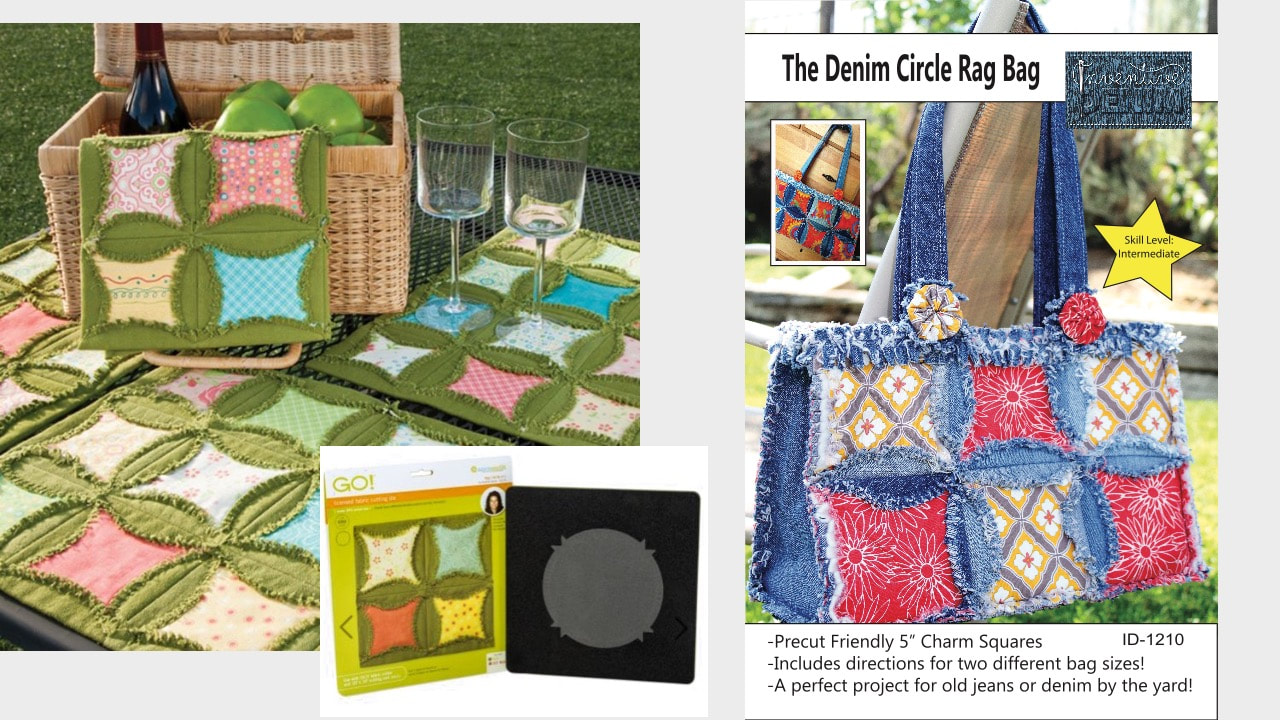
Heather's signature "faux" cathedral windows rag quilt pattern is designed to coordinate with her Accuquilt die. Find out more about this GO! Rag Circle 6 1/2 inch die for the Accuquilt GO HERE.

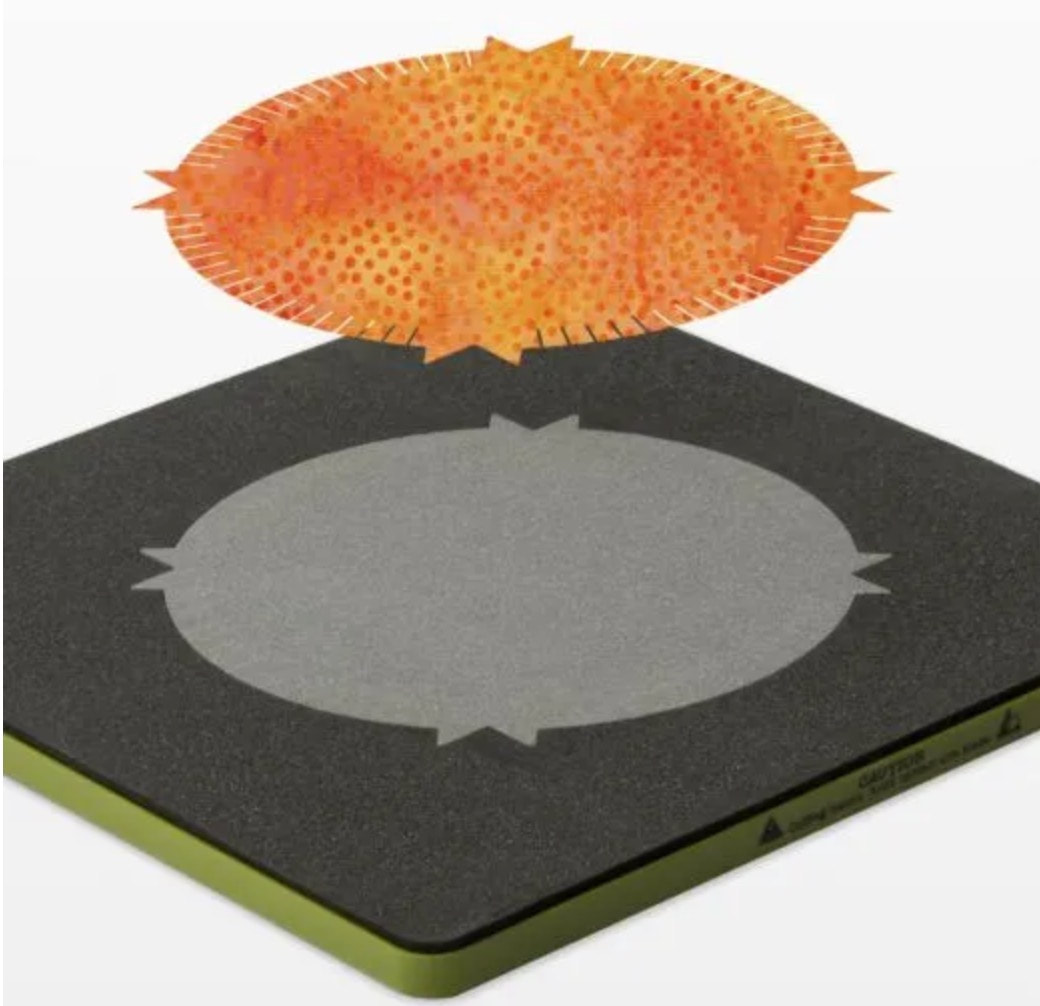
​This cool tool cuts the circle with important notches and it snips the entire circle so it's ready to fluff up as a rag quilt when laundered. Heather talked about other methods for cutting circle but it's easy to see why her favorite method is using her Accuquilt GO machine. Explore more about the Accuquilt cutting system HERE.
Picture
This is what a completed circle looks like.
Picture
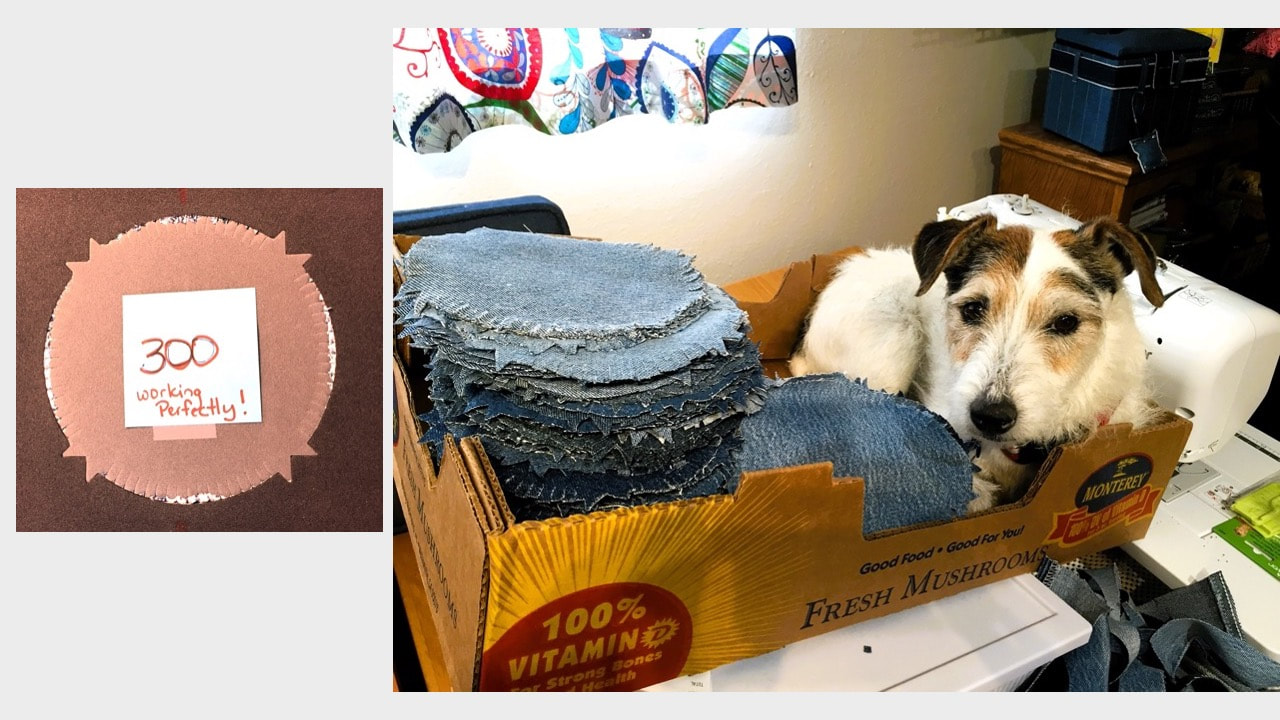
Of course denim quilts are perfectly pet approved! Rugged, yet beautiful, and so much fun to make. Heather told us she cut 300 circles before she had to clean out the fuzz left from fringing with the special die. That's pretty impressive!
Picture
Using a quilt as you go method, these blocks work for so many different projects, including table runners, placemats, totes, and all kinds of colorful quilts paired with 5-inch charm squares and optional batting. Heather showed exactly how to cut and sew the blocks during the show.
Picture
Picture
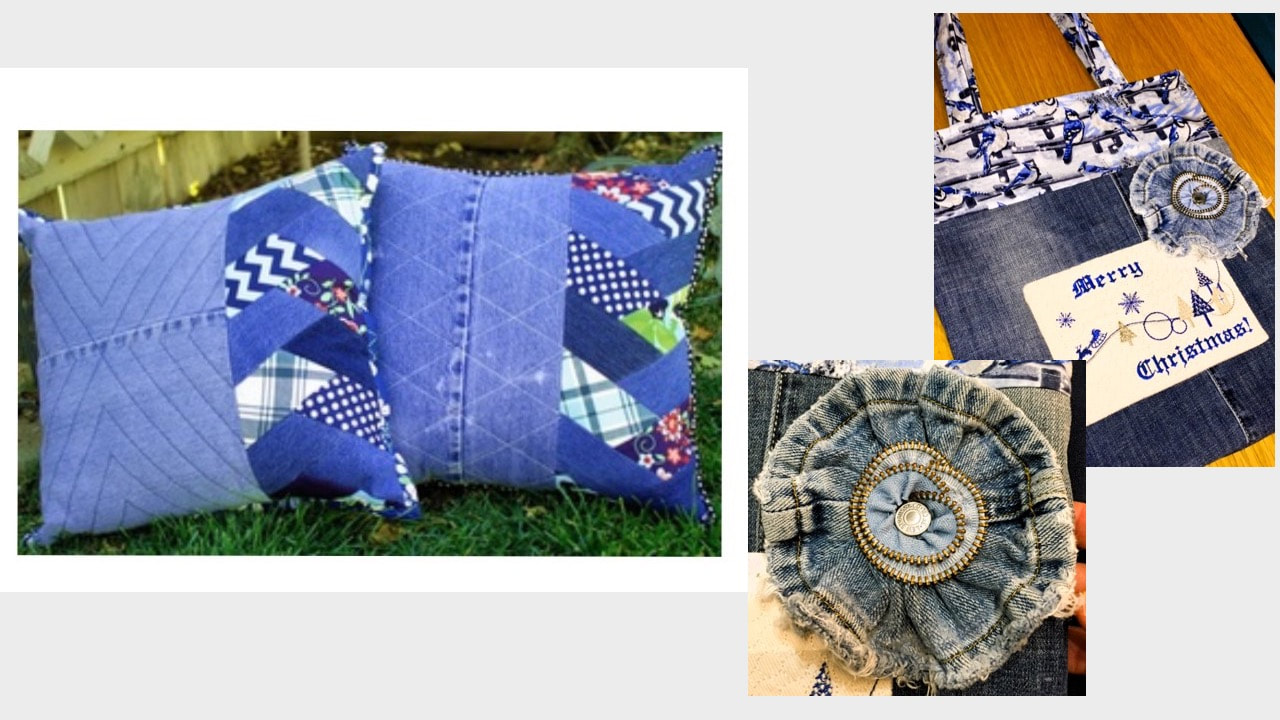
Denim can be re-worked into a wide variety of creative projects.
Combine patchwork with denim for pillows and use every part of old jeans for embellishment. even zipper teeth can be used as an accent!
Picture
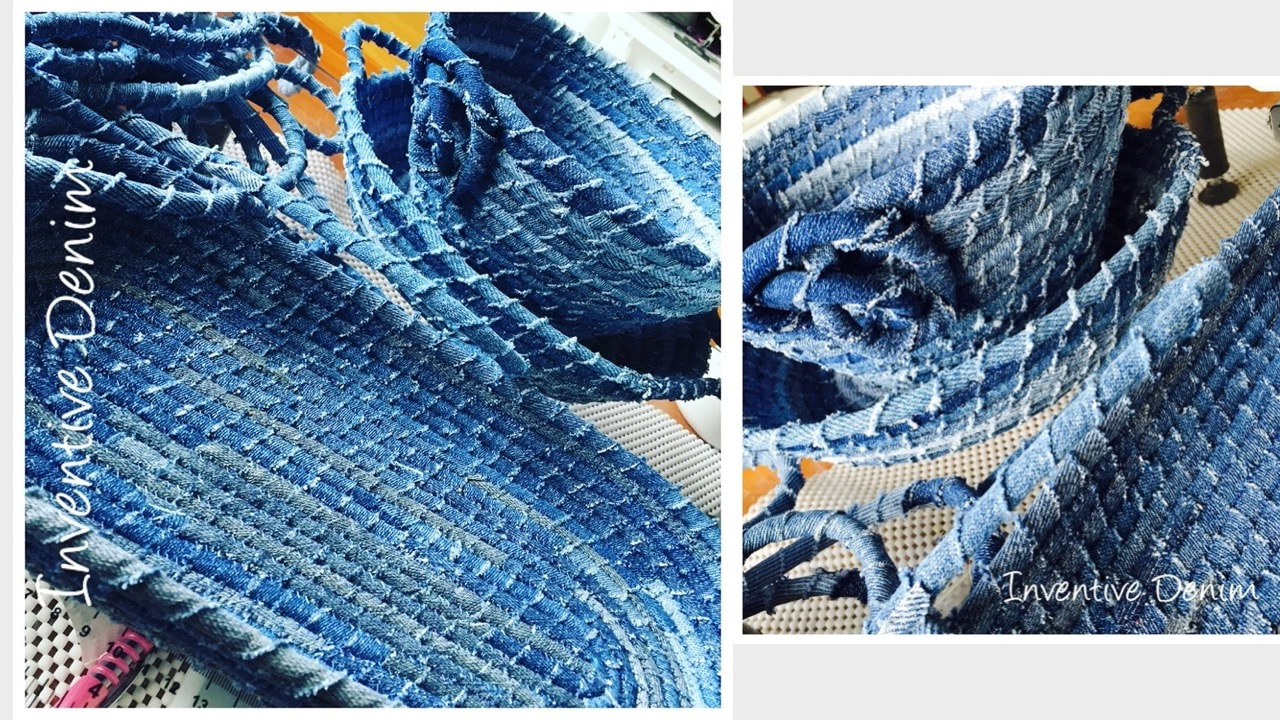
How about using strips of denim to make coiled bowls? These are all the rage! While this pic didn't make it into the show, I hope to have Heather on in the future to show us how it's done.
Picture
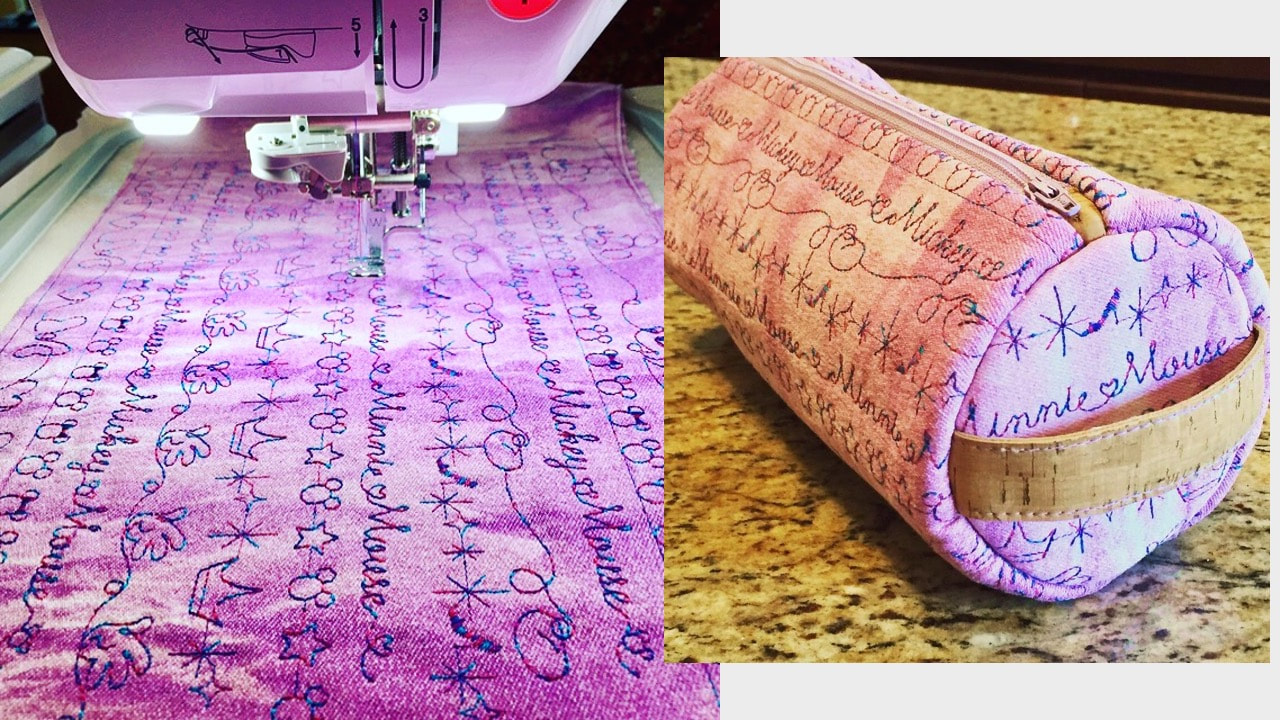
Denim doesn't have to be blue. Here we see a pretty pink piece she decorated with small pattern stitches on the embroidery side of her machine and turned into a cute little duffel bag. Yet another example of Heather's creativity that we didn't get to see during the show.

In talking about storing jeans for future use, Heather told us she  likes to sort by color, and often cuts up the jeans into usable pieces, keeping the extra parts such as pockets, zippers, etc. aside to use for embellishment purposes.
Picture
Heather spends a lot of time creating in her sewing space. She shared some of her favorite tools on the show, including her favorite blue ink wash away fabric marking pen, brand name Leonis, found HERE online.

​Having a mini iron is an essential in her sewing repertoire. When I asked Heather what helps make her sewing space a happy place, she said she likes to see what she has, so storing supplies in clear containers helps her make her sewing space a happy place. Having her 3 dogs near by, with their dog beds finding a prominent place in her space keeps her happy too!!!
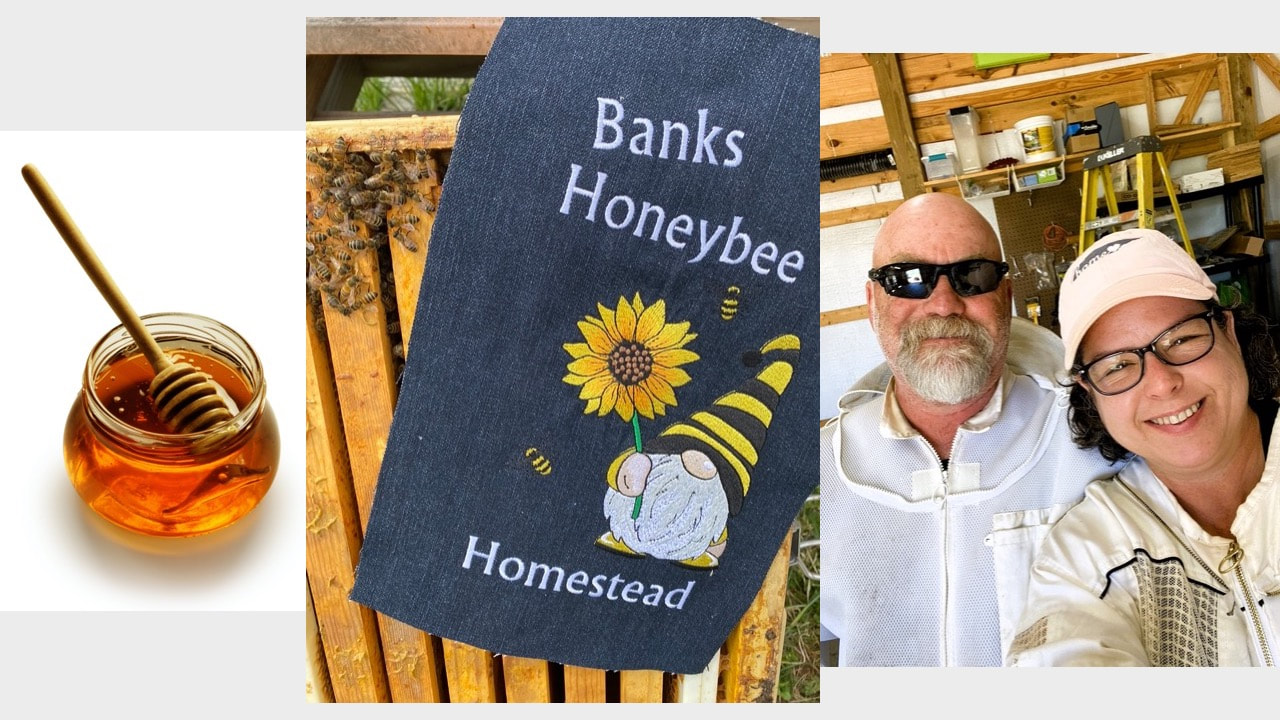
Oh yes! Heather has many other interests that keep her busy. Living in a rural environment, Heather and her hubby grow veggies for canning, raise chickens, and are known as the the Banks Beekeepers. 

Connect with Heather and learn more from her when you visit her sites:
Website: ​sewingwithheather.com
You Tube channel:
www.youtube.com/@sewingwithheather
​Etsy Store:
www.etsy.com/shop/InventiveDenim
​Private Facebook Group: The Education Connection (with Cindy Hogan)
Picture
Watch the replay video on my Let's Go Sew with Joanne Banko You Tube channel HERE.
2 Comments

Best of Hoop Fest 2023 - Tips, & Tricks for Machine Embroidery

6/18/2023

0 Comments

 
Picture
As promised, I'm sharing some resources to follow up the two 25 minute segments I presented during the annual Sewing Machines Plus Hoop Fest. You can check out the SMP YouTube channel HERE for replays of all five days. There were lots of great presentations and guests sharing helpful and interesting ideas to help you enjoy the art of machine embroidery. And oh yes! There were tons of specials on a multitude of great products!

Throughout the two segments you see embroidery designs from my Just Jackets collection, and from my book titled Wrapped in Embroidery.

Options for purchasing either of these include ordering special packages from this website using the links above.

In addition, you can visit Sewing Machine Plus for the Just Jackets downloadable version
HERE and standard book option for Wrapped in Embroidery HERE. The choice is yours!

Okay, on to highlights and resources to follow up from the presentations I prepared for the Thursday LIVE show.

Segment #1:
Building Big Embroidery with All Size Hoops
Watch the entire segment below:

In this segment I showed how to use paper and printed templates to precisely position designs using center markings. In my demonstration I used a standard 4-inch hoop and the plastic hoop grid that comes with most hoops. As a Brother ambassador, I'm working with Brother hoops included with the machine. If you have hoops without these grids, I suggest you contact your dealer or machine manufacturer to ask about grids for your hoops. By the way, my featured machine for this demo was the NS1750D combo sewing and embroidery machine.
You'll see how I created a two identical designs made up of four rose clusters. One was stitched using templates to align four separate designs in four separate hoopings with a 4-inch hoop, while the other was done in an 8 X12 hoop, stitching all four designs at once. You'll see that no matter your hoops size, big or small, templates allow for stitching multiple designs and building big designs. With a template of a single design in a smaller hoop you simply follow the steps to re-hoop with precision placement. In contrast, if you had a template consisting of the four rose clusters grouped together, you could stitch larger areas more quickly with the use of a larger hoop.
Below are a few resources that coordinate with the information in the video:
Software for printing templates - Embroidery Tool Shed is a free program from my friends at Dime. It's sew easy to print a template using Embroidery Tool Shed. Follow the steps below:
  1. Open your design in Embroidery Tool Shed Software.
  2. In the File Menu, select "print"
  3. In Print Preview, you can select "Settings" and mark the checkboxes next to: realistic, crosshairs, actual size, stitches.
  4. Choose the print button when you're ready. 
Tool Shed allows for printing templates and includes all of the following features:
  • Read and write popular formats
  • Resize designs
  • Cut, Copy, Paste
  • Rotate and Mirror
  • Re-colorize designs
  • Print templates with image, color sequence and cross hair
  • Convert colors between brands
  • Design Analyzer
  • Stitch Sequence Simulator
  • Zoom, Pan, Realistic viewing options
  • View Stitch Ends, Commands
  • Adjustable Viewing Grid
  • View and Create Hoops
  • Junk Stitch Filter
*Embroidery Tool Shed software also houses the entire collection of Inspiration software available for purchase from Designs in Machine Embroidery. Access all of your programs directly in the Tool Shed or download new applications as you need them all in one convenient location. No more flipping back and forth from software program to program - everything you need is right in the Tool Shed! Of course, the folks at Dime have other great software programs for purchase too.

For Brother specific software options available for purchase, you can take a look at various options in various price ranges available from sewingmachinesplus.com HERE. I happen to like the features found in the Brother BLUE Software.

Print templates onto Dime *Print & Stick Target Paper for reusable and repositionable templates that stay put while you are designing your masterpiece.

No software? No problem! I showed how you could use graph paper to make accurate template. Print your own millimeter or other size graph paper using the Brother Creative Center found HERE.

Segment #2:
Embroider First, Sew Second

Watch the entire segment below:
Segment #2, compliments segment #1 and I highly recommend watching both of them. In this presentation you'll see embroidered garments and learn tips and tricks for embroidering sections of fabric prior to sewing into a garment. Below you'll find a PDF that coordinates with this segment and includes a sheet with resources.
embroider_then_sew.pdf
File Size: 8566 kb
File Type: pdf
Download File

0 Comments

Got The Urge To Serge?

5/27/2023

6 Comments

 
Picture
Let's go Sew LIVE shows for the past two months have been all about the world of sergers. While both of these shows are packed with information, I will readily admit they just scratch the surface. I've got plans for additional videos with more in-depth tutorials for you so stay tuned!

By way of introduction, I got into the serger universe before they were available to the home sewing market. In fact, my first serger experience was at the tender age of 16 when I started working for a custom drapery manufacturer.

The first serger I touched sat in a pan of oil, stitched at lightning speed, had no manual to reference and no color coding or threading chart to guide the operator of such a beast. I use the term beast, tongue in cheek. While it was a bit of a challenge to master, it operated flawlessly and made quick work of seaming together panels of expensive fabric for designer jobs and high-end department stores.

I could tell lots of stories of what it was like to work there for several years during high school and then part time as I attended fashion school. However, that's a topic for another time. Let's just say it was a real opportunity to get in on the ground floor serger wise. In fashion school several of us bought the first home model type of serger, which at that time was sold by industrial dealers that catered to small business and cottage industries. After graduating from Progressive Fashion School in good old Cleveland, Ohio, I used that machine in my start up custom dressmaking business. It was a huge asset to finish seams, so they looked like they came from ready to wear.

I say all this to set the stage for the start of a series of serger related blog posts along with links to current & recent videos on the topic. If you've been following my Sew . . . Tell Me Live shows you know that I did two in a row based on commonly asked serger questions. I'll link to these videos at the end of this post.

For today, I'm sharing images and descriptions of a few of the most commonly used serger stitches, with both graphics and actual photos.  Let's talk about choosing and using common serger stitches. Here we go!
It’s true that an ordinary straight stitch machine can be used to execute most any type of sewing project. Sergers however, are very unique in that they produce stitches that are unavailable on any sewing machine. Even if you posess the latest computer equipped model you will benefit from adding a serger to your repertoire. While never meant to replace your sewing machine, it is the perfect addition to a well-equipped sewing room.

Contemporary sergers are capable of forming many different types of stitches.  My intent is to give a brief overview of serger stitches that can be utilized for construction techniques and some decorative effects. We'll start with the 4, 3, and 2 thread stitches. I’ve listed some of these common stitches along with some of the best ways to make use of them. Stay tuned for more serger stitches and tips in future posts.
Picture
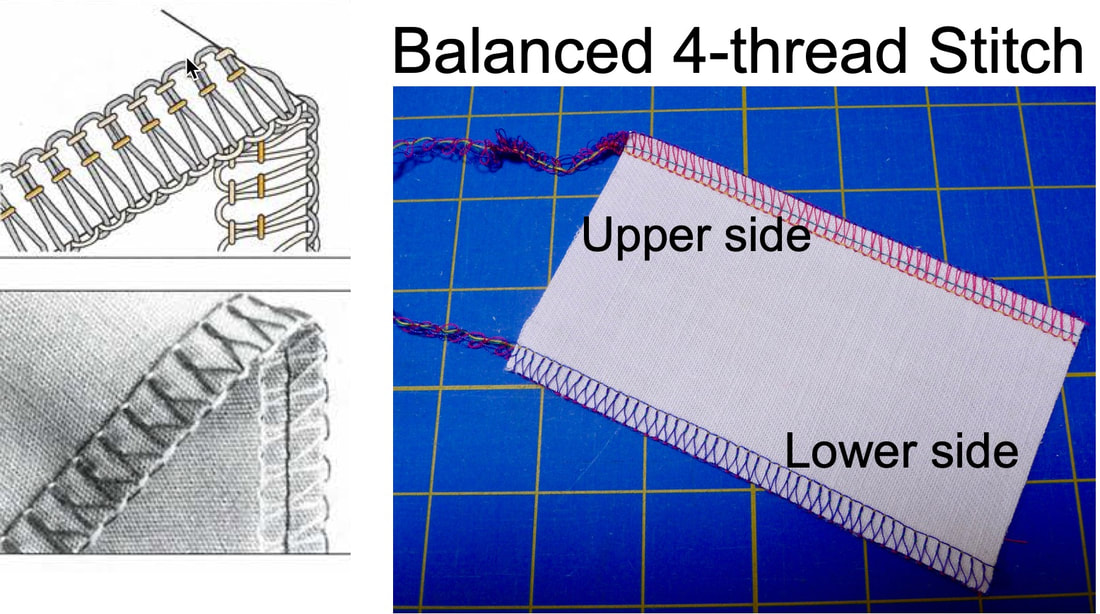
This is by far the most common and perhaps the most basic stitch found on today’s sergers. Here, the machine uses two needles in combination with the upper and lower looper to form a stitch approximately 1/4 inch wide. While it doesn’t lock quite as tight as a regular sewing machine stitch, it does sew a seam and overlock the raw edges in one step.

It's ideal for sewing and finishing seams on most any fabric. With two needle lines forming the seam, it is a strong stitch. High stress areas such as armholes and crotch seams should be re-enforced by sewing alongside or on top of the serger stitch with a conventional straight stitch. Remember, a serger stitch is a “looped” stitch. This makes it more flexible than a sewing machine stitch but also makes it possible for some of the stitch to show form the right side if there is significant stress put on the seam. On many fabrics such as spongy knits, the threads making up the stitch are “absorbed” by the fabric, so they aren't seen from the right side.

Tip: It's nice to have all 4-threads perfectly match your fabric so your seam is totally color coordinated on both right and wrong side. However, it's perfectly okay to blend threads and use a mix of colors. Just know that the leftmost needle and the lower looper are the two threads that should match your fabric best. If there is a slight amount of pull on the seam on the right side, these are the two thread that will show. The other two are only visible on the wrong side.
Picture
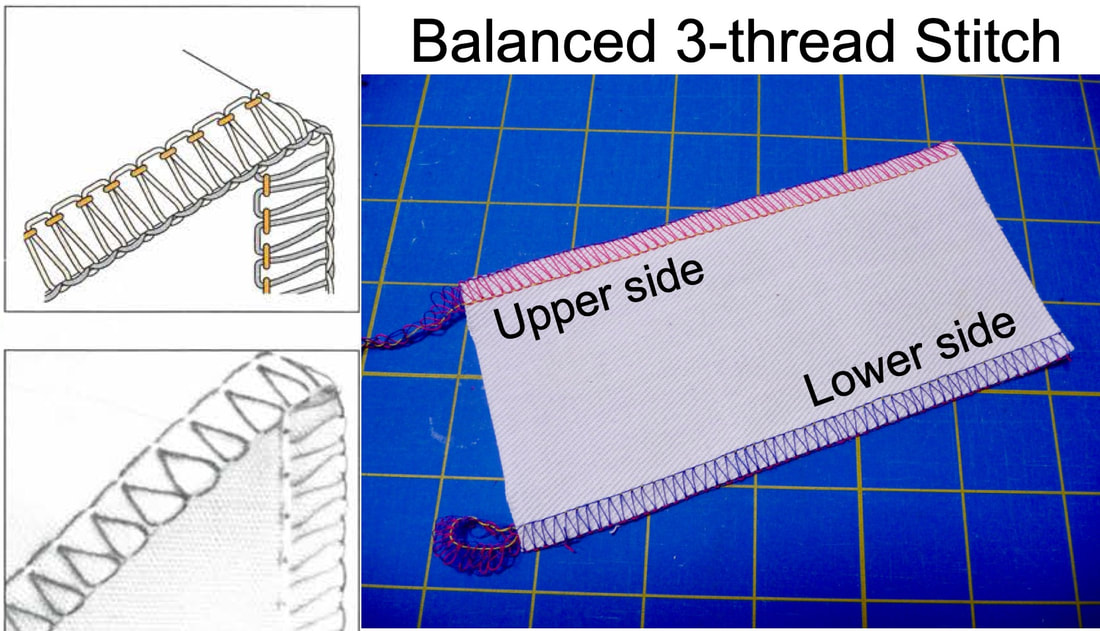
One needle, along with the upper and lower looper are necessary in order to form this stitch. Most sergers use the left needle to achieve a wide stitch and the right needle to achieve a stitch that is narrower. I prefer this stitch for seaming knit fabric. It provides for stretch and recovery of the seam. Although the 4-thread stitch can be used for more stable knits, the extra needle thread in a 4-thread seam somewhat inhibits the flexibility of the seam on lighter and more stretchy knits so I prefer to drop the right needle and serger with 3 threads.

The 3-thread stitch also neatly finishes the raw edges of seams that are sewn on a conventional machine. Using a combination of your regular sewing machine straight stitch along with a 3-thread overlock allows you to produce a seam that is sewn securely, as well as being neatly finished at the raw edges.

Serge finish edges and sew a conventional seam, pressing seams open, or sew, then serge and trim excess seam allowance for a seam pressed to one side. Use whatever method is best for your project.

A 3-thread stitch is ideal for finishing raw edges that traditionally required “clean finishing” by zig zagging or overcasting, turned under edges under, or bound edges. Hem and facing edges are prime examples.

Since a balanced three thread stitch looks almost identical on both the upper and lower looper side, it makes for a reversible stitch particularly when heavy threads are used in the loopers for decorative serging.
Picture
Little known and infrequently used, this stitch has become much more common on many serger models. In my opinion it is a valuable and useful option.

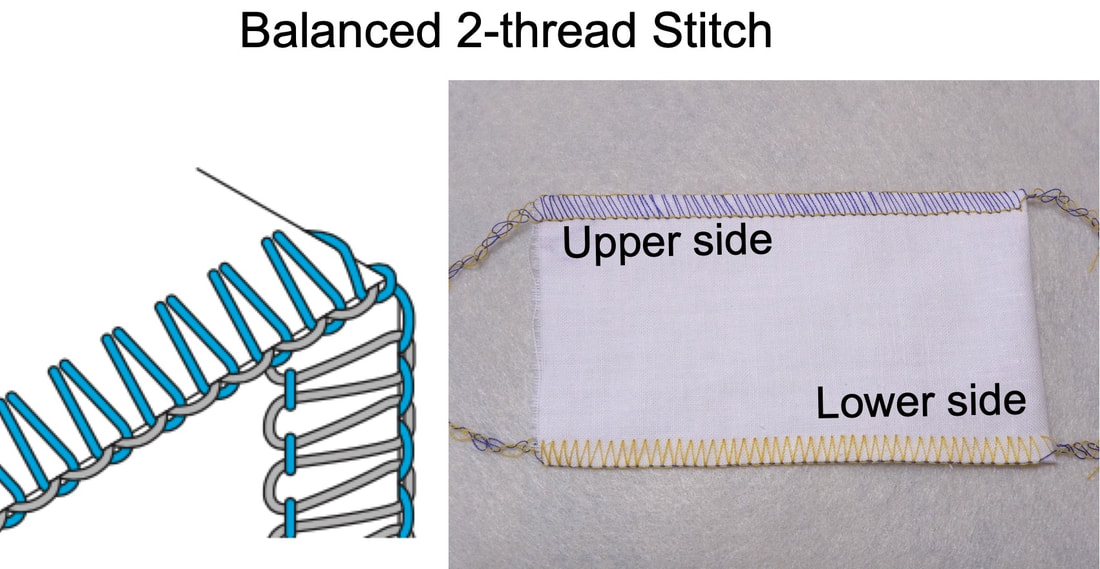
An attachment is used to de-activate the upper looper so that only one needle and the lower looper are used to form the stitch. This stitch does not lock at the seamline, making it unsuitable for use as a regular seam, unless you are using it as a flatlock stitch to seam two ravel proof materials together. Again, not trying to tease you but I'll have more on that technique in a future post.

A 2-thread stitch produces a lightweight finish requiring only two thread spools or cones. This makes it economical, especially for those who sew with a wide variety of colors and like their serger thread to match their fabric perfectly.

When used to finish the raw edge of fabrics this stitch is properly called overcast, not an overlock as it overcasts the raw edge without locking at the seamline.

A 2-thread stitch can also be used for a variety of decorative finishes. In addition, a variation of this stitch can be used to form a rolled hem.  Using only two threads makes it a lighter weight counterpart to the three-thread version. More on the rolled hem coming soon!

I hope this gives you some insight into serger stitches that will help you sew neater, nicer, and more professional looking projects. Please feel free to leave your comments and questions below. I'll make note of them for future posts and videos.
You can watch the first live show with serger Q&A when you CLICK HERE to watch on my YouTube channel.

You can watch the second live show with serger Q&A when you CLICK HERE to watch on my YouTube channel.

And, if you haven't already done so, I invite you to CLICK HERE​ to subscribe to the channel and hit the bell for notifications so you never miss a new video.
Download this article in PDF form:
got_the_urge_to_serge_5_27_23.pdf
File Size: 3155 kb
File Type: pdf
Download File

6 Comments

Creating cording with Thread For Bustling On A Bridal Gown

3/25/2023

20 Comments

 
Picture
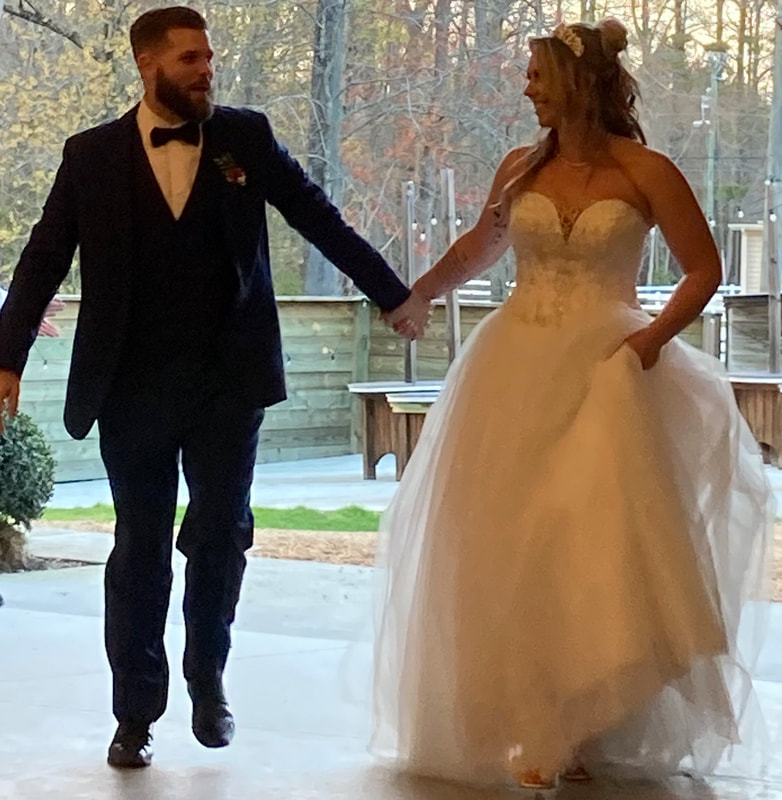
The new Mr. and Mrs. - David and Naomi House!
I recently bustled the dress for this beautiful bride. The groom is the son of Deb, and step son of Don, my special friends who live out of State. You can learn more about them and their own sewing adventures in the replay of this YouTube show HERE.

I volunteered somewhat last minute to be the official "bustler." Originally, I thought they just needed me to figure out how to drape the dress and make it hang nice. Indeed, the draping part is quite an art in an of itself. Turns out, there were no loops or "bustling buttons" in place when I arrived 2 days before the wedding. While the family was busy with last minute preparations, I scoured the sewing room for something to make this work. I should mention that the sewing room is well stocked due to the fact that both Deb and her hubby Don sew, embroider, and craft the most amazing things. However, it was not full of much in the way of dressmaking supplies.

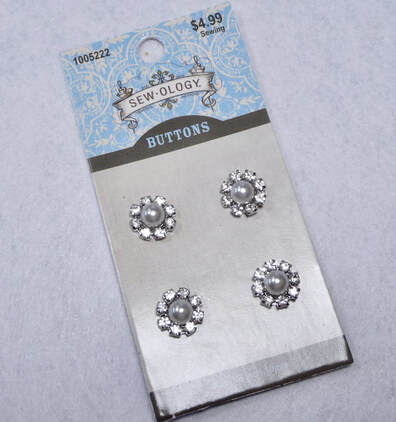
I searched the drawers and cubbies and found coarse crafting yarn but no silken cord or pearl like buttons like I happen to have at home in my own stash. Believing that necessity is the mother, father, sister, brother, and first cousin of invention, I ended up making cording from thread, sewing loops to the lining and then the netting layers on the dress, stabilizing the four layers of fine netting with little circles of embroidery stabilizer. Deb was tasked with hunting for some sparkling buttons to add to the back bodice to hook the loops onto. She came home with some stunning button options from good ole Hobby Lobby. 
Picture
These gorgeous buttons were stitched on the night before the big day. The end result was a beautiful bustle that held tight through a night of joyful dancing.
​
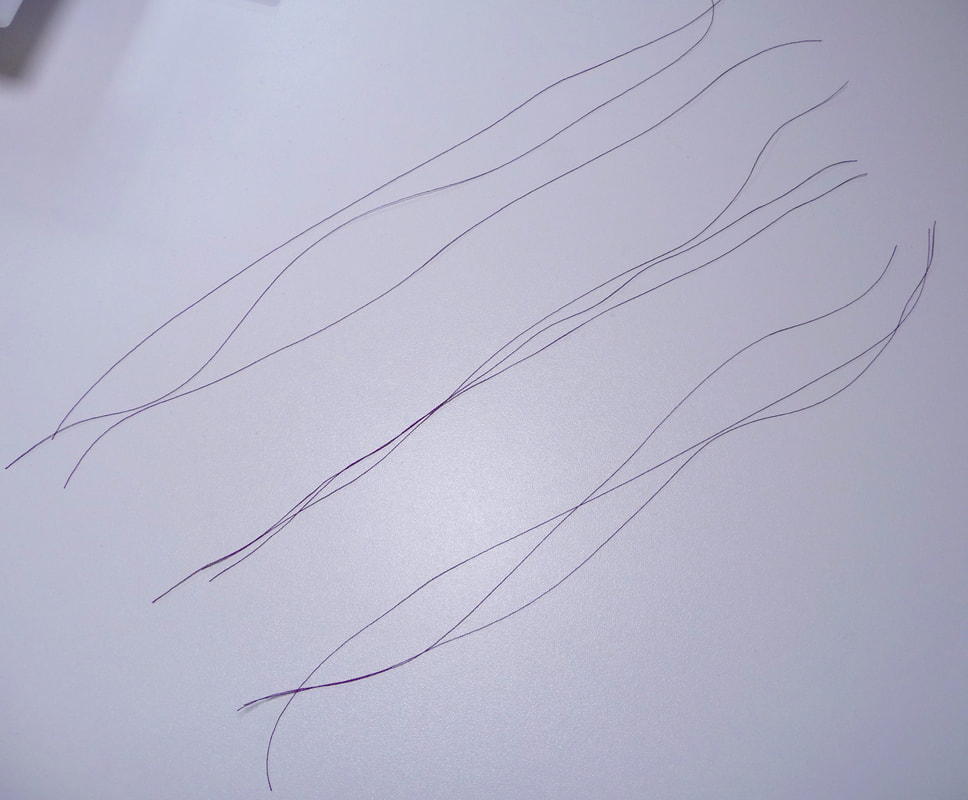
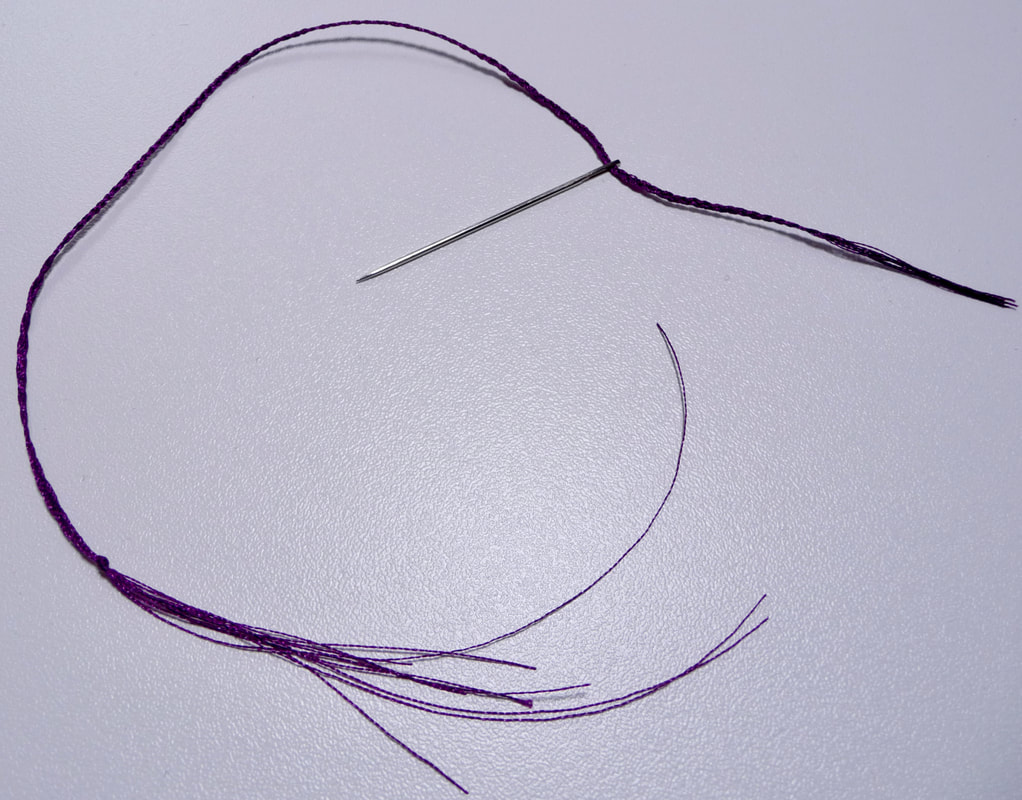
Braiding nine cords together was the trick to making a strong, silky, thin cord with lots of strength. The idea of creating cording from nothing more than thread can work for other applications such as belt loops, loops for buttons on a garment, and even a thread chain to connect lining to the face garment such as a lined skirt or coat. Take a look at the simple steps I devised to make cording below.
Step One: Cut three sets of three strands of smooth, strong thread. I used polyester machine embroidery thread. Tip: Cut strands about 12-inches long. Any longer and you risk tangling while braiding.

P.S. While braiding the strands, the groom's beloved grandmother June reminded me of Ecclesiastes 4:12 where it says that a cord of three strands is not easily broken. How true!!!
Picture
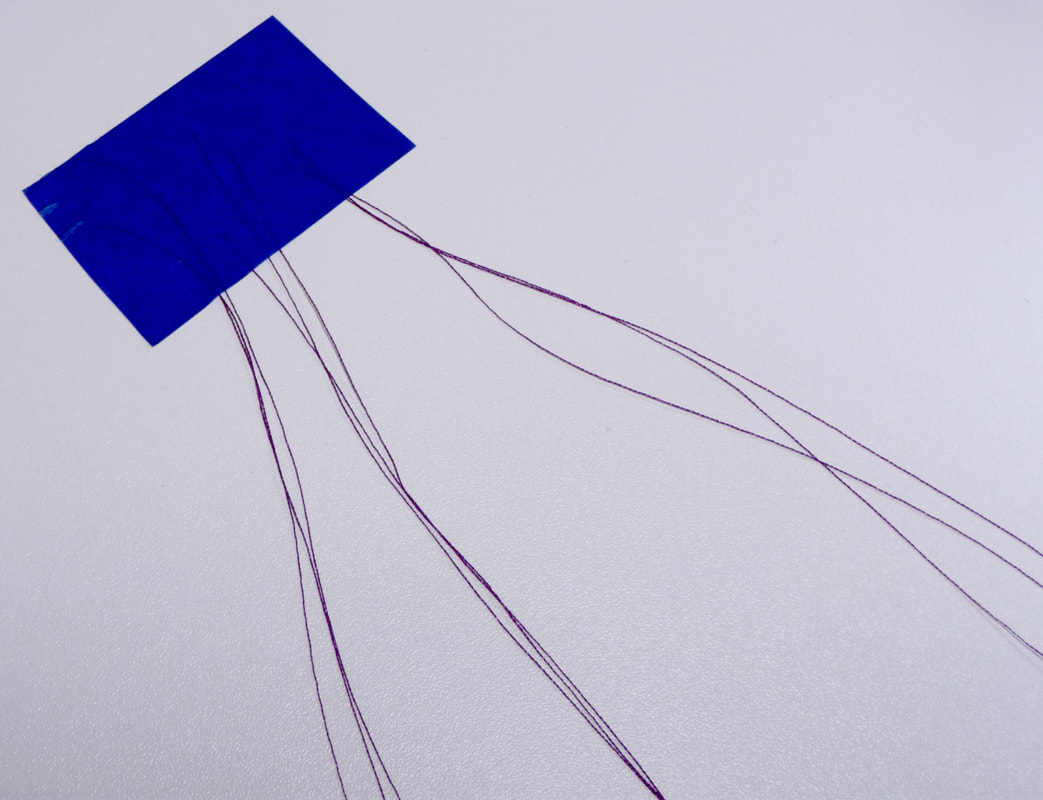
Step Two: Tape to a flat surface.
Picture
Step Three: Carefully braid the strands together into a smooth, tight cord.
Picture
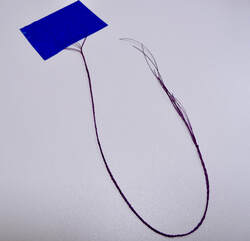
Step Four: Thread cording into a large eyed needle to insert where ever you need it. Be sure to anchor the ends with secure knots.

Picture
20 Comments

Getting Into Garment Sewing

3/4/2023

1 Comment

 
Picture
If you're new to garment making, or feel that your garment making skills have gotten a little rusty, I have a few tips for you.
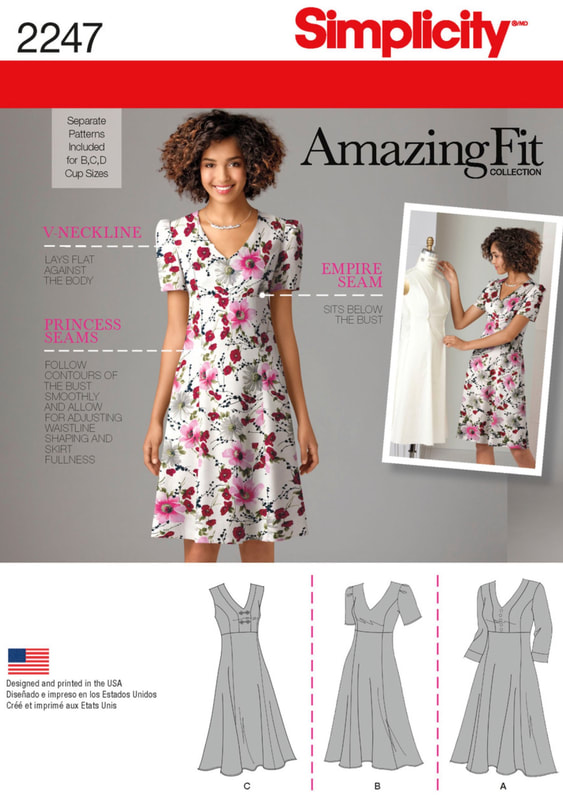
  • Stick with easy fitting garments until you gain confidence. Skirts with and elastic waist and tops with a relatively loose fit would be in the super easy range. The Learn to Sew line up from McCalls Patterns has quite a few possibilities for a variety of garments. Amazing Fit patterns from Simplicity include a lot of fitting opportunities. Always remember that while princess seams take a bit of practice to sew, if you have curves on your body, princess seams are your best friend. Simplicity 2247 is already in my pattern stash and making it's way to my cutting table soon!
  • Pattern sizes and fitting is another great big topic but let's assume you are getting back in the swing of garment sewing by sewing an easy fitting garment. This archived blog post from Craftsy can help you choose a pattern size from the big four pattern companies. This Simplicity Guide is also helpful for choosing sizing. Last but not least, this blog post from Let's Go Sew has some additional tips on patterns.
  • While knits are not hard to sew, a light to medium weight woven is easier to handle and the seams can be finished with a serger, sewing machine overcasting stitch, or even a simple triple zig zag stitch to prevent raw edges form raveling.
  • If you're not too sure of yourself, start with a low-cost piece of fabric or a piece of fabric you're not totally in love with or emotionally attached to. Use this fabric to test the pattern. You do want the trial fabric to have a similar hand or characteristic to the fabric you choose for the final garment. Otherwise, it may hang totally different and cause you to be disappointed. If all works out well, you'll be ready to stitch it up again in fabric you really love.
  • Be sure to mark the right side of each cut piece either with a small safety pin or an “X” made with a removable marker. Keep pattern pieces loosely pinned to cut pieces, removing them as you sew. Always read through the pattern instructions before beginning, even if everything doesn't make sense at first. Check off each step as you complete it.
  • I still like to cut my notches outward on many pattern pieces, especially if there are multiple pieces that may look similar. I know a lot of sewing enthusiasts like to make small clips into the fabric for notches but if you end up needing to let the seam out you won't have as much strength with snips in your narrow seams. As an alternative to cutting out notch shapes you can use a removable marker. By the way, always test your markers for complete removability on a scrap of fabric.
  • While constructing your garment, always handle fabric gently. If your fabric pieces get stretched or skewed they may not fit corresponding pieces. 
  • Take the time to pin baste or machine baste seams to test fit and always try the garment on with the right side facing out.
  • Finally, give yourself a pat on the back for giving it a go!  If your finished piece is wearable, great! If not, chalk it up to experience. You've gained a lot of practice and you can always donate the piece to a thrift shop where finding a bargain will make someone else happy. Start a new garment and enjoy your garment making journey stitch by stitch!
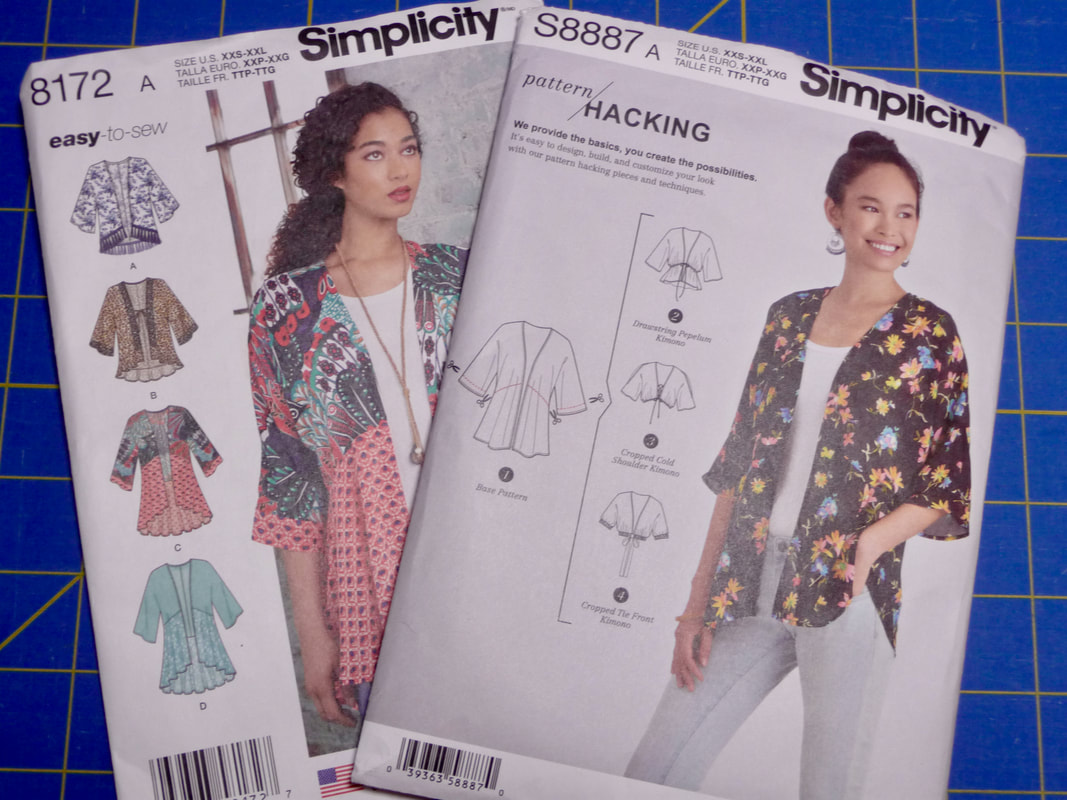
Looking for a pattern recommendation to get you started? Consider Simplicity 8887 for a simple spring topper. I originally made Simplicity 8172 (discontinued but revived as a close copy with the new 8887), for It's Sew Easy TV episode 1406-3 found on my YouTube channel HERE. I made one from double gauze fabric and another using a scarf as my fabric. You'll see exactly how in the video. You can read more in this archived blog post with a link to the PDF of instructions. Pick a nice rayon challis, rayon batik, or soft lightweight cotton for the first time you sew it. I've also made it in chiffon but it is a bit trickier to sew when your fabric is slippery.
Picture
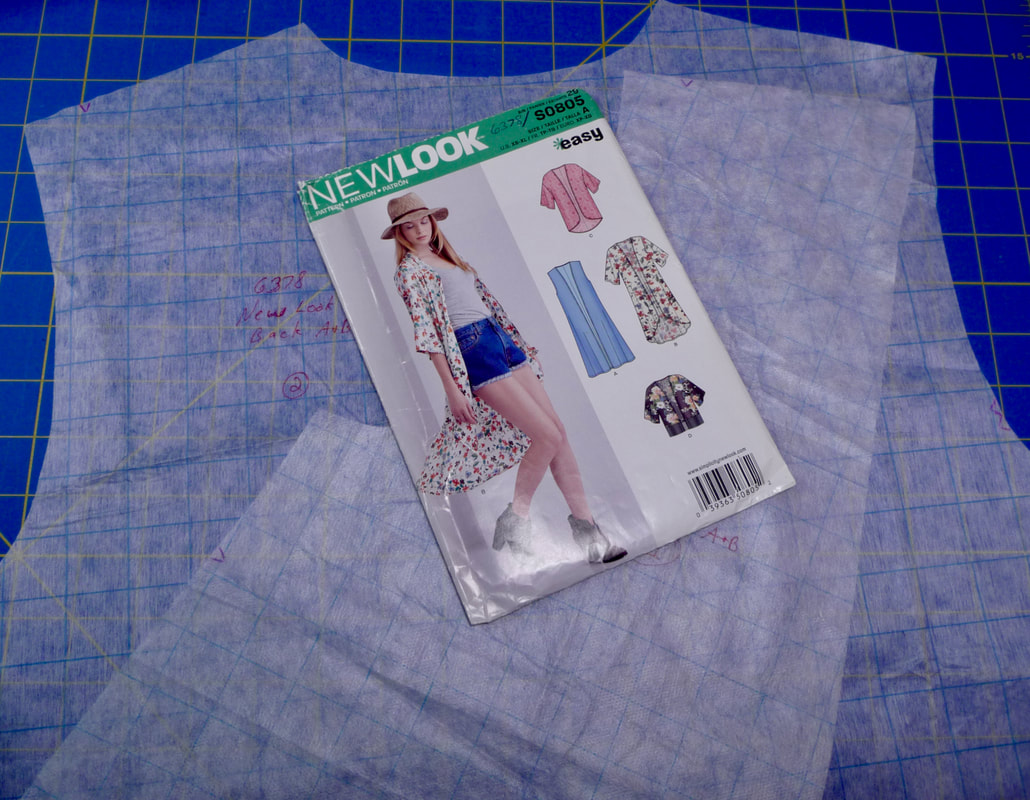
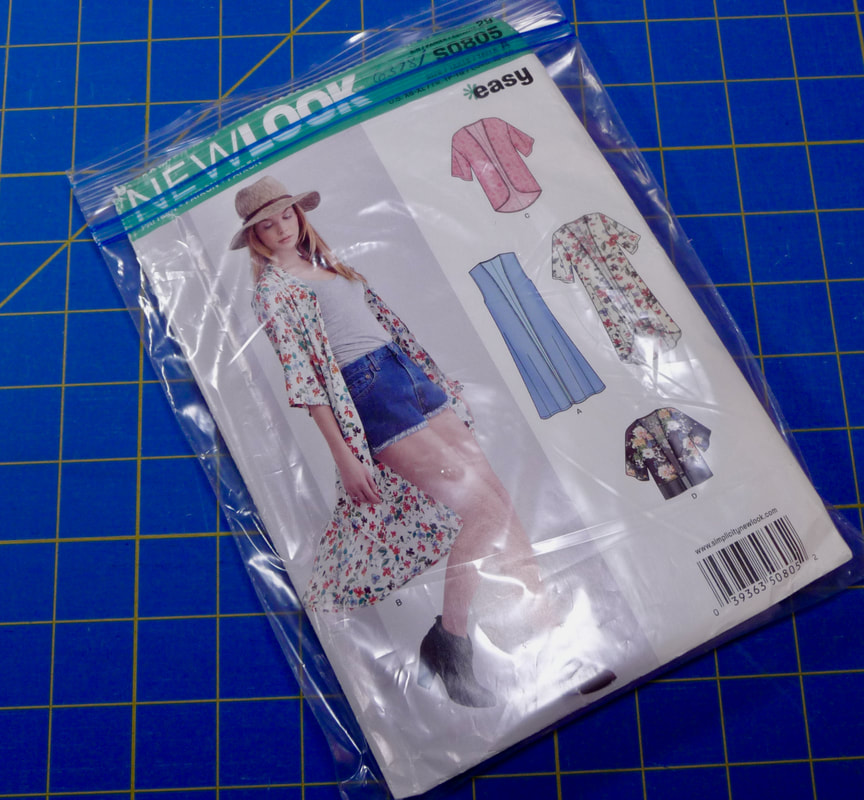
For another easy to sew spring topper, take a look at New Look 6378. I made View C and it went together super fast. Mine was cut from a silky blouse fabric but any of the fabrics named above work work well too, and be a bit easier to sew.
More Pattern Tips
Picture
When I like a pattern and plan to use it more than once, I will often trace it onto pattern tracing cloth such as Pellon 810. In fact, I sometimes use this particular tracing cloth to make a mock garment to test fit. While it may not drape like the fashion fabric, it can be helpful for determining basic width and length requirements for an untested pattern. Pellon 830 works in a similar way when you want tracing cloth that is plain.
Picture
Picture
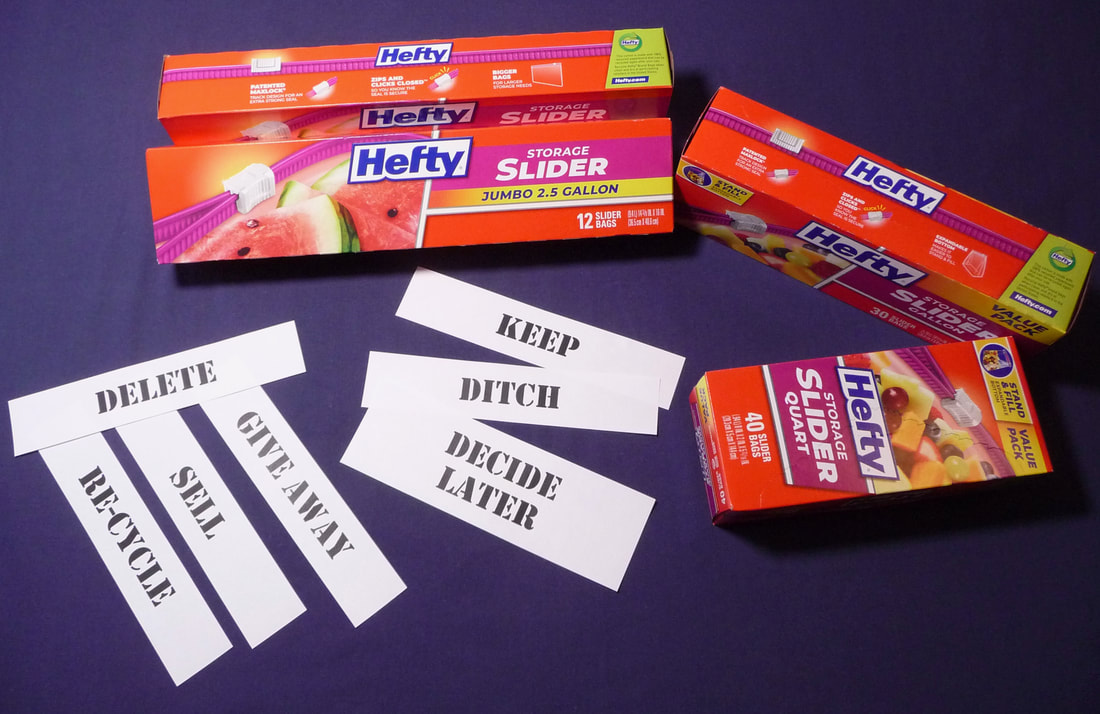
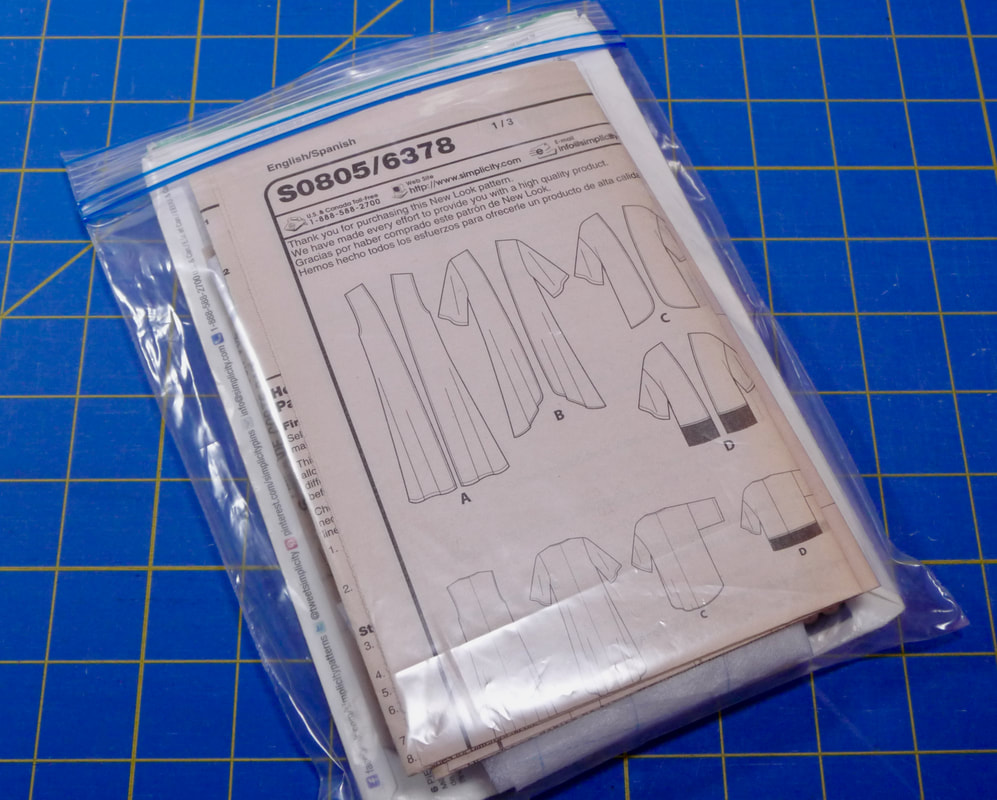
For storage, I like to put cut patterns in quart size zipper bags with the front of the envelope facing out on the front side and the line drawings facing out on the back side.

Reusing patterns is not only a great way to get your money's worth out of them, it makes repeat sewing faster and easier. I make sure to take notes for any preferred changes and slip my notes inside with the cut pattern.

I hope you found these tips helpful! Please leave any comments or questions you have below. Happy sewing!
1 Comment

Sandra Betzina - The Power Behind Power Sewing

2/5/2023

3 Comments

 
Picture
Connect with Sandra at www.powersewing.com
Join me as I recap highlights of my recent conversation with Sandra Betzina, the power behind POWER SEWING and a true sewing industry icon! 
Below, you'll find the replay from this Let's Go Sew Sew . . . Tell me live show broadcast on January 30th, 2023. It was a joy to bring Sandra on and share her with my sewing friends. We chatted about "sew" many things and as always, Sandra's enthusiasm for sewing along with her vast knowledge, keep the conversation lively and interesting. She answered lots of questions from the chat and gave out a notepad full of golden tips to all of us. I've listed some of her top tips at the end of this post.

​Below, you'll find a link to watch the replay. Watch the entire show and learn about sewing, fitting, patterns, & fine fabrics, & more with Sandra Betzina! 

Along with the video link, I've added many resources that were shared during the show. I hope you enjoy this post! 

Books!!!
Sandra is the author of many books, including the following:
​•FAST FIT
•MORE FABRIC SAVVY
•FEAR OF SEWING
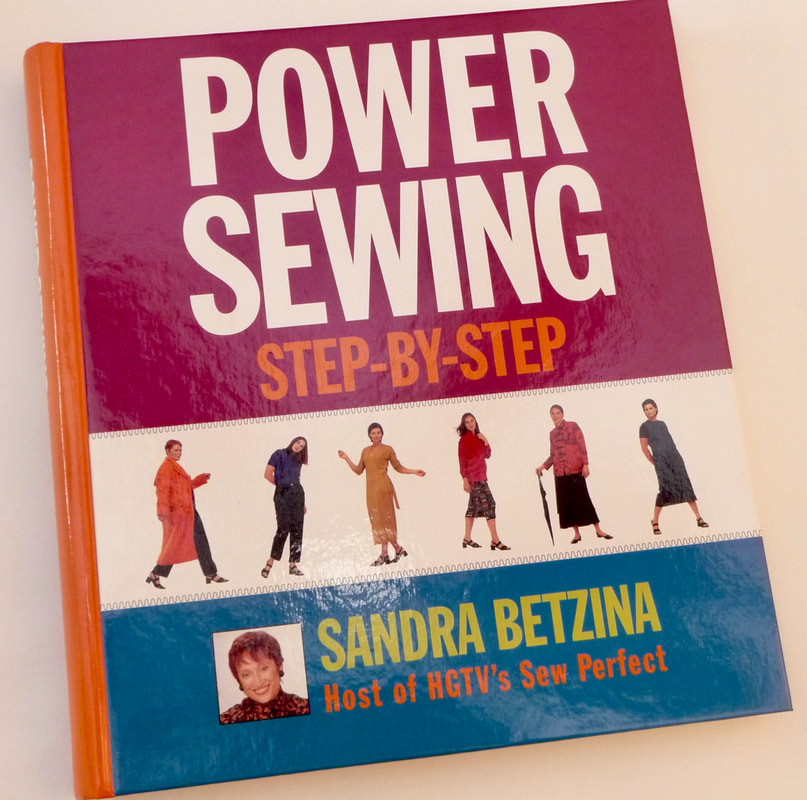
•POWER SEWING STEP BY STEP
•SANDRA BETZINA SEWS FOR THE HOME
•Her most recent books are titled POWER SEWING TOOLBOX 1 and 2 

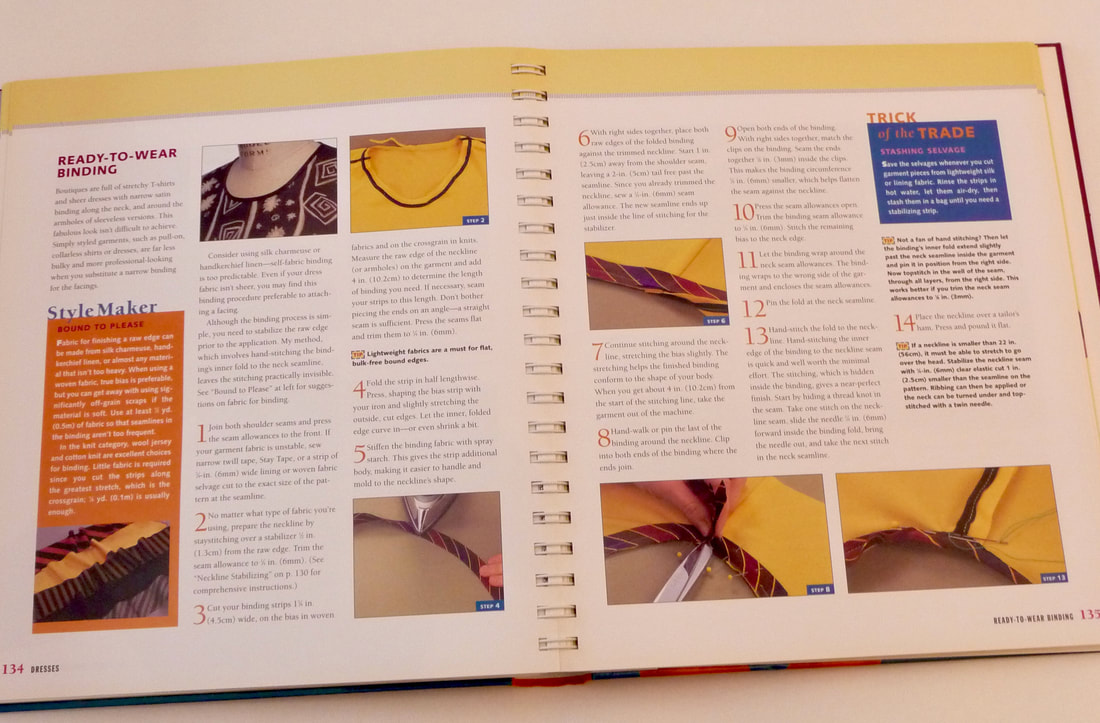
Fast Fit, Fabric Savvy, and Power Sewing Step by Step are three of my favorites. These titles are reference material I refer to time and time again. A few years ago I deleted quite a few books from my personal library,  but these are cherished classics that I will hold onto for as long as I sew.
Picture
Picture
These books are not only informative, they are so beautifully illustrated, I enjoy browsing the pages for relaxation and a little sewing meditation!

Check out her books here on her website:
powersewing.com/shop/books/

You'll find even more on Amazon, including a kindle version of the ever popular More Fabric Savvy HERE.
Patterns!
Sandra's unique pattern designs have graced the pages of the Vogue Pattern book for many years. Sized for real women with a totally different set of measurements, if you follow the measurement guidelines, they can be trusted to fit far better than any other commercial pattern you have ever used. 

So many of the patterns we talked about have been discontinued but I was able to find quite a few for sale on both ETSY and Ebay. I've accumulated got quite a collection of my own over the years and while some are still uncut, they are on my "sewing wish list" and one day I believe I'll have them all made up and in my closet. When I mention the patterns here you can assume they are discontinued unless otherwise stated.
Picture
During the show, I was wearing the embroidered and crystal embellished  top you see in the above photo. I wore this once on It's Sew Easy TV so it may look familiar. This is the Sandra Betzina Today's Fit Vogue 7281. Sandra knew the pattern number instantly as she said it was one of the all time most requested patterns she ever designed.
Picture
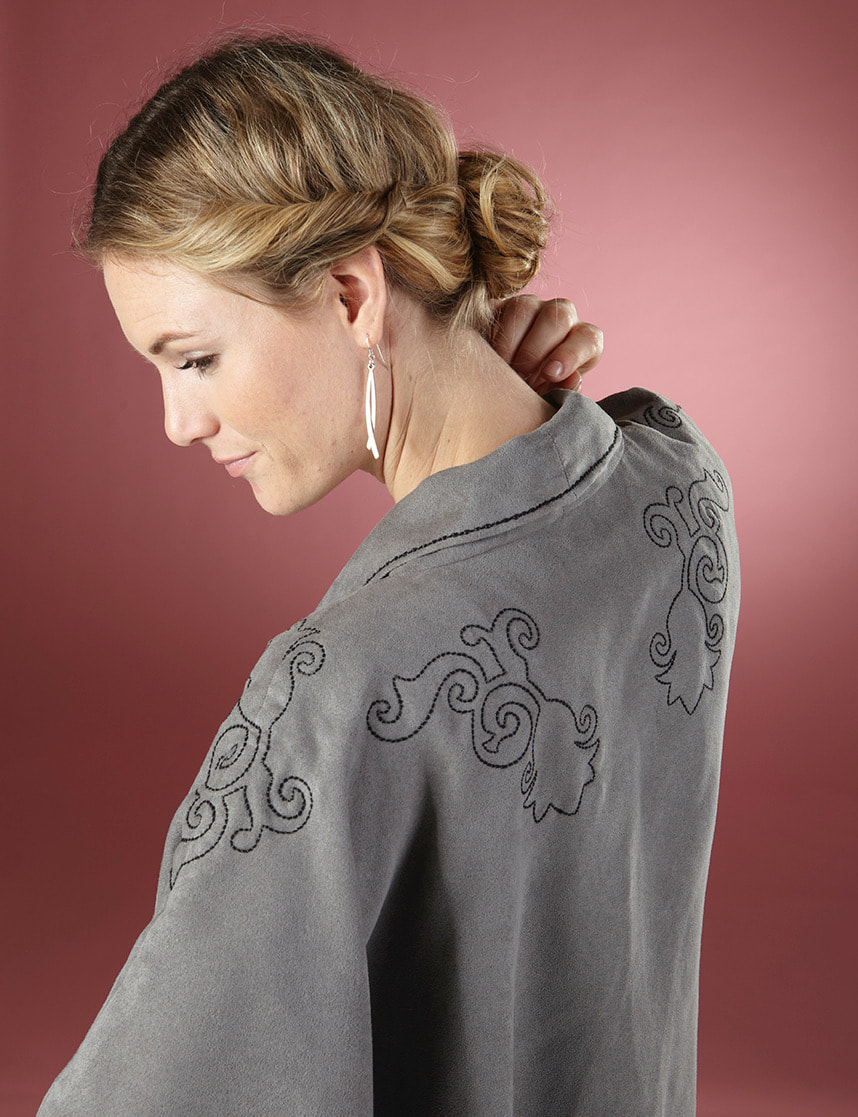
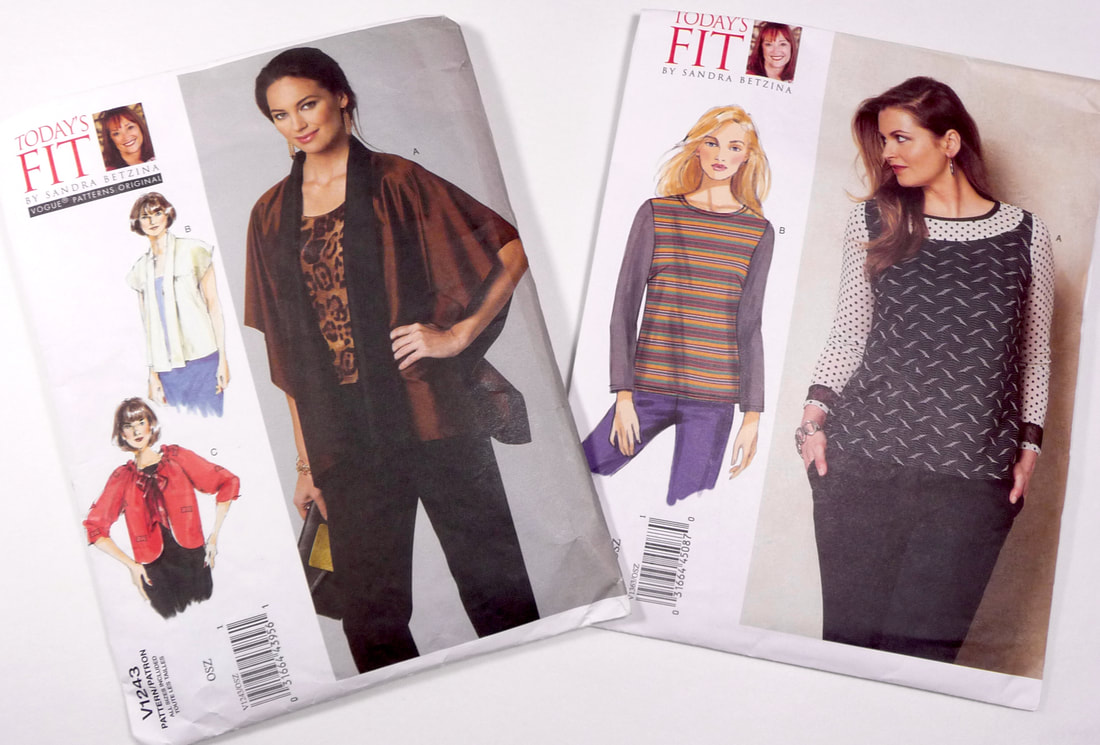
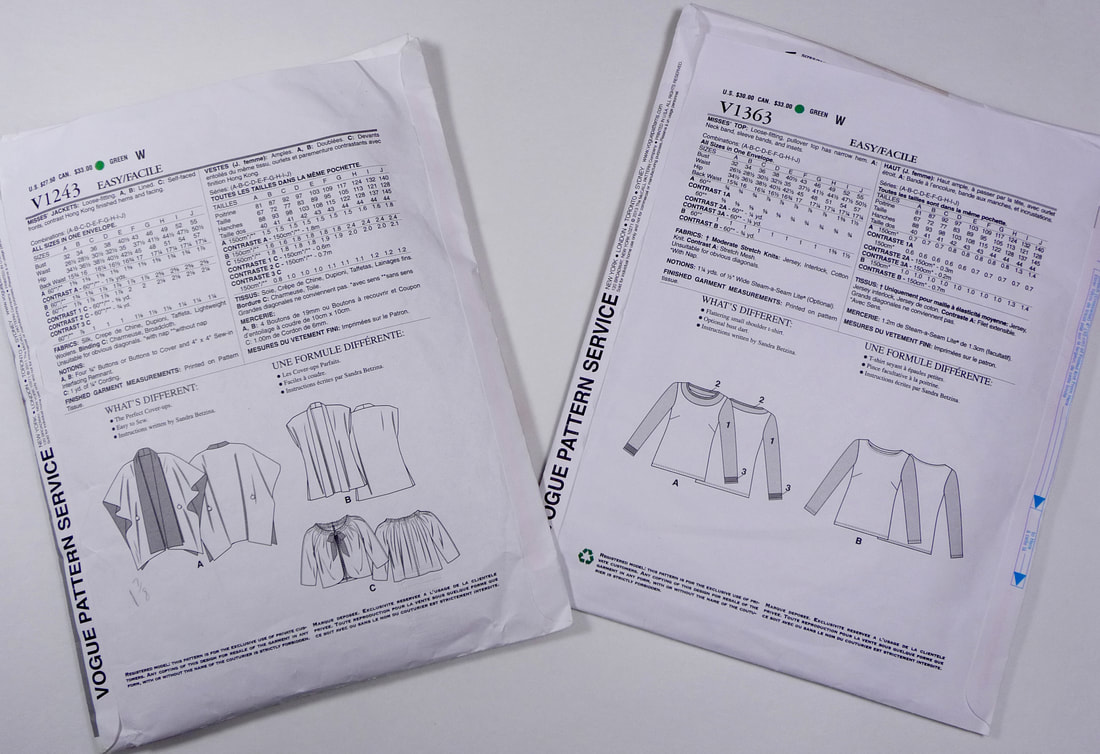
I also showed my version of the Sandra Betzina Today's Fit topper pattern, Vogue 1243. I've loved wrap style garments long before my Wrapped in Embroidery book was published. The one you see here is made from dress weight faux suede and embroidered using special bobbin work designs. It was published in Volume 78 of the Designs in Machine Embroidery magazine.

​Another favorite is my "go to" T-shirt pattern, the Sandra Betzina Today's Fit Vogue 1383, shown below with the topper. On the show, Sandra told a fun story of the history of how that pattern came to be.
Picture
Picture
Sandra shared the pattern number for the gorgeous tunic she had on. It was the Sandra Betzina Today's Fit Vogue 1456. Seeing her pull things from her closet and shout out the numbers to us, made us feel like we were in the same room, instead of miles away from each other. When a question was asked about dressing to flatter a changing figure, Sandra showed samples of her current Vogue 1756 coat/dress. I hope these numbers help you in the hunt for some of these collectable patterns. You'll find the ones that are current as of today HERE, in the Designers tab on the Vogue pattern site. 

Speaking of discontinued patterns, many of us thought it was a good idea to write to Vogue and put in a request to bring back some of Sandra's most popular patterns. If you'd like to give that a try, here is the contact link for their corporate name Something Delightful: Email Vogue
​
Or, connect with them on Facebook HERE.
Fabrics!
Several resources came up, along with Sandra's personal favorites. Here is a list for you to explore:
  • Britex https://www.britexfabrics.com
  • Silk and silk blends: Thai Silks https://www.thaisilks.com
  • International Silk and Woolens https://intlsilk.com

Craftsy Classes
Check out her Craftsy Classes HERE. ​ 
Enter Sandra Betzina in the search engine and you’ll find four great classes.
Web TV Episodes
Picture
Savvy sewing advice from Sandra!
Truly, the one hour and eighteen minute show was jam packed with valuable information for sewing enthusiasts. Last, but not least, here are a few of Sandra's golden tips:
  • Don’t empty the garbage can when sewing because you may find yourself digging for what you lost before your project is finished.
  • Create “fit insurance” in the side seams with a 1” seam allowance to allow for letting out later.
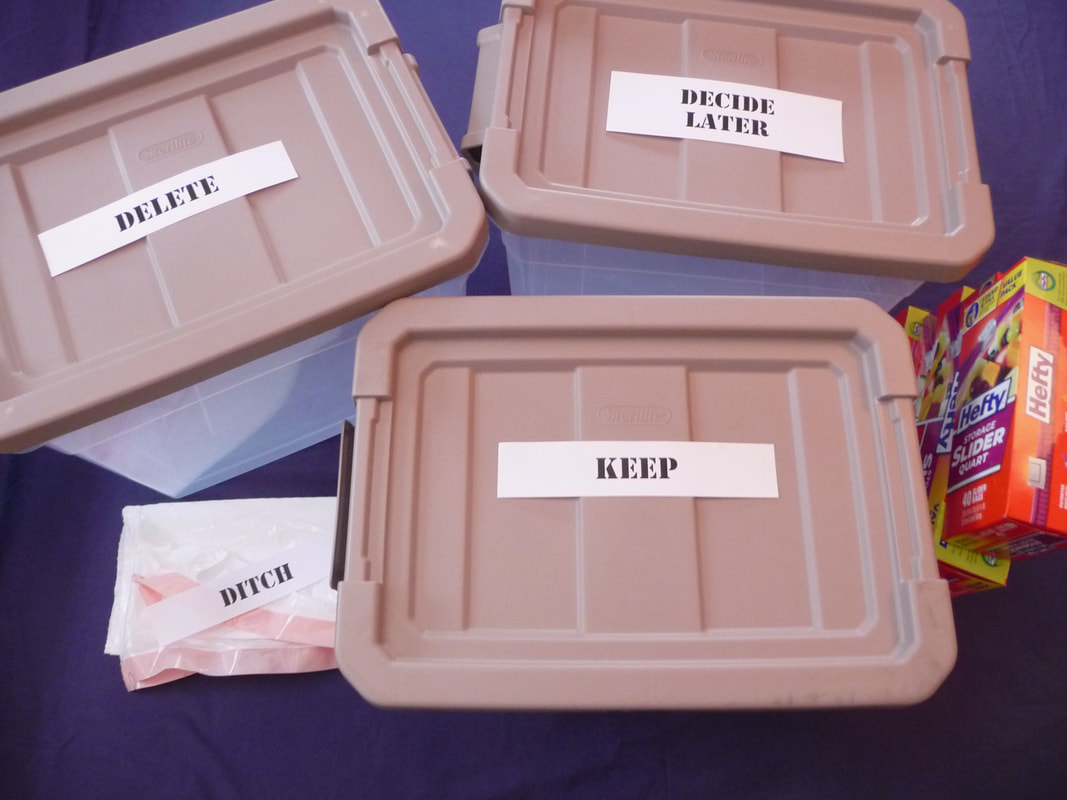
  • Sandra gave great advice for cleaning out your fabric stash and getting your sewing mojo fired up. She started by taking everything out and making three piles.
  1. Never want to see this again
  2. Maybe
  3. Keeper
Sandra says she got rid of all of the never and maybe pieces donating them to a local place called SCRAP in SanFrancisco. Check for similar outlets in your local community. Other options include thrift stores, senior centers, church groups, 4H clubs, and local Buy Nothing groups.

Last but not least, she sorted all the fabrics by color and found pieces that would be great together. After sorting, she put her top five in a basket and was inspired to sew them up without hesitation! Such a great idea!

Please share any resources you yourself have found to give your "once loved, but no longer wanted fabrics" a new home.

Thanks for reading! Feel free to leave your comments. I'd love to hear your thoughts!​

3 Comments

Comforting Caps for Chemo and Other Hair Loss

1/21/2023

3 Comments

 
Picture
I was recently asked if I knew of any recommendations for patterns to fit this topic. Alas, I did not have any resource so I did a bit of hunting with a mish mash of results. Then decided to reach out to the wonderful folks on my Let's Go Sew email list. Wow! So many came through with stories, ideas, and links to share, so I am putting together this post to hopefully help anyone who would like to make "comfort caps" as a charity project or for those they know who have the need for this. 
Beret Style Hat
Let's start with the one that came up multiple times, a beret style hat that was originally shared by none other than Nancy Zieman. Known as the Creative Kindness Cap, designed by Gail Brown, I searched for the original post myself but found it gone from the archives. However, the instructions live on via a quilt guild post with modified instructions, you'll find HERE.
Stretchy Turbans
Turbans are another popular style. Friends contributed a few resources for this one,  and I found a couple more. Below is a list. Pick one that clicks with your style of sewing:

Simple Turban published on Sewing.org HERE.

Turban for knit fabrics with video and written instructions from the Sweet Red Poppy site.
Link for video HERE.
​Link for written instructions HERE.
Woven Cotton Head Wrap
Laura Ann Coia from the Sew Very Easy channel designed a cotton head wrap you can make with fat quarters. CLICK HERE to watch her video. Thanks Blanca for sharing this one!
Newsboy Style
​for a Clever Head Covering
The idea for a newsboy style cap came up more than once from kind friends who submitted ideas and resources. Do your own search on YouTube and you'll find several, including some freebie patterns.

One reasonably priced pattern was recommended and found on the ButterflyTree Etsy site HERE. This one is fully lined which will prevent irritation issues from seams.

If you're looking for ideas for embellishing any of these styles I found an inspiring site with ready made cancer caps HERE.
Knitted & Crocheted Styles
If you are gifted in the art of knowing how to knit or crochet (it's on my bucket list), you'll find a ton of free patterns HERE on the Knots of Love site. What a wonderful resource this is!!!
The Ever Popular Knit Fabric Beanie Cap
Riley Blake designs produced a nice video with a coordinating PDF pattern you'll find HERE. My Let's Go Sew friend C.P. made these from the bottom edge of T-shirts left over from making T-shirt quilts. What a great way to re-cycle! She also suggests using double brushed poly fabric.
Final Thoughts for Creating Headcoverings
The American Cancer Society has a whole lot of tips for choosing and using head coverings. Take a look and the wisdom shared HERE on their website:

Thanks for reading! I welcome any comments or thoughts you care to share.
Note: Information above deemed reliable but not guaranteed.
3 Comments

2022 Video Review

12/31/2022

0 Comments

 
Picture
Let's go Sew LIVE show review!

The fourth Monday of every Month in 2022 was the designated day for the Let's Go Sew Live show. All but one of the shows featured guests, and the topics ranged from sewing, quilting, crafting & machine embroidery.

The whole goal of the show is to inspire and inform you by interviewing industry experts and fellow sewing enthusiasts just like you! So many wonderful friends show up live and participate in the chat on both YouTube and Facebook. Many others catch the show via the replays. I've got more great guests lined up for 2023 but I thought I would put together a post with a summary of the topics covered in 2022.

Check these over and binge watch all of them if you wish, or pick through them based on what interests you most at the moment you're reading this. Enjoy, and be sure to leave your comments, questions, or suggestions for topics at the end of this post. It is always a joy to hear from you! 

January 2022
Q&A featuring Yours Truly, with a focus on Tips & Tricks for machine embroidery, choosing stabilizers, and preventing puckered embroidery.

February 2022
​Special guest: Rhonda Pierce, Spokesperson, SCHMETZ needles North America & Vice President, Euro-notions. Learn the fine points about choosing the right sewing machine needle for every sewing & embroidery project!

March 2022
Special guest: Angela Wolf, Entrepreneur, Fashion & Pattern Designer, Author, Speaker, Brother Brand Ambassador, and PBS TV personality. Angela shared her secrets for sewing beautiful garments and more in this show.

April 2022
Special guest: Roy Garland from Designs in Machine Embroidery, AKA DiME, demonstrated software tips and tricks for beginners and beyond beginners!

May 2022
Special guest: Janice Ferguson, author, designer, fellow Brother Ambassador, and heirloom expert! See her inspiring samples and hear her remarkable sewing stories. Learn her tips and tricks for adding heirloom touches to garments, home decor, and more!

June 2022
Special guests: Kelly Theriot and Sharon Smith from Laser Bee Studio! A true power duo husband and wife team! Learn about their innovative tools to store threads and organize projects! Plus, learn tips and tricks to improve your embroidery projects and stitch stunning tile scenes!

July 2022
Special guests: Emily Thompson, Blogger & Brother Ambassador, and Sewing business owner and Educator Kathy Zagar. Experts when it comes to many things, including clothing and crafts for kinds. Learn what it's like to sew FOR kids and WITH kids!

August 2022
Special guest: Diane Scarponi from Style Falcon Pattern Company. Learn all about flattering patterns for those who want both style and a great look at any age!

September 2022
Special guest: ​Francesca Yu Ling Morella, Owner of The Quirky Zipper See how she turns "stuffies" into cherished zipper totes!

October 2022
Special guests: Caroline Booth and Heather Banks share tips and tricks for making embroidered robe bowls, prepping appliqué, choosing stabilizers for machine embroidery, and so much more! This show is packed with inspiration and information!

November 2022
Special guest: Eileen Roche, Author, Inventor, TV Personality and Embroidery Expert Extraordinaire!

December 2022
Special guests: Don & Deb Strahan, husband and wife who share a life, and share the sewing space too! See some of their special projects as they pass along tips for making everything from popular gifts to embroidered hats!
0 Comments

Sorting out bobbin and Embroidery thread

11/19/2022

4 Comments

 
Picture
Picture
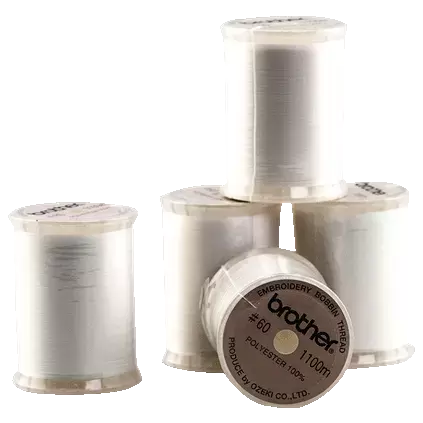
​Bobbin thread: The first thing to do is check your manual and see what your machine manufacturer recommends. Chances are, the suggested thread is very specific to your make and model. Bobbin thread weight is thinner that the top thread and geared for premium results with the bobbin case supplied with your machine. This is true whether your machine is sewing & embroidery or embroidery only. I've seen some messed up machines that behaved badly just because of the thread they were fed.

As a Brother Ambassador working with Brother machines, most of the time I stick with Brother branded thread for the bobbin. This thread is found both on spools to wind yourself or put up on re-usable pre-wound bobbins. These pre-wound bobbins are the same bobbins that come with Brother machines so they are very well made. Side note: Cheap generic bobbins are something I stay away from. Good quality bobbins make a big difference in how your machine operates in both sewing and embroidery mode! While I do actually enjoy winding my own bobbins,  another advantage of pre-wound is the fact that they are wound to hold the maximum amount of thread that can be squeezed onto a bobbin. This bobbin thread is available in both black and white. You should be able to purchase both at your local Brother dealer in quantities you prefer. 

Other machine brands should check with the manufacturer's reccomendations

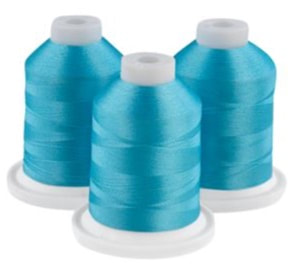
Now let's talk embroidery thread. Unless stated other wise, standard embroidery designs are made for 40-50 wt. embroidery thread. Highly magnified, the 40 and 50 weight embroidery thread wold look virtually identical. Good quality polyester fiber is the preferred choice because it is strong and colorfast.

Rayon is an option for embroidery, but you must take great care when washing rayon as it can bleed when wet. It can also fade and does not have the shelf life that poly has. In addition, it breaks and shreds more easily. The prime reason someone would choose rayon would be for color selection. Rayon can be dyed in greater shades because it is more porous. It is also just a tad softer when finished. I rarely use rayon and when I do I take all these precautions into account.

Brand wise, I would stick with the following major brands, Brother, Madeira, and Exquisite. These are the ones I use regularly in my own sewing space.

Below is a link to Brother Brand thread: 
https://www.brother-usa.com/search#q=embroidery%20thread&t=tab-Supplies-and-Accessories&layout=card

Outside the Brother family, I also like Madeira Polyneon 40wt. thread. You can usually find this on both large and small spools so it's an option when you need more or less thread.

Last but not least, I am a huge fan of the Exquisite line of thread sold by DiME. Their Kingstar metallic is excellent as well. By the way, they also sell pre-wound class 15 (one time use/disposable) bobbins in a 60 wt. and a 70wt. I like the 70 wt. best but I do switch out my bobbin case to the one with the purple dot when I use that thread, as it is a bit finer.

Several sewing /embroidery models include this bobbin case with the machine. I like to call it the "just in case" bobbin case. the bobbin case found as the default with the machine has a green screw that is painted  and this screw is meant to be left alone. However, the case with the dot inside has an adjustable screw so you can modify the tension as needed. Note that different machines behave differently. Make a sample when using third party bobbin thread and see if you need to make any adjustments. Sometimes I find it necessary to the alternative case for finer bobbin threads.

Below is an *affiliate link to DiME products and the high quality polyester Exquisite brand thread by DiME. 

CLICK HERE for DiME embroidery products!

Leave a note in the comments if you have more thread questions or want to share your thoughts.

Happy stitching!

*Affiliate link: I only recommend supplies I use and love. If you purchase through this link I receive a tiny commission.
4 Comments

Let's Make Labels!

10/29/2022

0 Comments

 
Picture
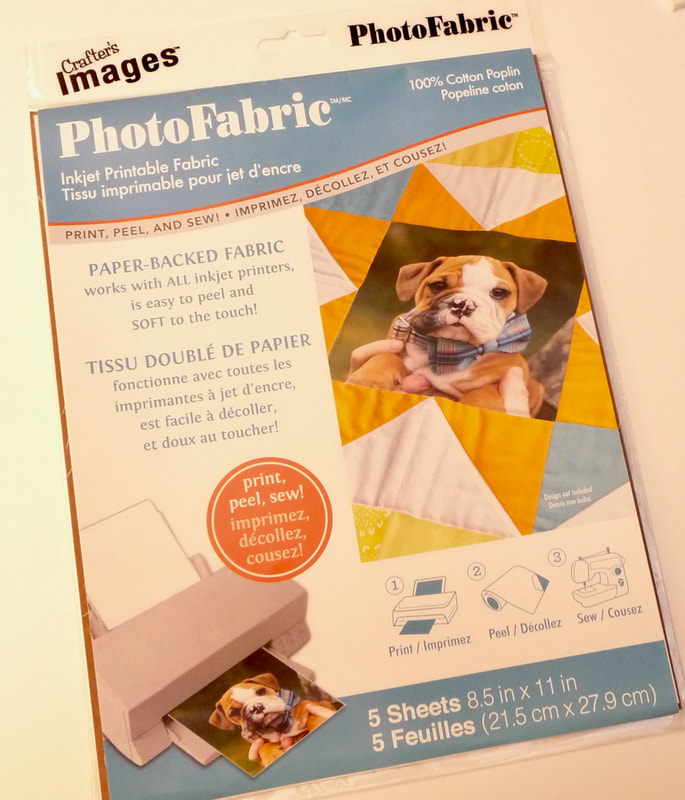
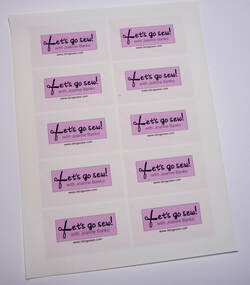
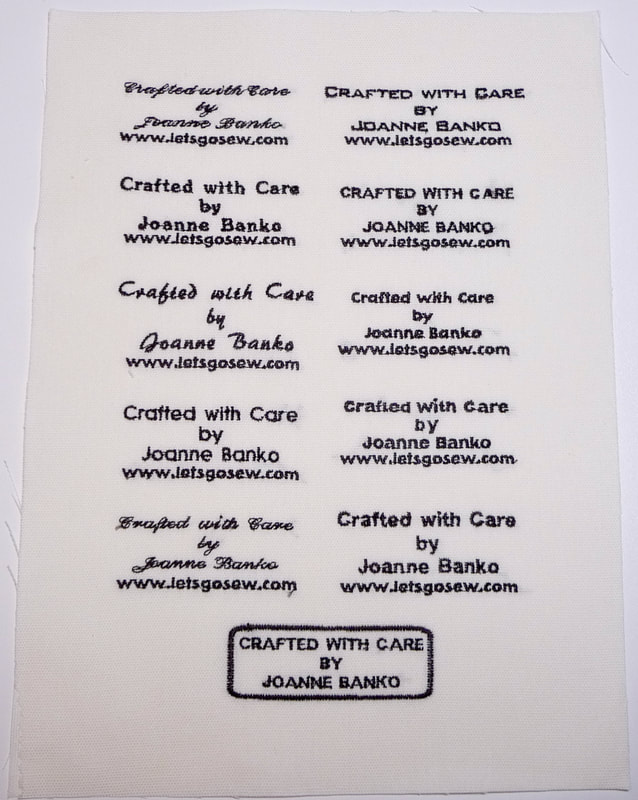
Let's Make Labels was my topic for the  recent live show I presented for friends of Sewing Machines Plus. I'm a big fan of labeling your custom creations and wanted to share three easy ways to make memorable labels. In the beginning of the show, you'll see labels printed on printable fabric using simple and free online programs for the basic templates.
Picture
In the show I talked about using business card templates, typing into the box and adding my logo. In the past, I've used templates from avery.com and from the Brother Creative Center at www.creativecenter.brother/en-us https://www.creativecenter.brother/en-us

CLICK HERE for a label project using the free Brother program.

​Here is an example:
Picture
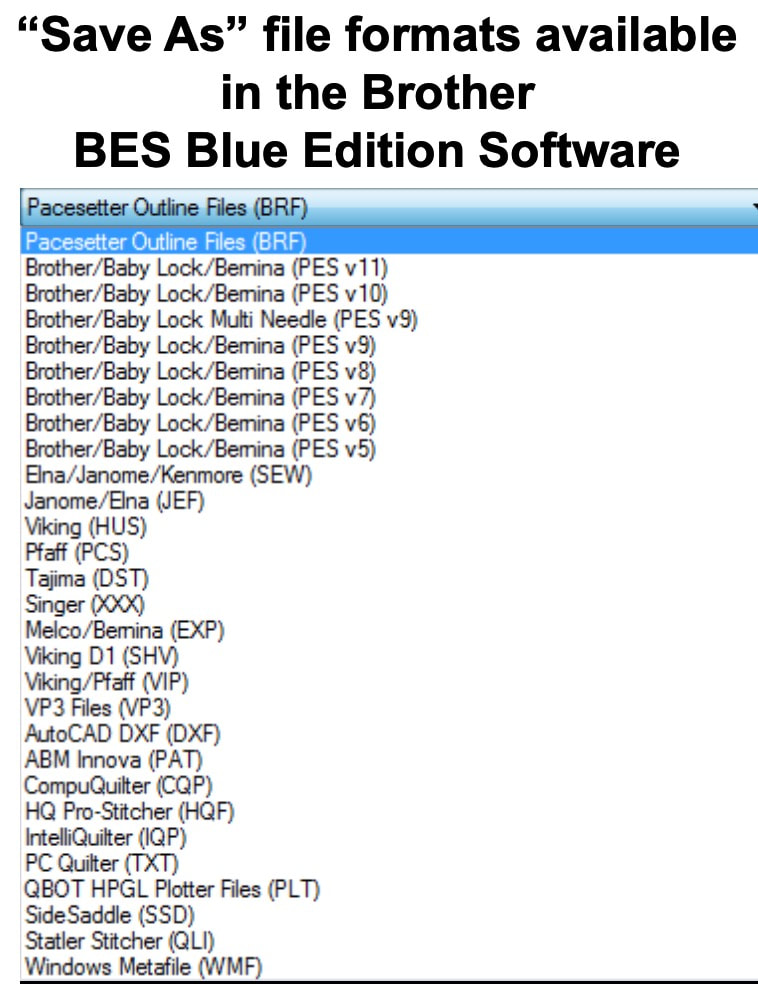
Next, I showed how to create labels using a favorite lettering and customization software from Brother, called BES Blue Edition. This software shares many top features of the Brother BES4 Dream Edition software and includes all the same fonts and design elements for you to choose from. The ten special small fonts in the software are ideal for making labels that are small, yet easy to read. Another super great thing about the software is the ability to create, and then save in multiple formats! this software will work for all different types of embroidery machines! Take a look at the options below:

Picture
After stitching the labels created in software, I cut a matching piece of fabric for the back and fused the layers together using FuseMe lightweight fusible webbing from my friends at DiME.
Picture
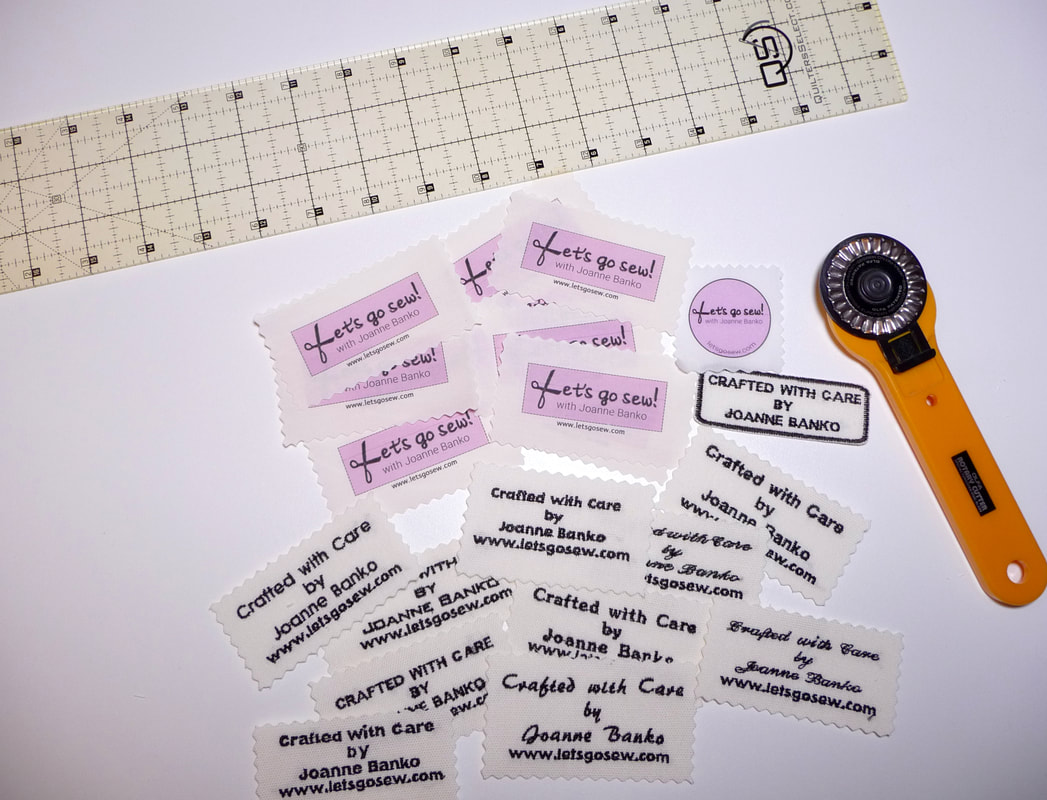
To finish these, I simply cut them apart using a pinking blade on my rotary cutter. Now they're ready to stitch or fuse to any custom crafted item. For another option, you could add a ribbon to the ones with backing, and use them for a tag.
Picture
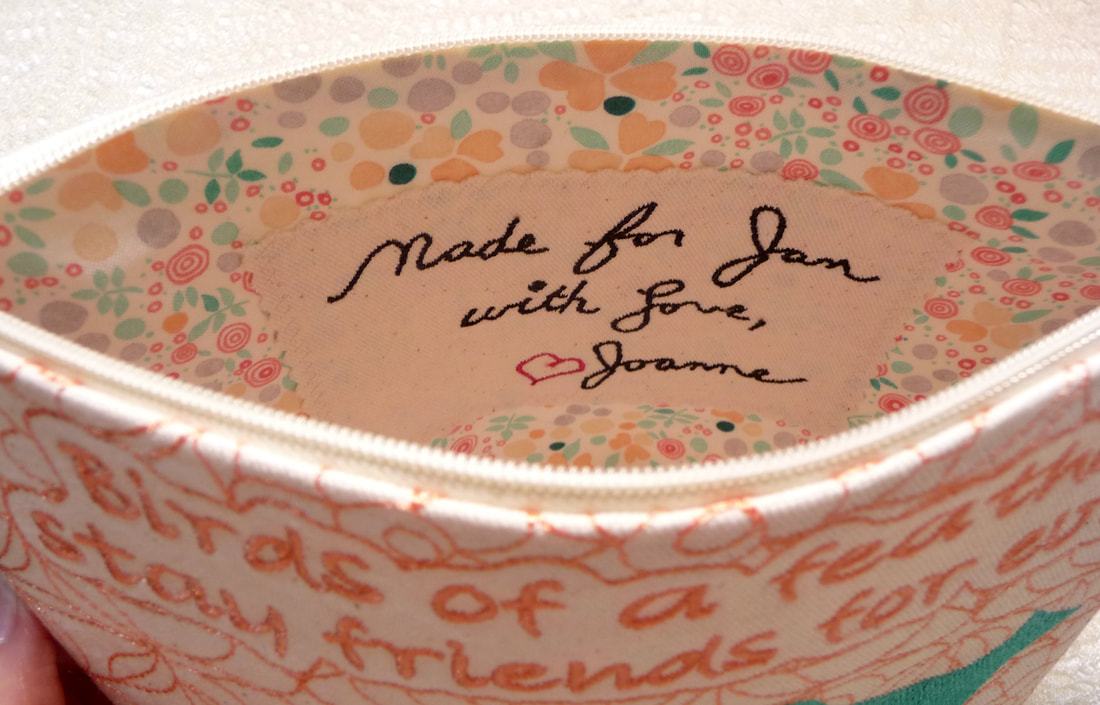
The third option I presented was the method for using the Brother My Design Center feature to create a label using your own hand writing. Take a look at one example below:
Picture
You can CLICK HERE to watch a video tutorial on my YouTube channel, showing how to make this label step by step.

A medium zig zag stitch is an easy way to attach any of these labels to fabric. One or more of these three methods are sure to work for you. I hope you get the chance to make some of your own. Feel free to leave questions or comments at the end of this post. Enjoy!
Picture


​
Watch the video replay!

Here are some additional resources for items you can purchase from Sewing Machines Plus:

BES Blue Embroidery & lettering Software:
https://www.sewingmachinesplus.com/SABESBLUE.php

Printable Quilt Label Fabric sheets
https://www.sewingmachinesplus.com/JT403.php
​

Whole sheets of printable fabric
https://www.sewingmachinesplus.com/7550-1.php

Dime Fine Line thread
https://www.sewingmachinesplus.com/exquisite-t20.php

Dime Sticky Hoops
https://www.sewingmachinesplus.com/searchresults.php?search_field=Dime+sticky+hoop
0 Comments

Zip It Up! Zap Your Fear Of Zippers!

9/18/2022

1 Comment

 
Picture
I had the privilege of presenting an educational segment titled Zip it up! Zipper tips and tricks, on a recent Sew Fest show hosted by Sewing Machines Plus. To watch this segment on their YouTube channel you can CLICK HERE. You'll find my 30 minute segment running from time stamp 1:59:44 to 2:31.

During this live show, I shared many of my top tips for successful zipper stitching and gave a detailed explanation of various zipper feet. I'm following up the show by including information on the feet here in this blog post. Keep in mind, as a Brother Ambassador I'm showing feet and referencing part numbers from that manufacturer. However, you'll find most or all of these feet available for just about every modern machine model around.

At the end of this post, you'll find links to zipper stitching videos and even more detailed information to help you zap your fear of zippers!
Now . . . let's meet the feet!
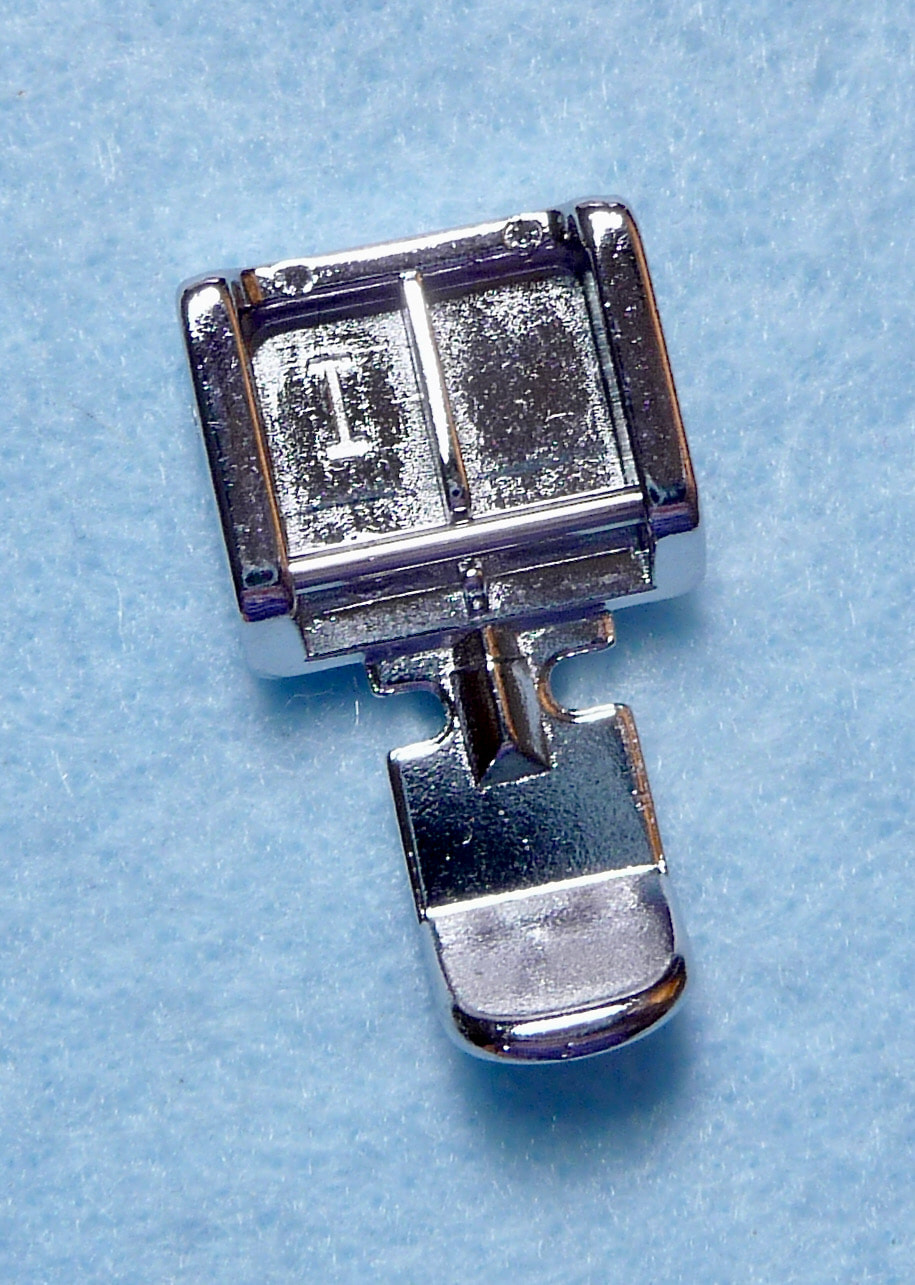
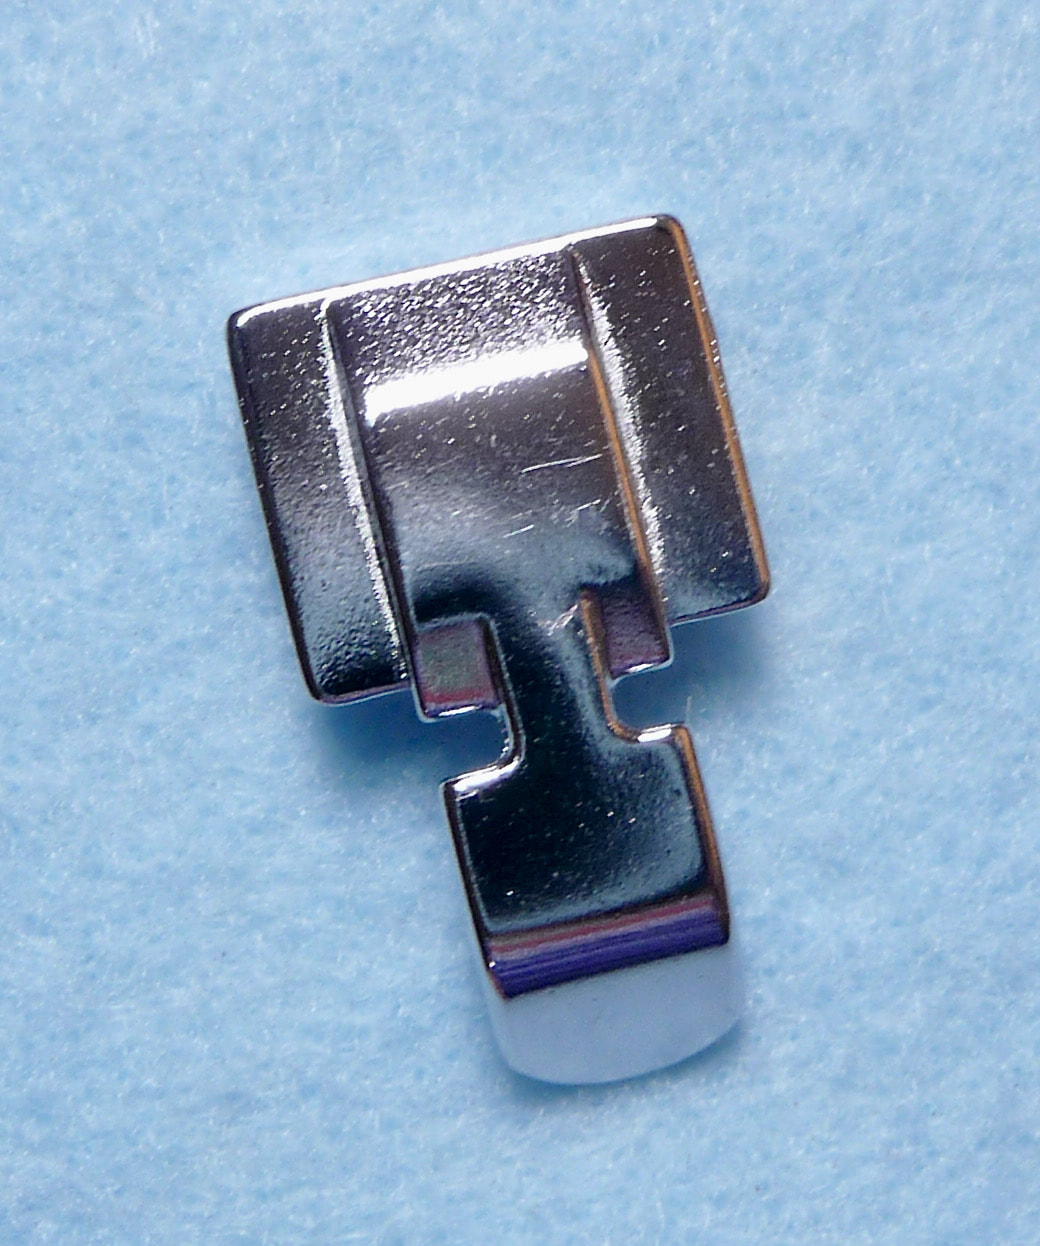
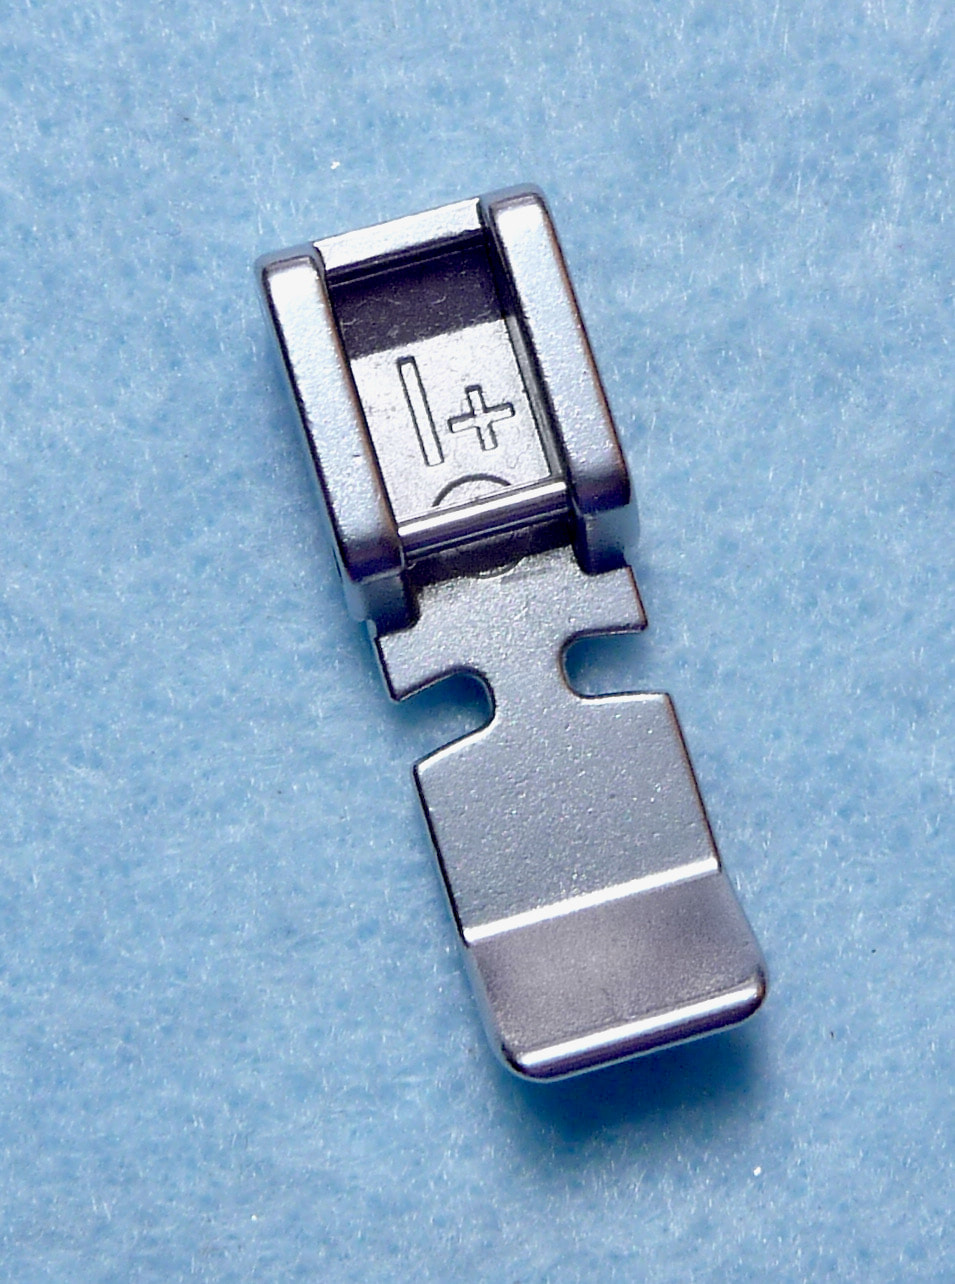
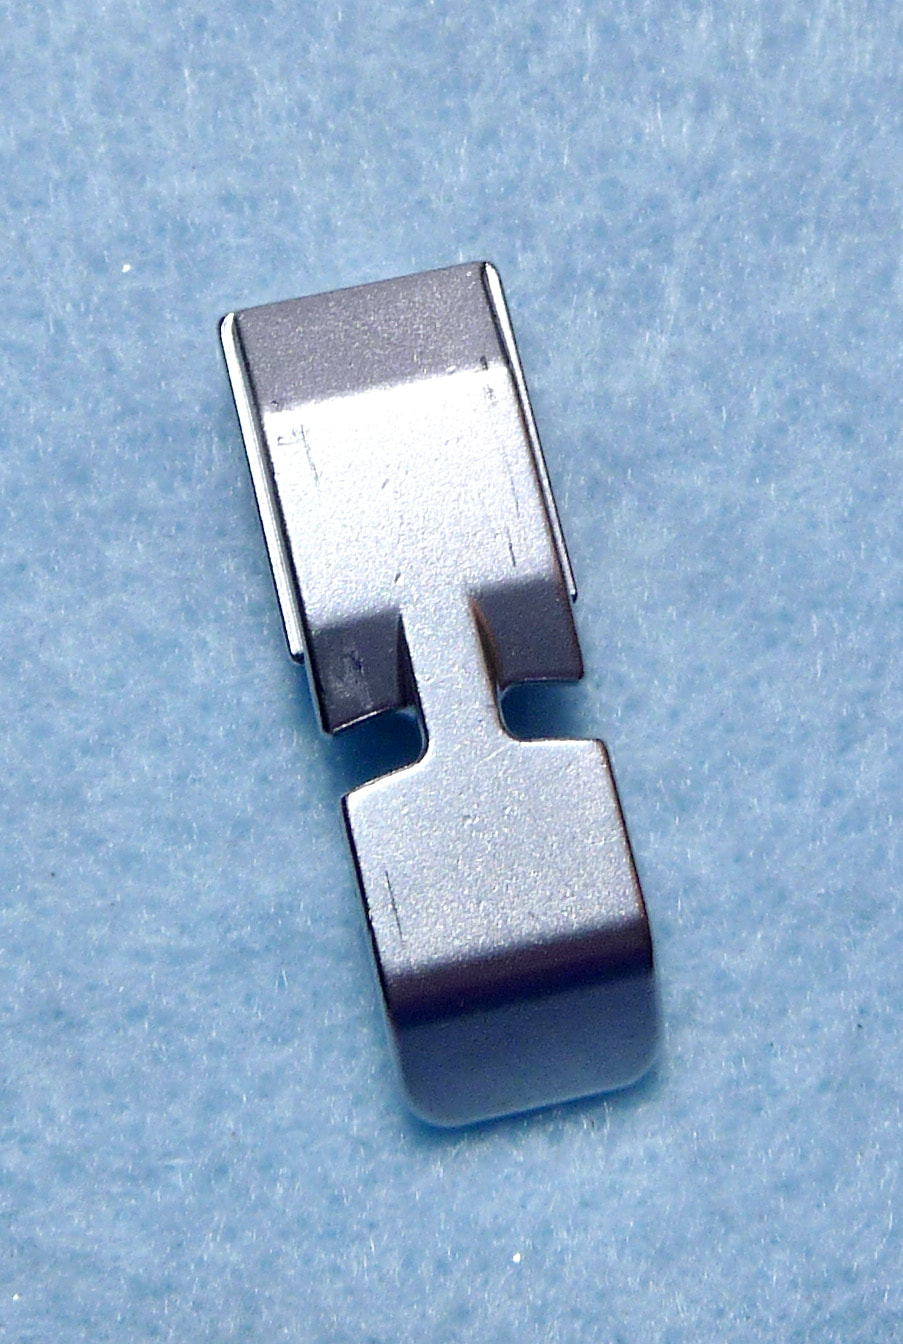
ZIPPER FOOT #1: Part #X59370-051 for 7mm machines. Standard snap-on zipper foot included with many machines.
Picture
Top Side of Foot
Picture
Bottom Side of Foot
IMPORTANT! For this specific foot, you’ll want to select a center needle straight stitch. Let’s look at the top side and the bottom side of this foot. On the top side, this “I’ foot has a right and left space for snapping on the foot. Coordinating holes on the right and left make space for the needle. The narrow toe gives good visibility for sewing along zipper tape or topstitching zippers. On the bottom side, this foot is flat down the center and has two distinct grooves. While this foot can be used for stitching a wide variety of zippers, it is designed specifically for sewing common zipper application such as the lapped zipper and slotted zipper. Note that this zipper foot is wide in the back. That is to accommodate the grooves that are designed to travel over the zipper coils. For other zipper applications you’ll find yourself needing to move the needle position away from the center and out towards the left or right, coordinating with the side of the foot you are using.

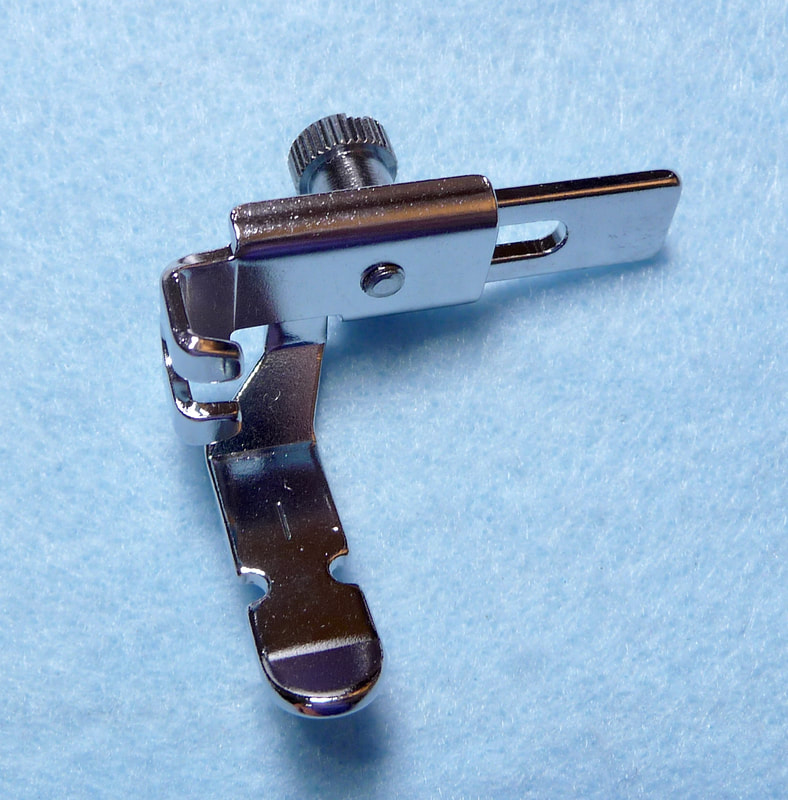
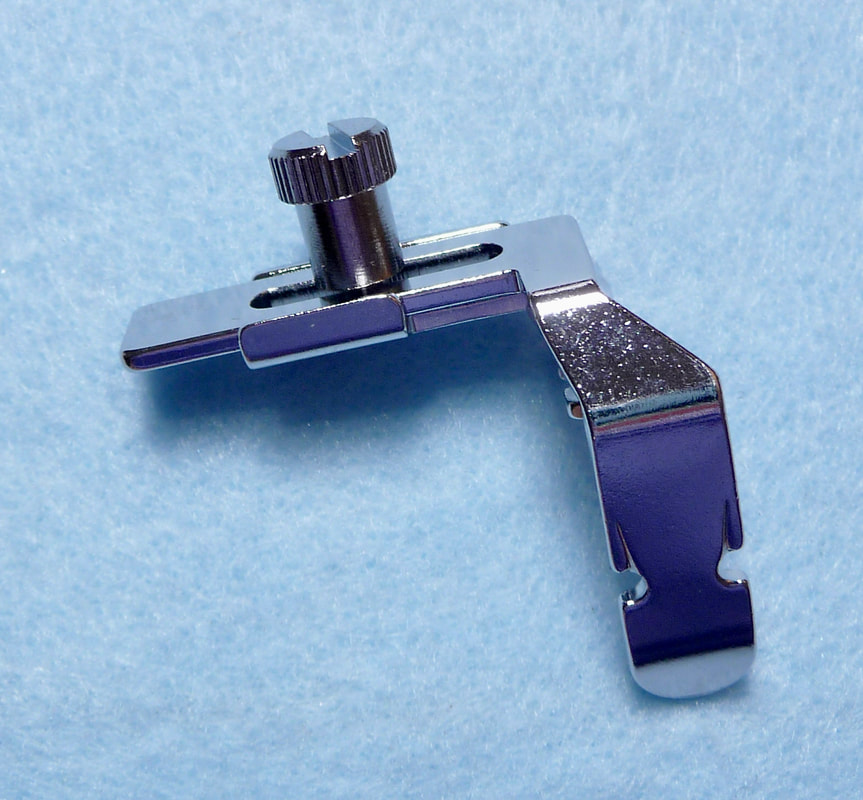
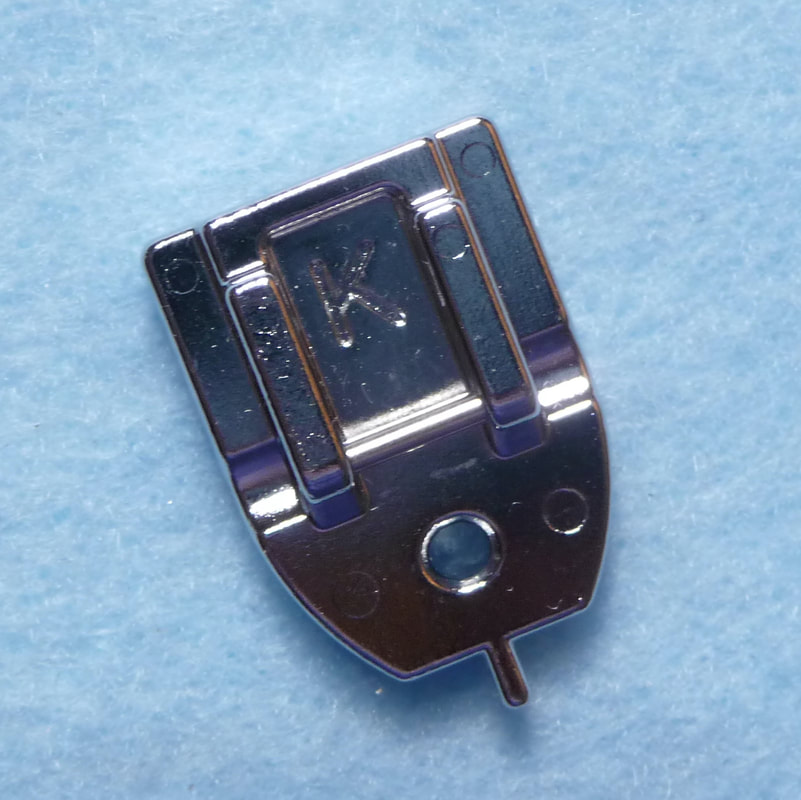
ZIPPER FOOT #2: Brother SA161, Adjustable Zipper & Piping Foot.
Picture
Top Side of Foot
Picture
Bottom Side of Foot
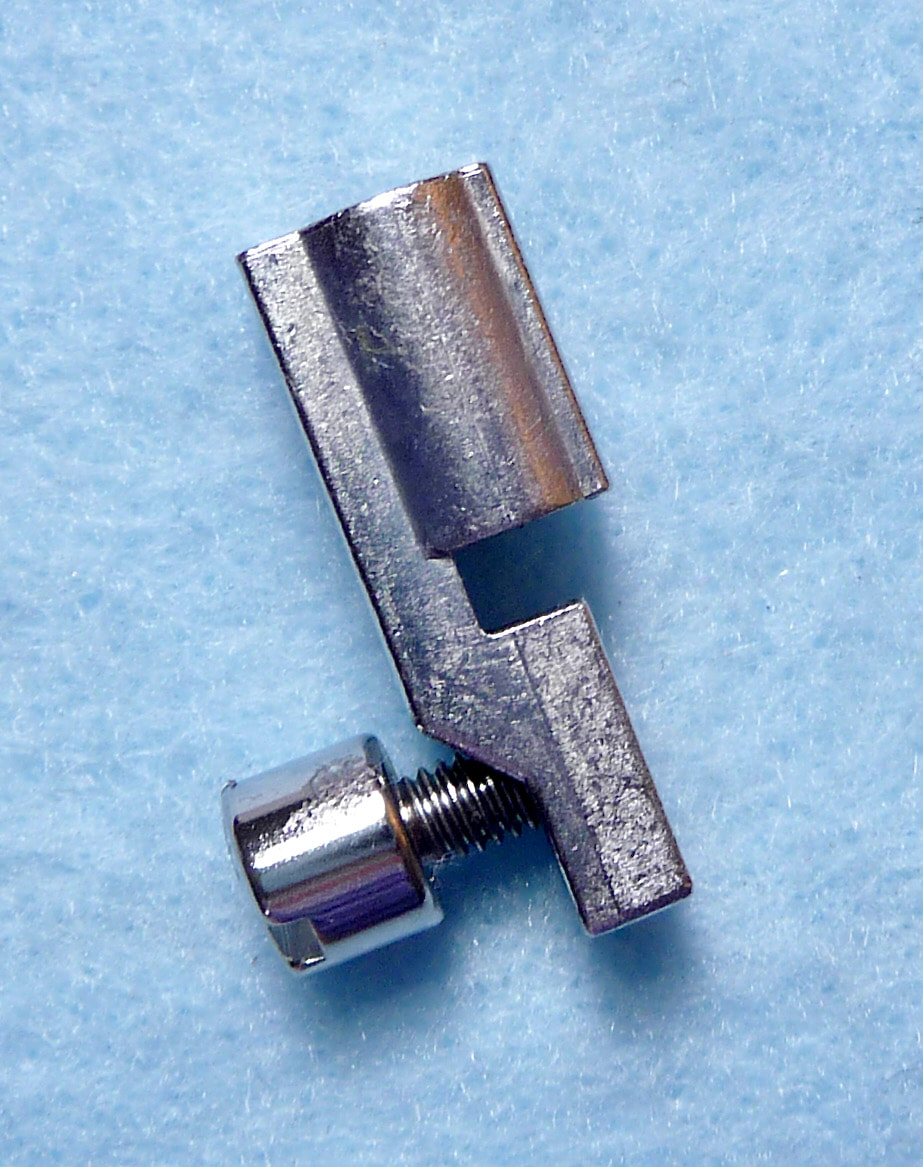
This is a low shank foot that must be attached by screwing it onto the machine. Machines with a high shank will require you to use the low shank adapter. 
Picture
Low Shank Adapter
Both the top and bottom side of this foot is flat and it has the characteristic holes on both the right and left side for accommodating the needle. Long and somewhat narrow, it maintains good contact with the fabric when sewing close to zipper teeth or cord inserted in piping. Start with the center needle straight stitch, and then loosen the screw at the back to move that foot from right to left, fine tuning the position so the foot is off to the side and allows you to sew exactly where you need to. Resist the temptation to use this foot for sewing seams. Because it is narrow, it does not provide as much contact with the feed dogs as the standard straight and zig zag foot does.

ZIPPER FOOT #3: Brother SA208 Narrow Base Zipper Foot.
Picture
Top Side of Foot
Picture
Bottom Side of Foot
​This snap-on foot is the “new kid on the block” in the Brother world.  Sleek and narrow from front to back, this foot offers excellent visibility and the opportunity to sew very close to zipper teeth on all kinds of zippers. IMPORTANT! If you’re using SA208, you need to make sure you use just two needle positions, either the far-left straight stitch (7.0) or the far-right straight stitch (0.0). This foot is ideal for accurate topstitching on many zipper applications and sits very firm and flat on the fabric layers. It’s ideal if you want to sew close to zipper teeth while maintaining good contact with the fabric layers as well as excellent visibility.

ZIPPER FOOT #4: Brother SA102 Snap-on Concealed Zipper foot, aka hidden or invisible zipper foot.
Picture
Top Side of Foot
Picture
Bottom Side of Foot
​Misc. Zipper tips:
 
  • In most cases, it’s best to purchase a standard zipper at least two inches longer than what the pattern calls for. Extend the top part of the zipper beyond the edge to avoid having to stitch next to the bulky zipper stop. Pin zipper above the tab to protect form zipping off zipper when cutting to final length. 
  • The term zipper coils and zipper teeth are used interchangeably. “Teeth” can be molded or made form metal. It’s okay to stitch over polyester coil zippers but never sew over metal zipper teeth.
  • Create a new zipper stop when necessary, by stitching a bar tack over the zipper teeth.
  • Always interface zipper area to keep fabric from stretching or distorting.
  • Consider adding ribbon or strips of fabric with added decorative stitches to extend the width of standard zippers and make them suited for decorative application as exposed zippers.
You'll find videos for sewing slotted, lapped, & concealed zippers, plus lots more free information you can download HERE on this page of my website. Enjoy and please leave your comments and or questions below. I'd love to hear from you!
1 Comment

Happy Hemstitching by Brother Ambassador Joanne Banko

8/20/2022

18 Comments

 
Picture
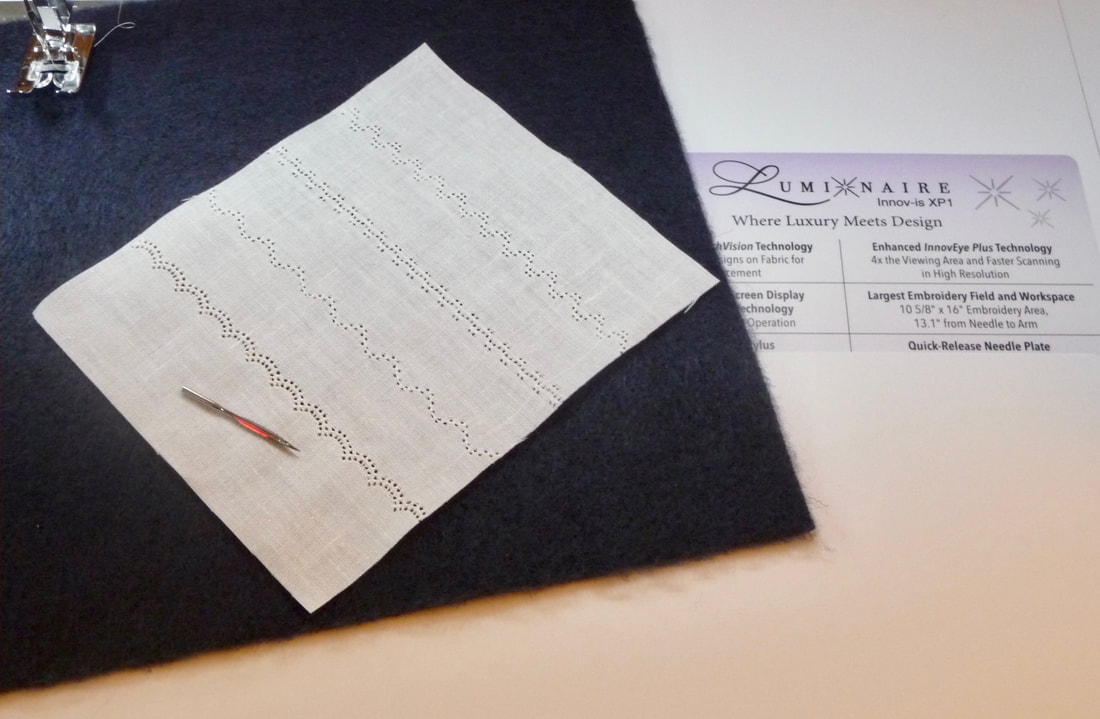
In this tutorial I’d like to introduce you to the art of hemstitching with various stitches included in the hemstitching category on my machine. The images and stitches you see here are from the Brother Luminaire, but if you look closely at the stitches, you'll likely find identical or similar stitches on your own machine.
Picture
Hemstitched items have been around for many years. Formerly created with tedious handwork, in the late 1800’s a machine was developed to produce hemstitching in a fraction of the time it took to create by hand.

Somewhere along the line a specialty needle called a wing needle was developed for modern, household machines. Combined with special decorative stitches suited for use with a wing needle, sewing enthusiasts can now create hemstitched effects as easily as sewing a straight stitch! In this tutorial you’ll learn more about creating these delicate, delightful stitches yourself. Are you ready? Let’s go sew!
Picture
You'll need some basic supplies to get started.
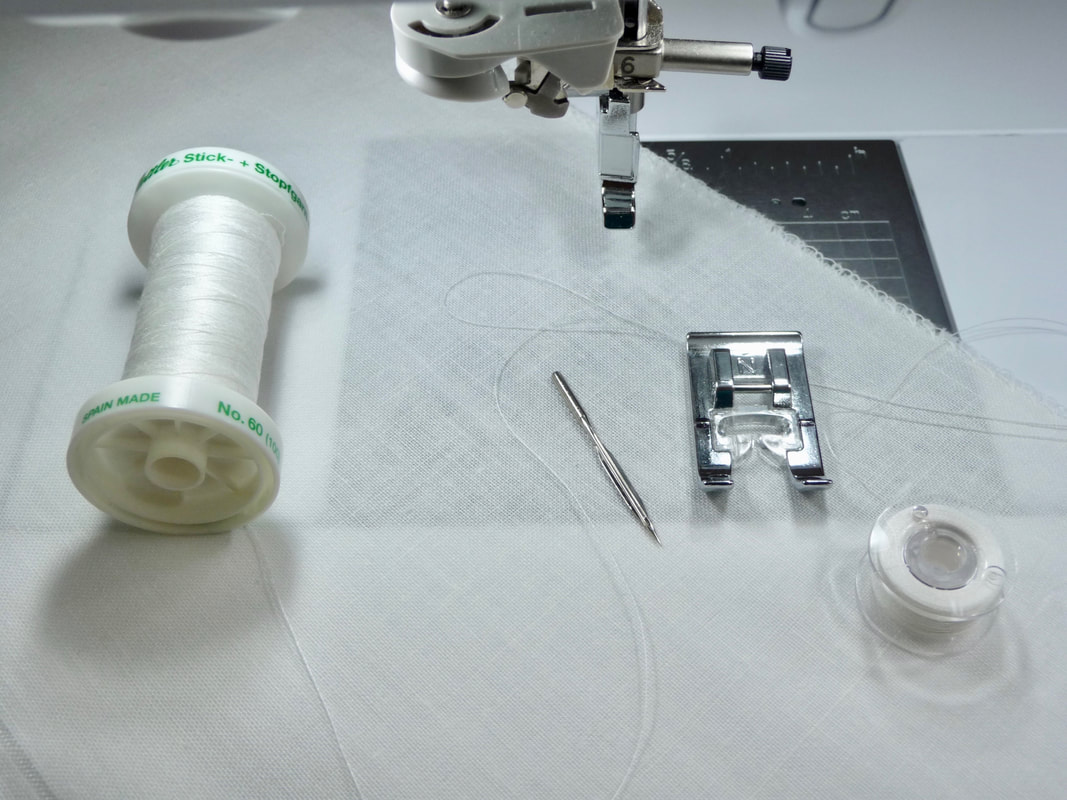
  • Fine, smooth thread such as 60 weight silk finish cotton, 80 weight cotton, or 100 weight silk. Feel free to experiment with other threads. In general, natural fiber threads work best. You’ll want the thread weight not to exceed 60 weight. Thicker thread will not produce pretty stitches. Check the numbers on the spool and always use good quality thread.
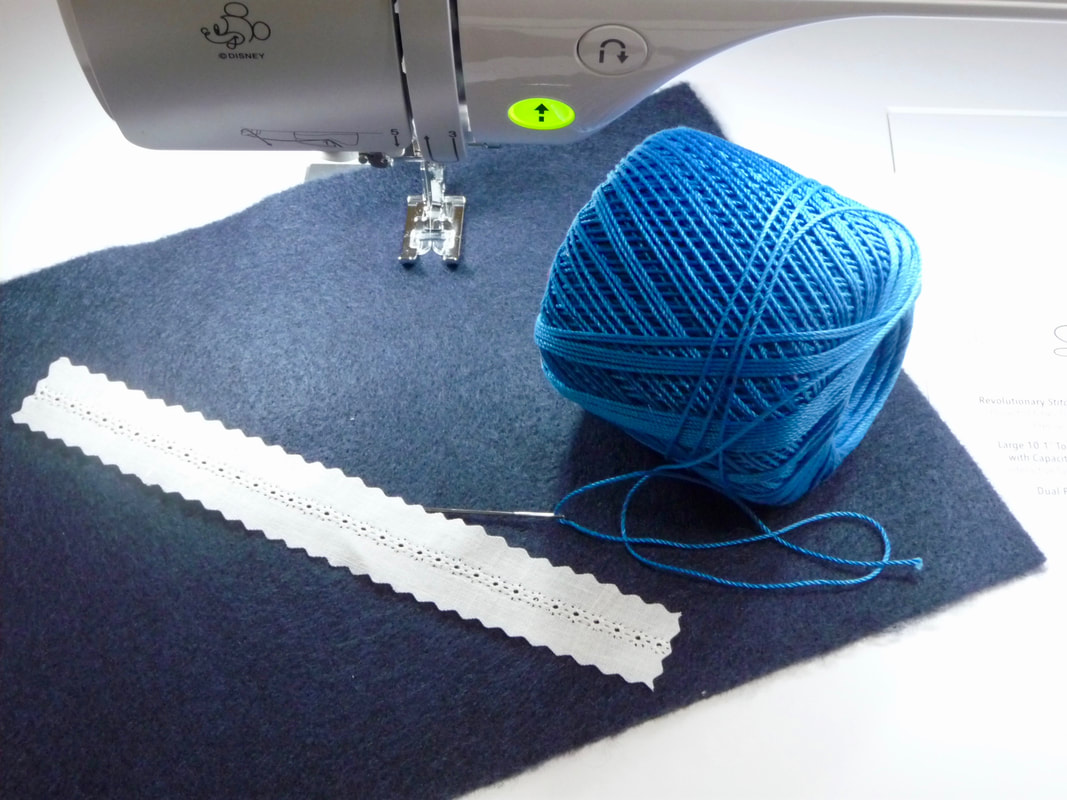
  • Optional – Fine crochet cotton or thin decorative cord, for threading through wing needle stitching.
  • Large-eyed tapestry needle for threading crochet cotton through holes.
  • Wash out marker for marking lines on fabric.
  • Preferred fabrics include natural fiber fabrics that are not tightly woven. I have successfully hemstitched on the following: Linen, linen/ramie or linen/cotton blends, cotton batiste and cotton lawn. Feel free to try other fabrics, keeping in mind the fact that holes created by the needle are more prominent on lightweight natural fibers without a tight weave. Polyester has memory and does not produce wing needle holes.
  • Adhesive backed water-soluble stabilizer, such as Brother product #SA5906
  • Ordinary fabric spray starch or other wash out stiffener. Read more about temporary fabric stiffener in this post HERE.
  • Wing needle, size 16 to 19.
More about the wing needle: This specialty needle is large, with wide “wings” or flanges on each side of the eye of the needle. When used with stitches that enter the same spot on the fabric multiple times, the wing pierces the fabric and spreads apart the threads that make up the weave of the fabric. Stitches then fill the area around the hole, keeping the threads separated and creating a lacy, open work look. It’s essential that the fibers are easily pushed apart and the thread is thin so that the hole is not filled up from the thickness of the thread. Natural fibers work best because they stay in place. Synthetics have memory and tend to “bounce back, while the natural fibers stay pushed apart.

Below are some important set-up guidelines and general rules to follow for hemstitching: 
  • Begin with a clean machine. Pop up the throat plate and clean out the dust bunnies. Be sure your bobbin case is seated correctly when you put the machine pack together.
  • Wind a matching bobbin with your chosen thread. When threading the machine do not use the automatic needle threader. Simply thread the eye of the needle by hand. In addition, do not use the auto cut function or the scissors key.
  • When sewing, be sure to stitch at a slow to medium speed so the holes have the chance to form properly. I like to pull one or two vertical threads out of the fabric to both mark my lines of stitching and give the wing needle an improved chance of spreading the fibers apart. If this is easy for you to do, go ahead and try it. If not, it’s perfectly okay to skip this step.
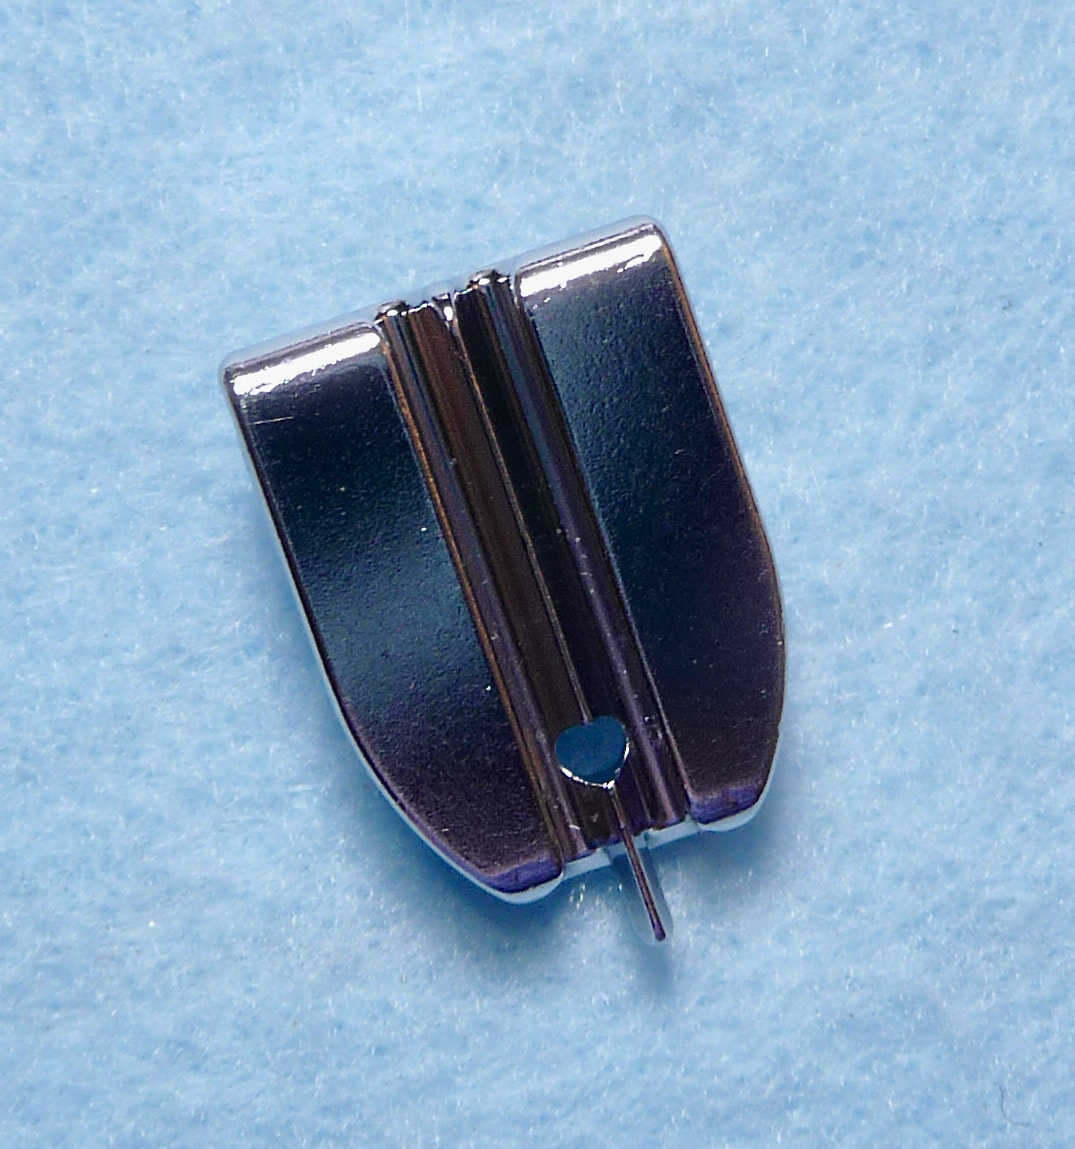
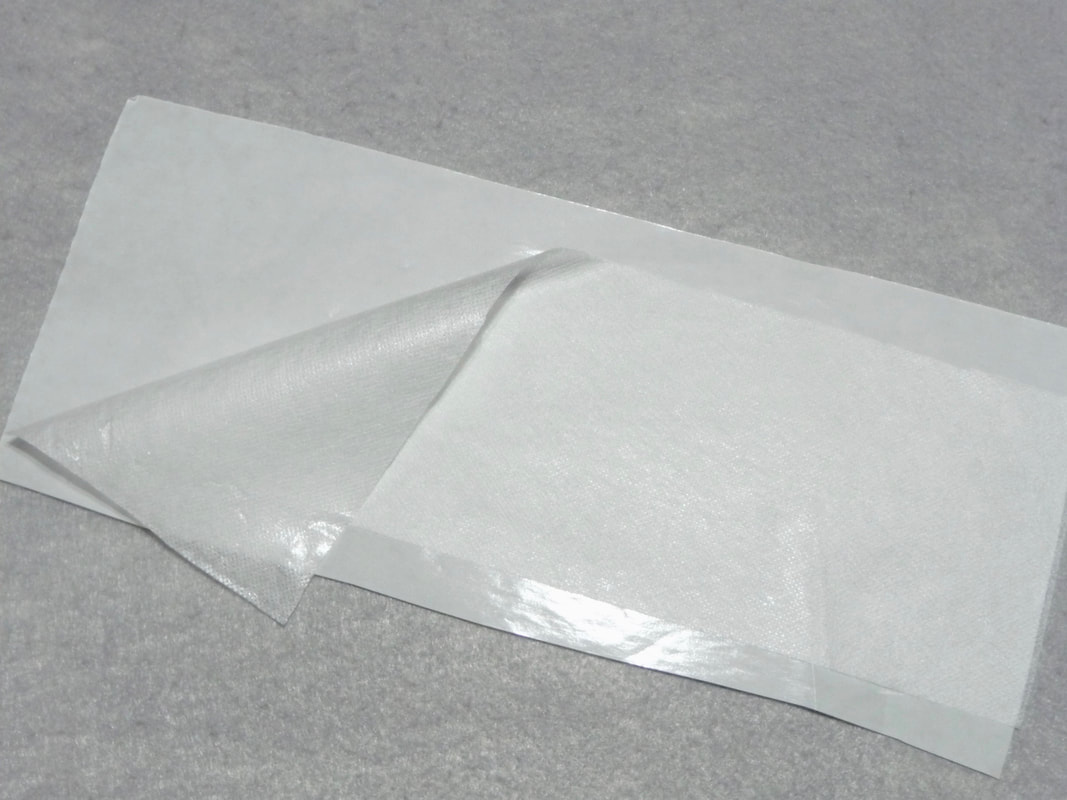
  • Pre-treat fabric with spray starch to make it smooth and somewhat firm. If you choose to use strips of the water-soluble stabilizer you will not need to heavily starch your fabric. However, without this stabilizer you’ll need several applications of starch, ironing until the fabric is completely dry between each application of spray. Tip: I prefer an old-fashioned flat bottom dry iron for this process. The addition of strips of water-soluble attached to the wrong side of your fabric underneath the stitching area makes it really easy to stabilize the fabric for this type of stitching. I like to save leftover strips from embroidery to use for decorative stitching like this. Peel away the paper and apply the adhesive to the wrong side after lightly starching the fabric. See image below:​
Picture
I like to mark stitching lines either by pulling thread(s) along the grain of the fabric, or using a wash out pen. Tip: If you're able to pull a few threads, you'll find that wing needle holes are more prominent in your fabric.

Insert needle in machine, making sure it is pushed all the way up. Select menu in your machine with included hemstitches. Hemstitches vary but they all have one thing in common, the needle enters the same spot multiple times. This is essential for forming the distinctive holes. Tip: Feel free to experiment with other stitches that have the same characteristics of hemstitches, making certain that your stitch width stays between 5-6 mm. Important! Hand walk the stitch with the flywheel before you start to sew.

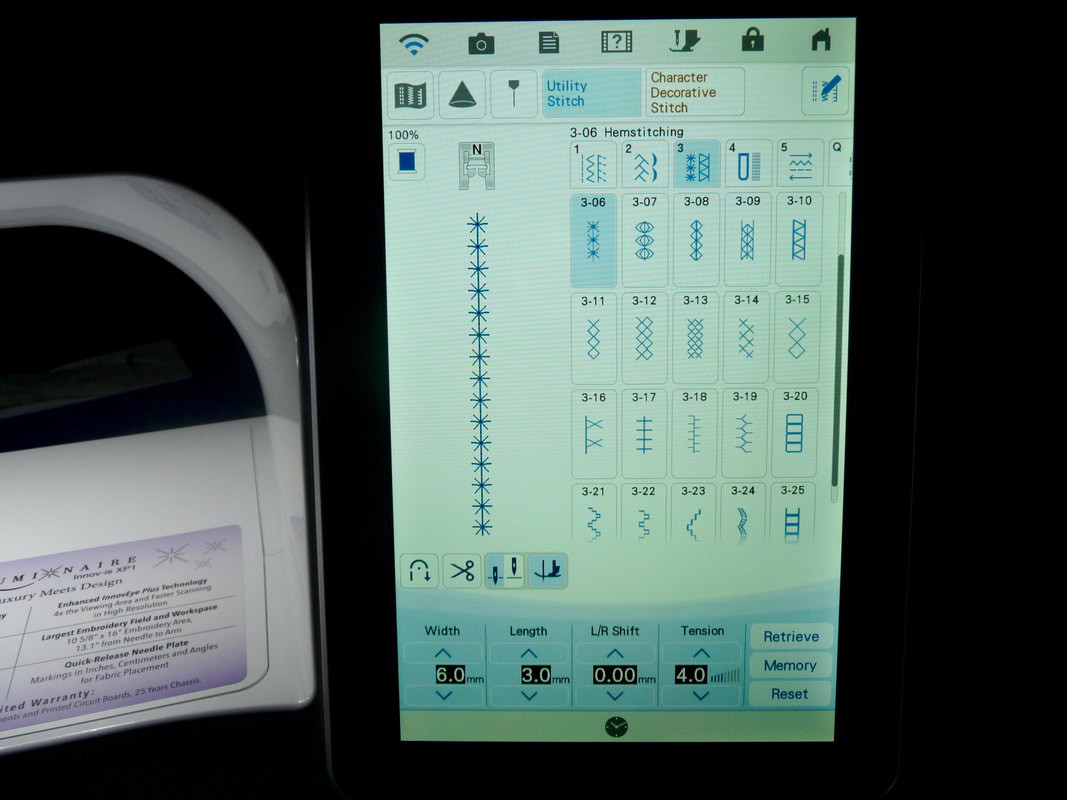
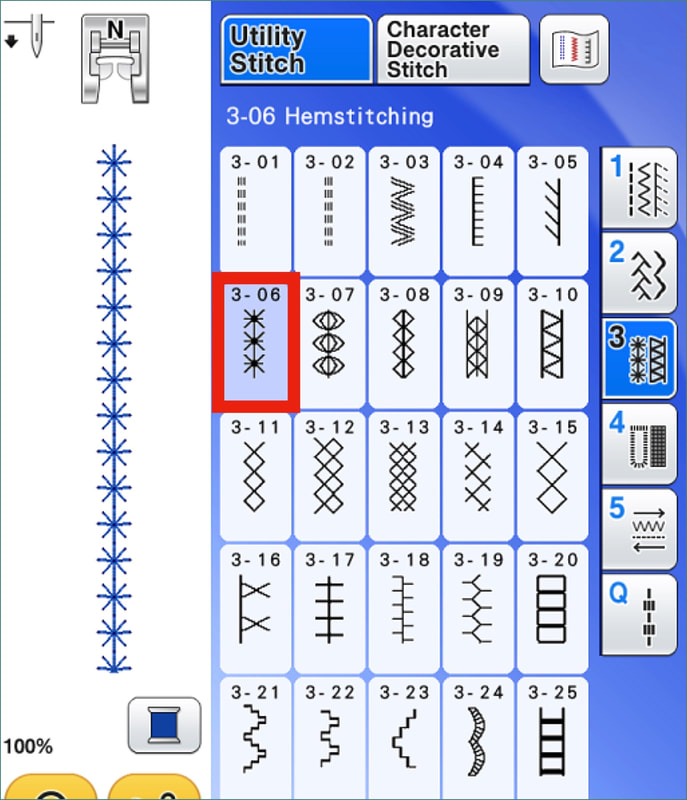
Sew along the lines with various hemstitches. Tip: Stitch No.3-06, shown below, is commonly found stitch on many machines. I like to call it the star stitch. It is one of my all-time favorites for wing needle stitchery. 
Picture
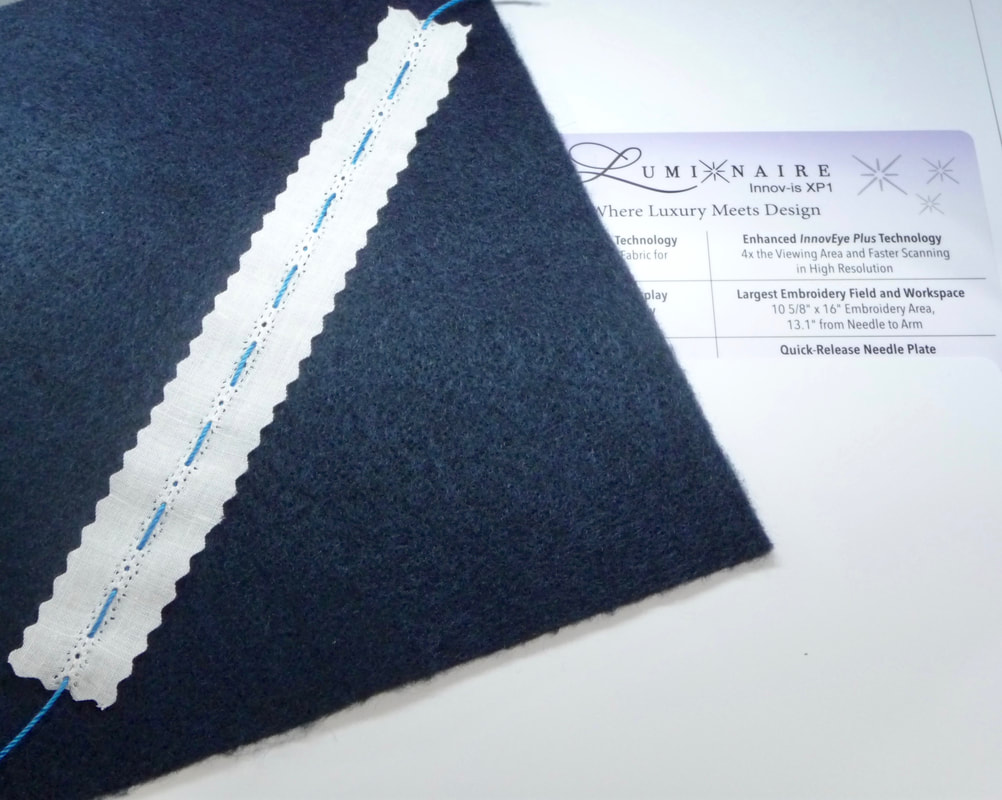
The prominent holes in the center of this stitch make it ideal for inserting cording through the stitches. 
Picture
Here you see where I used a large eyed tapestry needle to weave crochet cotton into every other hole. Again, there are so many possibilities with these stitches!
Picture
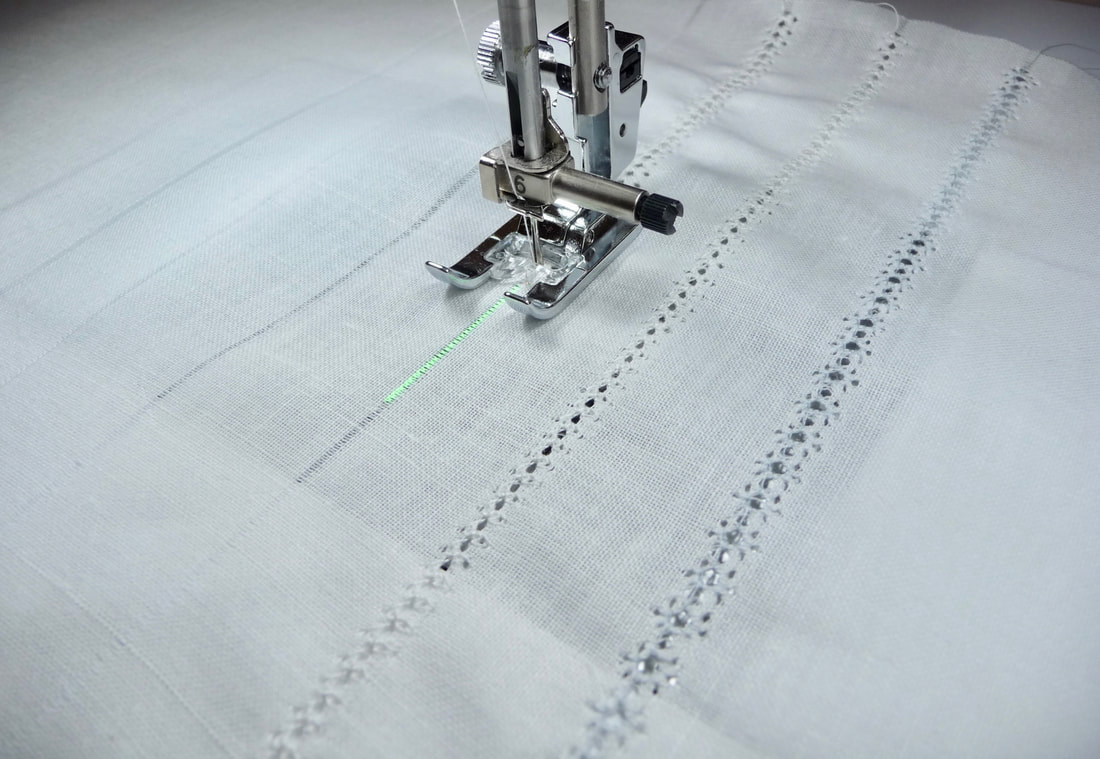
Once you are all set up for stitching, try various stitches and threads on your fabric. If you have the guideline marker capability on your Brother machine you can use it to help guide your stitching in a straight line.
Picture
I like to experiment with different threads but the 60-weight cotton is what I tend to use most often. Stitches shown below were created with the cotton 60-weight thread. 
Picture
I switched to the 100 weight silk thread for stitches No.3-21 through No.3-24, shown below.
Picture
When you’re finished with stitching wash out all markings and stabilizer, and then lightly starch your fabric for a smooth finished look. I hope this tutorial encourages you to try your hand at hemstitching!
 
More Options and Ideas:
 
  • Traditionally, hemstitches are done on white or off-white natural fiber fabrics, using matching thread for a tone on tone look. However, don’t overlook the possibility of experimenting with alternative colors and other fabric selections. Just know that the fibers need to separate easily for the featured holes to form.
 
  • Hemstitches are popular in the realm of heirloom sewing but once you see them stitched out it is likely you’ll find ways to use them in many other projects.
 
  • A common way to use hemstitched fabric is to create an oversized section of fabric, also known as a “fancy band.” Once the fabric has been embellished you can lay a pattern on top and cut yokes, cuffs, hem bands, and other sections of fabric as desired.
 
  • Hemstitched fabric makes great accents for home décor too! Pillows of any size and style, including neck roll pillows are beautiful when made with hemstitched fabric!
I'd love to entertain your questions and read your comments. Feel free to share your thoughts!
Download a printable PDF tutorial on Hemstitching below:
happy_hemstitching.pdf
File Size: 46170 kb
File Type: pdf
Download File

18 Comments

Beautiful Bobbin Work Stitchery

7/30/2022

4 Comments

 
Picture
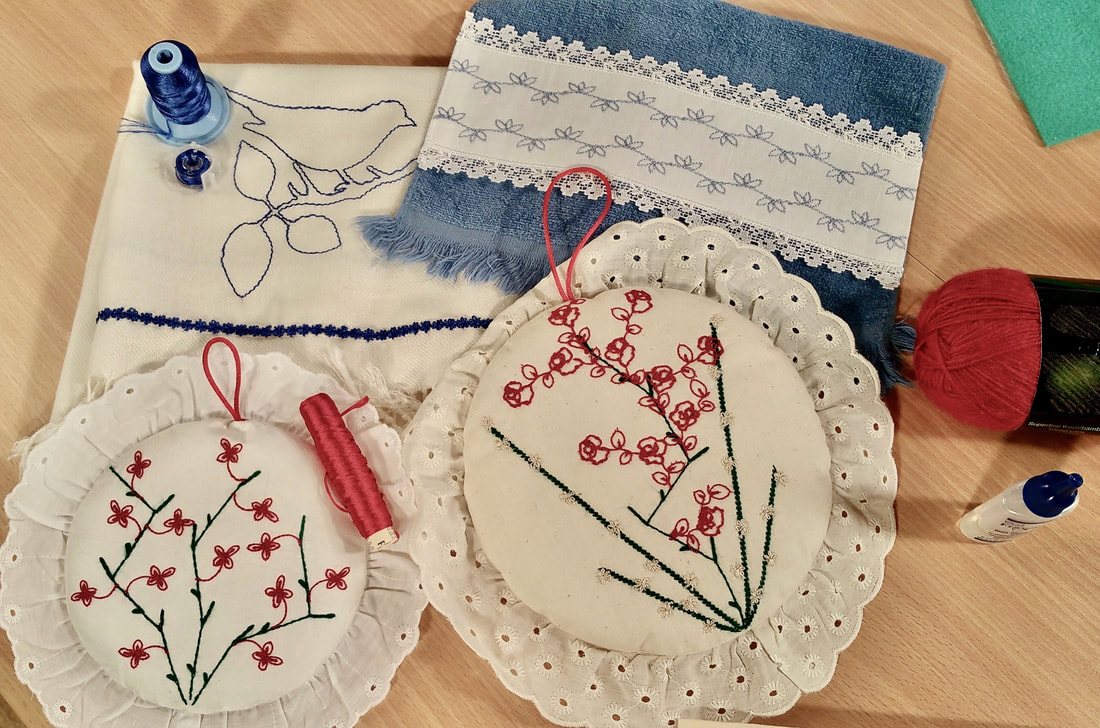
It’s fun and easy to use upside down stitchery, (also known as bobbin work), to embellish tea towels, table runners, pillows, scarves, jean jackets, & more! These are all ideal projects for embellishing with bobbin work. 

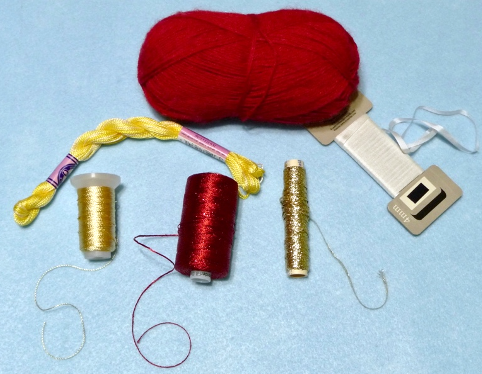
Just what is bobbin work and why is this technique called upside down stitchery? Simply put, bobbin work is an embellishment technique created with thick threads and novelty yarns that would never go through the eye of a needle and are not suitable for the thread path and tension mechanism of a sewing machine. 
Picture
Bobbin work is accomplished by winding thick thread onto a bobbin, and then changing out the bobbin case of the machine with an alternative bobbin case set for thick thread and a tension much looser than normal. You'll sew with the right side of the fabric facing the throat plate, therefore, sewing "upside down."
Bobbin work is possible for virtually any machine, as long as you have an alternative bobbin case with the tension loosened for the the thicker threads. Simply switch out your standard bobbin case for the one with loosened tension when you want to do bobbin work. You will need to adjust the bobbin case for various kinds of thick threads. Some will require looser tension than others. This technique is easy but it does require some time and experimentation as you are learning the nuances of using different threads and making adjustments.

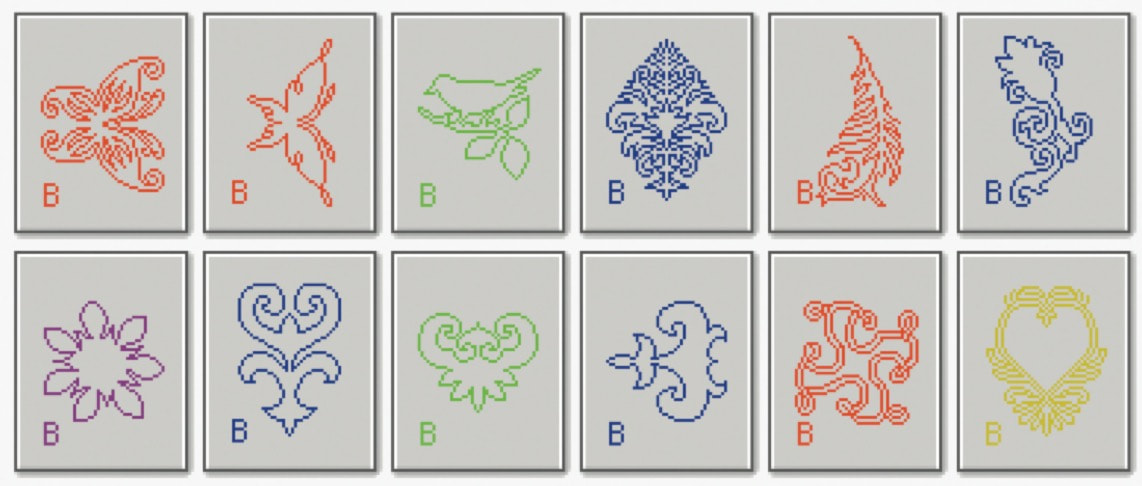
Some Brother machine models include a bobbin work bobbin case and there have been some past models with embroidery style bobbin work designs built-in to the machine. Bobbin work embroidery designs seem to be in short supply these days but there's still a lot you can do with bobbin work on the sewing side of the machine. Below is an image of designs found is past Brother machines such as the Quattro and Dream Machine models.
Picture
 ​The special Brother bobbin case is grey, making it very noticeable and distinctive from an ordinary bobbin case. To learn lore about the optional Brother Bobbin Work Kit CLICK HERE to view the description on their website, and see compatible models. 
Here is a short video showing how to wind the bobbin for bobbin work:
The top of the machine is threaded with regular sewing thread, embroidery thread, or even monofilament type thread. A bobbin with thick thread is placed in the machine, and should flow freely from the bobbin case with the loosened tension. With a few tweaks and tests for tension, you're on your way to stitching hand drawn patterns or rows of decorative and straight stitches. If you're good at free motion stitchery, you could set up your machine for free-form sewing and create patterns by stitching over templates or traced images or free motioning like you would for quilting.

I recently did a live show tutorial for my friends at Sewing Machines Plus, with an overview of bobbin work, showing various samples I hope will inspire you. You can watch the video below. I've also created a written tutorial to go along with the video. Download the PDF file for more details and information that coordinates with the video.
lets_go_sew_with_joanne_banko_bobbinwork_stitchery.pdf
File Size: 7430 kb
File Type: pdf
Download File

Feel free to leave your comments and questions below!
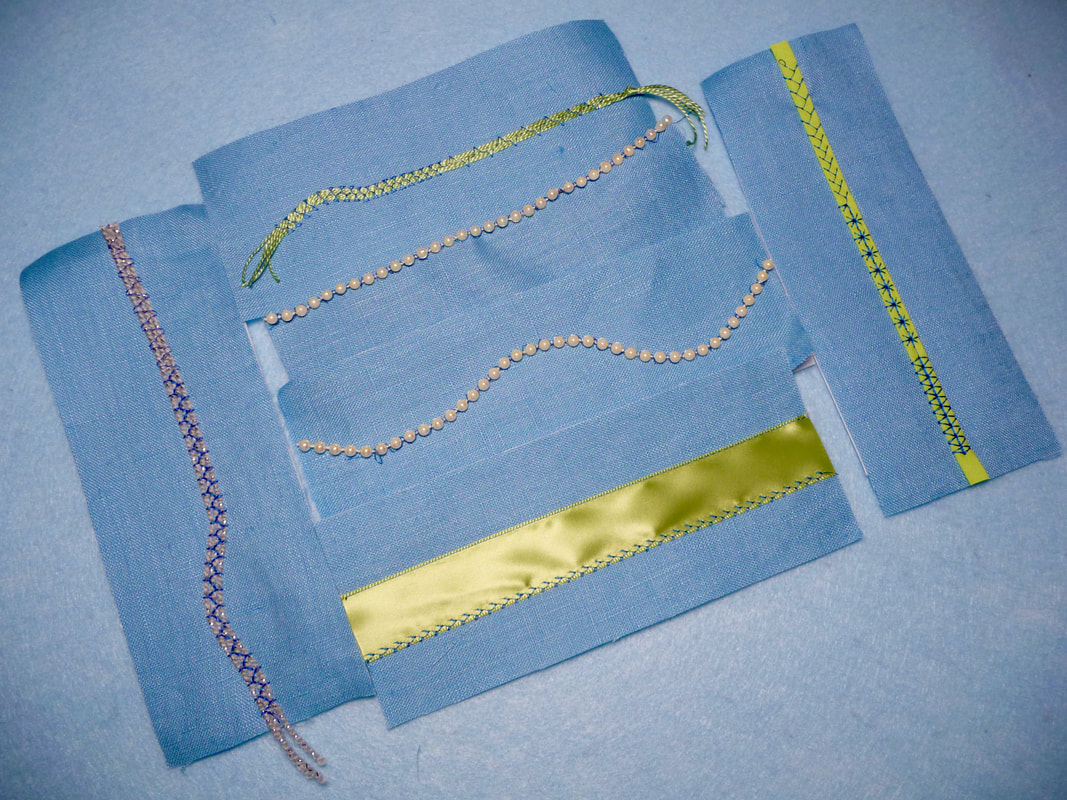
Interested in learning even MORE about bobbin work?
  • Brother has a short, silent video showing how to insert the bobbin case here: Brother has a short, silent video showing how to insert the bobbin case here: https://bit.ly/3zLgEvr
  • Check out my It's Sew Easy TV video about bobbin work  on the embroidery side of the machine when you click the following link: Machine Embroidered Bobbin Work Pashmina​
4 Comments

Embroider A Friendship Zipper Bag

7/28/2022

4 Comments

 
Picture
Picture
Making personalized gifts for friends is so rewarding!!! I created the featured zipper bag with the Brother Luminaire, using several special features, including the ability to create a stamp outline in embroidery edit mode, create an original design using stamp shapes & decorative fill stitches in My Design Center, and select a specific hoop area to fill with the region fill tool. If you have a machine with options like those found in My Design Center you can create a similar bag design.

​Of course, you can certainly use my basic instructions to create a bag using an embroidery design you already have in your repertoire.
This zipper bag was created for the July 21, 2022 Brother Live show, Episode 284,  broadcast on the Brother Sews USA Facebook page and the Brother Sews USA YouTube channel.
Watch the video below to see each step.
With a full lining and neatly covered zipper ends this bag is as pretty on the inside as it is on the outside. Leave it flat or choose to box the corners. Either way, this bag has plenty of room for a variety of items. Finished bag measures approximately 9-inches wide at the top edge, 6.5-inches at the bottom boxed edge, and 7 -inches long from top to bottom.

Take a peek at the inside of the bag and you'll see my custom label created using the special scanning mat. You’ll find a video showing the steps when you CLICK HERE to visit my Let’s Go Sew with Joanne Banko YouTube channel. While you're there, I'd love to have you subscribe and hit the bell for notifications if you haven't already.
Download a coordinating PDF of instructions below:
friendship_bag.pdf
File Size: 4708 kb
File Type: pdf
Download File

Enjoy this project and have fun making this for friends. Please leave your comments and questions below. Happy sewing!
4 Comments

Stitch it or Ditch it!

7/9/2022

15 Comments

 
Get rid of unfinished projects that are giving you a guilt complex!
​I've on a mission to tackle some unfinished projects (AKA UFO's), and move on to new shiny objects that I'm more interested in right now. Can you relate to having partially made projects stuffed away in a closet or bin? If I was dishing out advice to a new sewing enthusiast I would encourage them to follow the rule of three. That is, “try” to have no more than three projects you are working on at once. And, if you start something, and it isn't working out, and has no chance of working out, forgive yourself for starting and not finishing, then promptly get rid of it!
 
Forgive yourself you say? Yes! You see, I think sewing folks are some of the most kind hearted and generous folks in the world, but that also means we are good at piling guilt on ourselves when we perceive something is wasteful. I'm a big fan of recycling and hate to just throw things away. How to get rid of the guilt? If you can finish the item and donate it, great! Perhaps someone else will wear it or use it with joy. I remember a suit I made long ago that turned out great but just wasn't me. What was I thinking was all I could thing when I tired it on. I finished it up, promptly donated it, and always wondered who fell in love with it at the thrift shop.

Can't stand to finish up a UFO? A local thrift shop in town collects fabric scraps by the bagful. Not quite sure how they re-purpose the materials but I was told by one person that they re-cycle it, and then a clerk told me they can use it for packing material. Check your local thrift shops and ask if they take fabric remnants and scraps.
 
If I would have received and heeded the “rule of three” advice, I would not be in the predicament I am right now. I readily admit that I have way to many so called UFO's. I'm happy to say that I've been motivated to finish a few this week and finishing is a sure way to get rid of the guilt. I found three unfinished baby blankets stored away when I was doing lots for the Project Linus organization. While I did finish quite a few. My enthusiasm for the project meant that I cut more than I sewed. These UFO's have been hanging around for too long and weighed on my conscience. So, I finished then as quickly as I could and they are now ready for a new home where they can be used and loved. Thought I'd share a few photos with a description of each, with the hope of inspiring you. 
Picture
Blankie #1 is made of waffle weave cotton knit. This is the same kind of fabric that used to be common for long underwear. Somewhere in my past, I came across this pretty purplish/pink yardage. I thought it would be a soft and cozy blanket, but it did prove to be a little difficult to handle as it's very stretchy. I stabilized the embroidered area with medium weight cut-away attached with adhesive spray, and embroidered this cute applique from who knows where. Yes, that part was done many moons ago but came out quite nice. I had two identically sized pieces of the fabric all cut and layered together so I simply sewed right sides together leaving an opening, turned, pressed, and topstitched along the edge with a two step zig zag stitch. I knew the fabric would be hard to keep flat. The zigzag actually made it wave a bit on purpose and gave it a cute and durable finish, with opening closed up with the topstitching. Lining the entire piece gave the blanket extra body and covered up all the "uglies" from the backside of the embroidery.
Picture
Blankie #2 was a result of my desire to pair a cotton fabric panel with a backing cut from Minky. I remember wanting to try quilting the layers using the Brother Digital Dual Feed foot as it seemed perfect for the task. Indeed, it was! I sewed, turned, and topstitched the two pieces like I did for the previous blanket, this time, using the Dual Feed foot to control the unusual combination of fabrics. Then I quilted it, using a  3.5 straight stitch, stitching down the horizontal and vertical centers and then stitching more lines around the pre-printed blocks. The result was nice smooth Minky backing with virtually no ripples.
Picture
My third and final blankie was just a small pice of unfinished fleece. But oh my! What a cute print!  To get this one done in a flash I threaded my serger for a three thread balanced stitch and zipped all around the edge, finishing in less than five minutes! By the way, if you're looking for more fleece finishing ideas I have a Five Ways to Finish Fleece tip sheet HERE.

I'm so happy to see these finished and ready to go to a good home! I'm even happier that a friend of mine who specializes in sewing for charity will see that they are taken to a local hospital that welcomes the donations.

Hope you enjoyed reading about the blankets. Please share your UFO stories an ideas you have for getting rid of the guilt!
15 Comments

Embroidering Creative Coasters

7/3/2022

0 Comments

 
Picture
Coasters, coasters, and more coasters! Creating coasters with an embroidery machine is so easy and so much fun! These in-the-hoop style coasters finish up fast and make great gifts. Below, you'll see a sampling of some of my favorite coasters styles.

Picture
Holiday themes are always appreciated and making a set with a monogram or holiday design can be the perfect hostess gift. And who doesn't love a coaster personalized with their first initial? A single coaster is easy to include with a card and a wonderful way to say thank you or "I'm thinking of you today." Recently, I collected a list of names from my dental office and made one for everyone who works there. The smiles on the gift recipient's faces were priceless. Below are a few examples.
Picture
The stipple style coaster design shown above is available for you to download here on my site for free. I originally offered these as a bonus to coordinate with It's Sew Easy TV show 1506-2. You'll find them in different sizes and shapes, with the smallest one sized to fit a 4-inch embroidery hoop.

On show 1506-2, I created coasters with silk dupioni, metallic thread, and included a sheer organza gift bag. You can watch this episode HERE on my YouTube channel.
Picture
Visit the Let's Go Sew with Joanne Banko YouTube channel and you'll see two additional coordinating videos showing detailed steps to create in-the-hoop coasters using built-in frame shapes on Brother machines. Basic steps and supplies for creating all the coasters shown here are pretty similar. Watch the two videos and you can confidently create any of these coaster styles.

​Link to video #1: Create Custom Coasters using Brother Built-in Frame Shapes

Link to video #2: Extra Tips for Re-sizing Appliqué and conserving Fabric

Let's me outline general supplies you'll need and the steps to create:
  • Select fabric & batting. Quilting cottons, fancy fabrics like silk dupioni, and even ordinary craft felt will work. My preferred method is to cut coaster fabric to fit required hoop size and add a layer of cotton batting or fusible craft fleece, hooping the fabric and fleece together for the top side of the coaster. If you're creating a coaster using my method for adding an appliqué, you'll need contrasting fabric pieces, cut slightly larger than your appliqué shape.  Steps for adding an appliqué shape are  detailed in the video. I prefer to back my appliqué fabric with fusible web such as the Exquisite FuseMe fusible webbing by DiME. Once the coaster is all finished I give it a good press and my appliqué piece is throughly bonded to the coaster.
  • Select fabric for backing the coaster. I prefer to use the same fabric on the back as I did for the top part of the coaster. Back pieces need to be cut to meet in the middle if you want to add a water resistant filler to your coaster, but they can be cut larger to overlap at the back if you wish. Felt can be cut single layer but woven fabric needs to be cut on a fold. The video shows how to create a custom pattern to determine size for back coaster pieces. Be sure to securely tape pieces in place to avoid shifting during embroidery. I used ordinary Scotch® Magic™ Tape and stitched right through the tape.
  • ​Decorative frame shapes and lettering can easily be added to your coasters. Just remember, you'll want to stitch decorative frame patterns before adding the back pieces. In addition, for stipple fill coasters you'll add the monogram after the stippling is done on top, but before the backing is added to finish the coaster.
  • Insert a piece of vinyl shelf liner or cork to make your coaster water resistant.

Follow the steps shown on the video to create custom coasters you'll be proud to use or give as gifts! Feel free to leave your comments or questions below!
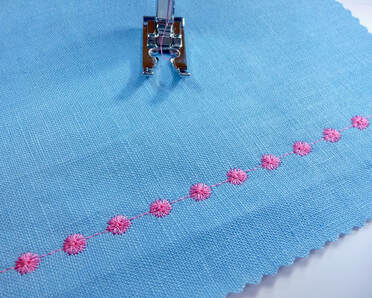
0 Comments

Tips & Tricks for Embroidery Placement and Embroidery on Ready-To-Wear

6/18/2022

2 Comments

 
Picture
Blouse created for Stitching Sewcial, the official Brother blog. Click image for more.
Design for blouse shown above is from iBroidery, the official Brother design download site. CLICK HERE for design info. If you have access to iBroidery designs, you may want to check out some pretty hibiscus flowers HERE on Embroidery Library.
Today I'd like to share some information about embroidering garments sewn from scratch or store bought. Embellishing garments with machine embroidery is one of my favorite this to doin my own sewing space. How about you? Are you interested more about this topic? Recently, I covered this very topic as a guest educator on the 2022 Sewing Machines Plus Hoop Fest. This online, five day festival celebrated the love of machine embroidery with tons of product demonstrations, detailed machine features outlined and described by industry experts, plus dedicated educational segments twice a day every day! Broadcast on both Facebook and YouTube, you can find videos for all five days HERE on the Sewing Machines Plus YouTube channel. My segments aired on Tuesday and Thursday.
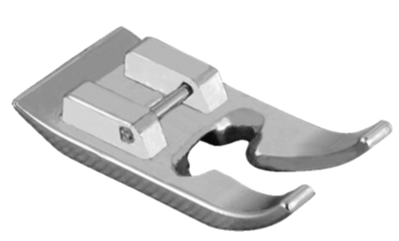
Tuesday's topic was "Pretty" Perfect Placement, with a show and tell of multiple sample garments, fashion ideas to illustrate flattering placement on garments, and methods to target the placement and prep for quality results. If you'd like to watch this particular segment, you'll find it on this YouTube video, with the 30 minute presentation starting at time stamp 4:34:00 HERE.

Thursday's topic was Tips & Tricks for embroidering on Ready-to-Wear, with the 30 minute presentation starting at time stamp 2:03:00 HERE. I followed up with a few more ideas for placement, tips for using templates, then showed some detailed ways to position and hoop garments. I also shared a special offer for a placement chart with some really specific guidelines for placement on garments and more! You'll find this in a downloadable PDF form HERE on my website.
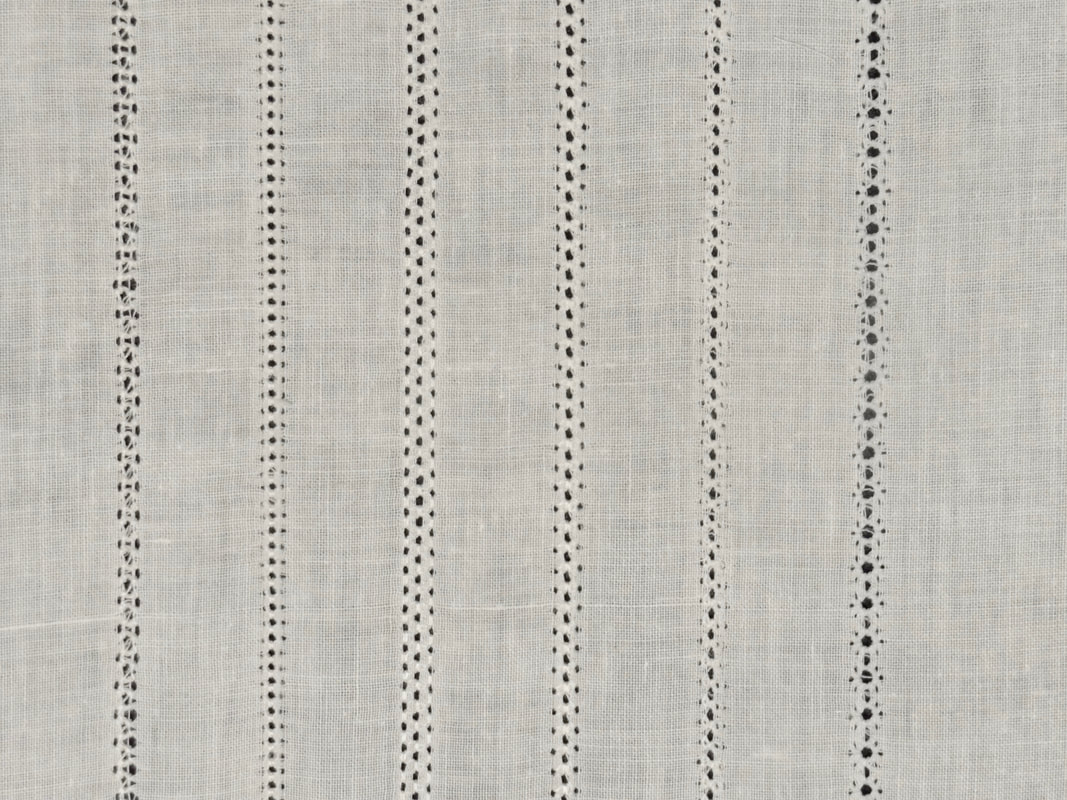
By the way, if you're looking for a free software program you can use for printing templates plus a whole lot more, look no further than the website of my friends at Designs in Machine Embroidery. They offer a free software program called Embroidery Tool Shed. CLICK HERE to download this program from the Designs in Machine Embroidery website. There's even more to love about this software! It works on both Windows based and Mac computers! I love having embroidery software compatible with my Mac.

To compliment these two segments, you'll find a summary of tips for embroidering on ready mades below. For even more information, I encourage you to watch my It's Sew Easy TV segment from show 1402, with more on this same topic. You'll find it on my YouTube channel HERE!
Tips for adding machine embroidery to readymades:
  • “It’s best to test!” I dig into my stash or purchase a small amount of fabric yardage that’s as close as possible to my ready-made and test the design and stabilizer combination before embellishing my actual garment. Of course, if you have a similar garment you can use for a test, that works too.
  • Denim is ideal for many embroidery designs, usually needing only a layer or two of light to medium tear-away, or a layer of wash-away stabilizer on the back to achieve good results. Jean jacket backs are a great canvas for added embroidery. Steer clear of bulky seams and consider adding trim to compliment the design.
  • Light weight fabrics and fabrics that stretch benefit from a stabilizer bonded to the fabric. My “go to” stabilizer for knits or fabric with a stretch factor is fusible no-show (cut-away) mesh. If you're using non-fusible no-show (cut-away) mesh, you’ll need to adhere stabilizer with temporary adhesive spray such as Sulky KK2000. 
  • If possible, pre-wash garments before embroidering. This takes care of any shrinkage issues and eliminates excess dye.
  • Stock up on stabilizers. This subject is too big to cover in one short show but keep these general rules in mind: Knits and thin fabrics benefit from a stabilizer that is temporarily or permanently bonded to the fabric. Tear-away or wash-away generally works well for stable woven fabrics. Avoid hooping stiff tear-away with your garment. Use a medium weight stabilizer instead, or consider “floating” the tear-away under the hoop. Any fabric with nap or texture requires a water-soluble or iron-away topper to keep stitches from sinking into the nap or texture and getting lost in the fabric.
  • Use the smallest hoop possible, whenever possible, and you will have better registration with your designs.
  • For ease in embroidering, choose garments that can open up perfectly flat. However, don’t let lined garments stop you from adding embroidery. Carefully open up lining as much as needed to establish a generous flat area, and then either hoop traditionally or use wash-away or tear-away sticky stabilizer to temporarily hold fabric in place. Clip or tape excess fabric to keep it out of the way while stitching.
  • If you have a piece that is impossible to hoop, embroider on a sheer or complimentary fabric, and then trim, treat with seam sealant if necessary, and use hand or machine stitches to apply to your piece as an appliqué. If sewing is not at all possible, select suitable fabric glue and glue in place.
  • Design templates make embroidery easy and very accurate. Learn to use a software program to print templates and your embroidery life will be so much easier. Your design placement will be more accurate too!
I'd love to hear your comments and answer any questions you much have right here on this post. Please leave your comments below.
2 Comments

Embroidered Vinyl Desk Tray

6/4/2022

5 Comments

 
Be sure to check out the bonus video at the end of this post!
Picture
If you've never embroidered on vinyl, you'll be surprised at how easy it is! And, if you have already embroidered on vinyl, you know how fun it is! Take a look at this vinyl desk tray design with a custom monogram in the center.

Picture
I've found that desk trays can be the perfect gift for someone who seems to have everything. Great for organizing, they're perfect for catching clutter on tables, desks, and countertops.
This particular project was created wearing my Brother Ambassador hat and is posted on the official Brother blog. You'll find instructions for making your own when you CLICK HERE. 

While this project is full of techniques accomplished with the Brother Luminaire, you'll find that I also included instructions for creating a tray using an embroidery machine with a 4-inch hoop capability. You don't need top of the line features to make a nearly identical tray. Take a look at my alternative monogram design idea for smaller hoops.
Picture
Picture
The Brother post also includes a link to the featured design shown above. I have good news for you! This classy design is free for a limited time and you can download the .pes file during the month of June 2022.
​With the Brother Luminaire, I used special features such as grouping to make a beautiful four piece frame, and then I used My Design Center to create the diamond background. To help you learn the steps, I've created a 13 minute video to compliment the written instructions. 
Bonus #2, here is a download (in PDF format) of my instructions for using special selection and grouping features to create the monogram frame with the Brother Luminaire:
grouping_in_lumi.pdf
File Size: 5259 kb
File Type: pdf
Download File

By the way, once you learn the basic techniques, this tray can be made using other sizes, either square or rectangular. Looking for more gift ideas? A square tray is ideal as a holder for matching custom coasters. CLICK HERE and you'll find my coaster instructions from a previous episode of It's Sew Easy TV.
I hope you enjoy the project, the free design, and the bonus video featured here. I'd love to hear your thoughts on the project!
5 Comments
<<Previous
    Picture

    Author:

    Joanne Banko
    Brother Ambassador


    I'd love to stay in touch with you!

    Click Here
    and Sign up for
    ​Sewing News, plus tips, tricks, and notifications about new blog posts.

    Archives

    September 2023
    July 2023
    June 2023
    May 2023
    March 2023
    February 2023
    January 2023
    December 2022
    November 2022
    October 2022
    September 2022
    August 2022
    July 2022
    June 2022
    May 2022
    April 2022
    March 2022
    January 2022
    December 2021
    October 2021
    August 2021
    July 2021
    June 2021
    May 2021
    April 2021
    March 2021
    February 2021
    November 2020
    October 2020
    June 2020
    May 2020
    April 2020
    March 2020
    February 2020
    January 2020
    November 2019
    August 2019
    July 2019
    June 2019
    May 2019
    March 2019
    February 2019
    January 2019
    December 2018
    September 2018
    August 2018
    July 2018
    June 2018
    March 2018
    February 2018
    December 2017
    September 2017
    August 2017
    June 2017
    April 2017
    February 2017
    January 2017
    December 2016
    September 2016
    July 2016
    June 2016
    May 2016
    March 2016
    February 2016
    January 2016
    December 2015
    October 2015
    September 2015
    July 2015
    June 2015
    May 2015
    March 2015
    January 2015
    October 2014
    July 2014
    May 2014
    March 2014
    January 2014

    *As a believer in full disclosure, I'd like you to know that Blog posts may contain affiliate links for products and services I know and trust. Purchasing items through a link marked * results in a small commission for me, with no extra charges for you.

    Categories

    All

    RSS Feed

© Copyright 2023 by Joanne Banko. All rights Reserved